Addi-Data MSX-AI-5000 User manual

USER
MANUAL
MSX-AI-5000
Edge AI vision system

2
TABLE OF
CONTENTS
- Warranty and liability ............................................................... 3
- Copyright ................................................................................. 3
- ADDI-DATA software product licence ........................................ 4
- Trademarks ............................................................................. 4
- Features .................................................................................. 5
- Included components ............................................................... 5
- Optional components .............................................................. 5
-Connection to the system .......................................................... 7
- Create a new account ............................................................ 7
- User login .............................................................................. 8
- Menu ..................................................................................... 8
- Camera settings ..................................................................... 9
- Access to cameras settings .......................................... 9
- Cameras configuration ................................................. 9
- Save a media ............................................................. 11
- Close the session ........................................................... 11
- Configuration file ........................................................... 12
- Media .................................................................................... 13
- Snapshots .................................................................... 13
- Recordings ................................................................... 14
- Task launch ............................................................................ 15
- Add task(s) .................................................................. 15
- Save task(s) .................................................................. 17
- Watch the task ............................................................... 19
- Dataset ..................................................................................... 20
- Add a new dataset ...................................................... 20
- Edit a dataset ............................................................... 23
- Notifications .......................................................................... 26
- Settings .................................................................................. 26
- Agent settings ................................................................26
- Types of settings ............................................................ 29
- User management ........................................................ 31
- User profile ................................................................... 33
- Languages ............................................................................. 34
- Logout .................................................................................... 34
Product information .................................................................... 3
Brief description ............................................................................ 5
Connecting the peripherals ..................................................... 6
Return of the material .............................................................. 35
Web application user guide ............................................. 7
Contact and support ................................................................. 36

3
PRODUCT
INFORMATION
This manual contains the technical installation and important instructions for correct commissioning and usage,
as well as production information according to the current status before printing. The content of this manual
and the technical product data may be changed without prior notice. ADDI-DATA GmbH reserves the right to
make changes to the technical data and the materials included herein.
The user is not permitted to make changes to the product beyond the intended use, or to interfere with the
product in any other way.
ADDI-DATA shall not be liable for obvious printing and phrasing errors. In addition, ADDI DATA, if legally
permissible, shall not be liable for personal injury or damage to materials caused by improper installation and/
or commissioning of the product by the user or improper use, for example, if the product is operated despite
faulty safety and protection devices, or if notes in the operating instructions regarding transport, storage,
installation, commissioning, operation, thresholds, etc. are not taken into consideration.
Liability is further excluded if the operator changes the product or the source code files without authorisation
and/or if the operator is guilty of not monitoring the permanent operational capability of working parts and
this has led to damage.
This manual, which is intended for the operator and its staff only, is protected by copyright. Duplication of the
information contained in the operating instructions and of any other product information, or disclosure of this
information for use by third parties, is not permitted, unless this right has been granted by the product license
issued. Non-compliance with this could lead to civil and criminal proceedings.
Warranty and liability
Copyright

4
Please read this license carefully before using the standard software. The customer is only granted the right to
use this software if he/she agrees with the conditions of this license.
The software must only be used to set up the ADDI-DATA products.
Reproduction of the software is forbidden (except for back-up and for exchange of faulty data carriers).
Disassembly, decompilation, decryption and reverse engineering of the software are forbidden. This license
and the software may be transferred to a third party if this party has acquired a product by purchase, has
agreed to all the conditions in this license contract and the original owner does not keep any copies of the
software.
ADDI-DATA, APCI-1500, MSX-Box and MSX-E are registered trademarks of ADDI-DATA GmbH.
Turbo Pascal, Delphi, Borland C, Borland C++ are registered trademarks of Borland Software
Corporation.
Microsoft .NET, Microsoft C, Visual C++, MS-DOS, Windows XP, Windows 7, Windows 8, Windows
Server 2000, Windows Server 2003, Windows Embedded and Internet Explorer are registered
trademarks of Microsoft Corporation.
Linux is a registered trademark of Linus Torvalds.
LabVIEW, LabWindows/CVI, DASYLab, DIAdem are registered trademarks of National Instruments
Corporation.
CompactPCI is a registered trademark of PCI Industrial Computer Manufacturers Group.
VxWorks is a registered trademark of Wind River Systems, Inc.
RTX is a registered trademark of IntervalZero.
Google Chrome is a trademark of Google LLC.
Mozilla Firefox is a registered trademark of Mozilla Foundation.
ADDI-DATA software product license
Trademarks

5
BRIEF DESCRIPTION
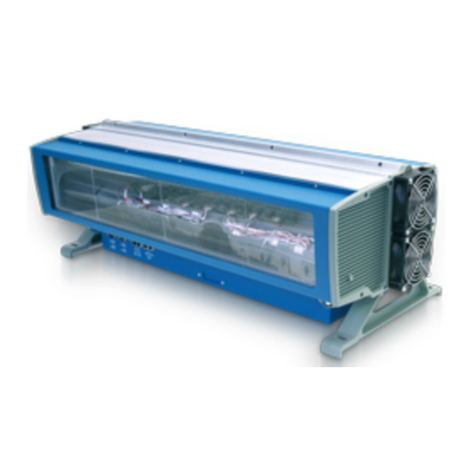
MSX-AI-5000 edge vision systems are intended to capture video streams from several industrial cameras, to
run embedded vision algorithms in real-time, and to visualize the ongoing processing as a live stream.
The system comes with two user interfaces: an Android application and a web browser interface. They allow
you to setup, monitor and live visualize the machine vision applications. The web browser interface also allows
you to centrally manage the deployed devices.
NVIDIA® Jetson Xavier™ NX
8GB LPDDR4x
Multi-storage option: 16GB eMMC / MicroSD slot / mSATA slot / 2.5 drive bay
GbE PoE/PSE LAN x 2
HDMI Input x 1 & HDMI Output x 1
Digital I/O 13-channel
Expansion support for WiFi/LTE
1x hardware module
1x power supply cable
1x LAN Ethernet cable
2x Wi-Fi antennas
Cameras (optional)
Camera cables
Mounting system
Light system
Features
Included components
Optional components

6
CONNECTING
THE PERIPHERALS
Power supply
Connect the power supply cable to the DC IN 12~24V port of the module and to your power grid.
Ethernet
If you need to establish a wired connection, plug the Ethernet cable to the module’s LAN port and to your
internal Ethernet network.
ANT
ANT
ANT
HDMI IN X1
OS Flash x1
Power Button COM/CANBUS x1
Recovery
HDMI OUT X1
ANT PoE x2
USB 3.2 Gen 1 x4 LAN
Micro SD x1
DC IN 12-24V DIO x1
Please note that the PoE ports aren’t suitable for this purpose.
Please note that the LAN port isn’t suitable for this purpose.
Cameras
If you use Ethernet cameras, connect them to the module’s Power Over Ethernet (PoE) ports.
If you use USB cameras, connect them to the module’s USB ports.
Antennas (optional)
If needed, connect the Wi-Fi antennas to the ANT ports.

7
WEB APPLICATION
USER GUIDE
Turn on the MSX-AI-5000 and wait a few minutes for the system to boot up.
Connection to the system
If you start the application for the first time, you have to create an account.
Create a new account
If you already have an account, please go to the next section.
To create an account, all fields are mandatory.
The name field must contain between 3 and 30 characters.
The field for the email address must contain "@".
The password must meet the following criteria:
The first user of the application to create an account must
be an administrator.
be at least 8 characters long
contain a lowercase, an uppercase, a number and
a special character

8
The main menu is on the left of the screen. It allows to access the
different items.
Each item is represented by
an icon, making it easier to
understand and find your way
around.
You can open or close the sections
of the menu by clicking on the
heading.
Menu
Log in to the user account provided by your organization.
User login
If you don’t have an account, please
go to the previous section.

9
Within the menu, click on the "SMART SENSORS" tab to
access the sensor settings.
Camera settings
Access to camera settings
Configure camera(s)
Select the camera you want to configure.
A symbol for each camera appears in the right top
corner, representing the type of connection of the
camera.
The button allows to refresh the page.

10
You can set different parameters depending on the cameras. The updates are displayed in real-time. The
settings you’ve made are stored in the system.
You can adjust the exposure manually or just
put an automatic exposure.
You can adjust the gain of the video stream to
manage the visual noise.
At this step, you can modify different parameters in
real time.
In the user inputs, it is forbidden to use spaces, as well as the followings special
characters: " _ - =

11
You can take a snapshots or recordings with the cameras.
You may find your recordings and snapshots in the Media section of the application.
Save a media
Close the session
You can close the session with the top right button.

12
Configuration file
Click here to open the "Configuration file" tab.
This feature allows to manually upload an existing file (.txt
or .xml) for default camera configuration. This configuration
file must comply with the specifications provided by the
manufacturer.
If the configuration file is compliant, click
on the "UPLOAD" button for validation.
An uploaded file can be downloaded or deleted.
If you delete a file, the default settings will be restored.
The file must be a text file complying with the manufacturer’s specifications.

13
Snapshots
Click here to see the gallery of
snapshots.
Click on the section "Filter by" to
sort or filter the snapshots.
You can download, rename and delete the snapshots.
Media
Filter by:
Filter by:

14
Recordings
Click here to see the list of recordings.
Click on one of the recordings in the list to view it.
You can download the recordings.
You can play, download,
rename and delete
recordings.

15
Add task(s)
Within the menu, go on the "TASKS" rubric to open the task
menu, and click on the button "ADD TASK" to add a new task.
If there are no running tasks, the following message is displayed: "No Tasks are currently running".
Task launch

16
Select an available task among the list
You can choose to execute the task on the live stream of a camera, or on a previous recording:
- select the relevant camera within the "Smart sensors" list
- or select the relevant recording within the "Recordings" list
Adjust the settings according to your needs

17
Save task(s)
If needed, you can save the task and its parameters
before running it.
To edit and delete a zone.
To add a new zone.
A zone on the streaming.
To validate the zone settings
and save the task.
To set the zone in full screen.
You can set zones on the streaming depending on the task chosen if you have the button "SET ZONES".
You can add a zone and define the zone on the streaming with your cursor.
The Zone Settings

18
Within the menu, go on the "TASKS" rubric to open the task
menu, and click on the button "SAVED TASKS" to access the
previously saved tasks.
You can launch or delete saved tasks, and access to their
parameters with the button: "SEE MORE..."
In the settings, you can choose to activate the automatic launch of the task at system startup and change the
name of the task with this icon:

19
Watch the task
Within the menu, go on the "TASKS" rubric to open the task
menu, and click on the button "RUNNING TASKS".
You can watch a task, or stop it with the cross at the top right.

20
Dataset
Add a new dataset
Within the menu, go on the "TRAINING" rubric to open the
training menu, and click on the button "DATASET".
Click on the icon to add a new dataset.
Filter by:
Other manuals for MSX-AI-5000
1
Table of contents

