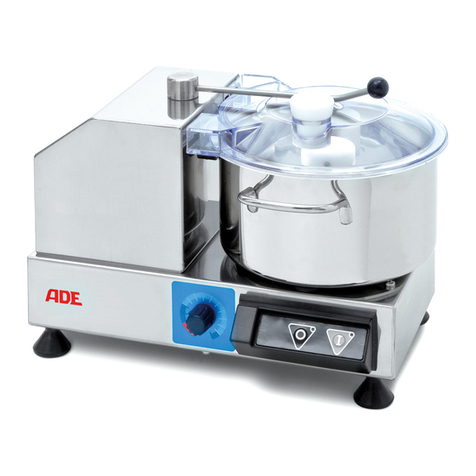
ADE VITALIS Series User manual

Illustration shows device
with U-clamp lock

INTRODUCTION
Before operating the device, read through the entire operating manual carefully and strictly follow the safety
instructions. In any case, careful work is indispensable. Safety is also in the hands of those who work with the
device during the intended service life.
The operating staff must be properly trained and provided with safety instructions at regular intervals. This
operating manual should be made available to all persons who are responsible for the operation and
maintenance of the machine. Keep this operating manual in a known place so that it is always available when
needed.
Some text parts have been highlighted to emphasise the importance of information:
Indicates technical information of particular importance that must not be neglected.
Indicates that appropriate precautions must be taken to ensure that persons are not exposed
to health and safety risks and to avoid material damage.
Indicates serious hazardous situations which, if not avoided, could pose a serious risk to
health and safety of persons.
SAFETY INSTRUCTIONS
General safety instructions
- The machine may only be operated by trained staff, who must be completely familiar with the safety
instructions in this operating manual.
- In the event that staff is changed, provision must be made for its timely instruction.
- It is important that you keep your hands clear of the moving parts, even if the machine is equipped with
safety devices.
- Disconnect the machine from the mains supply before performing any cleaning or maintenance work.
- Thoroughly assess any residual risks before cleaning or maintaining the vegetable cutter (and hence
removing the protective covers).
- Keep your mind focused when performing any cleaning or maintenance work.
- Check the condition of the power cord on a regular basis. Do not use the device with a damaged or faulty
power cord. As soon as you detect a fault or a defect in the cord, immediately stop the device and have
the cords replaced by authorised and qualified staff.
- If the machine seems or proves to have malfunctions, it is recommended that you do not use it and call
the customer service. Do not use the vegetable cutter for frozen goods, meat and fish, as well as for non-
food products.
- Do not attempt to perform the necessary repairs by yourself and always contact the authorised customer
service.
- Always use the retaining device or the pusher to cut the goods.
- Never fill the vegetable cutter completely or forcefully to avoid any problems that may result if you do so.
- The manufacturer assumes no liability in the following cases:
-If the machine is operated by unauthorised personnel;
-If non-original parts and inserts of other types are used instead of the original components from our
own suppliers;
-If the instructions in this operating manual are not strictly followed;
-If the machine surface is treated with unsuitable products.
- Never manipulate, remove or bypass the safety devices installed on the device.
Use the device only for its intended purpose. Improper use and operation of the device for
purposes other than those specified herein can cause risks to the safety and health of persons
and material damage.
Before performing any cleaning, maintenance work, etc., TURN OFF THE MAINS SUPPLY (or
pull out the mains plug) and make sure that the area to be treated has completely cooled down.

Electrical safety precautions
The vegetable cutter is equipped with various sensors for the operator's safety:
- Retaining device: Stops the machine when the retaining device is folded up and enables automatic
restart when the retaining device is pushed down:
- Lid: Stops the machine when the lid is removed, for example, for the disc change. Voluntary power-
on by pressing the “I” start button is only possible when the lid is replaced and is locked by the screw
cap.
- Housing connected to the collecting pot or ejection chute: Stops and prevents start-up of the machine
if the collecting pot or ejection chute is not properly positioned. Voluntary power-on by pressing the
“I” start button is only possible when the collecting pot or chute with the magnetic sensor are positioned
correctly inwards to the device.
The vegetable cutter is equipped with the N.V.R. device that allows the machine to be turned on by only
pressing the “I” start button in the event of power recovery after a power outage.
Residual risks
The vegetable cutter is provided with the standards for the electrical and mechanical safety devices.
Nevertheless, this operating manual describes the residual risks that cannot be completely ruled out. The
hazards of the respective situations are explained in detail below.
INTENDED USE
The vegetable cutter is a device that is designed and constructed to cut and slice many kinds of vegetables,
fruits, potatoes, etc. intended for human consumption. The vegetable cutter must not be used for frozen
products, meat or fish with bones.
It is a professional device that can be used in commercial premises (restaurants, commercial kitchens, pizza
restaurants, bars, etc.).
Any use that is not intended by the manufacturer should be considered as “IMPROPER”.
The manufacturer assumes no liability for damage caused by improper use of the device, failure
to comply with the information in this operating manual, as well as manipulation or
modifications of the device without its formal approval.
BEFORE FIRST USE
Unpacking the device
Upon receipt of the device, check the integrity of all components. If any parts are damaged or missing, please
contact immediately the dealer from whom you purchased the device to discuss further steps.
•Open the box and remove the machine.
•Check the package contents and check that it matches the specifications on the delivery note.
Packaging materials are valuable materials and must not be disposed of in household waste.
Check with your local authorities for proper disposal options. Local regulations must be
followed during disposal. Never dispose of packaging materials in nature!

The delivery includes:
- Vegetable cutter
- Pusher
- Collecting pot with magnetic sensor
- Discharge shovel
- User manual incl. declaration of conformity
Discs must be ordered separately and are not included!
Setting up the machine
Requirements for proper operation:
- The ambient/room temperature must be between +5°C and +35°C.
- The relative humidity must not exceed 75%.
- The working environment must be free of areas with gas or powder concentrations that can cause a
potential risk of fire and/or explosion.
Make sure that the installation area is suitable, sufficiently ventilated, illuminated and stable, and that it has
sufficient ambient space to ensure easy operation, cleaning and maintenance of the device. In addition, make
sure that the installation surface is flat, dry, smooth and sturdy, and that it is easy to clean from leftovers to
avoid the risk of dirt accumulation and food contamination. The machine should be installed on a worktop
approx. 80 cm from the ground.
CONNECTING TO THE LOCAL MAINS SUPPLY
The installation must be carried out by authorised staff, who must first ensure that the power supply line
complies with the relevant statutory regulations, as well as standards and specifications applicable in the
country of use.
Before connecting to the mains supply, make sure that the voltage indicated on the nameplate
matches that of the local mains supply!
Vitalis vegetable cutter - 230 V AC
The machine is equipped with a Schuko plug. Connect the machine to the local mains supply. You can now
start working.
Vitalis vegetable cutter - 400 V three-phase current
The machine is equipped with a red CEE plug. Connect the machine to the local mains supply and make sure
the grounding functions correctly. Before starting work, check the direction of rotation of the discs. To turn on
the machine, press the “I” start button without first loading it with foods to be processed.
The disc must rotate counter-clockwise when looking through the opening through
which the ram is inserted. If the disc does not rotate correctly, two of the three current
phases in the mains plug must be swapped by an authorised specialist. Once the disc
rotates counter-clockwise, you can start working.
Correct direction
of rotation:
counter-clockwise

DESCRIPTION OF THE DEVICE
Structure of the device
Description of the controls
The device is equipped with the listed controls required to enable the main functions.
A)
“I” start button:
turns on the device.
B)
“O” stop button:
turns off the device.
When you press the “I” start button, the machine is in
pulse mode. The machine starts and stops automatically
depending on the position of the retaining device.
A
B
BASE
PUSHER
HOUSING
LID
POWER CORD
U-CLAMP LOCCK
FEET
EJECTION
CHUTE
RETAINING
DEVICE
ON/OFF BUTTON
Control
LOCKING SCREW FOR LOCKING THE LID

START-UP
If the device is used for the first time, remove the protective film before enabling the operation
and clean thoroughly from any remaining construction materials.
Checking the operability
Check the operability several times using the following procedure:
-Press the “I” start button and then the “O” stop button and make sure that the machine is turned on or off by
means of the corresponding control lamps (on the control).
-Lift up the retaining device first and then push it down to check that the motor turns off and starts up stepwise.
-Check that the machine turns off when you remove the lid and then turns on again when you briefly press
the “I” start button after correctly replacing the lid.
-Check the functioning of the machine as described above, however, with regard to the collecting pot or
ejection chute.
ASSEMBLING THE TOOL DISCS
General
1 Select the disc (A1-A2-A3-A5-A8-A10-A2W-A3W, S-VG, S2-S3-S4-S7-S8-S9, or F2.5x2.5-F4x4-F6x6-
F8x8-F10x10)
2 Remove the steel lid. Make sure that the discharge shovel is already mounted on the disc holder pin
before installing the disc.
3 Install the selected disc on the disc shaft. Tighten the disc as far as it will go. Replace the steel lid and
lock it with locking screw.
Application for dicing
1 Select the dicing disc (C8x8, C10x10, C20x20) and prepare the appropriate cutting disc (A8 for C8x8,
A10 for C10x10 and C20x20). If necessary, remove the discharge shovel by turning it clockwise.
2 Remove the steel lid and first insert the C disc so that the notch faces to the right as viewed from the
device. Then mount the A disc by proceeding as described above.
When using the C dicing discs, the discharge shovel must be disassembled.
Discharge
shovel
Disassembling and assembling
the discharge shovel
Using the dicing disc in conjunction with a cutting disc
(without discharge shovel)

FILLING AND CUTTING
During operation, a correct posture should be taken to avoid accidents. The body must always
be perpendicular to the worktop.
Make sure that no body parts come into direct contact with the running device.
1 Position the collecting pot under the ejection chute so that the magnetic
sensor is positioned close to the housing.
2 Install the appropriate disc with which you want to process your foods as
described under “Assembling the tool discs”.
3 Fill the device through the lid opening. Smaller pieces (e.g. carrots,
zucchini, etc.) are fed through the tube on the lever. Turn on the device and slightly push down the
retaining device. Use the pusher when filling through the tube.
Filling through the lid opening
Filling through the tube on the lever
4 Once you have finished, lift the lever. The device is turned off by a safety system. Fill the foods to be
processed. If you push down the retaining device, the device will automatically turn on again.
5 To change the disc, proceed as described under “Assembling the tool discs”. After this operation, an
electronic system prevents automatic power-on. To turn on, press the “I” start button.
Exercise utmost care when replacing the discs as there is a risk of cutting with the blades of
the discs.
Make sure that the lid is locked by locking screw before operating the device!
6 Empty the pot after 2-3 cutting cycles. Overfilled pots can compromise the normal discharge process,
possibly resulting in the irregular cut, blocking of the device and damage to the motor.
SENSOR

7 If a larger collecting pot is to be used (e.g. GN pots), the
VITALIS vegetable cutter must be operated with the optional
ejection chute (not included). In this case, the ejection chute
must be installed under the outlet opening. To install, pull the
screws through the screw holes in the chute and push down
the chute until it locks into place.
8 Then press the “I” start button of the on/off switching unit to
start the device.
9 During operation, continuously fill the foods through the feed
opening.
Do not open the locking screw of the lid during ongoing operation.
10 At the end of the work, press the “O” stop button of the on/off switching unit to stop the device.
CLEANING
Always disconnect the device from the mains supply before cleaning (at the end of the working
day or if necessary)!
General cleaning instructions
- Clean the device at the end of each use or, if you consider it necessary, according to the type of foods
processed.
- Thoroughly clean all parts of the device (including adjacent areas) that may come into direct or indirect
contact with foods to protect them from the risk of contamination and to maintain hygiene.
- Only clean the device with cleaning products suitable for foodstuffs. Never use corrosive or flammable
cleaning products or products that contain and/or release harmful substances.
- Never clean the device with a water jet in order not to damage its components, especially the electrical
and electronic ones.
- In case the device will not be used for a long time, clean all parts of the device (inside and outside) and
dry them thoroughly. Unplug the power cord and make sure that the ambient conditions are suitable
for a long-term storage of the device.
Cleaning the device
1 Remove the lid of the cutting disc holder, the collecting pot and the tools. Clean, rinse with clear water
and dry them thoroughly.
2 Clean the device with a damp cloth or a sponge.
Make sure that no water can get inside the housing!
3 Replace the collecting pot, the tools and the lid of the cutting disc holder.
4 Thoroughly clean the work surface and all surrounding areas.
Exercise utmost care when cleaning the discs as there is a risk of cutting with the blades of the
discs.
Perform the cleaning work only with cleaning products suitable for foodstuffs. Never use
corrosive or flammable cleaning products or those containing harmful substances.

STORAGE AND TRANSPORT
During transport and storage, the ambient temperature must be between -25°C and +55°C with a maximum
value of +70°C (provided that the exposure time does not exceed 24 hours).
Keep all parts of the packaging in case you need to return the shipment to avoid possible damage during
transportation.
TROUBLESHOOTING
The information below is intended to help you identify and remedy any faults or malfunctions that may occur
during operation. Some faults may be remedied by the operator, others require precise technical competence
or special skills and may only be remedied by qualified staff, who has proven and recognised experience.
Do not remove any internal parts of the device. The manufacturer assumes no liability for
damage caused by manipulations.
Malfunctions
Fault
Causes
Remedy
The device does not start.
The main switch is off.
Turn on the main switch.
The device does not start.
No voltage on the power supply
line.
Contact your dealer or the
customer service.
The device does not start.
The retaining device has not been
pushed down.
Push down the retaining device.
The device does not start.
The collecting pot has not been
inserted correctly.
Make sure that the collecting pot
is inserted correctly.
The device does not start.
The fuse has blown.
Contact your dealer or the
customer service.
The direction of rotation of the tool
is not correct.
The current phases of the power
cord of the device are not
connected correctly.
Have the current phases of the
power cord swapped by a
qualified technician.
WARRANTY
ADE will repair or replace this product if it has failed within 1 year from the date of purchase (proof of purchase
is required) due to poor workmanship or defective material.
The above does not apply to all moving parts such as a power cord, collecting pot, pusher, discs, etc. Warranty
does not apply to normal appearance of usage or sign of wear or any damages caused by accidents or misuse.
The warranty will not apply for devices that have been opened by unauthorised persons.
This warranty agreement does not affect the customer's legal rights in any manner.
The dealer from whom the machine was purchased is responsible for complaints.

DISPOSAL
Waste electrical equipment do not belong in household waste. Please dispose of defective or
old devices according to the legal and country-specific regulations!
TECHNICAL DATA
Model
VITALIS-230
VITALIS-400
Power
0.51 kW
0.51 kW
Power supply
230 V/50 Hz
400 V/50 Hz
Dimensions of the device* (WxDxH)
400 x 510 x 790 mm
* with the retaining device open
Dimensions of the collecting pot
320 x 170 x 195 mm
Capacity of the collecting pot
6.5 litres
Rotational speed of the discs
300 rpm
Net weight
22 kg
Gross weight
24 kg
Packaging dimensions
720 x 360 x 510 mm
Switching unit
IP54 insulated
Length of the power cord
1.50 m
Noise level
<70 dB

OPTIONAL ACCESSORIES
Options:
Ejection chute
when using larger collecting pots
H4498-002
Disc holder, enamelled,
for 5-6 discs (depending on the disc)
H4501-0621
Disc range (not included):
A smooth cutting discs
(e.g. for potatoes, onions, small radish, turnips, radish, cabbage, parsley, cucumbers, mushrooms, apples, pears, bananas, peppers,
eggplants, artichokes, fennel, etc.)
A1 = Cutting height 1 mm
/ 3 blades
Z4551
A2 = Cutting height 2 mm
/ 3 blades
Z4552
A3 = Cutting height 3 mm
/ 2 blades
Z4553
A5 = Cutting height 5 mm
/ 1 blade (sickle)
Z4555
A8 = Cutting height 8 mm
/ 1 blades
Z4558
A10 = Cutting height 10 mm
/ 1 blades
Z4560
AW wave/varied cutting discs
(e.g. for beetroot, cucumber, zucchini, etc.)
A2W = Cutting height 2
mm
/ 1 blades
Z4582
A3W = Cutting height 3
mm
/ 1 blades
Z4583
S rubbing discs
(e.g. for carrots, white cabbage, celery, apples, chocolate, cheese, etc.)
S2 = Rubbing disc diameter 2 mm
Z4561
S3 = Rubbing disc diameter 3 mm
Z4562
S4 = Rubbing disc diameter 4 mm
Z4563
S7 = Rubbing disc diameter 7 mm
Z4565
S8 = Rubbing disc diameter 8 mm
Z4559
S9 = Rubbing disc diameter 9 mm
Z4564
S-VG = Rasp diameter 2 mm
Z4566

F Julienne stick cutting discs
(e.g. for carrots, cucumbers, radish, turnips, kohlrabi, celery, pumpkins, etc.)
F2.5x2.5 = Cutting width 2.5x2.5 mm
Z4567
F4x4 = Cutting width 4x4 mm
Z4568
F6x6 = Cutting width 6x6 mm
Z4569
F8x8 = Cutting width 8x8 mm
Z4570
F10x10 = Cutting width 10x10 mm
Z4571
C dicing grid (dicing grid discs only in conjunction with A cutting discs)
(e.g. for carrots, apples, radish, turnips, pumpkins, peach, celery, etc.)
C8x8 = Dice size 8x8 mm
Z4573
C10x10 = Dice size 10x10 mm
Z4574
C20x20 = Dice size 20x20 mm
Z4575
CE MARKING AND DECLARATION OF CONFORMITY
Declaration of conformity by the manufacturer
This product has been manufactured in accordance with the harmonised European standards. They
conform to the regulations of the EC-directives listed below:
−Machinery directive 2006/42/EC
−EMC Directive 2014/30/EU regarding electromagnetic compatibility
−Low voltage directive 2014/35/EU
−RoHS Directive 2011/65/EU
in the currently valid versions.
The declaration will be void if a change that was not agreed with us has been made on the machine.
Hamburg, August 2019
ADE Germany GmbH & Co. KG
Hammer Steindamm 27-29
D-22089 Hamburg

CIRCUIT DIAGRAMS
VITALIS-230 V
VITALIS-400V

EXPLOSION SIGNS


SPARE PARTS LIST
NR.
DESCRIPTION
ITEM NO.
260
Collecting pot
H4498-001
270
Ejection chute
H4498-002
32
Discharge shovel
H4498-003
226
Magnetic switch
H4498-004
8
Ball handle for pusher
H4498-005
10
Pusher, round
H4498-006
20
Pusher for lever
H4498-007
Switch assembly
H4498-008
258
Magnet for collecting pot or ejection chute
H4498-013
70
Adjustable foot
H4498-011
82
Drive belts
HH4498-020
52
Motor 400V
52
Motor 230V
H4498-0121
804BTF
PCB 400 V
H4498-022
804
PCB unit 230 V
H4498-023


Distributor:
This manual suits for next models
2
Table of contents
Other ADE Cutter manuals