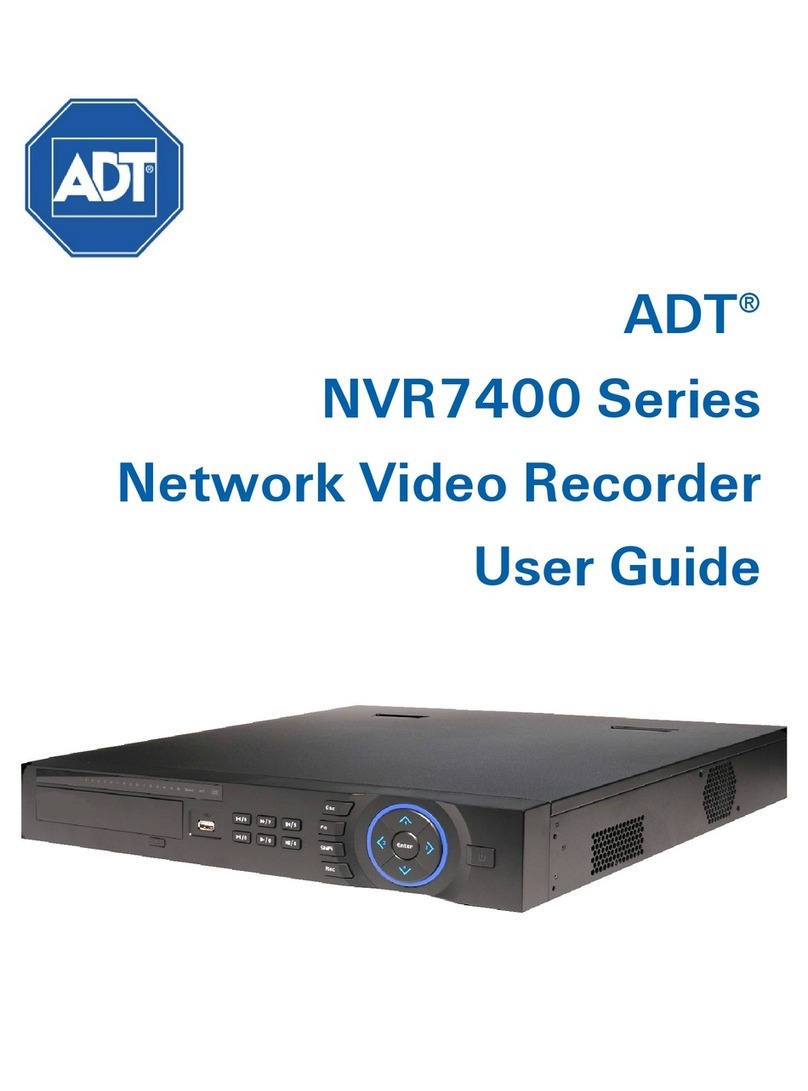
ADT NVR4200 Series User manual

ADT®
NVR4200 Series
Network Video Recorder
User Guide

Typographic Conventions
This document uses the following typographic conventions to help you locate and identify
information:
Italic text Identifies new terms, emphasis, book titles and text to enter on the keyboard
Bold text Identifies button names and other items that you can click or touch in the graphical user
interface or press on a computer keyboard
Note: Notes provide extra information about a topic that is good to know but not essential to the
process.
Tip: A useful hint for proper use of the product or software.
IMPORTANT: Identifies significant information that warrants more than ordinary consideration but
not essential to system security.
CAUTION: Cautions draw your attention to actions that could compromise the security of your
system or result in the loss of data.
©2015 ADT LLC dba ADT Security Services. All rights reserved. ADT, the ADT logo, 800 ADT.ASAP and the
product/service names listed in this document are marks and/or registered marks. Unauthorized use is strictly
prohibited. Portions of the software provided with this product may be subject to one third party licenses,
including licenses for the use of "open source" software. Details can be found in the file LICENSE_README.TXT
on the installation CD.
NVR4204-P/NVR4208-8P-UG-01 (04/15)
NVR4200 Series User Guide ii

Table of Contents
1NVR Overview................................................................................................................................... 1
1.1 Front Panel........................................................................................................................................................ 1
1.2 Rear Panel ......................................................................................................................................................... 3
1.3 Alarm Connections ......................................................................................................................................... 3
1.3.1 Alarm Port .............................................................................................................................................. 5
1.3.2 Alarm Input Port.................................................................................................................................... 5
1.3.3 Alarm Input and Output Port .............................................................................................................. 6
1.4 Network Connection ...................................................................................................................................... 7
1.5Bidirectional Talk............................................................................................................................................. 8
1.5.1 NVR to PC ............................................................................................................................................... 8
1.5.2 PC to the NVR ........................................................................................................................................ 8
1.6Remote Control................................................................................................................................................ 9
2Getting Started................................................................................................................................. 1
2.1 Login, Start up and Logout............................................................................................................................ 1
2.1.1 Virtual Keyboard ................................................................................................................................... 3
2.1.2 Right-click Menu ................................................................................................................................... 4
2.2 Startup Sequence ........................................................................................................................................... 4
2.2.1 Logout / Shutdown.............................................................................................................................. 5
2.3 Preview (Live Viewing)................................................................................................................................... 6
2.4 Navigation Bar.................................................................................................................................................. 7
2.4.1 Channel Info........................................................................................................................................... 8
2.4.2 Video Color............................................................................................................................................. 8
2.5 Search and Playback ....................................................................................................................................10
2.5.1Other Functions...................................................................................................................................13
2.5.2 Smart Search .......................................................................................................................................14
2.5.3 Playback by Time ................................................................................................................................15
2.5.4 Mark Playback .....................................................................................................................................16
2.6 Backup .............................................................................................................................................................18
2.6.1 File Backup ...........................................................................................................................................18
2.6.2 USB Device Auto Pop-up...................................................................................................................19
2.7 Snapshot .........................................................................................................................................................20
2.7.1 Schedule Snapshot ............................................................................................................................21
2.7.2 Activation Snapshot...........................................................................................................................22
2.7.3 Manual Record/Snapshot ................................................................................................................24
2.7.4 Holiday Record/Snapshot ................................................................................................................26
NVR4200 Series User Guide iii

3Local Menu Operations................................................................................................................ 29
3.1 Menu Tree.......................................................................................................................................................29
3.2 Remote ............................................................................................................................................................31
3.2.1 Remote Device ....................................................................................................................................31
3.2.2 Image.....................................................................................................................................................35
3.2.3 Encode ..................................................................................................................................................37
3.2.4 Cam Name............................................................................................................................................41
3.3 Network...........................................................................................................................................................42
3.3.1 TCP/IP ...................................................................................................................................................42
3.3.2 Connection...........................................................................................................................................44
3.3.3 WIFI........................................................................................................................................................45
3.3.4 3G...........................................................................................................................................................46
3.3.5 PPPoE ....................................................................................................................................................46
3.3.6 DDNS.....................................................................................................................................................47
3.3.7 IP Filter...................................................................................................................................................49
3.3.8 Email ......................................................................................................................................................51
3.3.9 FTP .........................................................................................................................................................52
3.3.10 SNMP ...............................................................................................................................................54
3.3.11 Multicast Setup..............................................................................................................................55
3.3.12 Alarm Center ..................................................................................................................................56
3.3.13 Register............................................................................................................................................56
3.3.14 Switch ..............................................................................................................................................58
3.4 Event ................................................................................................................................................................58
3.4.1 Video Detect ........................................................................................................................................58
3.4.2 Alarm Setup .........................................................................................................................................71
3.4.3 Abnormality .........................................................................................................................................75
3.4.4 Alarm Out .............................................................................................................................................77
3.5 Storage ............................................................................................................................................................78
3.5.1 Schedule...............................................................................................................................................78
3.5.2 HDD Manager......................................................................................................................................81
3.5.3 Manual Recording ..............................................................................................................................83
3.6 System.............................................................................................................................................................84
3.6.1 General..................................................................................................................................................84
3.6.2 Display Setup.......................................................................................................................................88
3.6.3 RS232 ...................................................................................................................................................91
3.6.4 Pan/Tilt/Zoom (PTZ) .........................................................................................................................92
3.6.5 Account..............................................................................................................................................101
3.6.6 Auto Maintenance...........................................................................................................................105
3.6.7 Import/Export...................................................................................................................................106
3.6.8 Default................................................................................................................................................107
3.6.9 Upgrade .............................................................................................................................................108
NVR4200 Series User Guide iv

3.7 Information (Info)........................................................................................................................................109
3.7.1 HDD Information (Info) ...................................................................................................................109
3.7.2 BPS......................................................................................................................................................110
3.7.3 Version ...............................................................................................................................................111
3.7.4 Remote Device Information ..........................................................................................................112
3.7.5 Online Users......................................................................................................................................113
3.7.6 Network Load ...................................................................................................................................114
3.7.7 Network Test ....................................................................................................................................115
3.7.8 Log ......................................................................................................................................................116
3.8 Shutdown ....................................................................................................................................................118
4Web Service .................................................................................................................................119
4.1 Network Connection .................................................................................................................................119
4.2 About PoE Address Setup, Operation and Allocation........................................................................119
4.3 Login .............................................................................................................................................................120
4.4 Preview Tab.................................................................................................................................................122
4.4.1 LAN Mode .........................................................................................................................................123
4.4.2 WAN Mode .......................................................................................................................................125
4.4.3 Real-time Monitor ............................................................................................................................126
4.4.4 Pan/Tilt/Zoom (PTZ) Panel ...........................................................................................................127
4.4.5 Image Settings .................................................................................................................................129
4.4.6 Alarm Out ..........................................................................................................................................130
4.4.7 Multi Preview....................................................................................................................................130
4.5 Playback (Search).......................................................................................................................................131
4.6 Alarm.............................................................................................................................................................135
4.6.1 Alarm Type ........................................................................................................................................135
4.6.2 Operation...........................................................................................................................................135
4.6.3 Alarm Sound .....................................................................................................................................135
4.7 Setup.............................................................................................................................................................136
4.7.1 Remote Camera ...............................................................................................................................136
4.7.2 Network .............................................................................................................................................145
4.7.3 Event...................................................................................................................................................161
4.7.4 Storage...............................................................................................................................................186
4.7.5 Setting ................................................................................................................................................192
4.8 Information (Info)........................................................................................................................................212
4.9 Logout...........................................................................................................................................................214
4.10 Un-install Web Service..............................................................................................................................214
Appendix A Troubleshooting, Daily Maintenance and Glossary..............................................215
Appendix B Specifications ................................................................................................................223
Appendix C Compatible Network Cameras..................................................................................225
NVR4200 Series User Guide v

Appendix D Compatible Backup Devices ......................................................................................229
Appendix E Compatible SATA HDDs..............................................................................................231
Appendix F Compatible CD/DVD Devices.....................................................................................235
Appendix G Compatible Displays....................................................................................................236
Index........................................................................................................................................................237
NVR4200 Series User Guide vi

Preface
Preface
FCC Compliance Statement
This device complies with Part 15 of the FCC Rules. Operation is subject to the following conditions:
1. This device may not cause harmful interference, and
2. This device must accept any interference received, including interference that may cause
undesired operation.
Important Safeguards and Warnings
Electrical Safety
All installation and operation here should conform to your local electrical safety codes. The product
must be grounded to reduce the risk of electric shock. ADT assumes no liability or responsibility for all
the fires or electrical shock caused by improper handling or installation.
Transportation security
Heavy stress, violent vibration or water splash are not allowed during transportation, storage and
installation.
Installation
•Keep upright
•Handle with care
•Do not apply power to the NVR before completing the installation
•Do not place objects on top of the NVR
Qualified Service Personnel
All examination and repair work should be performed only by qualified service personnel. ADT is not
liable for any problems caused by unauthorized modifications or attempted repair.
Environment
The NVR should be installed in a cool, dry place away from direct sunlight.
Accessories
•Be sure to use only the accessories recommended by manufacturer.
•Before installation, open the package and check that all the components are included.
•Contact us if something is damaged in the package.
Lithium Battery
•When replacing the battery, make sure you are using the same type.
•Improper battery use may result in fire, explosion or personal injury.
NVR4200 Series User Guide vii

Preface
Welcome
Thank you for purchasing the ADT®NVR4200 Series network video recorder. The ADT NVR4200
Series is available in the following models:
SCN# Item
NVR4204-P-ADT-1 4 Channel 1U 4 PoE Network Video Recorder with 1 TB HDD
NVR4204-P-ADT-2 4 Channel 1U 4 PoE Network Video Recorder with 2 TB HDD
NVR4204-P-ADT-4 4 Channel 1U 4 PoE Network Video Recorder with 4 TB HDD
NVR4208-8P-ADT-1 8 Channel 1U 8 PoE Network Video Recorder with 1 TB HDD
NVR4208-8P-ADT-2 8 Channel 1U 8 PoE Network Video Recorder with 2 TB HDD
NVR4208-8P-ADT-4 8 Channel 1U 8 PoE Network Video Recorder with 4 TB HDD
This user guide is designed to be a reference tool for the installation and operation of your NVR. Here
you can find information about NVR features and functions, as well as a detailed menu tree. Before
installation and operation, please read the following safeguards and warnings carefully.
Features
Overview
The ADT®NVR4200 Series network video recorder is a digital monitoring product designed for
security applications. It adopts embedded Linux OS to maintain reliable operation and the H.264
compression algorithm to provide high quality, low bit streams. The frame-by-frame playback function
is ideal for detailed analysis.
The NVR4200 Series features:
•Real-time Surveillance
oVGA port and HDMI port
oMonitor real time surveillance
oSupports popular PTZ decoder control protocols, preset, tour and pattern
•Playback
oEach channel records independently and at the same time can support search, forward
play, network monitor, record search and download functions
oSupports various playback modes: slow play, fast play, backward play and frame-by-
frame playback
oSupports time-of-day text overlay so that you can view event time and camera name
oSupports customized zoom function
•User Management
oEach group has different management rights that can be edited freely
oEvery user belongs to an exclusive group
NVR4200 Series User Guide viii

Preface
•Storage
oBackup recorded video data (configured in Alarm setup and Schedule setup)
oRecord video locally or via the Web and store the file on the client end
•Alarm
oResponds to external alarms simultaneously (within 200ms), based on your relay setup
oCan send alerts via email
oSupports central alarm server setup, so that alarm information can remotely notify the
user automatically
•Network Monitor
oCompresses video data by IPC or NVS and sends through the network to the client where
the data is decompressed and displayed
oTransmit video data by TCP, MULTICAST, etc.
oCertain alarm data can be transmitted by SNMP
oSupports Web access in WAN/LAN
•Window Split
oAdopts the video compression and digital process to display several windows on one
monitor
oSupports 1/4/8/9 window display during real time preview
•Record
oSupports normal/motion detect/alarm record function
oSave the recorded files in the HDD, USB device, client PC, or network storage server
oSearch or playback the saved files at the local end or via the Web/USB device
•Backup
oSupports local backup operation via the USB 2.0 port (such as a flash drive, portable
HDD)
oSupports backup via the Web
•Network Management
oSupervise NVR configuration and control power via Ethernet
oSupports management via the Web
•Peripheral Equipment Management
oSupports peripheral equipment management such as protocol setup and port connection
oSupports transparent data transmission such as RS232, RS422, and RS485
•Auxiliary
oSupport switch between NTSC and PAL.
oSupport real-time system resources information and running statistics display.
oSupport log file.
oLocal GUI output. Shortcut menu operation via mouse.
NVR4200 Series User Guide ix

1 NVR Overview
1NVR Overview
This chapter provides information about front panel and rear panel.
1.1 Front Panel
The front panel is shown in Figure 1-1.
Figure 1-1
Refer to the following table for detailed information.
Group
No. Symbol Function
1
Power. Press and hold for three seconds to power up or shut down the NVR.
2 ^/ 1 Up arrow: Press to move the selection in the currently-active control up or to
increase the numeric value.
1: In text mode, press to enter the value 1.
</ 2
Left arrow: Press to move the selection in the currently-active control left.
During playback, click to control the playback bar.
2: In text mode, press to enter the value 2.
>/ 3
Right arrow: Press to move the selection in the currently-active control right.
During playback, click to control the playback bar.
3: In text mode, press to enter the value 3.
/ 4
Down arrow: Press to move the selection in the currently-active control down
or to decrease the numeric value.
4: In text mode, press to enter the value 4.
Enter Enter. Use to confirm the current operation, return to the default button or
select a menu item.
3 Esc Escape. Return to the previous menu or cancel the current operation.
During playback mode, press to restore real-time monitor mode.
Fn
(Function)
In one-window monitor mode: displays the PTZ control and image color
functions.
In motion detection setup: use with the direction keys to complete setup.
In text mode: toggles between numeric and alpha characters (lower/upper
case). Also serves as the Backspace function to delete the previous character
(to the left of the cursor) when pressed for 1.5 seconds.
In HDD management screen: switches between HDD recordings and other
information (Menu prompt).
NVR4200 Series User Guide 1

1 NVR Overview
Group
No. Symbol Function
Shift Shift. Press to toggle between character types: number 0-9, upper case letter
or lower case letter.
Rec Record. Press to manually start/stop recording. Use the direction keys or
number keys to select the recording channel.
4 / 0
In playback mode: Press to playback the previous video.
In text mode: Press to select the number 0.
/ 9 In playback mode: Press to playback the next video.
In text mode: Press to select the number 9.
/ 8
In playback mode: Press to toggle between normal playback and various
slow play speeds.
In text mode: Press to select the number 8.
/ 7
In playback mode: Press to toggle between normal playback and various
fast play speeds.
In text mode: Press to select the number 7.
/ 6
In playback mode: Press to toggle between reverse playback and pause
playback modes.
In text mode: Press to select the number 6.
/ 5
In playback mode: Press to toggle between normal playback and pause
playback modes.
In text mode: Press to select the number 5.
5 1-8 Record Active indicators. Individual LEDs illuminate to indicate that a
channel is recording.
HDD HDD indicator. Lights to alert you of a hard disk error or that the disk capacity
is below the specified threshold value.
NET Network indicator. Lights to alert you of a loss of the network connection.
IR IR receiver. Receives the signal from the remote control.
6 USB Port. Connects a USB storage device or USB mouse.
NVR4200 Series User Guide 2

1 NVR Overview
1.2 Rear Panel
The 4-channel model NVR rear panel is shown in Figure 1-2.
Figure 1-2
Refer to the following table for detailed information.
Item Function
1 Grounding mount
2 Power on/off switch
3 12VDC, 5A Power Input port
4
Alarm input port. See separate table below. When your
alarm input device is using external power, make sure the
device and the NVR have the same ground.
5 USB2.0 port
6 HDMI port
7
Audio Input port for bidirectional talk, which receives the
analog audio signal output from a microphone.
8 VGA analog video signal
9
Network port; 10M/100M/1000Mbps self-adaptive
Ethernet
10
PoE ports. Built-in Switch supports Power over Ethernet.
One PoE port supports 15W max:
4 PoE port product supports 48V / 50W
11
48VDC, 1.04A Power Input port
12
Audio Out port for analog audio signal output: Bidirectional
talk output, Audio output on 1-window video monitor,
Audio output on 1-window video playback.
13
RS-232 port for general COM debug to configure IP
address or transfer transparent COM data
Note: When connecting the Ethernet port, use the crossover cable to connect the PC and use the
straight cable to connect to the switcher or router.
NVR4200 Series User Guide 3

1 NVR Overview
The 8-channel model NVR rear panel is shown in Figure 1-3.
Figure 1-3
Refer to the following table for detailed information.
Item Function
1 Grounding mount
2 Alarm input / output ports. See discussion below.
3 USB2.0 port
4 HDMI port
5 Audio Input port for bidirectional talk, which receives
the analog audio signal output from a microphone.
6 VGA analog video signal
7 Network port; 10M/100M/1000Mbps self-adaptive
Ethernet
8
PoE ports. Built-in Switch supports Power over
Ethernet. One PoE port supports 15W max:
8 PoE port product supports 48V / 120W
9 Power on/off switch
10 100–240 VAC Power Input socket
11
Audio Out port for analog audio signal output:
Bidirectional talk output, Audio output on 1-window
video monitor, Audio output on 1-window video
playback.
12
RS-232 port for general COM debug to configure IP
address or transfer transparent COM data
Note: When connecting the Ethernet port, use the crossover cable to connect the PC and use the
straight cable to connect to the switcher or router.
NVR4200 Series User Guide 4

1 NVR Overview
1.3 Alarm Connections
1.3.1 Alarm Port
Please refer to the following figure for detailed information about the alarm port.
Figure 1-4
Row ID Description
Upper N1/C1
N2/C2
Alarm Output groups 1–2
N is a normally open alarm output port and C is the alarm output common.
A/B 485 communication port: controls the PTZ decoder
Lower 1–4 Alarm Inputs NO (normally open)
Ground
Note: When your alarm input device is using external power, make sure the device and the NVR
have the same ground. Also, make sure that there is power to the external alarm device.
1.3.2 Alarm Input Port
To connect an alarm:
1. Connect the positive end (+) of the alarm input device to the alarm input port (1-4) of the NVR.
2. Connect the negative end (–) of the alarm input device to the ground end ( ) of the NVR.
In the example that follows, alarms 1 and 3 are configured.
NVR4200 Series User Guide 5

1 NVR Overview
Figure 1-5
Note
•The alarm inputs are Normally Open (NO).
•When connecting the ground port of the alarm device to the NVR, you can use either of the GND
ports ( ).
•When there is peripheral power supplied for the alarm device, please make sure it is grounded
with the NVR.
1.3.3 Alarm Input and Output Port
•There is peripheral power supplied for the external alarm device.
•To avoid an overload resulting in NVR damage, please refer to the following relay specifications
for detailed information.
•A/B cable of the RS485 is for the A/B cable connection of the speed PTZ.
NVR4200 Series User Guide 6

1 NVR Overview
Relay Specifications
Model: JRC-27F
Contact Material Silver
Rating
(resistance load) Rated switch capacity 30VDC 2A, 125VAC 1A
Maximum switch power 125VA 160W
Maximum switch voltage 250VAC, 220VDC
Maximum switch currency 1A
Insulation
Between touches with same
polarity
1000VAC 1minute
Between touches with
different polarity
1000VAC 1minute
Between touch and winding 1000VAC 1minute
Surge voltage
Between touches with same
polarity
1500V (10 x 160us)
Open time 3ms max
Close time 3ms max
Longevity
Mechanical 50 x 106 times (3Hz)
Electrical 200 x103 times (0.5Hz)
Temperature -40°C to +70°C
1.4 Network Connections
Figure 1-6
8 channel model shown
NVR4200 Series User Guide 7

1 NVR Overview
1.5 Bidirectional Talk
1.5.1 NVR to PC
Device Connection
•Connect the microphone or pickup to the first audio input port on the device’s rear panel.
•Connect the earphone or the speaker to the audio output port on the PC.
•Login to the Web Service and click the Start Talk button to enable Bidirectional Talk (as
described on page 124).
Listening
Speak into the microphone connected to the NVR and the audio is received at the earphone or
speaker connected to the PC.
Figure 1-7
1.5.2 PC to the NVR
Device Connection
•Connect the microphone or the pickup to the audio output port on the PC.
•Connect the earphone or the speaker to the first audio input port on the device’s rear panel.
•Login to the Web Service and click the Start Talk button to enable Bidirectional Talk (as described
on page 124).
Listening
Speak into the microphone or pickup connected to the remote PC and the audio is received at the
earphone or speaker connected to the DVR.
Figure 1-8
NVR4200 Series User Guide 8

1 NVR Overview
1.6 Remote Control
The following describes the remote control.
Figure 1-9
NVR4200 Series User Guide 9

1 NVR Overview
No. Symbol Function
1 Power button. Press to power up or shut down the NVR.
2 Add Address. Use to input the device number of the unit that you want to
control with the remote.
3 Fast Play. Press to toggle between normal playback and various fast play
speeds.
4 Slow Play. Press to toggle between normal playback and various slow play
speeds.
5 Play Next. In playback mode, press to playback the next video.
In menu setup, press to move downward on the dropdown list.
6 Play Previous. In playback mode, press to playback the previous video.
7
Play / Pause. Press to toggle between normal playback and pause playback
modes.
8
Reverse / Pause.
Press to toggle between reverse playback and pause
playback modes.
9 Esc
Escape. Return to the previous menu or cancel the current operation.
During playback mode, press to restore real-time monitor mode.
10 Rec
Record. Press to manually start/stop recording. Use the direction keys or
number keys to select the recording channel.
11
Direction Keys. Press to move the selection in the currently-active control
left, right, up or own. During playback, click to control the playback bar.
12 Enter Enter. Use to confirm the current operation, return to the default button or
select a menu item.
13 Mult Multiple Windows. Press to toggle between one-window and multiple-
window display modes.
14 Fn
In one-window monitor mode: displays the PTZ control and image color
functions.
In motion detection setup: use with the direction keys to complete setup.
In text mode: toggles between numeric and alpha characters (lower/upper
case). Also serves as the Backspace function to delete the previous
character (to the left of the cursor) when pressed for 1.5 seconds.
In HDD management screen: switches between HDD recordings and
other information (Menu prompt).
15
0-9
A-Z
Shift
-/- -
Alpha Numeric Characters. Press to input a number 0-9, upper case letter
or lower case letter, using the Shift key to toggle between character types.
To enter a number greater than 9, first press the -/- - key, and then input the
desired number.
NVR4200 Series User Guide 10
This manual suits for next models
6
Table of contents
Other ADT Network Hardware manuals
Popular Network Hardware manuals by other brands

HIK VISION
HIK VISION DS-7600NI-Q1 Series user manual

HIK VISION
HIK VISION DS-9616NI-I8 quick start guide

Watchguard
Watchguard Firebox M290 quick start guide

Control Technologies
Control Technologies Ethernet TCP/IP Adapter Module CTI 2572 Technical overview

AirLive
AirLive WH-9000MESH Quick setup guide

CoolAutomation
CoolAutomation CoolMasterNet Quick installation guide