VIAVI Rail Kit (Gen3 Edition)
VIAVI Rail Kit (Gen3 Edition)
The VIAVI rail kit is used with its 2U and 5U 19 inch rack-
mounted appliances in four post L-bracket or U-bracket
cabinets.
Scan this QR Code with your mobile device for the latest
instructions and videos for this rail kit.
How to install the rails
Installation is fast and easy, and no tools are required to install
the rails in your cabinet.
Prerequisite(s):
Ensure you have all of the parts. Rail kit hardware (page 2)
These steps assume you are at the front of the cabinet when
installing. If you install appliances from the rear of your cabinet,
such as for airflow reasons, the front of the rail must be closest
to the face of the appliance for the slide locks to engage.
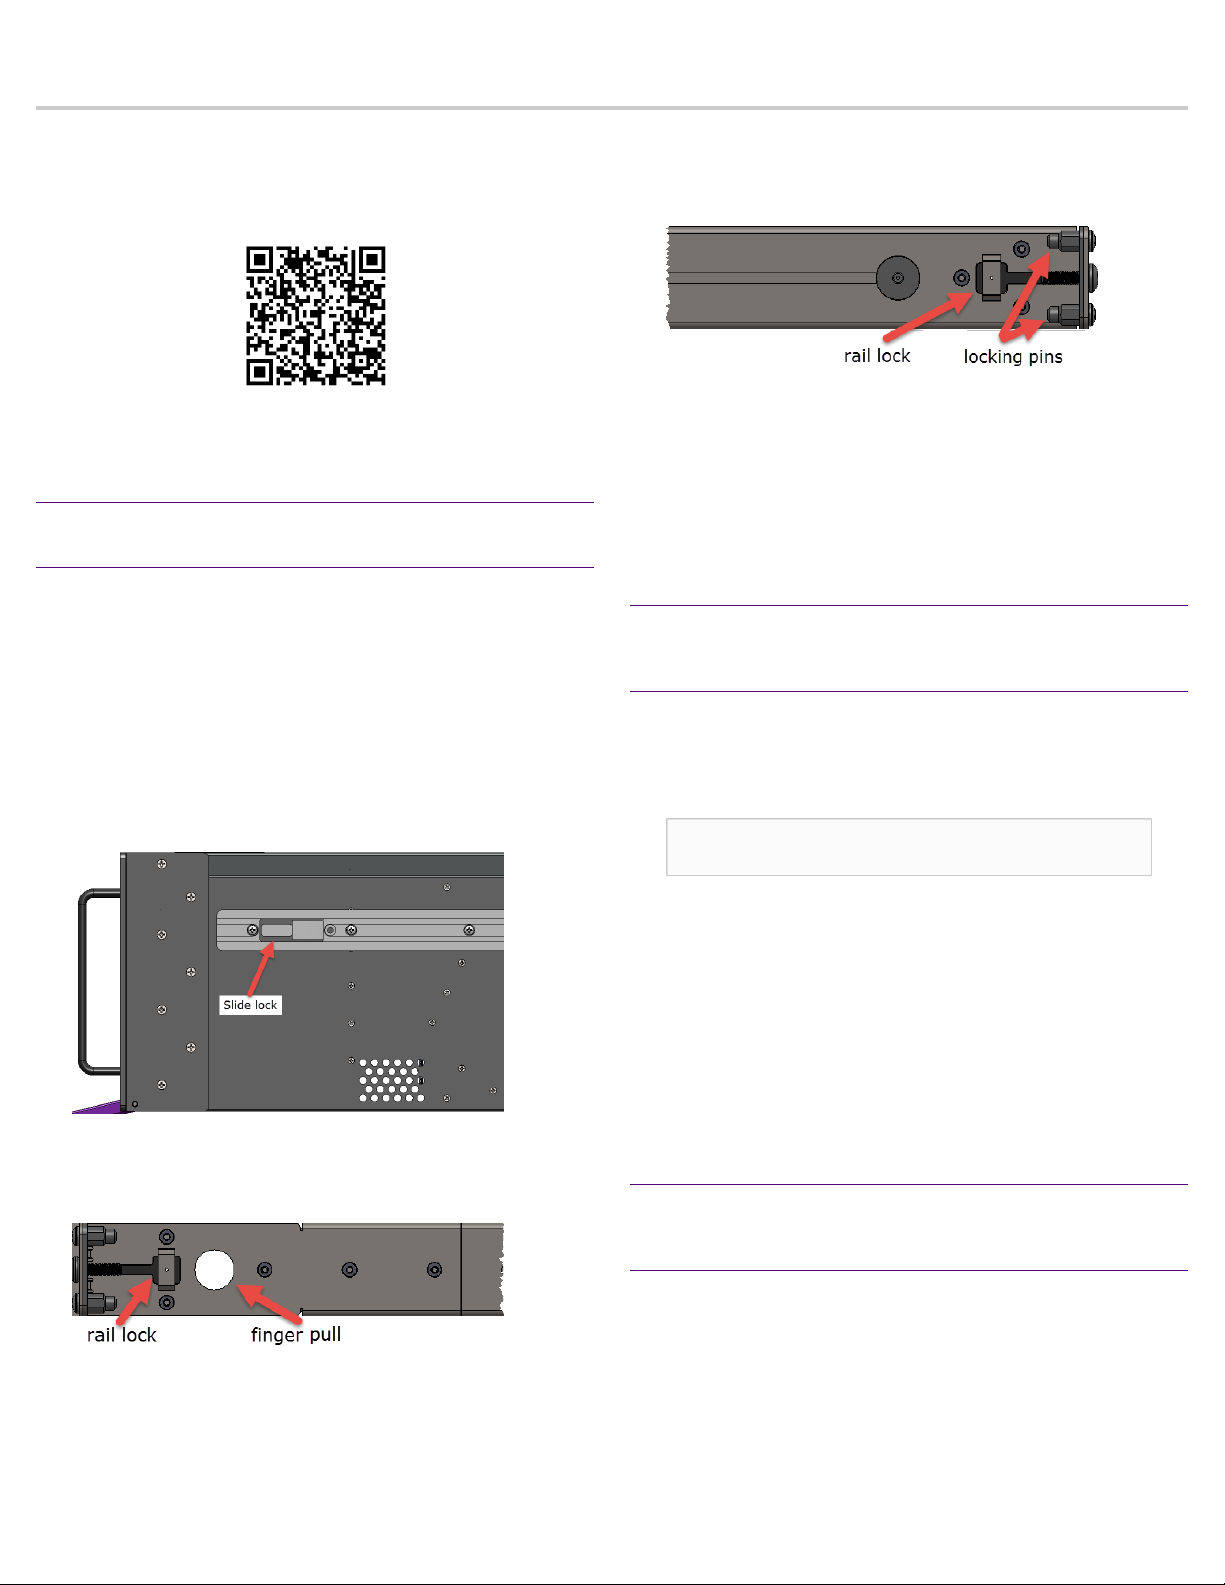
Rather than screws, ½ inch (14mm) posts on the rail known as
locking pins fit into holes in the cabinet. A plastic tab known
as a rail lock ensures the rail stays attached to the cabinet. If
your cabinet requires screws, replace the locking pins with the
provided screws (page 2).
1. If your Observer GigaStor has a blue face plate, remove the
existing slides and attach one plastic slide to each side of
the appliance with the slide lock towards the front.
2. Identify the front of the rail kit.
The front is marked with FA near the finger pull on a label.
The front of the rail should be closest to you when inserting
the rails into your cabinet.
3. Expand the rail a bit longer than the length of your
cabinet’s posts.
The rails should slide easily to expand. If it does not, loosen
the thumb screws.
4. Insert the rear locking pins into your cabinet and pull
towards you until the rail lock clicks into place.
Due to noise in your server room you may not hear it click.
Also, the rail lock is small and you may not feel it catch.
5. Insert the front of the rail into the cabinet.
Use the finger pull to shorten the rail. Like the rear, it also
has a rail lock that secures the rail in the cabinet.
6. (Optional) Tighten the thumb screws.
How to remove your appliance from the rails
Two sets of tabs known as slide locks must be pressed to allow
the appliance to be pulled toward you.
Prerequisite(s):
If you are removing the appliance from the cabinet, remove all
of the RAID drives.
The first set of slide locks allow you to pull the appliance out
part way. The second set of slide locks are used if you want
to remove the appliance from the cabinet. These tabs protect
you by preventing the appliance from coming out of the rack if
pulled too hard.
Caution: Appliances are very heavy. Work with a
partner and use extreme care when removing!
Because of the weight of the appliance, we recommend
that the appliance be fully removed from the cabinet for all
maintenance.
1. Pull the appliance toward you until it stops.
2. On both sides of the appliance, press the slide locks on
the white plastic on the appliance and pull the appliance
toward you.
3. (Optional) Repeat for the second locking tab.
How to remove the rails from a cabinet
Each rail has two rail locks that secure it into your cabinet.
These locks must be raised to release the rail from the cabinet.
Prerequisite(s):
Remove the appliance from the rails. How to remove your
appliance from the rails (page 1)
1. Front: Gently lift the front rail lock with one hand and
with the other hand pull the rail toward you until the two
locking pins clear the cabinet.
2. Rear: Gently lift the rear rail lock with one hand and with
the other hand push the rail away from you. Alternatively,
from the rear of the cabinet, lift the rail lock and pull the
rail toward you.


