6
2 Gel Preparation
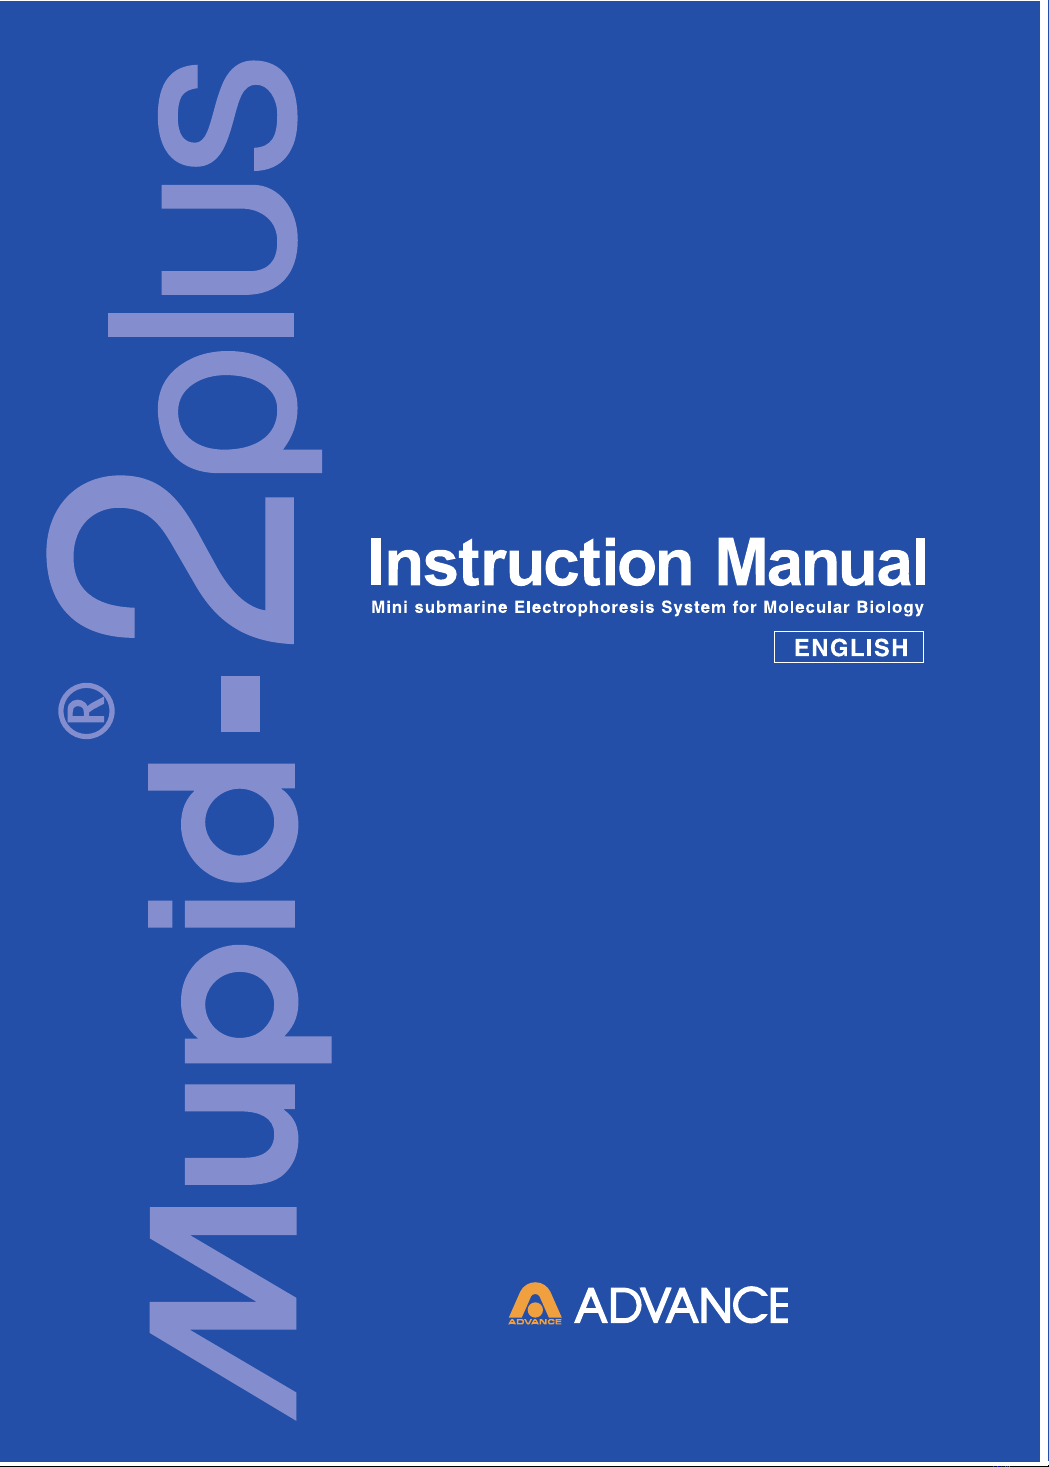
(1) Place the gel maker stand level and set the gel tray into
the stand. At maximum, four mini gels and two large
gels can be prepared at once.
If the gel tray is not placed level, the thickness
of the gel will not be uniform and migration
may be affected.
If preparation is conducted at 80 °C or higher,
there is a danger of deforming the gel maker
stand and gel tray.
(2) Weigh the required amounts of agarose powder and
buffer solution in a conical flask or other vessels, and
completely dissolve the agarose by applying heat.
(3) Let the agarose solution stand until it cools to 70 °C or
below.
(4) Set the comb into the gel maker stand. Choose the
small-toothed side (4 mm ×8 or 17 wells) or the large-
toothed side (6 mm ×6 or 12 wells) depending on the
purpose. Multiple combs can also be set for a single gel.
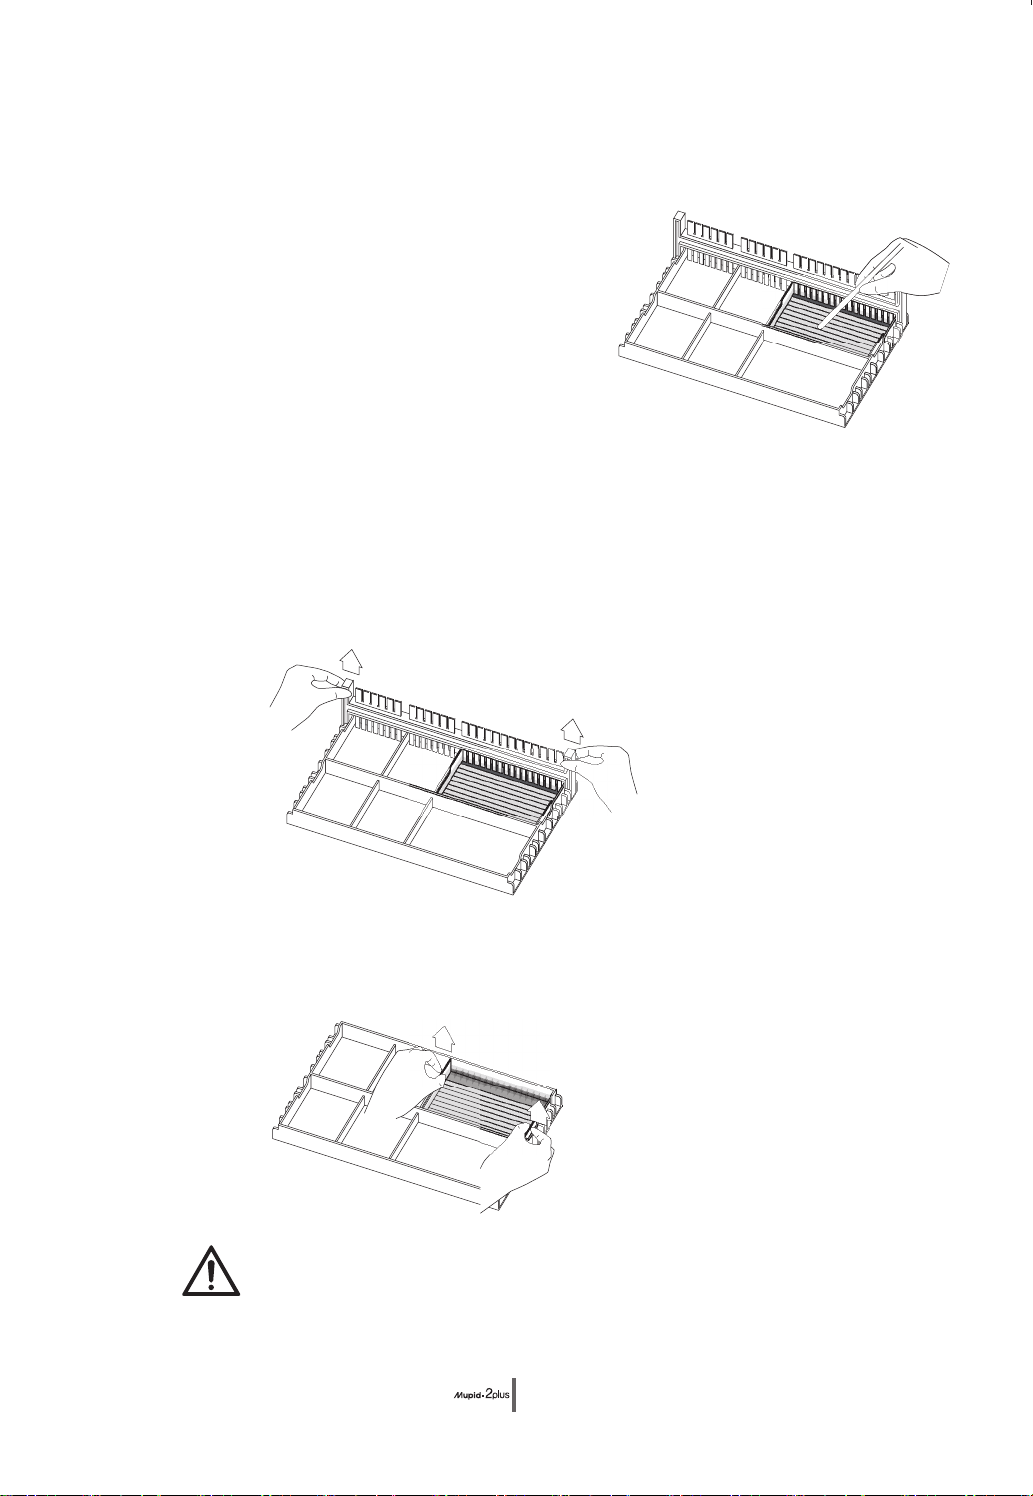
(5) Pour the appropriate amount of agarose solution into the
gel tray. To prepare a gel of about 4 mm thickness,
approximately 13 mL of agarose solution is required for
a mini gel and 26 mL for a large gel.
The order of steps (4) and (5) can be
reversed. For high-viscosity gels in which
air bubbles may be apt to remain,
performing step (5) first is recommended.
11P6P
11
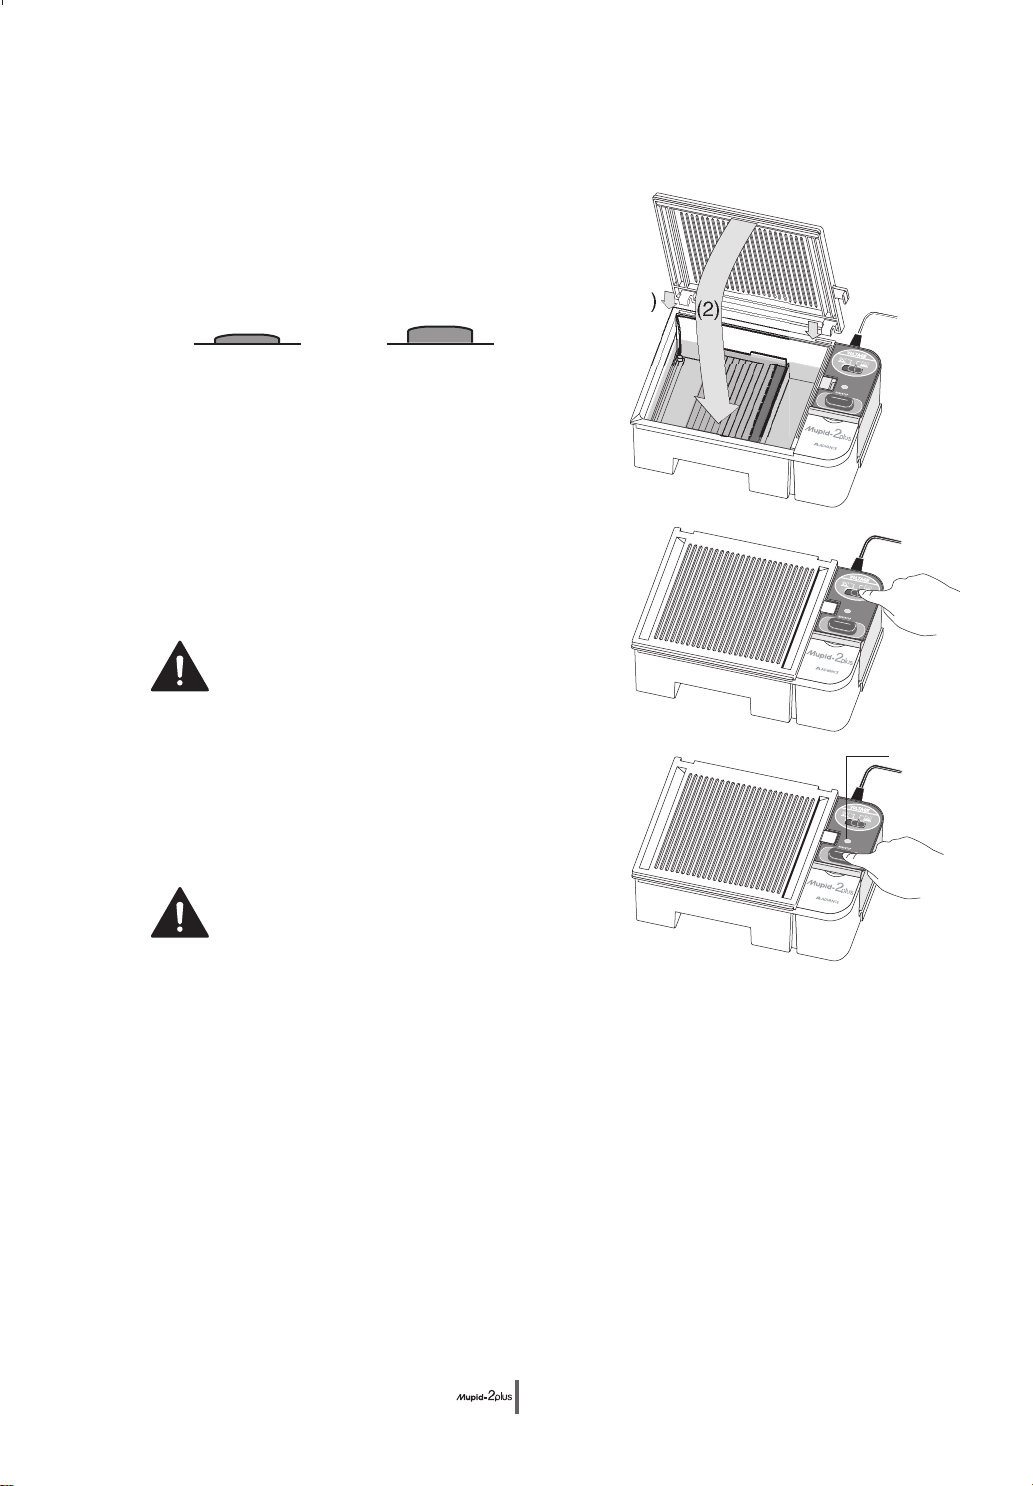
5 Product Maintenance
Do not let buffer stand in the migration tank for a long time or re-use it. This can
not only prevent accurate test results, but can also cause damage.
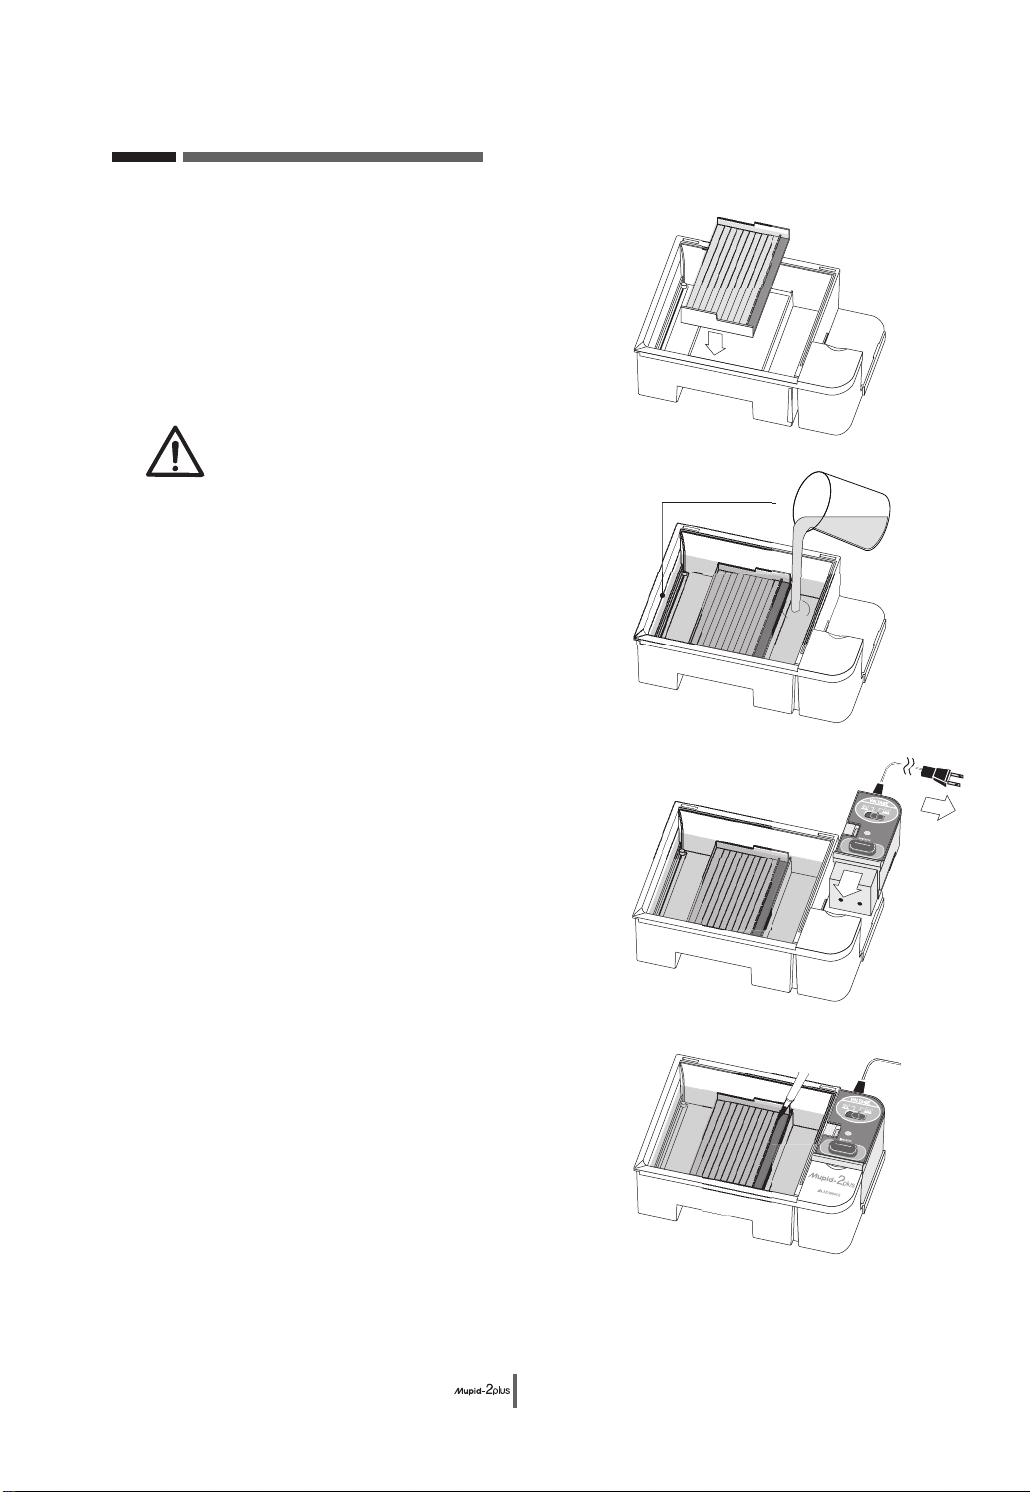
Detach the power supply when discarding
buffer or cleaning the migration tank.
When detaching the power supply, push the top
with the thumb as illustrated in the figure at
right. Don't pull on the electric cord.
If buffer is spilled on the power supply, dry it thoroughly and have it checked at a
distributor as a precautionary measure.
Although the migration tank does not have any electrical switch, do not clean it by
immersion in water.
Polishing or cleaning the electrode with a brush can cause breakage and should
be avoided.
After cleaning, allow it to dry it in a place out of direct sunlight. Do not dry it under
severe conditions such as a dry oven, or a hair dryer.
Do not clean this product with organic solvents such as acetone. Deformation
could result.
Do not attempt to modify this product.
This product is designed to run on input of 100-120 V of alternating current; if
using it in a country where voltage is higher, be sure to use a step-down
transformer. When there is the necessity of keeping the temperature of buffer liquid
low, It recommends using it in 100 VAC.