AEG COMPETENCE B3000-1 User manual

COMPETENCE B3000-1
The Versatile Built-in Oven
Operating Instructions
0

2
Dear Customer,
Please read these operating instructions carefully.
In particular please note the "Safety"“ section on the first pages. Please
retain these operating instructions for later reference and pass them on
to any future owners of the appliance.
1 The warning triangle and/or key words (Warning!, Caution!,
Important!) highlight information that is important for your safety or
the function of the appliance. It is imperative that this information is
observed.
0 1. This symbol guides you step by step through the operation of the
appliance.
2. ...
3 This symbol gives you additional information and practical tips on using
the appliance.
2 Tips and information about the economical and ecological use of the
machine are marked with the clover sign.
These operating instructions contain information on steps you can take
yourself to rectify a possible malfunction. Refer to the section "What to
do if...“
In the event of any technical problems please contact your nearest
CUSTOMER SERVICE CENTRE at any time. (Addresses and telephone
numbers may be found in the appendix under "Customer Service
Centres“).
You should also refer to the section "Service"“.
Printed on environmentally friendly paper.
Thinking ecologically means acting ecologically ...

3
Contents
Safety Instructions . . . . . . . . . . . . . . . . . . . . . . . . . . . . . . . . . . . . . . . . . . . . 5
Disposal . . . . . . . . . . . . . . . . . . . . . . . . . . . . . . . . . . . . . . . . . . . . . . . . . . . . . . 7
Eco-insulation . . . . . . . . . . . . . . . . . . . . . . . . . . . . . . . . . . . . . . . . . . . . . . . . . 7
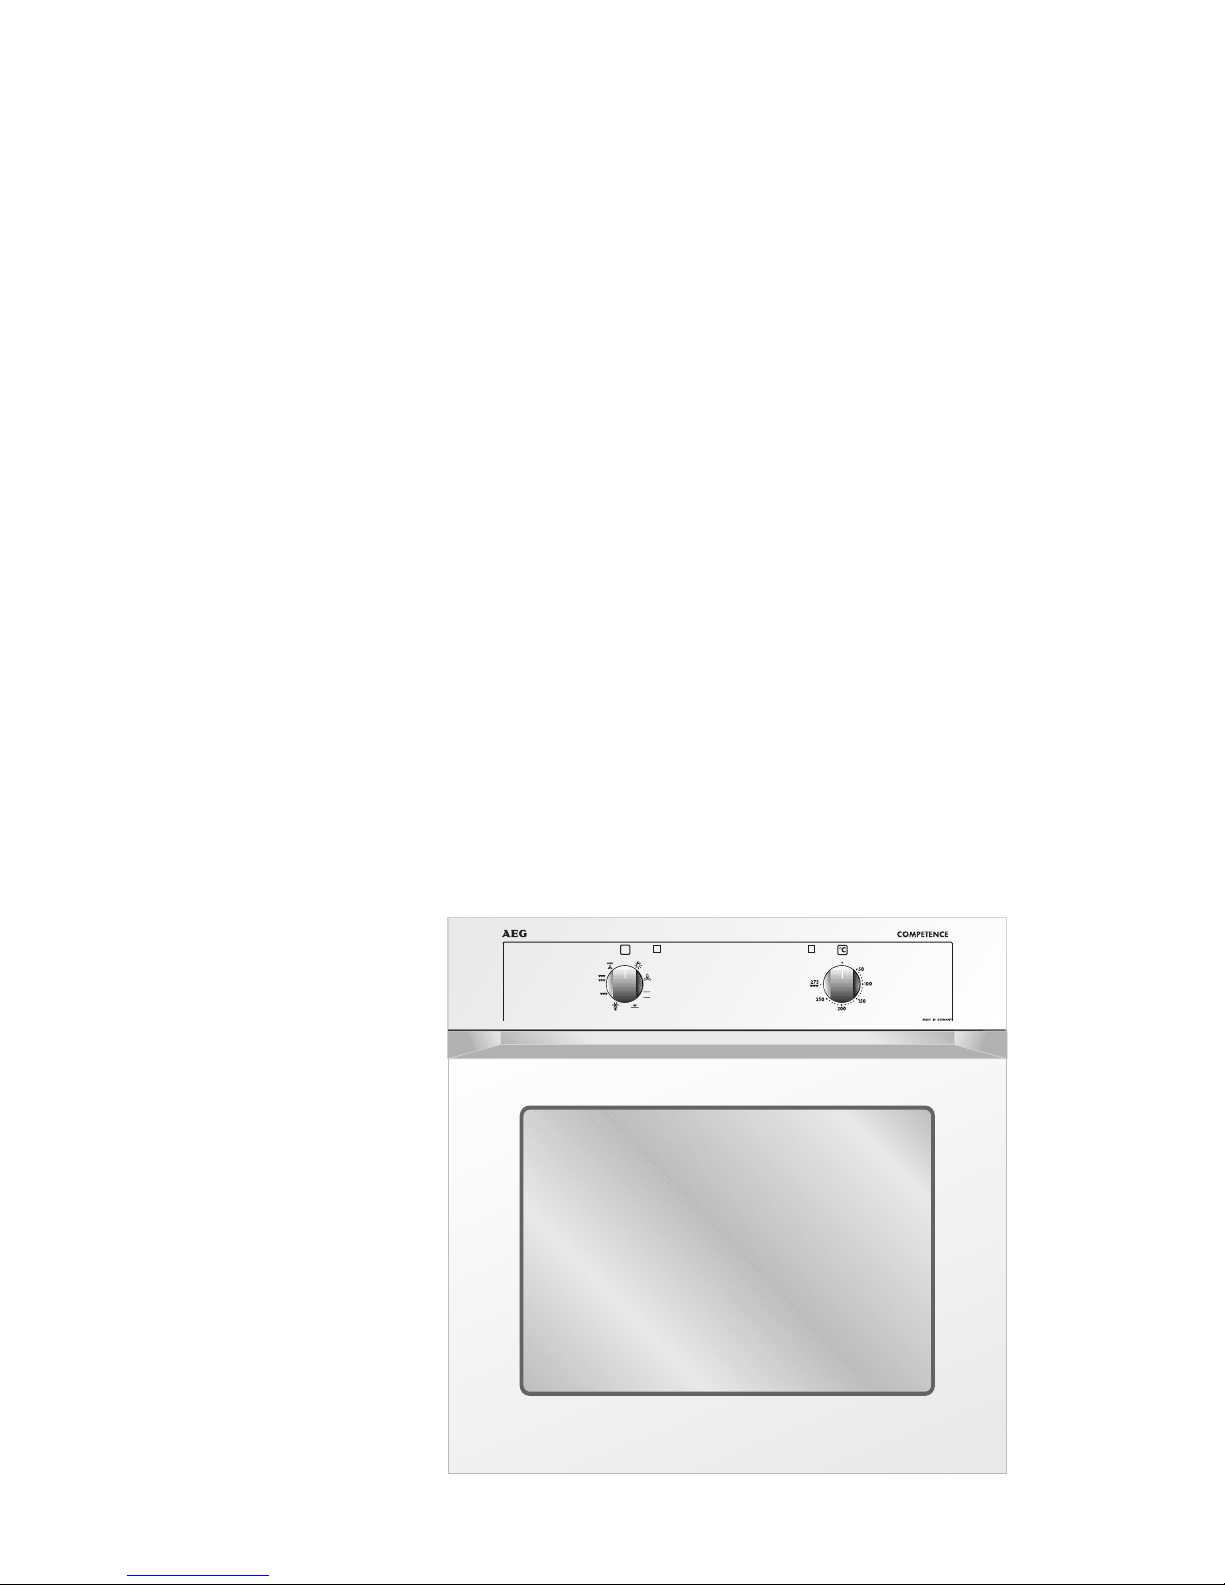
Appliance Assembly . . . . . . . . . . . . . . . . . . . . . . . . . . . . . . . . . . . . . . . . . . . . 8
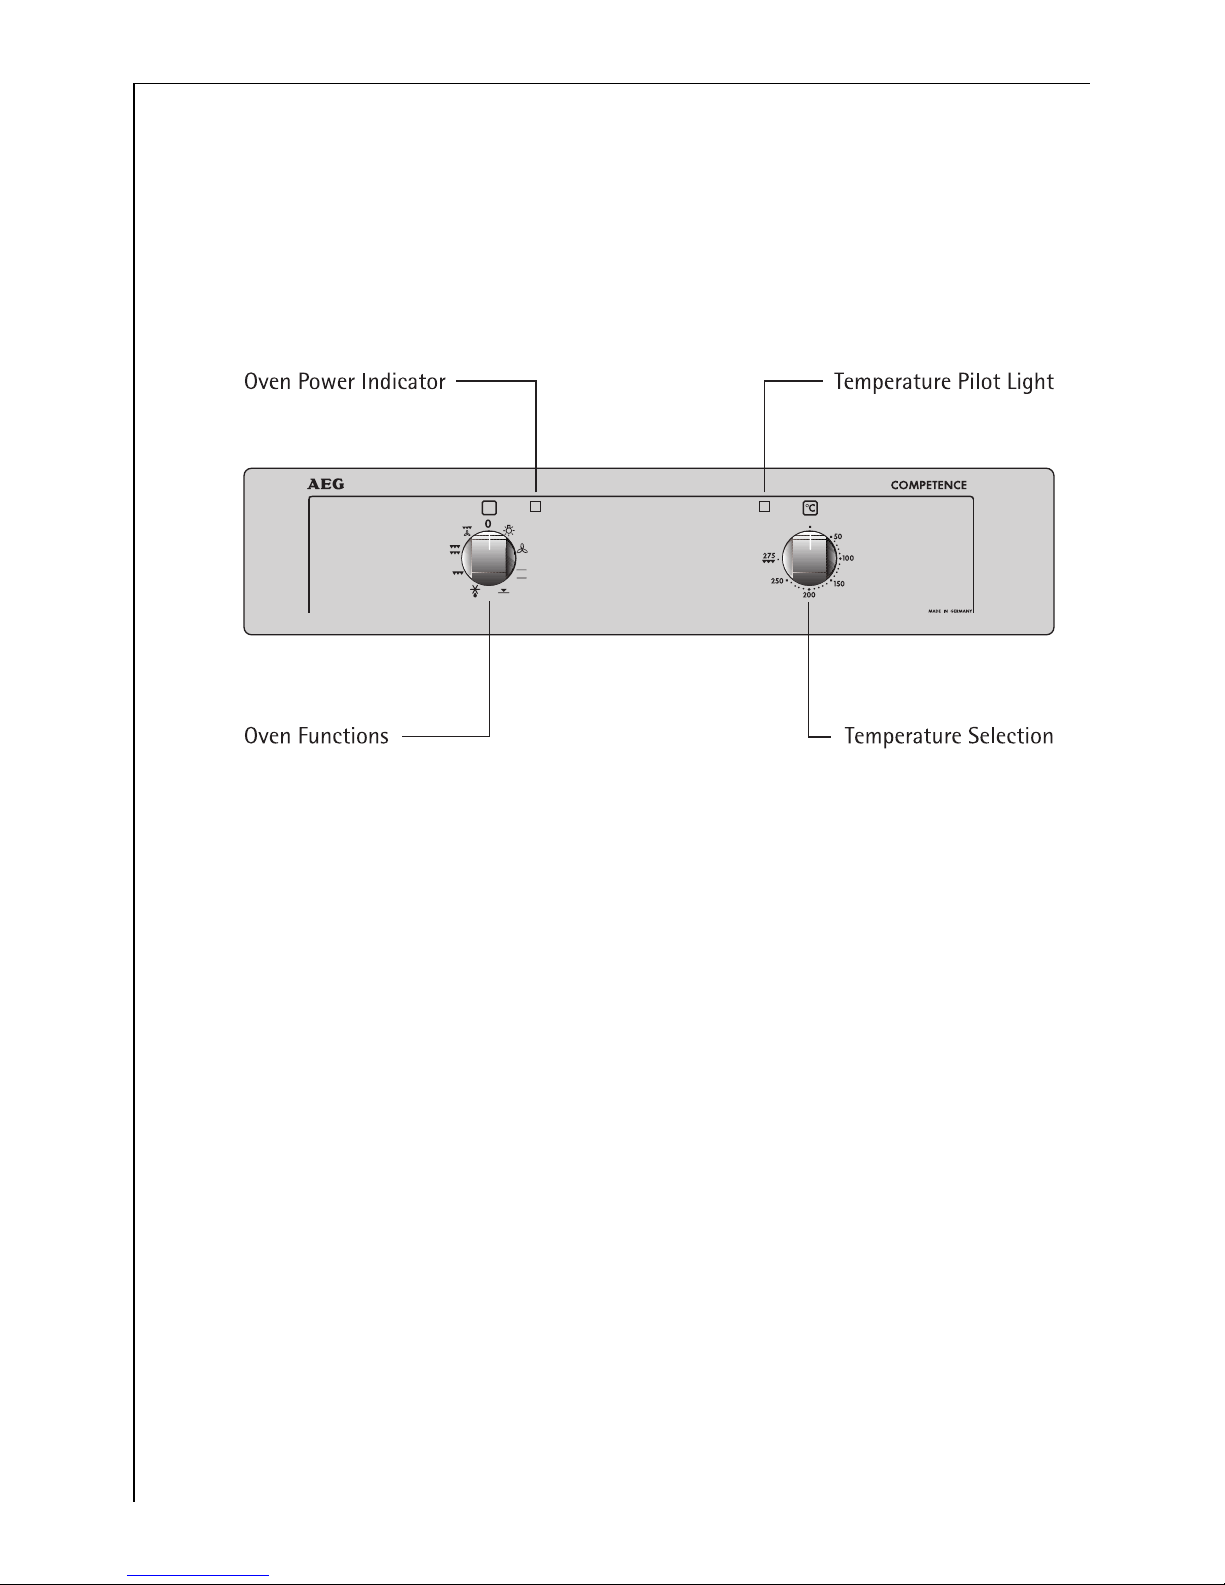
Control Panel . . . . . . . . . . . . . . . . . . . . . . . . . . . . . . . . . . . . . . . . . . . . . . . . . . 8
Oven Features . . . . . . . . . . . . . . . . . . . . . . . . . . . . . . . . . . . . . . . . . . . . . . . . . . 9
Oven Accessories . . . . . . . . . . . . . . . . . . . . . . . . . . . . . . . . . . . . . . . . . . . . . . . 10
Oven Functions . . . . . . . . . . . . . . . . . . . . . . . . . . . . . . . . . . . . . . . . . . . . . . . . 11
Before Using for the First Time . . . . . . . . . . . . . . . . . . . . . . . . . . . . . . . . . 13
Initial Cleaning . . . . . . . . . . . . . . . . . . . . . . . . . . . . . . . . . . . . . . . . . . . . . . . . . 13
Using the Oven . . . . . . . . . . . . . . . . . . . . . . . . . . . . . . . . . . . . . . . . . . . . . . . . 14
Positioning the Shelf Unit and the Universal Baking Tray . . . . . . . . . . . . . 14
Switching the Oven On and Off . . . . . . . . . . . . . . . . . . . . . . . . . . . . . . . . . . . 15
Uses, Tables and Tips . . . . . . . . . . . . . . . . . . . . . . . . . . . . . . . . . . . . . . . . . . . 16
Baking . . . . . . . . . . . . . . . . . . . . . . . . . . . . . . . . . . . . . . . . . . . . . . . . . . . . . . . . 16
Baking Table . . . . . . . . . . . . . . . . . . . . . . . . . . . . . . . . . . . . . . . . . . . . . . . . 18
Tips for Baking . . . . . . . . . . . . . . . . . . . . . . . . . . . . . . . . . . . . . . . . . . . . . . 20
Table for Soufflés and Dishes Au Gratin . . . . . . . . . . . . . . . . . . . . . . . . . 21
Table for Frozen and Ready-Made Foods . . . . . . . . . . . . . . . . . . . . . . . . 21
Roasting . . . . . . . . . . . . . . . . . . . . . . . . . . . . . . . . . . . . . . . . . . . . . . . . . . . . . . 22
Table for Roasting . . . . . . . . . . . . . . . . . . . . . . . . . . . . . . . . . . . . . . . . . . . 24
Grilling . . . . . . . . . . . . . . . . . . . . . . . . . . . . . . . . . . . . . . . . . . . . . . . . . . . . . . . 26
Grilling table . . . . . . . . . . . . . . . . . . . . . . . . . . . . . . . . . . . . . . . . . . . . . . . . 26
Defrosting . . . . . . . . . . . . . . . . . . . . . . . . . . . . . . . . . . . . . . . . . . . . . . . . . . . . . 27
Defrosting table . . . . . . . . . . . . . . . . . . . . . . . . . . . . . . . . . . . . . . . . . . . . . 27
Preserving . . . . . . . . . . . . . . . . . . . . . . . . . . . . . . . . . . . . . . . . . . . . . . . . . . . . . 28
Preserving times . . . . . . . . . . . . . . . . . . . . . . . . . . . . . . . . . . . . . . . . . . . . . 28
Cleaning and Care . . . . . . . . . . . . . . . . . . . . . . . . . . . . . . . . . . . . . . . . . . . . . 29
Exterior of the Appliance . . . . . . . . . . . . . . . . . . . . . . . . . . . . . . . . . . . . . . . . 29
Oven Interior . . . . . . . . . . . . . . . . . . . . . . . . . . . . . . . . . . . . . . . . . . . . . . . . . . 29
Accessories . . . . . . . . . . . . . . . . . . . . . . . . . . . . . . . . . . . . . . . . . . . . . . . . . . . . 29
Shelf Support Rails . . . . . . . . . . . . . . . . . . . . . . . . . . . . . . . . . . . . . . . . . . . . . 30
Oven Light . . . . . . . . . . . . . . . . . . . . . . . . . . . . . . . . . . . . . . . . . . . . . . . . . . . . 31

4
Grill Element . . . . . . . . . . . . . . . . . . . . . . . . . . . . . . . . . . . . . . . . . . . . . . . . . . . 32
Oven Door . . . . . . . . . . . . . . . . . . . . . . . . . . . . . . . . . . . . . . . . . . . . . . . . . . . . . 33
Oven Door Glass . . . . . . . . . . . . . . . . . . . . . . . . . . . . . . . . . . . . . . . . . . . . . . . . 34
What to do if ... . . . . . . . . . . . . . . . . . . . . . . . . . . . . . . . . . . . . . . . . . . . . . . . 36
Technical Data . . . . . . . . . . . . . . . . . . . . . . . . . . . . . . . . . . . . . . . . . . . . . . . . 37
Oven Interior Dimensions . . . . . . . . . . . . . . . . . . . . . . . . . . . . . . . . . . . . . . . . 37
Regulations, Standards, Directives . . . . . . . . . . . . . . . . . . . . . . . . . . . . . . . . . 37
Index . . . . . . . . . . . . . . . . . . . . . . . . . . . . . . . . . . . . . . . . . . . . . . . . . . . . . . . . . 38
Service . . . . . . . . . . . . . . . . . . . . . . . . . . . . . . . . . . . . . . . . . . . . . . . . . . . . . . . 39

5
1 Safety Instructions
The installation and connection of the new appliance must only be car-
ried out by a registered specialist.
Where damage occurs the warranty will not apply if this instruction has
not been adhered to.
The safety features of AEG electrical appliances comply with recognised
technical standards and the German law covering equipment safety.
However, as manufacturers we also believe it is our responsibility to fa-
miliarise you with the following safety instructions.
General Safety
•Take care when connecting electrical appliances to sockets near to
the appliance. Do not allow connecting leads to come into contact
with hot rings or to catch beneath the hot oven door.
•Do not store inflammable objects in the oven. They may ignite when
the oven is switched on.
•For safety reasons cleaning the appliance with a steam jet cleaner or
high-pressure water cleaner is not permissible.
•Using force, especially on the edges of the front glass panel, may
break the glass.
•Caution: Risk of burning! Whenever you bake, roast or grill the oven
door becomes hot, as do the inner surfaces of the oven, heating ele-
ments and accessories. Always use an oven cloth or oven gloves and
take every care to avoid burns. For this reason keep children away
from the appliance at all times.
•Overheated fats and oils catch fire quickly. Do not leave the appliance
unattended when cooking food in fat or oil (e.g. chips).
•Using ingredients containing alcohol in the oven may create an alco-
hol-air mixture that is easily ignited. In this case, open the door care-
fully. Do not have embers, sparks or naked flames in the vicinity when
opening the door. We recommend that you leave the cooked item in
the oven with the door closed and the oven turned off for about 10 -
15 minutes to cool.
•Repairs to the appliance may only be carried out by qualified spe-
cialists. Improperly effected repairs may result in significant risk to
the user. If your appliance needs repairing, please contact customer
service or your dealer.
•If the appliance malfunctions: remove fuses or switch off.

6
Intended Use
•This appliance is intended to be used for cooking, frying and baking
food in the home and must not be used for any other purpose.
•Only use the appliance to prepare food.
•Do not use the oven as a room heater.
To Avoid Damaging Your Appliance
•Do not line your oven with aluminium foil and do not place a baking
tray or dish on the oven floor, otherwise the oven enamel will be
damaged by the resulting build up of heat.
•Clean the appliance after each use. This is the easiest way to remove
spills and prevents them being burnt on.
•Juice from fruit that drips from baking trays will leave marks that
cannot be removed. For very moist cakes, use the universal baking
tray.
•Never pour water directly into the hot oven. The enamel may be dam-
aged.
•Do not put any weight on the open oven door.
•Do not store moist food in the oven.

7
2 Disposal
Disposing of packaging material
All materials used can be fully recycled.
The cardboard container is made from 80% recycled paper.
Plastics are marked as follows:
•>PE< indicates polythene, as used on the outer covering and the
wrappings inside.
•>PS< indicates expanded polystyrene e.g., the padding materials. It is
entirely CFC-free.
Any unwanted packaging materials will be taken back by your dealer
free of charge.
Disposing of old appliances
To protect the environment, it is important that worn out appliances
are disposed of in the correct manner. This applies to your old appliance
and will also apply to your new appliance at some time in the future
when it is no longer required.
1 Warning! Before disposing of old appliances make them inoperable.
Disconnect the appliance from the mains supply and remove the mains
lead.
This prevents children getting into life-threatening situations when
playing.
2 Disposal advice
•The appliance must not be disposed of with household rubbish.
•You can obtain information about collection dates or public refuse
disposal sites from your local refuse department or council.
•You can also take the appliance to your AEG dealer; they will dispose
of it for you for a small contribution towards the costs.
Eco-insulation
The oven is fitted during manufacture with eco-insulation. This insula-
tion has been tested for harmful substances by independent test cen-
tres and has been classified safe.

8
Appliance Assembly
Control Panel
Oven functions
Rotary switch used for selecting the required oven function.
Temperature selection
Rotary switch for selecting the required oven temperature.
Oven power indicator
The yellow oven power indicator comes on as soon as the oven or rings
are switched on.
Temperature pilot light
The red temperature pilot light comes on while the oven is warming up
and goes out once the set temperature has been reached.

9
Oven Features
Shelf positions
There is a shelf support rail on both
sides of the oven, with 5 shelf posi-
tions on which to insert the acces-
sories.
Anti-tip device
All slide-in units are fitted with an
anti-tip device to prevent them be-
ing pulled out of the oven uninten-
tionally.
When the unit is inserted the anti-
tip device must be to the rear of the
oven.
Oven steam vent
Steam from the oven is fed out below the door handle.
Relates only to appliances with a metal front:
Steam from the oven is fed out between the upper door edge and the
control panel.
Fan run-on
The fan switches on automatically as soon as the oven is switched on.
Once the oven has been switched off, the fan continues running to cool
down the appliance and then switches itself off automatically.
✘

10
Oven Accessories
The following parts are supplied with the oven:
Combination shelf
For dishes, cake tins, items for
roasting and grilling
Universal baking tray
For moist cakes, roasts or asa baking
tray or as a container to catch fat

11
Oven Functions
The oven has the following functions:
HHot air
Hot air is particularly suitable for baking biscuits on 2 levels at the
same time.
The oven temperatures are usually 20-40 °C lower than with conven-
tional.
Top and bottom heat are used. In addition, a fan in the rear wall of the
oven ensures constant circulation of hot air within the oven compart-
ment. Hot air reaches all sides of the food.
OConventional
Conventional oven heating is suitable for baking and roasting on one
level.
Heat is supplied evenly from above and below.
ÜBottom heat
You can use this oven function to crisp and brown bread, cakes (e.g.,
moist cakes) and pastries from below.
In this case only the heater fitted in the base of the oven is used.
ADefrosting
Using the defrost oven function you can partially- or completely and
evenly defrost foods such as flans, butter, bread, fruit or other delicate
foods.
With this function only the fan is in operation; there is no heating.
FGrill
Grilling is particularly suitable for grilling or toasting flat foods, such
as steaks, escalopes, fish or toast.
The heat is supplied from the grill element on the oven ceiling.
ZDual grill
The dual grill is suitable for grilling or toasting large quantities of flat
food such as steaks, escalopes, fish or toast.
When you use this function an additional, second grill heating element
in the oven ceiling is switched on.

12
IRotitherm
Rotitherm is particularly suitable for roasting larger joints of meat or
poultry on one level. The function is suitable for browning gratin dis-
hes and crisping toppings.
The grill heating element and the fan operate alternately.

13
Before Using for the First Time
Initial Cleaning
Before using the oven for the first time you should clean it thoroughly.
You can switch on the oven light to make cleaning easier.
0 1. Turn the oven function switch to Oven Lighting .
2. Remove all accessories and the side support rails, and wash them with
warm water and washing-up liquid.
3. Then wash out the oven with warm water and washing-up liquid, and
dry.
4. Wipe off the front of the unit with a damp cloth only.
3 To clean stainless steel fronts use commercially available cleaning
agents that create a protective film to prevent finger marks.
1 Important: Do not use any caustic, abrasive cleaners! The surface could
be damaged.

14
Using the Oven
Positioning the Shelf Unit and the Universal Baking Tray
All slide-in units have a small bulge on the left and right. This bulge
serves as an anti-tip device and must always point downwards.
Inserting shelf unit
0 Insert the shelf unit with both guide
rails pointing upwards. The anti-tip
device must point downwards and
be positioned to the rear of the
oven compartment.
Inserting the shelf unit and tray
0 When the shelf unit and universal
baking tray are used together, care-
fully place the shelf anti-tip device
in the bulges on the tray.

15
Switching the Oven On and Off
0 1. Turn the "oven functions“ switch to set the required function.
2. Turn the "temperature selection“ switch to set the required tempera-
ture.
The yellow oven power indicator comes on as soon as the oven or rings
are switched on.
The red temperature pilot light comes on when the oven is heating up
and goes out once the set temperature has been reached.
3. To switch the oven off turn the "oven functions“ switch and the "tem-
perature selection“ switch back to zero.

16
Uses, Tables and Tips
Baking
For baking use the hot air Hoven function or conventional O.
Baking tins
•When using conventional heat Ocoated baking tins or tins made of
dark metal are most suitable.
•For hot air Hbaking tins made of light metal are also suitable.
Shelf positions
•Baking with conventional Ois only possible on one shelf position at
a time.
•Using hot air Hyou can bake dry items and biscuits on 2 baking
trays simultaneously.
1 Baking tray
Shelf position 3
1 Baking tin:
Shelf position 1
2 Baking trays:
Shelf positions 1 and 4

17
General information
•Always count the shelf positions from the bottom upwards.
•Insert baking sheets with the bevelled edge to the front!
•Always place cake tins in the middle of the shelf.
•You can also bake with two tins at the same time using conventional
Oor hot air H. In this case, place the cake tins side by side on the
shelf. The cooking time is increased, but only slightly.
Notes on the baking tables
In the tables you will find information on temperatures, cooking times
and shelf positions for a selection of dishes.
•Ranges are given for the temperature and cooking time since these
are dependent on the mixture, quantity and cake tin used.
•When using 2 baking trays the lower baking tray should remain in the
oven for an extra 5-10 minutes if necessary.
•Items that might drip (e.g., pizzas, fruit flans) should only be prepared
on one level.
•When using for the first time, we recommend setting the lower tem-
perature, and only if necessary, e.g. if increased browning is required
or the cooking time is too long, select a higher temperature.
•If you cannot find specific information for one of your own recipes,
use information given in a similar recipe for guidance.
•Variations in the height of the item to be baked can lead to different
degrees of browning at the start of baking. In this case please do not
change the temperature setting.
Differences in the degree of browning will balance out during baking.
2 Switch off the oven 10-15 minutes before the end of the cooking time
to make use of the residual heat.
Unless otherwise stated, the information in the tables assumes starting
with a cold oven.

18
Baking Table
Type of Cake or Pastry Hot Air HConventional OTime
Shelf
Position
from
Bottom
Temper-
ature
ºC
Shelf
Position
from
Bottom
Tempera-
ture
ºC
For Both
Functions
Hours:
Mins.
Baking in tins
Ring-shaped or
pudding-bowl shaped
cakes
1150-170 1160-180 0:50-1:10
Madeira cake/
king cake 1140-160 1150-170 1:10-1:30
Sponge cake 1140-160 2160-180 0:25-0:40
Shortcrust pastry flan base 3170-180 2190-21010:10-0:25
Sponge flan base 3150-170 2170-190 0:20-0:25
Covered apple flan 1150-170 1170-190 0:50-1:00
Savoury flan
(e.g., quiche lorraine) 1160-180 1190-210 0:30-1:10
Cheesecake 1140 -160 1170-190 1:00-1:30
Baking on
baking trays
Plaited roll/ring 3160-170 3170-190 0:30-0:40
Fruit loaf 3160-17013160-18010:40-1:00
Bread (rye bread) initially
.....................................then 1180-2001
140-160 22501
160-180
0:20
0:30-1:00
Cream puffs/eclairs23160-
17013190-210 0:25-0:40
Swiss roll 3150-17013180-20010:10-0:20
Dry streusel cake33150-160 3170-190 0:20-0:40
Butter cake/sugar cake,
sugar-topped cakes 3160-17013190-21010:15-0:30

19
Fruit flan
(with a yeast dough/sponge
base)
3140-160 3170-190 0:25-0:50
Fruit flan with shortcrust
pastry base23150- 170 3170-190 0:40-1:20
Tarts baked with
delicate fillings
(e.g., curd cheese, cream.)
- - 3 170-190 0:40-1:20
Pizza (with deep topping)21180-200 1190-21010:30-1:00
Pizza (thin) - - 1 230-30010:10-0:25
Unleavened Bread - - 1 275-30010:08-0:15
Flat sweet or savoury pies 1180-200 1210-230 0:35-0:50
Biscuits
Shortbread biscuits33150-160 3170-19010:06-0:20
Small piped biscuits33140-150 3160-180 0:10-0:40
Sponge fingers33150-160 3170-190 0:15-0:20
Meringues 380-100 3100-120 2:00-2:30
Macaroons 3100-120 3120-140 0:30-0:60
Small pastries made with
yeast dough 3150-160 3170-190 0:20-0:40
Small pastries made with
puff pastry 3170-18013190-21010:20-0:30
Bread Rolls 3170-19013180-22010:20-0:35
1) Pre-heat the oven
2) Use the combination/fat tray or the fat tray alone
3) Baking on 2 levels possible Information printed in bold type indicates the
preferred oven function or temperature
Type of Cake or Pastry Hot Air HConventional OTime
Shelf
Position
from
Bottom
Temper-
ature
ºC
Shelf
Position
from
Bottom
Tempera-
ture
ºC
For Both
Functions
Hours:
Mins.

20
Tips for Baking
Tip
To tell if your cake is cooked
through
Push a wooden skewer into the highest point of the
cake. If the skewer comes out clean, you can switch
off the oven and utilise the residual heat.
The cake collapses (is sticky,
not properly cooked through,
water marks)
Check your recipe. Next time, use less liquid. Check
that you have beaten the mixture for the correct
length of time, particularly when using a food-proc-
essor.
The cake is undercooked at
the bottom
Next time use a dark cake tin or place the cake one
level lower.
Cake with moist topping/
cheesecake is not cooked
through
Next time bake at a lower temperature and increase
the cooking time.
Other manuals for COMPETENCE B3000-1
2
Table of contents
Other AEG Oven manuals

AEG
AEG BY9314001 User manual

AEG
AEG 30" DEO76 User manual

AEG
AEG U25493 B 8139-4-m User manual

AEG
AEG BS9304001M User manual

AEG
AEG BCK55632XM User manual

AEG
AEG BEB231011M User manual

AEG
AEG BOBZDB User manual

AEG
AEG COMPETENCE E1100-4 Operation manual

AEG
AEG BBS6402B User manual

AEG
AEG Competence 5238 B User manual