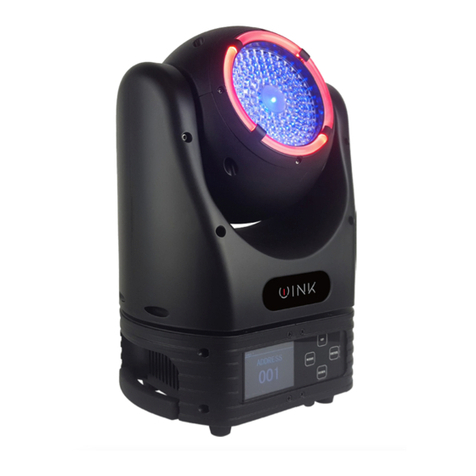
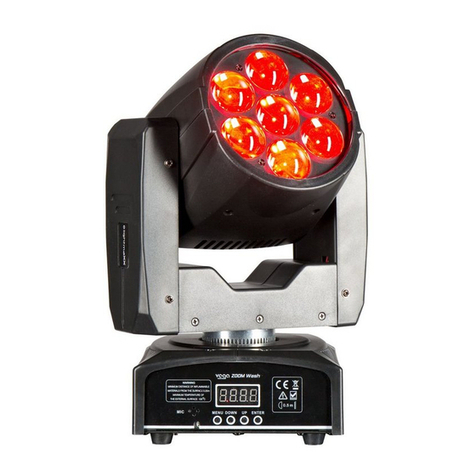
afx light HYBRID-360LED-FC User manual

Illustrations - p. 2-3
DMX channels - p. 4-6
GB - User Manual - p. 7
F - Manuel d'Utilisation - p. 11
D - Bedienungsanleitung - S. 16
NL - Handleiding - p. 21
ES - Manual de Uso - p. 26
View the product on our website
and download the multilanguage
manual
HYBRID-360LED-FC
CODE: 16-2018
HYBRID MOVING HEAD (SPOT- ZOOM)
360W IN A FLIGHT CASE
LYRE HYBRIDE SPOT-ZOOM 360W
DANS UN FLIGHT CASE
HYBRIDES MOVING HEAD SPOT-ZOOM 360W
IN EINEM GERÄTEKOFFER
HYBRID MOVING HEAD SPOT-ZOOM 360W
IN EEN FLIGHT CASE
CABEZA MOVIL HIBRIDA SPOT-ZOOM 360W
EN UN FLIGHTCASE

EN 2© COPYRIGHT LOTRONIC 2023
EN 2
REAR PANEL (FIG. 1)
INSTALLATION DIAGRAM (FIG. 3) FIXTURE LINKING (FIG. 4)
FRONT PANEL (FIG. 2)
SIGNAL
MIC
DISPLAY
MENU UP DOWN ENTER

EN3
WWW.AFX-LIGHT.COM
PHOTOMETRIC DIAGRAMS (FIG. 5)
GOBO & COLOUR WHEEL
CMY + CTO WHEEL
DIMENSIONS

EN 4© COPYRIGHT LOTRONIC 2023
DMX CHANNEL TABLE
1 1 0..255 PAN
Movement
20..255 Fine
control
of
Pan
movement
3 2 0..255 Tilt
Movement
40..255 Fine
control
of
Tilt
movement
5 3
0..9 Open
/
white
10..19 Color
1
20..29 Color
2
30..39 Color
3
40..49 Color
4
50..59
Color
5
60..69 Color
6
70..79
Color
7
80..89
Color
8
90..99
Color
9
100..127
Color
10
128..189 Forwards
rainbow
effect
from
fast
to
slow
190-193 Color
rotation
stop
194..255 Backwards
rainbow
effect
from
slow
to
fast
5 3
0..4 Open
/
white
5..9 White
+
Color
1
10..14 Color
1
15..19 Color
1
+
Color
2
20..24 Color
2
25..29 Color
2
+
Color
3
30..34 Color
3
35..39 Color
3
+
Color
4
40..44 Color
4
45..49 Color
4
+
Color
5
50..54 Color
5
55..59 Color
5
+
Color
6
60..64 Color
6
65..69 Color
6
+
Color
7
70..74 Color
7
75..79 Color
7
+
Color
8
80..84 Color
8
85..89 Color
8
+
Color
9
90..94 Color
9
95..99
Mode/Channel Value Function
22CH 20CH
Color
9
+
Color
10
100..104
Color
10
105..127 Color10 + White
128..189 Forwards rainbow effect from fast to slow
190-193 Color rotation stop
194..255 Backwardsrainbow effect from slow tofast
Pan
Pan-fine
Tilt
Tilt-fine
Color
wheel
Color
wheel
(Mode
2)

EN5
WWW.AFX-LIGHT.COM
6 4
0..9 Open
10..19 gobo 1
20..29 gobo 2
30..39 gobo 3
40..49 gobo
4
50..59 gobo
5
60..69 gobo
6
70..79 gobo
7
80..99 Gobo
1
shake
slow
to
fast
100..119 Gobo
2
shake
slow
to
fast
120..139 Gobo
3
shake
slow
to
fast
140..159 Gobo
4
shake
slow
to
fast
160..179 Gobo
5
shake
slow
to
fast
180..199 Gobo
6
shake
slow
to
fast
200..219 Gobo
7
shake
slow
to
fast
220..255 Rot.
gobo
wheel
cont.
rotation
slow
to
fast
7 5
0..127 Gobo
indexing
128..189 Forwards
gobo
rotation
from
fast
to
slow
190..193 Gobo
rotation
stop
194..255 Backwards
gobo
rotation
from
slow
to
fast
8 6
0..9 Hole
with
spot
10..19 Gobo
1
20..29 Gobo
2
30..39 Gobo
3
40..49 Gobo
4
50..59 Gobo
5
60..69 Gobo
6
70..79 Gobo
7
80..89 Gobo
8
90..99 Gobo
9
100..109 Gobo10
110..119 Gobo11
120..129 Gobo
1
shake
slow
to
fast
130..139 Gobo
2
shake
slow
to
fast
140..149 Gobo
3
shake
slow
to
fast
150..159 Gobo
4
shake
slow
to
fast
160..169 Gobo
5
shake
slow
to
fast
170..179 Gobo
6
shake
slow
to
fast
180..189 Gobo
7
shake
slow
to
fast
190..199 Gobo
8
shake
slow
to
fast
200..209 Gobo
9
shake
slow
to
fast
210..219 Gobo
10
shake
slow
to
fast
220..229 Gobo
11
shake
slow
to
fast
230..255 Gobo
wheel
rotation
from
slow
to
fast
9 7
0..31 Shutter
closed
32..63 shutter
open
64..95 Strobe
effect
slow
to
fast
96..127 shutter open
128..159 Pulse - effect insequences slow to fast
160..191 shutteropen
192..223 Randomstrobeeffect slow tofast
224..255 shutter open
Gobo wheel 1
Gobo
1
rotation
Gobo
wheel
2
Shutter

EN 6© COPYRIGHT LOTRONIC 2023
10 8 0..255 Dimmer 0%...100%
11 9 0..255 Cyan 0%...100%
12 10 0..255 Magenta
0%...100%
13 11 0..255 Yellow
0%...100%
14 12 0..255 Configure
To
Order
0%...100%
15 13 0..255 In(near)
to
out(far)
16 14 0..255 In(near)
to
out(far)
17 15 0..5 Prism1
swing
out(hole)
6..255 Prism1
swing
in
18 16 0..5 Prism2
swing
out(hole)
6..255 Prism2
swing
in
19 17
0..127 Prism
rotation
stop
128..189 Forwards
rotation
from
fast
to
slow
190..193 Prism
rotation
stop
194..255 Backwards
rotation
from
slow
to
fast
20 18
21 19
0..225 max
to
min
speed
226..235 blackout
by
movement
236..245 blackout
by
all
wheel
changing
246..255 no
function
22 20
0..19 No
function
20..29 No
function
30..39 No
function
40..79 No
function
80..84 All
Motor
reset
85..87 Scan
motor
reset
88..90 Colors
motor
reset
91..93 Gobo
motor
reset
94..96 No
function
97..99 Other
motor
reset
100..119 Internal
program
1
120..139 Internal
program
2
140..159 Internal
program
3
160..179 Internal
program
4
180..199 Internal program 5
200..219 Internal program 6
220..239 Internal program 7
240..255 Internal Sound program 1
Dimmer
Cyan
Magenta
Yellow
CTO
Focus
Zoom
Rotating
prism1
Rotating
prism2
Rotating
Prism
Frost
Speed
pan/tile
Special
function
0..199 Frost
OFF
200..255 Frost
ON

EN7
WWW.AFX-LIGHT.COM
USER MANUAL
UNPACKING INSTRUCTIONS
Immediately upon receiving a xture, carefully unpack the carton, check the contents to ensure
that all parts are present and have been received in good condition. Notify the freight company
immediately and retain packing material for inspection if any parts appear to be damaged from
shipping or the carton itself shows signs of mishandling. Keep the carton and all packing materi-
als. In the event that a xture must be returned to the factory, it is important that the xture be
returned in the original factory box and packing.
CONTENTS OF THE CARTON
• 1 x LED light effect
• 2x omega clamps
• 1x Powercon cable
• 1x DMX lead
• 1x User Manual
EXPLANATION OF SYMBOLS ON THE SILKSCREEN
The triangle containing a light-
ning symbol is used to indicate
whenever your health is at risk (due to
electrocution, for example).
An exclamation mark in a triangle indicates particular risks in handling or operating the ap-
pliance.
The unit complies with UK standards
For indoor use only
0.5m
Minimum distance between the appliance and other objects
Don’t stare into the light beam
IMPORTANT NOTE: Electric products must not be put into household waste. Please bring them to a recycling centre. Ask your local
authorities or your dealer about the way to proceed.
Please read this manual carefully before operating this product.
SAFETY RECOMMENDATIONS
• Please read these instructions carefully, they include important information about the installa-
tion, usage and maintenance of this product.
• Please keep this User Guide for future reference. If you sell the unit to another user, be sure that
he also receives this instruction booklet.
• Always make sure that you are connecting to the proper voltage, and that the line voltage you
are connecting to is not higher than that stated on the bottom of the xture.
• The appliance is part of class I and must exclusively connected to an earthed mains outlet.
• This product is intended for indoor use only!
• To prevent risk of re or shock, do not expose xture to rain or moisture. Make sure there are no
ammable materials close to the unit while operating.
• The unit must be installed in a location with adequate ventilation, at least 20in (50cm) from
adjacent surfaces. Be sure that no ventilation slots are blocked.
• The minimum distance luminaire from that part of the luminaire or lamp to the lighted object is
0.5m.
0.5m
• The max. ambient temperature (Ta) is 40°C. Don’t operate the xture at higher temperatures.
• The surface temperature of the unit may reach up to 85°C. DO NOT TOUCH the housing bare-
hand during its operation. Turn off the power and allow about 15 minutes for the unit to cool
down before replacing or servicing.
• DO NOT OPEN the unit within 5 minutes after switching off.
CAUTION
DO NOT OPEN THE HOUSING
SHOCK HAZARD

EN 8© COPYRIGHT LOTRONIC 2023
• In the event of a serious operating problem, stop using the unit immediately. Never try to repair
the unit by yourself. Repairs carried out by unskilled people can lead to damage or malfunction.
Please contact the nearest authorized technical assistance center. Always use the same type of
spare parts.
• Make sure the power cord is never crimped or damaged.
• Never disconnect the power cord by pulling or tugging on the cord.
• Avoid direct eye exposure to the light source while it is on as sensitive persons may suffer an
epileptic shock (especially meant for epileptics)!.
• The product is for decorative purposes only and not suitable as a household room illumination.
• If the external exible cable or cord of this luminaire is damaged, it shall be exclusively replaced
by the manufacturer or his service agent or a similar qualied person in order to avoid a hazard.
• The lenses, housing or ultraviolet lter must be replaced if they are visibly damaged.
• The light source of this device is not replaceable. If it is defective, the entire unit must be discard-
ed.
DISCONNECT DEVICE
Where the MAINS plug or an appliance coupler is used as the disconnect device, the disconnect
device shall remain readily operable.
FEATURES
• 1x 360W white LED lamp
• 22/20 DMX channels USITT DMX-512
• ArtNet
• 1 rotating gobo wheel with 2 rotating glass gobos, 5 metal gobos + Open, with speed adjust-
ment, stream effect, dithering effect, left/right rotation and gobo indexing
• 1 static gobo wheel with 11 gobos + Open
• 1 colour wheel with 10 colours + Open
• Gobo overlay (gobo morphing)
• Frost lter
• Totem mode
• DMX, master-slave, sound activated or auto operation (8 built-in programs)
• Electric focus from 2.5 – 15m
• Linear motorized zoom with 3-48° beam angle
• Linear CMY + CTO
• 25x/sec shutter/strobe with speed control
• 0-100% linear LED dimmer
• 3-facet prism, 5-facet prism and frost lter with variable speed & direction
• Preset variable/random strobe and dimming pulse effect
• 2.8” TFT LCD touch display (320 x 240px) with 4 buttons
• Improved optics and at beam eld
• Variable direction rainbow effect with speed adjustment
• Fan cooling system with constant temperature readout and management function
• Powercon IN/OUT connectors
• 3-pin XLR IN/OUT connectors
• RJ45 IN/OUT connectors for ArtNet
• IP20 protection rating
• 2x ¼ turn fastening Omega clamps
• Safety attachment point
FUSE REPLACEMENT
Disconnect the power cord before replacing a fuse and always replace with the same type fuse.
With a screwdriver wedge the fuse holder out of its housing.
Remove the damaged fuse from its holder and replace with exactly the same type of fuse.
Insert the fuse holder back in its place and reconnect power.
Warning: If after replacing the fuse you continue to blow fuses, STOP using the unit. Contact cus-
tomer support for further instructions. Continuing to use the unit may cause serious damage.

EN9
WWW.AFX-LIGHT.COM
CONTROL CONNECTION (FIG4)
Connect the provided XLR cable to the 3-pin XLR output of your controller and the other side to the
male 3-pin XLR input of the moving head. You can chain multiple moving heads together through
serial linking. The cable needed should be 2-core, screened cable with XLR input and output connec-
tors. Please refer to diagram 4.
DMX512 CONNECTION WITH DMX TERMINATOR
For installations where the DMX cable has to run a long distance or is in an electrically noisy en-
vironment, such as in a discotheque, it is recommended to use a DMX termiantor. This helps in
preventing corruption of the digital control signal by electrical noise. The DMX terminaotr is simply
an XLR plug with a resistor connected between pins 2 and 3 which is then plugged into the output
XLR socket of the last xture in the chain. Please refer to diagram 4.
INSTALLATION (FIG.3)
The unit should be mounted via its screw holes on the bracket. Always ensure that the unit is rmly
xed to avoid vibration and slipping while operating. Always ensure that the structure to which you
are attaching the unit is secure and is able to support a weight of 10 times of the unit’s weight.
The installation must always be secured with a secondary safety attachment, e.g. an appropriate
safety rope. Never stand directly below the device when mounting, removing or servicing the x-
ture. This xture may be mounted in any position provided there is adequate room for ventilation.
The LED moving head provides a unique mounting bracket assembly that integrates the bottom
of the base, the included ‘omega bracket’ and the safety cable rigging point in one unit (see illus-
tration 3).When mounting this xture on a truss, be sure to use an appropriate clamp with the in-
cluded omega bracket using a M10 screw tted through the center hole of the ‘omega bracket’. As
an added safety measure, be sure to attach at least one properly rated safety cable to the xture
using one of the safety cable rigging points integrated in the base assembly.
POWER LINK
Connect an IEC cable from the POWER OUT connector of the 1st unit to the POWER IN connector of
the second unit, etc.
CONTROL PANEL (FIG. 2)
To access the main menu press the MENU button. Press the UP or DOWN buttons until you reach
function you wish to change. When you reach the function you wish to change, press the ENTER
button. When a function is selected, use the UP or DOWN buttons to change the function settings.
Once your changes are made, press the ENTER button.
Tip: Press UP & DOWN buttons at the same time for 3 seconds. The display will reverse.
ARTNET FUNCTION
Art-Net uses a network protocol that greatly extends the use of DMX, simplies cabling by using
RJ45 Ethernet cables and the possibility of using existing networks, HUBs and WIFI.
Art-Net theoretically allows the use of up to 32,768 universes, offering a huge range of possibili-
ties.
Connect an RJ45 cable to the RJ45 connectors on the rear panel, and the other end to your network.
FUNCTION MENU
MENU DESCRIPTION
DMX Mode
DMX address A001-AXXX DMX address setting
Channel Mode 22CH 22 channel mode
20CH 20 channel mode
Auto run Internal pro-
gram 1-9 Master/Alone Auto mode
Music run Internal pro-
gram 1-9 Master/Alone Sound controlled mode

EN 10 © COPYRIGHT LOTRONIC 2023
Option
Reset Default Yes/No Reset to default values
Ethernet Function
ArtNet to DMX
Device IP addr:
Host IP Addr:
Universe:
Share signal:
(On/Off)
192.168.001.201
192.168.001.001
000
(On/Off)
Connect ArtNet to DMX
Setting Device IP address
Setting Host IP address
Setting the Universe Send ArtNet
signal to DMX
Pan/Tilt
Reverse Pan (on/off) Reverse Pan
Reverse Tilt (on/off) Reverse Tilt
Select Pan 630/540/360 Select Pan
Select Tilt 270/180/90 Select Tilt
Totem mode OFF/CEN./R/L Restricts pan & tilt motion
UI Set
Mic sensitivity 0-99% Mic sensitivity
OFF signal mode (On/Off) Off at original status and ON at
reset status if no DMX signal
HalfColor Wheel (On/Off) Half Colour (default OFF)
Informa-
tion
Temperature XXX°C/F° Current temperature
Software version V1.0-V9.9 Software version
Manu Reset
Total reset
Pan/Tilt reset
Colour reset
Gobo reset
Other Resets
Reset All
Reset Pan/Tilt
Reset Colour
Reset gobo
Reset the others
Channel PAN=XXX... Manual channel control
ADV
(Advanced)
(Access code
0888)
Calibration PAN=XXX... Calibration
MAINTENANCE AND CLEANING
DANGER! DISCONNECT FROM THE MAINS BEFORE STARTING ANY MAINTENANCE WORK
It is essential that the xture is kept clean and that no dust, dirt or smoke uid residues are allowed
to build up on or in the xture. Failure to do so will signicantly reduce the luminaire's light output.
Regular cleaning will not only ensure maximum light output but will also give the xture a long and
reliable life. A soft, lint-free cloth moistened with any good glass cleaning uid is recommended.
Never use alcohol or solvents!
The front lens should be cleaned weekly as smoke uid tends to build up and reduce light output
very quickly. The cooling fans should be cleaned monthly.
The inside of the xture should be cleaned at least once a year with a vacuum cleaner or blower. Use
a soft brush and vacuum cleaner to remove dust and dirt from the fans and cooling vents.
IMPORTANT! Check the air lters regularly and clean them before they become clogged!
Clean two air lters located in the xture covers and two in the xture base. Use a vacuum cleaner,
compressed air or you can wash them and put them back dry.
After replacing the air lters, reset the elapsed time counter in the Information menu (Information
-> Air lters -> Elapsed time).
SPECIFICATIONS
Power supply ................................................................................................................... 100-240V~ 50/60Hz
Power Consumption .................................................................................................................................. 500W

FR11
WWW.AFX-LIGHT.COM
Light Source ................................................................................................ 1 x 360W white LED lamp, 5800K
Gobo size ...................................................................................................external: 22.9mm; internal: 18mm
Operating noise .................................................................................................................55dB at 3’ dB rating
Pan ........................................................................................................................................ 630° / 540° /360°
Tilt ........................................................................................................................................... 270° / 180° / 90°
Weight .................................................................................................................................................... 22.35kg
Dimensions ........................................................................................................................254 x 386 x 590mm
MANUEL D'UTILISATION
DÉBALLAGE
Dès réception de l’appareil, ouvrez le carton et vériez que le contenu est complet et en bon état.
Sinon, prévenez immédiatement le transporteur et conservez l’emballage s’il montre des signes de
mauvais traitements. Conservez le carton et tous les matériaux d’emballage an de pouvoir trans-
porter l’appareil en toute sécurité.
CONTENU DE L'EMBALLAGE
• 1 effet de lumière à LED
• 2x attaches oméga
• 1x cable signal
• 1 cordon Powercon
• 1 Mode d’emploi
EXPLICATION DES SYMBOLES SUR L'APPAREIL
L’éclair dans le triangle attire l’attention sur un danger physique (due à une électrocution p.
ex.).
Le point d’exclamation dans le triangle indique un risque dans la manipulation ou l’utilisation
de l’appareil.
L'appareil est conforme à la norme CE
Uniquement pour utilisation à l'intérieur
0.5m
Distance minimale entre l'appareil et d'autres objets
Ne pas regarder directement dans le rayon lumineux
ATTENTION
NE PAS OUVRIR LE BOITIER
RISQUE DE CHOC ELECTRIQUE
Lire attentivement ce manuel avant la première mise en service.
CONSIGNES DE SECURITE
• Lisez attentivement ce manuel qui contient des informations importantes sur l’installation, l’uti-
lisation et l’entretien de cet appareil.
• Conservez le manuel pour référence ultérieure. Si l’appareil change un jour de propriétaire, assu-
rez-vous que le nouvel utilisateur est en possession du manuel.
• Assurez-vous que la tension secteur convient à cet appareil et qu’elle ne dépasse pas la tension
d’alimentation indiqué sur la plaque signalétique de l’appareil.
• Cet appareil fait partie de la classe I et doit être impérativement branché sur une prise secteur
avec terre.
• Uniquement pour utilisation à l'intérieur!
• An d’éviter tout risque d’incendie ou de choc électrique, ne pas exposer cet appareil à la pluie
ou à l’humidité. Assurez-vous qu’aucun objet inammable ne se trouve à proximité de l’appareil

FR 12 © COPYRIGHT LOTRONIC 2023
pendant son fonctionnement.
• Installez l’appareil à un endroit bien ventilé à une distance minimum de 50cm de toute surface.
Assurez-vous que les fentes de ventilation ne sont pas bloquées.
• La distance minimale entre le luminaire et l’objet éclairé doit s’élever à 0,5m..
0.5m
• Ne pas faire fonctionner cet appareil pendant plus de 8 heures en continu. Laissez-le refroidir
avant de l'utiliser à nouveau an de prolonger sa durée de vie.
• Débranchez l’appareil du secteur avant toute manipulation ou entretien.
• La température ambiante ne doit pas dépasser 40°C. Ne pas faire fonctionner l’appareil à des
températures supérieures.
• Le boîtier peut atteindre 85°C. Ne pas toucher le boîtier les mains nues pendant le fonctionne-
ment. Coupez l'alimentation et attendez 15 minutes que l'appareil refroidisse avant d'effectuer
une intervention.
• NE PAS OUVRIR le boîtier dans les 5 minutes suivant l'arrêt.
• En cas de dysfonctionnement, arrêtez immédiatement l’appareil. N’essayez jamais de réparer
l’appareil par vous-même. Une réparation mal faite peut entraîner des dommages et des dys-
fonctionnements. Contactez un service technique agréé. Utilisez uniquement des pièces déta-
chées identiques aux pièces d’origine.
• Assurez-vous que le cordon d’alimentation n’est jamais écrasé ni endommagé.
• Si le cordon secteur de l’appareil est endommagé, il ne doit être remplacé que par le fabricant ou
son agent ou bien un technicien qualié an d’éviter tout risque d’électrocution.
• Ne jamais débrancher l’appareil en tirant sur le cordon.
• Ne pas exposer vos yeux à la source lumineuse.
• Le luminaire ne doit servir qu’à des ns décoratives et ne convient pas comme éclairage domes-
tique normal.
• Remplacez immédiatement les lentilles, le boîtier ou le ltre UV s'ils présentent des dommages.
• La source lumineuse de cet appareil n'est pas remplaçable. Si elle est défectueuse, l'appareil tout
entier doit être mis au rebut.
DISPOSITIF DE COUPURE
Lorsqu’une che SECTEUR ou un coupleur sont utilisés pour déconnecter l’appareil du secteur, ce
dispositif doit rester facilement accessible à tout moment.
DESCRIPTION
• Lampe à LED blanche 360W
• 22/20 canaux DMX USITT DMX-512
• ArtNet
• 1 roue mobile avec 2 gobos interchangeables en verre, 5 en métal + open, réglage de vitesse, effet
cascade, effet vibration, rotation G/D et indexation
• 1 roue statique avec 11 gobos + open
• 1 roue de couleurs avec 10 couleurs + open
• Superposition de Gobos (gobo morphing)
• Filtre Frost
• Fonctionnement DMX, maître-esclave, activé par le son ou automatique (avec 8 programmes
intégrés)
• Focus électrique de 2,5 à 15m
• Zoom linéaire motorisé avec un angle d’ouverture de 3-48°
• CMY + CTO linéaires
• Obturateur/stroboscope 25x/sec avec contrôle de la vitesse
• Variateur linéaire à LED 0-100%
• Prisme à 3 facettes, prisme à 5 facettes et ltre Frost avec vitesse et direction variables
• Effet stroboscopique variable/aléatoire préréglé et effet d'impulsion
• Écran tactile TFT LCD de 2,8 pouces (320 x 240 px) avec 4 boutons
• Optique améliorée et at beam
• Effet Rainbow à direction variable avec contrôle de la vitesse
• Système de refroidissement par ventilateur avec afchage constant de la température et gestion

FR13
WWW.AFX-LIGHT.COM
thermique
• Connecteurs Powercon IN/OUT
• Connecteurs XLR à 3 broches IN/OUT
• Connecteurs RJ45 IN/OUT pour ArtNet
• Indice de protection IP20
• 2 attaches oméga ¼ de tour pour le montage
• Point d'attache de sécurité
REMPLACEMENT DU FUSIBLE
Sortez le porte-fusible de son logement à l’aide d’un tournevis. Sortez le fusible grillé et rempla-
cez-le par un autre en tous points identiques. Remettez le porte-fusible dans son logement et re-
branchez l’appareil sur le secteur.
Attention : Si le fusible continue à sauter après avoir été remplacé, ARRÊTEZ l’appareil. Contactez
votre revendeur. Vous risquez d’endommager l’appareil si vous continuez à l’utiliser.
INSTALLATION (FIG. 3)
Fixez l’appareil au moyen des trous de vis sur l’étrier. Assurez-vous que l’appareil est solidement
xé pour éviter des vibrations et des mouvements pendant le fonctionnement. Veillez toujours à ce
que la structure qui accueille l’appareil, est sufsamment solide et capable de porter au moins 10
fois le poids propre de l’appareil.
L’appareil doit être xé par des professionnels à en endroit où il est hors de portée des personnes et
en dehors d’un chemin de passage.
Veillez à ce que l'endroit d'installation présente une ventilation sufsante. Lors du choix d’un em-
placement, tenez compte de la facilité d’accès à l’appareil pour des travaux de maintenance et de
nettoyage.
Ne jamais installer l’appareil à un endroit exposé à la pluie, l’humidité, aux changements de tem-
pérature importants et présentant une ventilation limitée.
MONTAGE
Utilisez toujours de câbles de sécurité
L’appareil comporte un dispositif de xation unique qui se trouve en-dessous de la base. C’est la
combinaison de l’attache oméga fourni et du point de xation du câble de sécurité (FIG. 3). Lorsque
vous installez cet appareil sur une traverse, utilisez un crochet compatible avec l’attache oméga et
xez-le à travers le trou au moyen d’une vis M10. Pour une sécurité supplémentaire, attachez un
câble d’acier sur l’un des points de xation présents sur la base.
CONNEXION DU CONTRÔLEUR (FIG. 4)
Connectez le câble XLR fourni à la sortie XLR 3 broches de votre contrôleur et l'autre côté à l'entrée
XLR 3 broches mâle de la lyre. Vous pouvez enchaîner plusieurs lyres grâce à la liaison série. Le
câble nécessaire doit être un câble bilaire blindé avec des connecteurs d'entrée et de sortie XLR.
Veuillez vous référer au schéma 4.
CONNEXION DMX512 AVEC TERMINATEUR DMX
Pour les installations où le câble DMX doit parcourir une longue distance ou se trouve dans un
environnement électriquement bruyant, comme dans une discothèque, il est recommandé d'uti-
liser une résistance de n de ligne DMX. Cela permet d'éviter la perturbation du signal de contrôle
numérique par le bruit électrique. La résistance de n de ligne DMX est simplement une prise XLR
avec une résistance connectée entre les broches 2 et 3 qui est ensuite branchée sur la prise XLR de
sortie du dernier appareil de la chaîne. Veuillez vous référer au schéma 4.
POWER LINK
Vous pouvez alimenter plusieurs appareils via les connecteurs POWER IN et POWER OUT à partir
d'une seule prise secteur. Banchez un cordon IEC du connecteur POWER OUT du premier appareil
au connecteur POWER IN du deuxième etc.

FR 14 © COPYRIGHT LOTRONIC 2023
ARTNET (CONNECTEURS RJ45)
Art-Net utilise un protocole réseau qui étend considérablement l'utilisation du DMX, simplie le
câblage en utilisant des câbles Ethernet RJ45 et la possibilité d'utiliser les réseaux existants, les
HUB et le WIFI.
Art-Net permet théoriquement d'utiliser jusqu'à 32 768 univers, ce qui offre un large éventail de
possibilités.
Branchez les connecteurs ArtNet sur votre réseau.
TABLEAU DE COMMANDE (FIG. 2)
Pour accéder au menu principal, appuyez sur la touche MENU. Appuyez sur les touches UP/DOWN
jusqu’à ce que vous atteigniez la fonction souhaitée. Lorsque vous l’avez atteinte, appuyez sur
ENTER. Lorsqu’une fonction a été sélectionnée, changez les réglages au moyen des touches UP et
DOWN. Lorsque vous avez ni les réglages, appuyez sur ENTER.
Astuce: Maintenez les touches UP & DOWN appuyé pendant 3 secondes pour retourner l'af-
chage
MENU
MENU DESCRIPTION
DMX Mode
DMX address A001-AXXX Réglage de l'adresse DMX
Channel Mode 22CH Mode 22 canaux
20CH Mode 20 canaux
Auto run Internal pro-
gram 1-9 Master/Alone Fonctionnement automatique
Music run Internal pro-
gram 1-9 Master/Alone Contrôle par le son
Option
Reset Default Yes/No Réinitialisation des paramètres
par défaut
Ethernet Function
ArtNet to DMX
Device IP addr:
Host IP Addr:
Universe:
Share signal:
(On/Off)
192.168.001.201
192.168.001.001
000
(On/Off)
Connecter ArtNet à DMX
Réglage de l'adresse IP de l'appa-
reil
Réglage de l'adresse IP de l'hôte
Réglage de l'univers, Envoi du si-
gnal ArtNet au DMX
Pan/Tilt
Reverse Pan (on/off) Inversion Pan
Reverse Tilt (on/off) Inversion Tilt
Select Pan 630/540/360 Sélectionner le Pan
Select Tilt 270/180/90 Sélectionner le Tilt
Totem mode OFF/CEN./R/L Limite les mouvements Pan & Tilt
UI Set
Mic sensitivity 0-99% Sensibilité du micro
OFF signal mode (On/Off)
Désactivée à l'état d'origine et ac-
tivée à l'état de réinitialisation en
l'absence de signal DMX
HalfColor Wheel (On/Off) Demi-couleur (OFF par défaut)
Informa-
tion
Temperature XXX°C/F° Température actuelle
Software version V1.0-V9.9 Version du logiciel

FR15
WWW.AFX-LIGHT.COM
Manu Reset
Total reset
Pan/Tilt reset
Colour reset
Gobo reset
Other Resets
Réinitialiser tout
Réinitialiser Pan/Tilt
Réinitialiser la couleur
Réinitialiser le gobo
Réinitialiser les autres
Channel PAN=XXX... Contrôle manuel des canaux
ADV
(Advanced)
(Access code
0888)
Calibration PAN=XXX... Calibrage
ENTRETIEN
DANGER ! DÉBRANCHEZ L'APPAREIL DU RÉSEAU ÉLECTRIQUE AVANT D'ENTREPRENDRE
TOUTE OPÉRATION D'ENTRETIEN.
Il est essentiel que le luminaire reste propre et qu'aucune poussière, saleté ou résidu de liquide
de fumée ne s'accumule sur ou dans le luminaire. Le non-respect de cette consigne réduira consi-
dérablement le rendement lumineux du luminaire. Un nettoyage régulier permet non seulement
d'obtenir un rendement lumineux maximal, mais aussi de prolonger la durée de vie du luminaire. Il
est recommandé d'utiliser un chiffon doux et non pelucheux imbibé d'un bon liquide de nettoyage
pour vitres. N'utilisez jamais d'alcool ou de solvants !
La lentille frontale doit être nettoyée chaque semaine car le liquide de fumée a tendance à s'accu-
muler et à réduire rapidement le rendement lumineux. Les ventilateurs de refroidissement doivent
être nettoyés tous les mois.
L'intérieur du projecteur doit être nettoyé au moins une fois par an à l'aide d'un aspirateur ou d'une
souferie. Utilisez une brosse douce et un aspirateur pour enlever la poussière et la saleté des ven-
tilateurs et des évents de refroidissement.
IMPORTANT ! Vériez régulièrement les ltres à air et nettoyez-les avant qu'ils ne soient
obstrués !
Nettoyez les deux ltres à air situés dans les couvercles du projecteur et deux dans la base du
projecteur. Utilisez un aspirateur, de l'air comprimé ou lavez-les et remettez-les en place après
séchage complet.
Après avoir remplacé les ltres à air, réinitialisez le compteur de temps écoulé dans le menu Infor-
mation (Information -> Air Filter -> Elapsed time).
CARACTÉRISTIQUES TECHNIQUES
Alimentation .................................................................................................................... 100-240V~ 50/60Hz
Consommation .......................................................................................................................................... 500W
Source lumineuse ...........................................................................................1 LED blanche de 360W, 5800K
Dim. Des gobos..................................................................................................... ext. : 22.9mm ; int. : 18mm
Bruit de fonctionnement ............................................................................................................................55dB
Pan ........................................................................................................................................ 630° / 540° /360°
Tilt ........................................................................................................................................... 270° / 180° / 90°
Poids ....................................................................................................................................................... 22.35kg
Dimensions ........................................................................................................................254 x 386 x 590mm
NOTE IMPORTANTE : Les produits électriques ne doivent pas être mis au rebut avec les ordures ménagères. Veuillez les faire recycler là
où il existe des centres pour cela. Consultez les autorités locales ou votre revendeur sur la façon de les recycler

DE 16 © COPYRIGHT LOTRONIC 2023
BEDIENUNGSANLEITUNG
AUSPACKEN
Sofort nach Empfang vorsichtig den Karton auspacken und den Inhalt überprüfen. Alle Teile müs-
sen vollzählig und in einwandfreiem Zustand sein. Sofort die Transportrma benachrichtigen und
das Verpackungsmaterial aufbewahren, wenn Teile Transportschäden aufweisen. Verpackungsma-
terial auch für späteren Transport des Geräts aufbewahren.
VERPACKUNGSINHALT
• 1 x LED Lichteffektgerät
• 2x Omega Halter
• 1x DMX Signalkabel
• 1 Powercon Kabel
• Bedienungsanleitung
ZEICHENERKLÄRUNG
Der Blitz im Dreieck weist auf
Gesundheitsrisiken hin (z.B.
Stromschlag)
Das Ausrufezeichen im Dreieck weist auf besondere Gefahren im Umgang oder Betrieb des
Geräts hin.
Das Gerät entspricht der CE Norm
Nur für Innengebrauch
0.5m
Mindestabstand zwischen dem Gerät und andere Gegenständen
Niemals direkt in den Lichtstrahl blicken
Vor der ersten Inbetriebnahme des Geräts sorgfältig die Anleitung durchlesen.
SICHERHEITSHINWEISE
• Diese Anleitung sorgfältig vor der ersten Inbetriebnahme lesen. Sie enthält wichtige Informatio-
nen über Installation, Gebrauch und Instandhaltung des Geräts.
• Die Anleitung für spätere Bezugnahme aufbewahren und an den nächsten Bediener weitergeben.
• Stets die Netzspannung vor Anschluss des Geräts überprüfen Sie muss mit der auf der Rückseite
des Geräts angegebenen Spannung übereinstimmen und darf auf keinen Fall höher sein.
• Das Gerät gehört zur Schutzklasse 1 und darf nur an eine Steckdose mit Schutzkontakt ange-
schlossen werden.
• Nur für Innengebrauch!
• Um Brand und Stromschlag zu vermeiden, das Gerät vor Regen und Feuchtigkeit schützen. Keine
brennbaren Materialien während des Betriebs in der Nähe des Geräts lassen.
• Das Gerät muss an einem gut belüfteten Ort und in mindestens 50cm Entfernung zur nächsten
Fläche angebracht werden.
0.5m
• Darauf achten, dass die Belüftungsschlitze nicht blockiert oder verstopft sind.
• Immer erst das Gerät vom Netz trennen, bevor es gewartet oder die Sicherung ersetzt wird. Die
Sicherung nur durch eine identische ersetzen.
• Das Gerät mit einer Sicherheitskette befestigen. Das Gerät niemals nur am Kopf tragen, sondern
auch am Sockel.
• Die Raumtemperatur darf 40°C nicht überschreiten. Das Gerät niemals bei höheren Temperatu-
ren betreiben.
• Das Gehäuse kann eine Temperatur von 85°C erreichen. NIEMALS das Gerät während des Be-
triebs mit bloßen Händen berühren. Gerät abschalten und 15 Minuten warten, dass sich das Ge-
rät abgekühlt hat, bevor Wartungsarbeiten vorgenommen werden können.
VORSICHT
NICHT DAS GEHÄUSE ÖFFNEN
STROMSCHLAGGEFAHR

DE17
WWW.AFX-LIGHT.COM
• NICHT das Gehäuse innerhalb von 5 Minuten nach Abschalten öffnen.
• Bei Betriebsstörungen das Gerät sofort ausschalten. Das Gerät niemals selbst reparieren. Re-
paraturen dürfen nur von einem Fachmann vorgenommen werden. Alle verwendeten Ersatzteile
müssen mit den Originalteilen identisch sein.
• Das Gerät nicht an ein Dimmerpack anschließen.
• Das Netzkabel niemals quetschen oder beschädigen.
• Wenn das Stromkabel beschädigt ist, muss es sofort durch ein Neues ersetzt werden.
• Beim Abziehen des Netzsteckers nur am Stecker ziehen, niemals am Kabel.
• Niemals direkt in die Lichtquelle blicken. Das kann bei empndlichen Personen zu epileptischen
Anfällen führen.
• Das Gerät ist nur für dekorative Zwecke und nicht als normale Haushaltsbeleuchtung geeignet.
• Beschädigte Linse, Gehäuse oder UV-Filter sofort ersetzen.
• Die Lichtquelle dieses Gerätes ist nicht austauschbar. Bei einem Defekt muss das gesamte Gerät
entsorgt werden.
NETZTRENNUNGSVORRICHTUNGEN
a) Wenn das Gerät über den Netzstecker ausgeschaltet wird, muss die Steckdose jederzeit leicht
zugänglich bleiben
b) Wenn das Gerät über einen Schalter ausgeschaltet wird, muss dieser klar gekennzeichnet und
leicht zugänglich sein.
FEATURES
• 1x 360W weiße LED-Lampe
• 22/20 DMX Kanäle USITT DMX-512
• ArtNet
• 1 rotierendes Goborad mit 2 auswechselbaren Glasgobos, 5 Metallgobos + offen, mit Geschwin-
digkeitsregelung, Stream-Effekt, Dithering-Effekt, Links-/Rechtsdrehung und Gobo Indexierung
• 1 statisches Goborad mit 11 Gobos + offen
• 1 Farbrad mit 10 Farben + offen
• Gobo-Überlagerung (Gobo-Morphing)
• Frost Filter
• Totem Mode
• DMX-, Master-Slave-, Sound- oder Automatikbetrieb (8 eingebaute Programme)
• Elektrischer Fokus von 2,5 - 15m
• Lineares motorisiertes Zoom mit 3-48° Abstrahlwinkel
• Linear CMY + CTO
• 25x/Sek. Shutter/Stroboskop mit Geschwindigkeitseinstellung
• 0-100% linearer LED-Dimmer
• 3-Facetten-Prisma, 5-Facetten-Prisma und Frostlter mit variabler Geschwindigkeit und
Drehrichtung
• Voreingestellter variabler/zufälliger Strobe- und Dimmimpulseffekt
• 2,8" 320 x 240px TFT LCD Touchscreen mit 4 Tasten
• Verbesserte Optik und acher Beam
• Regenbogeneffekt mit variabler Richtung und Geschwindigkeitssteuerung
• Lüfterkühlung mit Konstanttemperaturanzeige und Managementfunktion
• Powercon IN/OUT Anschlüsse
• 3-polige XLR IN/OUT-Anschlüsse
• RJ45 ArtNet IN/OUT Anschlüsse
• Schutzart IP20
• 2x ¼-Drehung Omegaklemmen zur Montage
• Sicherheitsöse
AUSWECHSELN DER SICHERUNG
Vor Auswechseln der Sicherung Gerät vom Netz trennen. Nur eine identische Sicherung benutzen.
Mit einem Schraubendreher den Sicherungshalter aus seinem Gehäuse entfernen. Die durchge-

DE 18 © COPYRIGHT LOTRONIC 2023
brannte Sicherung aus dem Halter nehmen und durch eine identische Sicherung ersetzen. Den
Sicherungshalter zurück ins Gehäuse setzen und Netz wieder anschließen.
Warnung: Wenn die neue Sicherung ebenfalls durchbrennt, benutzen Sie das Gerät nicht mehr, da
es sonst schweren Schaden nehmen kann. Nehmen Sie Verbindung mit Ihrem Fachhändler auf.
ANSCHLUSS DES CONTROLLERS (ABB. 4)
Verbinden Sie das mitgelieferte XLR-Kabel mit dem 3-poligen XLR-Ausgang Ihres Controllers und
die andere Seite mit dem männlichen 3-poligen XLR-Eingang des Moving Heads. Über die serielle
Schnittstelle können Sie mehrere Moving Heads miteinander verknüpfen. Das benötigte Kabel soll-
te ein abgeschirmtes zweiadriges Kabel mit XLR-Eingangs- und -Ausgangsanschlüssen sein. Bitte
beachten Sie dazu Abbildung 4.
DMX512-VERBINDUNG MIT DMX-ABSCHLUSSWIDERSTAND
Bei Installationen mit langen Kabelwegen oder in einer elektrisch gestörten Umgebung, wie z. B. in
einer Diskothek, empehlt es sich, einen DMX-Abschlusswiderstand zu verwenden. Dadurch wird
verhindert, dass das digitale Steuersignal durch elektrisches Rauschen gestört wird. Der DMX-Ab-
schlusswiderstand ist einfach ein XLR-Stecker mit einem zwischen den Stiften 2 und 3 angeschlos-
senen Widerstand, der dann in die XLR-Ausgangsbuchse des letzten Geräts in der Kette gesteckt
wird. Bitte beachten Sie dazu Abbildung 4.
POWER LINK (ABB. 4)
Sie können mehrere Geräte über die POWER IN / OUT Verbinder von einer einzigen Netzsteckdose
aus versorgen. Schließen Sie ein IEC Kabel vom POWER OUT Verbinder des 1. Geräts an den POWER
IN Verbinder des 2. Geräts an usw.
MONTAGE (ABB. 3)
Der Ventilator und die Belüftungsschlitze dürfen auf keinen Fall verstopft werden. Bei der Wahl des
Anbringungsortes darauf achten, dass das Gerät leicht zugänglich für Wartungs- und Reinigungs-
arbeiten bleibt. Benutzen Sie immer Sicherheitskabel.
Den Haltebügel am Gerät befestigen. Das Gerät muss fest und sicher installiert werden, um Er-
schütterungen und Spielraum während der Bewegungen zu vermeiden. Die Montageäche muss
stabil sein und mindestens 10-mal das Gewicht des Geräts tragen können. Bei der Montage das Ge-
rät immer zusätzlich durch ein Sicherheitskabel absichern, dass mindestens 12-mal das Gewicht
des Geräts tragen kann. Das Gerät darf nur von einem Fachmann installiert werden. Es muss an
einer Stelle installiert werden, wo es für Menschen unzugänglich ist und niemand unter dem Mon-
tagebereich stehen oder gehen kann.
Das Gerät besitzt eine Spezialbefestigung auf der Unterseite, die aus dem Omega-Halter und Auf-
hängestellen für das Sicherheitskabel besteht. (s. Abb. 3). Wenn Sie das Gerät an einem Traver-
sensystem befestigen, benutzen Sie einen passenden Haken, den Sie mit einer M10 Schraube am
Omega-Halter befestigen. Als zusätzliche Sicherheitsmassnahme müssen Sie ein Stahlkabel an
einer der Aufhängestellen befestigen.
ARTNET FUNKTION
Art-Net verwendet ein Netzwerkprotokoll, das die Nutzung von DMX erheblich erweitert, die Ver-
kabelung durch die Verwendung von RJ45-Ethernetkabeln vereinfacht und die Möglichkeit bietet,
bestehende Netzwerke, HUBs und WIFI zu nutzen.
Art-Net erlaubt theoretisch die Verwendung von bis zu 32.768 Universen und bietet somit eine
Vielzahl von Möglichkeiten.
Schließen Sie ein RJ45-Kabel an die RJ45-Anschlüsse auf der Rückseite an und verbinden Sie das
andere Ende mit Ihrem Netzwerk.
BEDIENFELD (ABB. 2)
Auf MENU drücken, um ins Hauptmenü zu gehen. Mit den UP / DOWN Tasten zur gewünschten
Funktion gehen und auf ENTER drücken. Wenn eine Funktion gewählt ist, mit den UP / DOWN Tas-
ten die Einstellung ändern und auf ENTER drücken.

DE19
WWW.AFX-LIGHT.COM
Hinweis: Zum Umkehren des Displays 3 Sekunden lang die UP & DOWN Taste drücken.
MENÜ
MENU BESCHREIBUNG
DMX Mode
DMX address A001-AXXX Einstellung der DMX-Adresse
Channel Mode 22CH 22-Kanal-Modus
20CH 20-Kanal-Modus
Auto run Internal pro-
gram 1-9 Master/Alone Auto-Modus
Music run Internal pro-
gram 1-9 Master/Alone Tongesteuerter Modus
Option
Reset Default Yes/No Zurücksetzen auf Standardeins-
tellung
Ethernet Function
ArtNet to DMX
Device IP addr:
Host IP Addr:
Universe:
Share signal:
(On/Off)
192.168.001.201
192.168.001.001
000
(On/Off)
ArtNet mit DMX verbinden
Einstellen der Geräte-IP-Adresse
Einstellung der Host-IP-Adresse
Einstellen des Universums, Sen-
den des ArtNet-Signals an DMX
Pan/Tilt
Reverse Pan (on/off) Pan Umkehrung
Reverse Tilt (on/off) Tilt Umkehrung
Select Pan 630/540/360 Select Pan
Select Tilt 270/180/90 Select Tilt
Totem mode OFF/CEN./R/L Einschränken der Pan & Tilt Bewe-
gung
UI Set
Mic sensitivity 0-99% Mikrofonempndlichkeit
OFF signal mode (On/Off)
AUS im Originalzustand und EIN
im Reset Zustand, wenn kein DMX
Signal anliegt
HalfColor Wheel (On/Off) Halbe Farbe (default OFF)
Informa-
tion
Temperature XXX°C/F° Aktuelle Temperatur
Software version V1.0-V9.9 Software Version
Manu Reset
Total reset
Pan/Tilt reset
Colour reset
Gobo reset
Other Resets
Alles Resetten
Pan/Tilt Resetten
Farbe Resetten
Gobo Resetten
Alle anderen Resetten
Channel PAN=XXX... Manuelle Kanalsteuerung
ADV
(Advanced)
(Access code
0888)
Calibration PAN=XXX... Eichung
PFLEGE
GEFAHR! NETZSTECKER ABZIEHEN, BEVOR SIE WARTUNGSARBEITEN DURCHFÜHREN.
Es ist wichtig, dass das Gerät sauber gehalten wird und sich kein Staub, Schmutz oder Rauchöl-
rückstände auf oder im Gerät ablagern. Andernfalls wird die Lichtleistung erheblich reduziert. Eine
regelmäßige Reinigung sorgt nicht nur für eine maximale Lichtleistung, sondern auch für eine
lange und zuverlässige Lebensdauer des Geräts. Wir empfehlen ein weiches, fusselfreies Tuch, das
mit einem guten Glasreiniger befeuchtet ist. Niemals Alkohol oder Lösungsmittel verwenden!

DE 20 © COPYRIGHT LOTRONIC 2023
Die Frontlinse sollte wöchentlich gereinigt werden, da sich Rauch sammelt und die Lichtleistung
sehr schnell abnimmt. Die Lüfter sollten monatlich gereinigt werden.
Das Innere des Gerätes sollte mindestens einmal jährlich mit einem Staubsauger oder Gebläse ge-
reinigt werden. Verwenden Sie eine weiche Bürste und einen Staubsauger, um Staub und Schmutz
von den Lüftern und Kühlöffnungen zu entfernen.
WICHTIG: Kontrollieren Sie die Luftlter regelmäßig und reinigen Sie sie, bevor sie
verstopfen!
Reinigen Sie die beiden Luftlter in den Geräteabdeckungen und die beiden Luftlter im Gerätesoc-
kel. Verwenden Sie dazu einen Staubsauger, Druckluft oder waschen Sie sie aus und legen Sie sie
trocken wieder ein.
Setzen Sie nach dem Wechsel der Luftlter den Zähler für die abgelaufene Zeit im Informationsmenü
zurück (Information -> Air lter -> Elapsed time.
TECHNISCHE DATEN
Versorgung ....................................................................................................................... 100-240V~ 50/60Hz
Verbrauch ................................................................................................................................................... 500W
Leuchtmittel ........................................................................................................ 1 x 360W weiße LED, 5800K
Gobo Größe ..................................................................................................... Außen: 22.9mm; innen: 18mm
Betriebsgeräusch ........................................................................................................................................55dB
Pan ........................................................................................................................................ 630° / 540° /360°
Tilt ........................................................................................................................................... 270° / 180° / 90°
Gewicht ................................................................................................................................................... 22.35kg
Abmessungen ....................................................................................................................254 x 386 x 590mm
WICHTIGER HINWEIS: Elektrogeräte gehören nicht in den Hausmüll. Sie müssen in speziellen Betrieben recycelt werden.
Bringen Sie sie zu einer speziellen Entsorgungsstelle für Elektrokleingeräte (Wertstoffhof)!
This manual suits for next models
1
Table of contents
Languages:
Other afx light Light Fixture manuals
afx light
afx light WASH760-FC User manual
afx light
afx light PARLED100-Z User manual
afx light
afx light COMET-GOBO User manual
afx light
afx light 9BEAM-FX User manual

afx light
afx light SPOT180LED User manual
afx light
afx light 6CUBE-FX User manual

afx light
afx light SPOT-240LED-FC User manual

afx light
afx light BAR LED 412 User manual
afx light
afx light HYBRID-470LED-FC User manual
