AG Neovo X-Series User manual


1
Table of Contents
Precautions................................................................................................................................................................2
Warning on installation...........................................................................................................................2
Warning on power connection..............................................................................................................2
Warning on tilt ...........................................................................................................................................2
Warning on Maintenance .......................................................................................................................3
Warning on transportation ....................................................................................................................3
Package Contents...................................................................................................................................... 4
Identify the Parts and Controls ...........................................................................................................................5
Setup..............................................................................................................................................................7
Customizing Your Monitor................................................................................................................................ 10
Adjusting Your LCD Panel ..................................................................................................................... 10
Selecting OSD Features ......................................................................................................................... 10
OSD Menus..................................................................................................................................................11
VGA-Input.......................................................................................................................................11
DVI-Input ....................................................................................................................................... 15
CVBS Input / S-VIDEO Input..................................................................................................... 17
Warning Messages and Troubleshooting......................................................................................................21
Warning Messages ..................................................................................................................................21
Troubleshooting .......................................................................................................................................23
Technical Features and Specifications........................................................................................................... 24
Power Saving Function.......................................................................................................................... 24
Plug & Play ................................................................................................................................................ 24
Specifications ........................................................................................................................................... 24
Preset and User Modes...........................................................................................................................25
Regulation ..............................................................................................................................................................26
FCC compliance........................................................................................................................................26
TCO'95 ..........................................................................................................................................................27

2
Precautions
Warning on installation
Do not cover or block the ventilation holes in the case.
Do not install the monitor near heat sources such as radiators or air ducts, or in a
place subject to direct sunlight, excessive dust, mechanical vibration or shock.
Optional Video adaptor installation
Turn off the power switch and unplug the monitor before installation to
avoid electric shock or damage.
Install the optional video adaptor on a stable surface. The monitor may
cause injury or damage if it falls or is dropped.
Warning on power connection
Use an appropriate power cord for your local power supply.
The outlet should be installed near the monitor and be easily accessible.
Do not allow anything to rest on the power cord.
Disconnect the power plug from the power outlet under following conditions:
If you will not use it for an indefinite period time.
When the power cord or plug is damaged of frayed.
If the product has been dropped or the cabinet has been damaged.
If the product exhibits a distinct change in performance, indicate a need
for service.
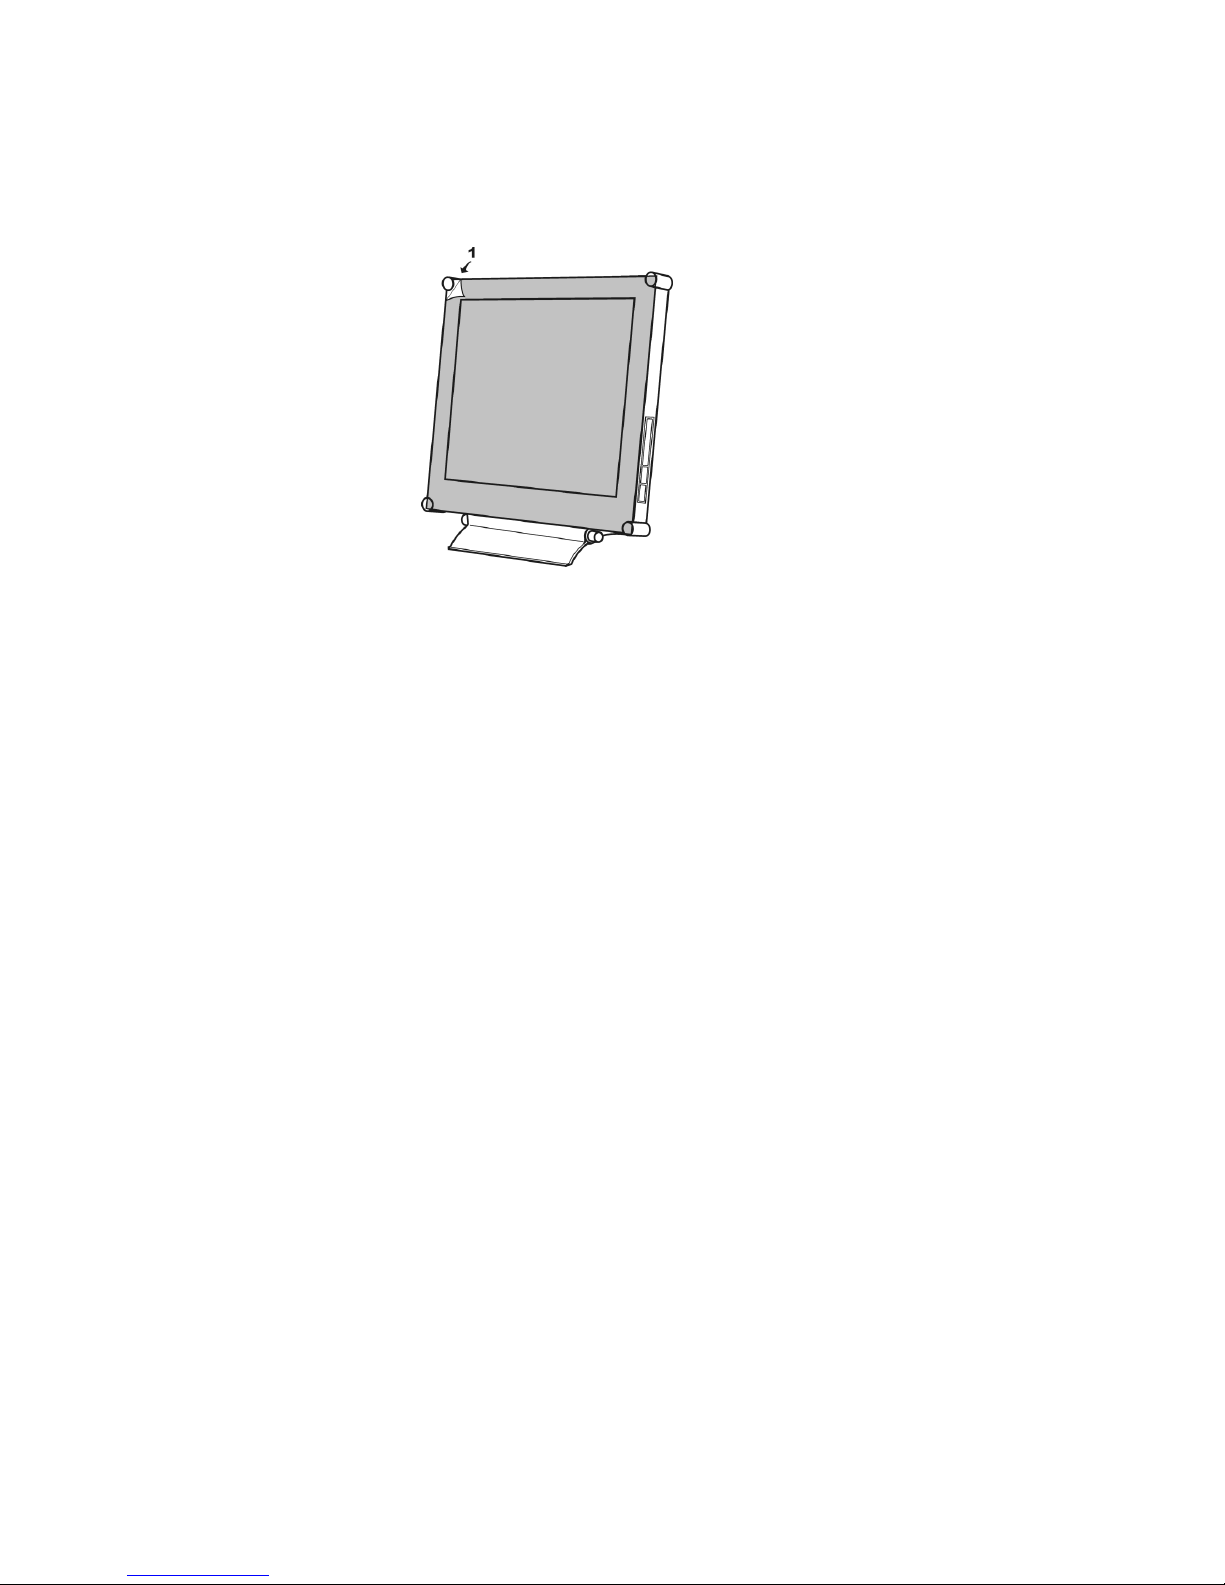
Warning on tilt
With the tilt, this monitor can be adjusted to the desired angle within 15 degree
vertically. To turn the monitor vertically, hold it at the top with both hands as
illustrated below.

3
Warning on Maintenance
Clean the cabinet, glass, and controls with a soft cloth lightly moistened with a
mild detergent solution. Do not use any type of abrasive pad, scouring powder or
solvent, such as alcohol or benzene.
Do not rub, touch, or tap the surface of the screen with sharp or abrasive items
such as a pen or screwdriver. This type of contact may result in a scratched glass.
Do not insert sharp objects or spill liquid into the monitor through ventilation
holes. They may cause accident fire, electric shock or failure.
Do not attempt to service this product yourself, as opening or removing covers
may expose you to dangerous voltage potentials or other risks.
Warning on transportation
When you transport this monitor for repair or shipment, use the original carton
and packing materials.
4
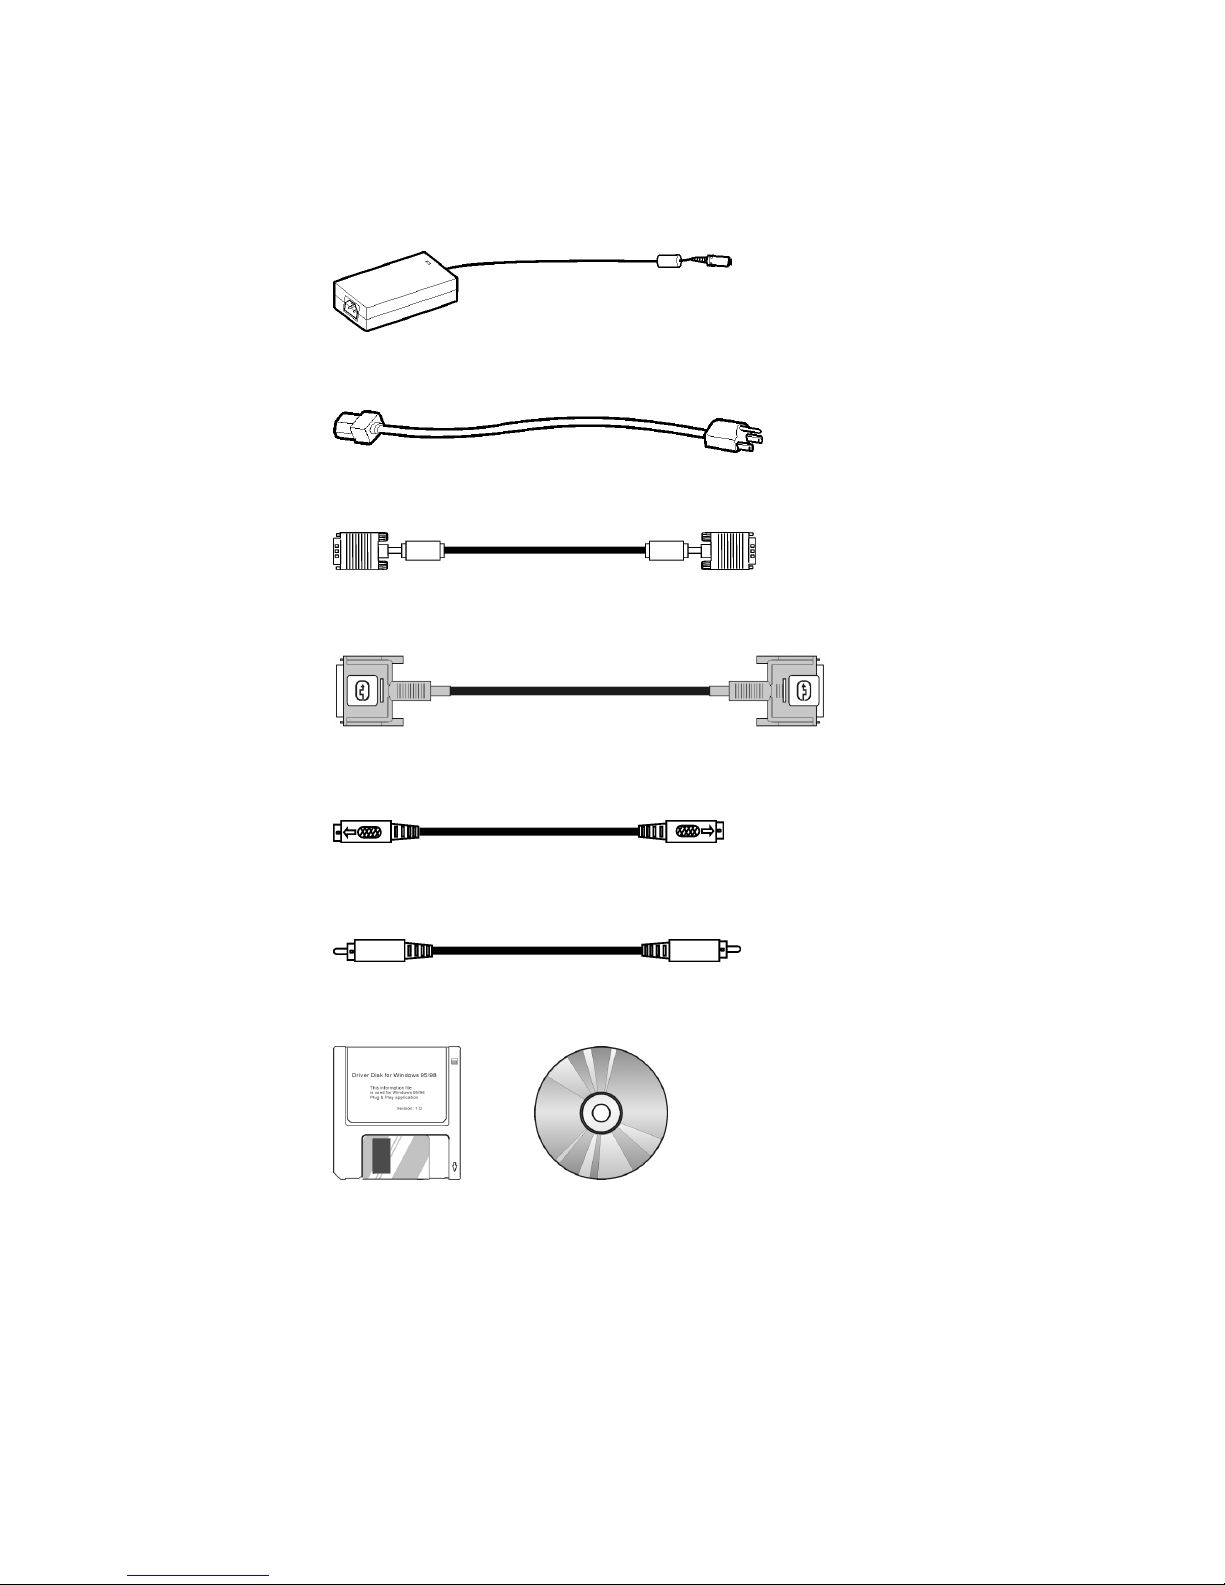
Package Contents
Before using this monitor, check the following items are included in your carton box:
Monitor (*1)
Power adapter (*1)
Power cord (*1)
D-sub 15-pin signal cable (*1)
Digital DVI signal cable (*1)
S- Video cable (*1,)
(Optional)
CVBS cable (*1)
(Optional)
Floppy/CD-ROM (containing Windows information file and user’s manual)

5
Identify the Parts and Controls
Side view
Powerswitch
Turns the monitor on or off.
AUTObutton
Adjust the picture position and performance automatically.
You are recommended to press the button the first time you use the monitor or
every time you change the resolution and/or refresh rate of the input signal.
UPbutton
Activates the On-Screen Display menu.
Move the selected item upward while the On-Screen Display sub-menu appears.
INPUT/DOWN button
Hot key for input source select / Activates the OSD and navigates within the display
Move the selected item downward while the On-Screen Display sub-menu
appears.
Increasebutton
Activates the On-Screen Display menu.
Move the selected item right while the On-Screen Display main menu appears.
Increase the adjustment value of selected item while the On-Screen Display
sub-menu appears.
Decreasebutton
Activates the On-Screen Display menu.
Move the selected item left while the On-Screen Display main menu appears.
Decrease the adjustment value of selected item while the On-Screen Display
sub-menu appears.

6
REAL
DC +12V Power inlet
Provides +12V DC power to the monitor.
VGA-In
D-sub 15-pin connector for VGA signal.
S-VIDEO-In
(Optional)
Connector for S-Video signal.
CVBS-In
(Optional)
Connector for CVBS signal.
Digital
DVI-D connector for digital signal input
7
Setup
Please follow the steps one by one to setup your monitor.
1. Split the dust-proof plastic sheet
Split the dust-proof plastic sheet from the screen surface of monitor.
2. Connect the monitor to the computer (if you are using a video source, please skip
this step.)
There are two kinds of signal formats that are digital and analog. This monitor can
support both of them. Depending on the output signal of your computer, you may
need to use different signal cable and to connect into different port of the monitor.
Connecting to an IBM PC/AT or compatible computer by using the D-Sub
15-pin cableWith the computer being switched off, connect the analog
VGA signal cable to the “ANALOG” port at rear of the monitor and
computer.
Connecting to an IBM PC/AT or compatible computer by using the DVI
cableWith the computer being switched off, connect the digital DVI
signal cable to the “DIGITAL” port at rear of the monitor and computer.
Connecting to a Macintosh or compatible computer With the computer
being switched off, connect the analog VGA signal cable to the
“ANALOG” port at rear of the monitor and computer.

8
3. Connect the monitor to the video source (DVD, VCD, VCR, etc.) (If you are using a
computer, please skip this step.)
(Optional)
This monitor can support both S-Video and CVBS jack. Depending on the signal output
port of your video source, you may need to use different signal cable and to connect
into different port of the monitor. (If both the ports are available in your video source,
the S-Video connection is recommended for better performance.)
Connecting to a video source with the S-Video cable
With the video source being switched off, connect the S-Video cable to
the “S-VIDEO” port at rear of the monitor and video source.
Connecting to a video source with the CVBS cable
With the video source being switched off, connect the CVBS cable to the
“VIDEO” port at rear of the monitor and video source.
4. Connect the power adapter and power cord
With the monitor switched off, connect the cable of power adapter to the
monitor. Then connect the power cord to the adapter, and the other end
of the power cord to a power outlet.
5. Turn on the monitor and computer
Turn on your computer.
Press the (Power) switch to turn on your monitor. You should see
the picture on your monitor now. If not, please check the “Warning
Signal and Troubleshooting” section of this user manual for details.

9
6. Use 1280x1024 resolution and press (AUTO) button for best performance. (If
you are not using a computer, please skip this step.)
Before starting to work, you are recommended to adjust the resolution
of video signal from your computer to 1280x1024 at 60Hz for best picture
performance. (Please check the user manual of your computer to learn
how to adjust the resolution and refresh rate.)
You are also recommended to press the (AUTO) button to adjust
the picture performance automatically and to ensure the tolerance-free
picture.
7. Install information file for Microsoft Windows 95/98/2000/ME/XP
The information file (also known as driver) for Microsoft Windows
95/98/2000/ME/XP are available in the attached floppy disk or CD-ROM.
You may install it for better communication between your monitor and
Windows 95/98/2000/ME/XP. Please refer to the text file of
“readme.txt” in the attached floppy disk or CD-ROM for details.
10
Customizing Your Monitor
Adjusting Your LCD Panel
In the OSD menu, you will find all kinds of features to help you adjust your LCD panel
to the optimal performance.
Important! Though manual adjustment of the LCD panel is available, we strongly
recommend you to use the auto adjustment function of the panel. It will automatically
tune your LCD panel to the optimal performance. Simply push the AUTO button to
enable the auto adjustment function. Additionally, we recommend you to use the auto
adjustment function every time after you have change the resolution or frequency of
your display.
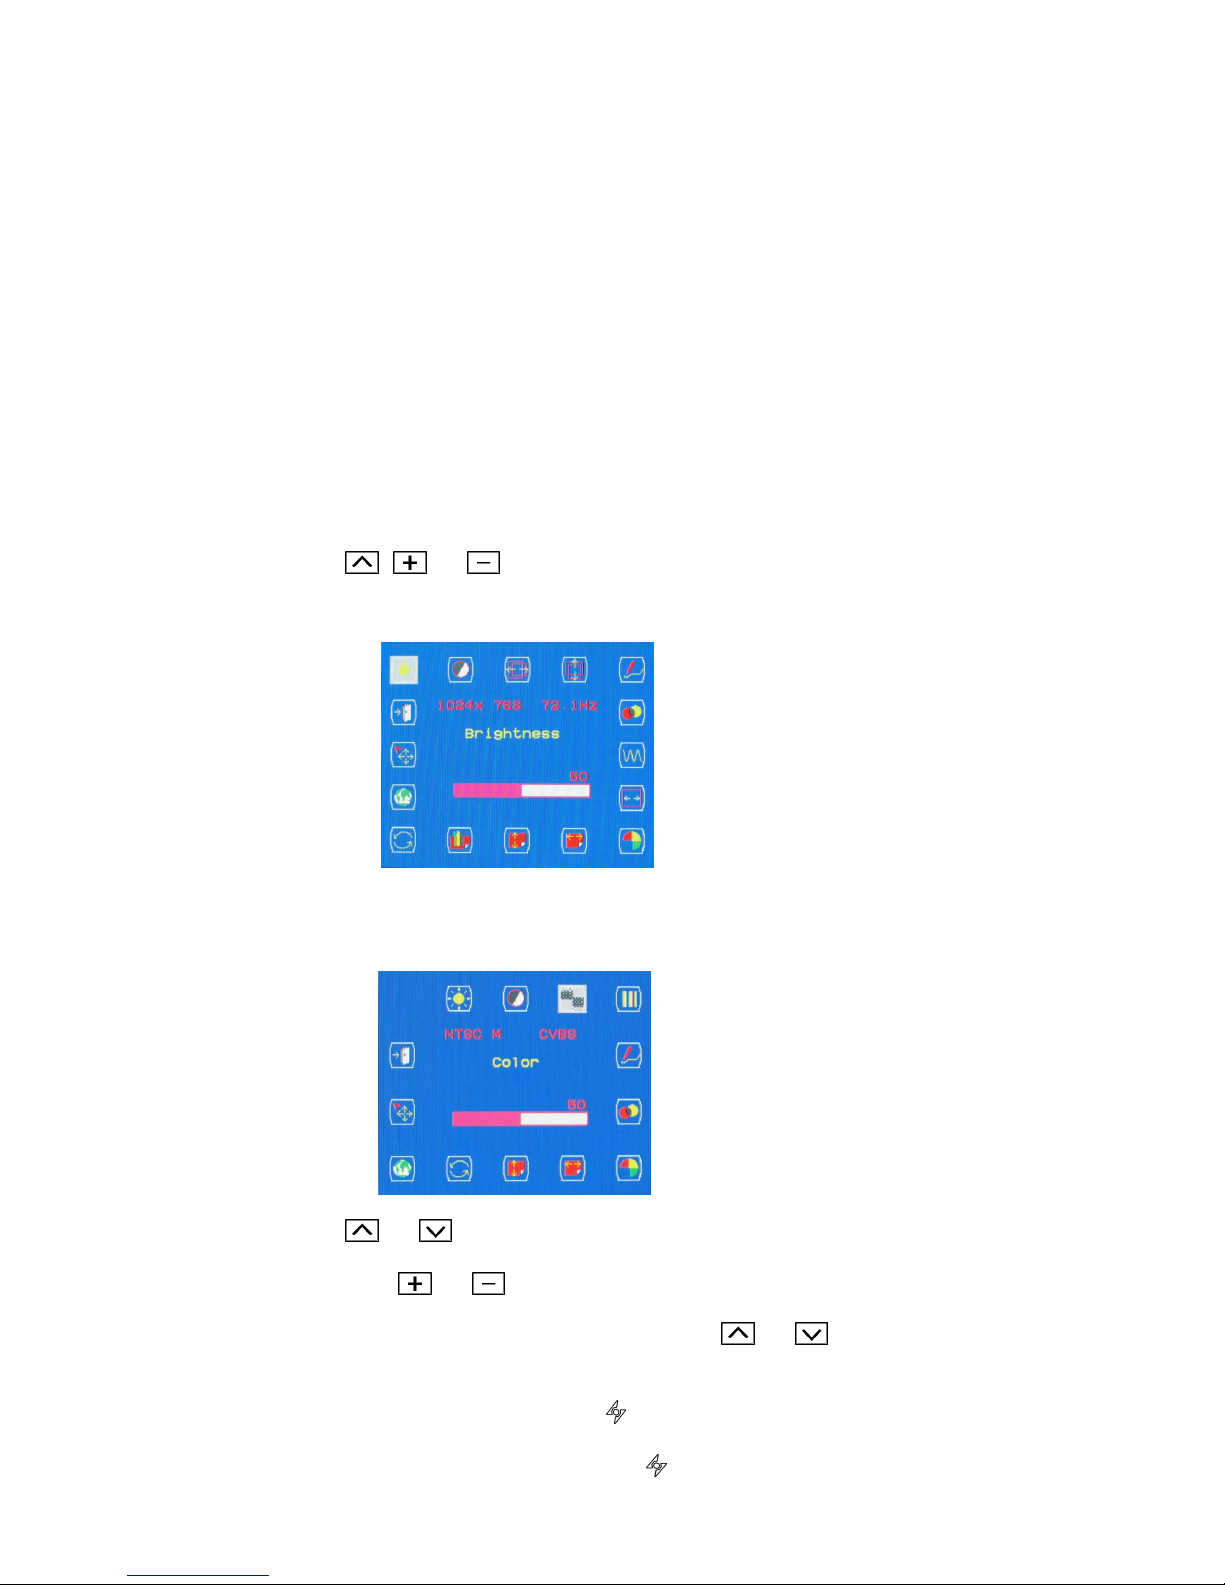
Selecting OSD Features
1. Push , or button to call out the OSD menu. The sixteen OSD icons
are represented in the following menu.
2. In case of using video adapter and selecting video or S- video, the OSD menu is
shown below.
3. Push or to move the highlight bar to the desired icon.
4. Then push or for adjustment or Sub-function selection.
5. In case of above Sub-function selection, push or to confirm the desired
selection.
6. In case of no OSD menu, the Icon can do auto adjustment function.
7. In case of having OSD menu, the Icon can do exit function.
11
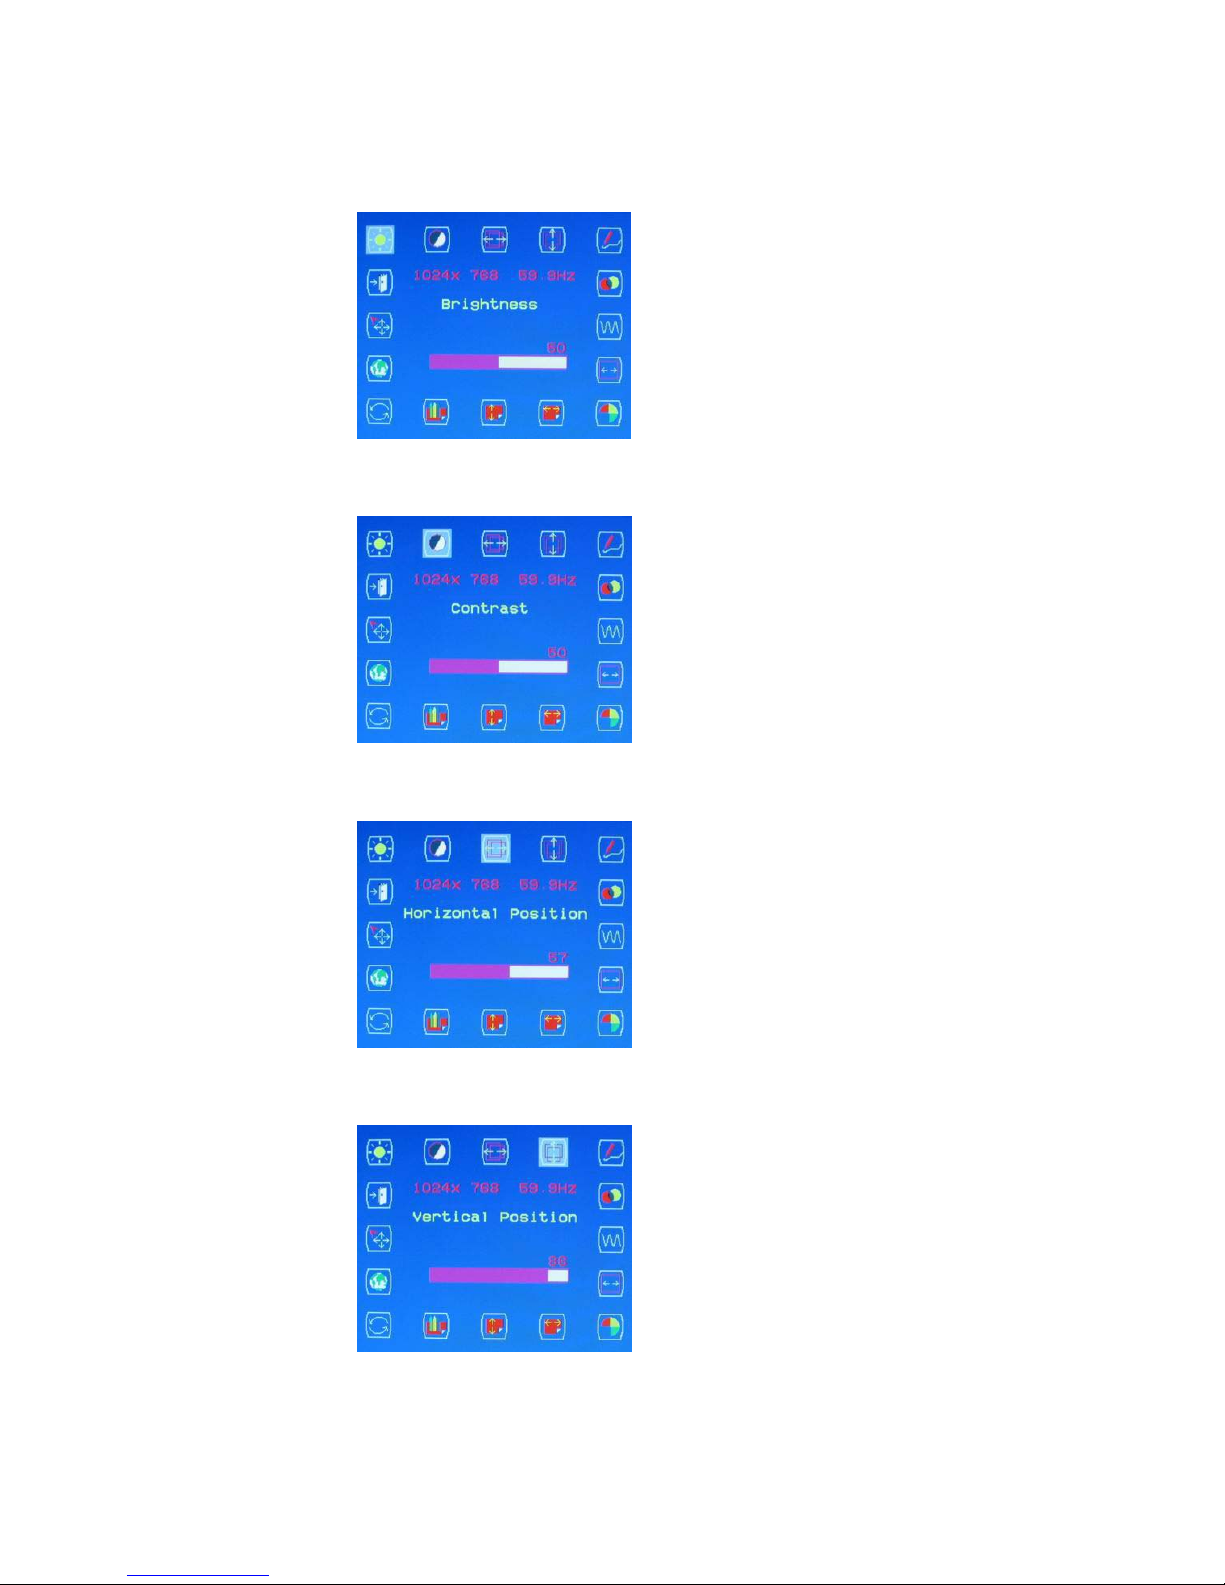
OSD Menus
VGA-Input
Brightness Adjustment
Contrast Adjustment
Horizontal Position Adjustment
Vertical Position Adjustment
12
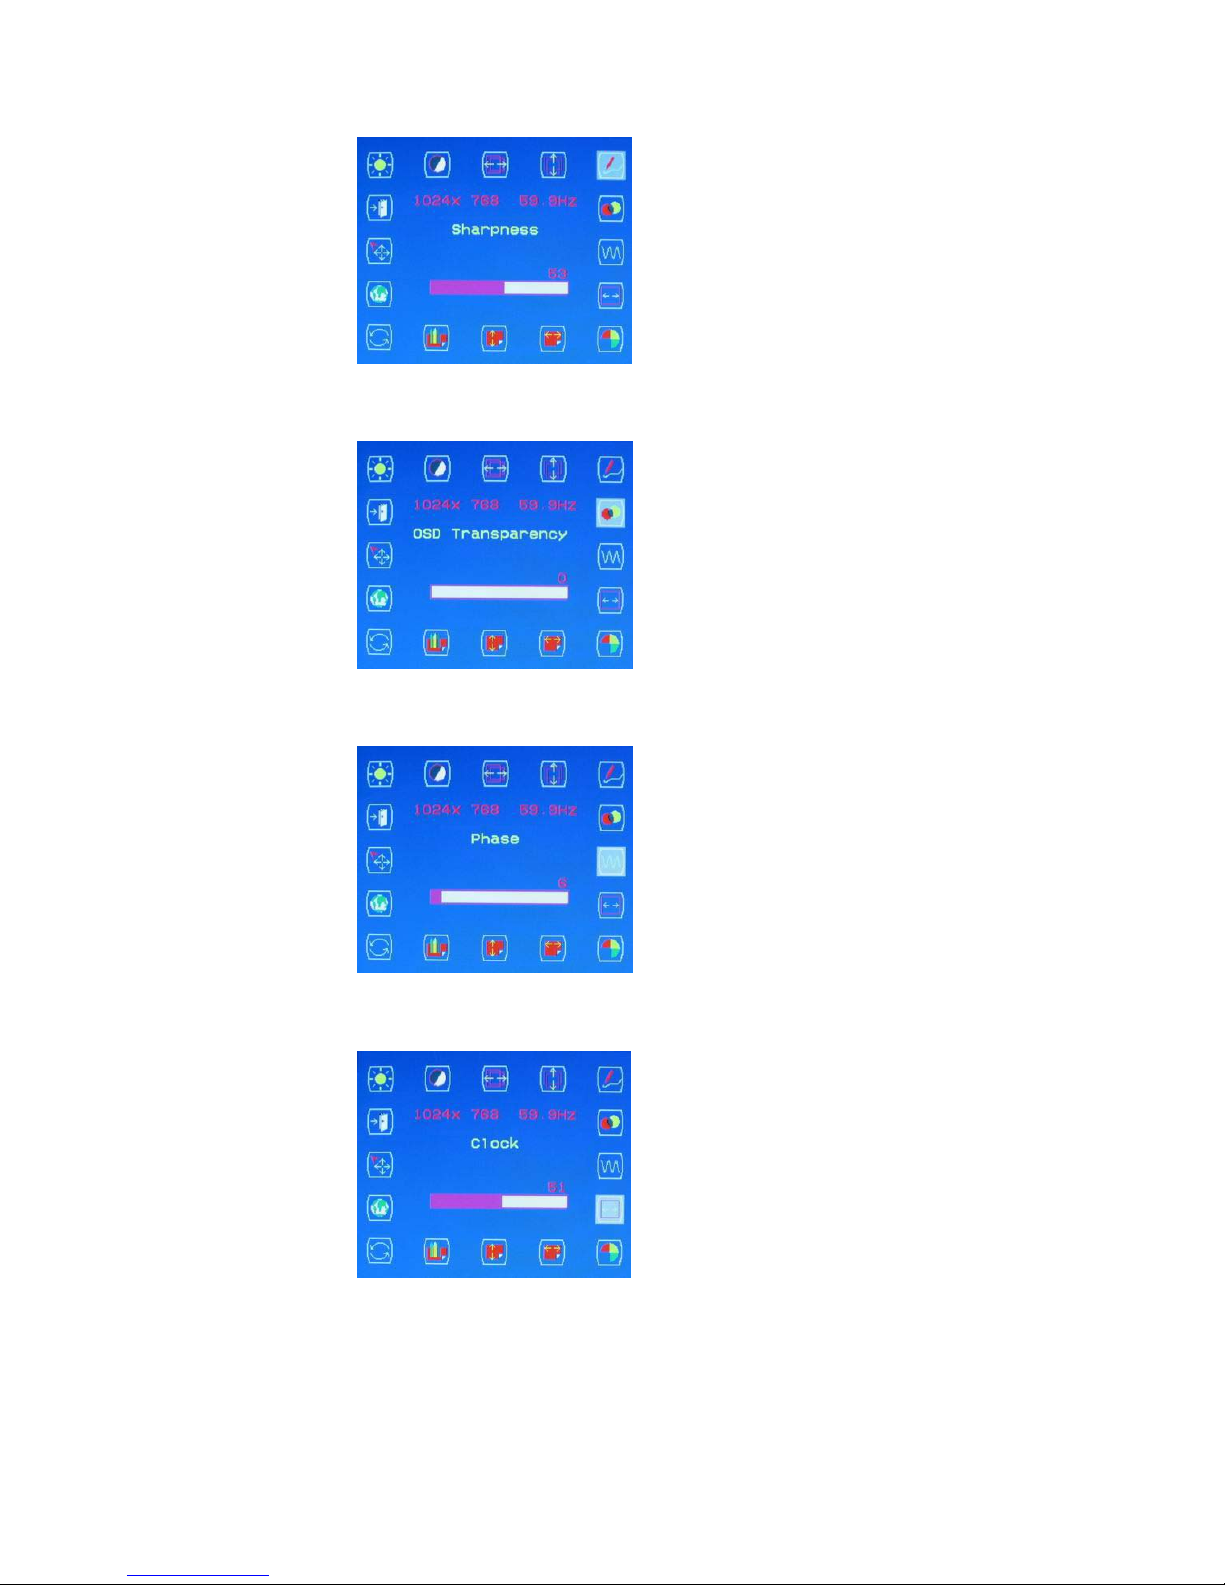
Sharpness Adjustment
OSD Transparency Adjustment
Phase Adjustment
Clock Adjustment
13
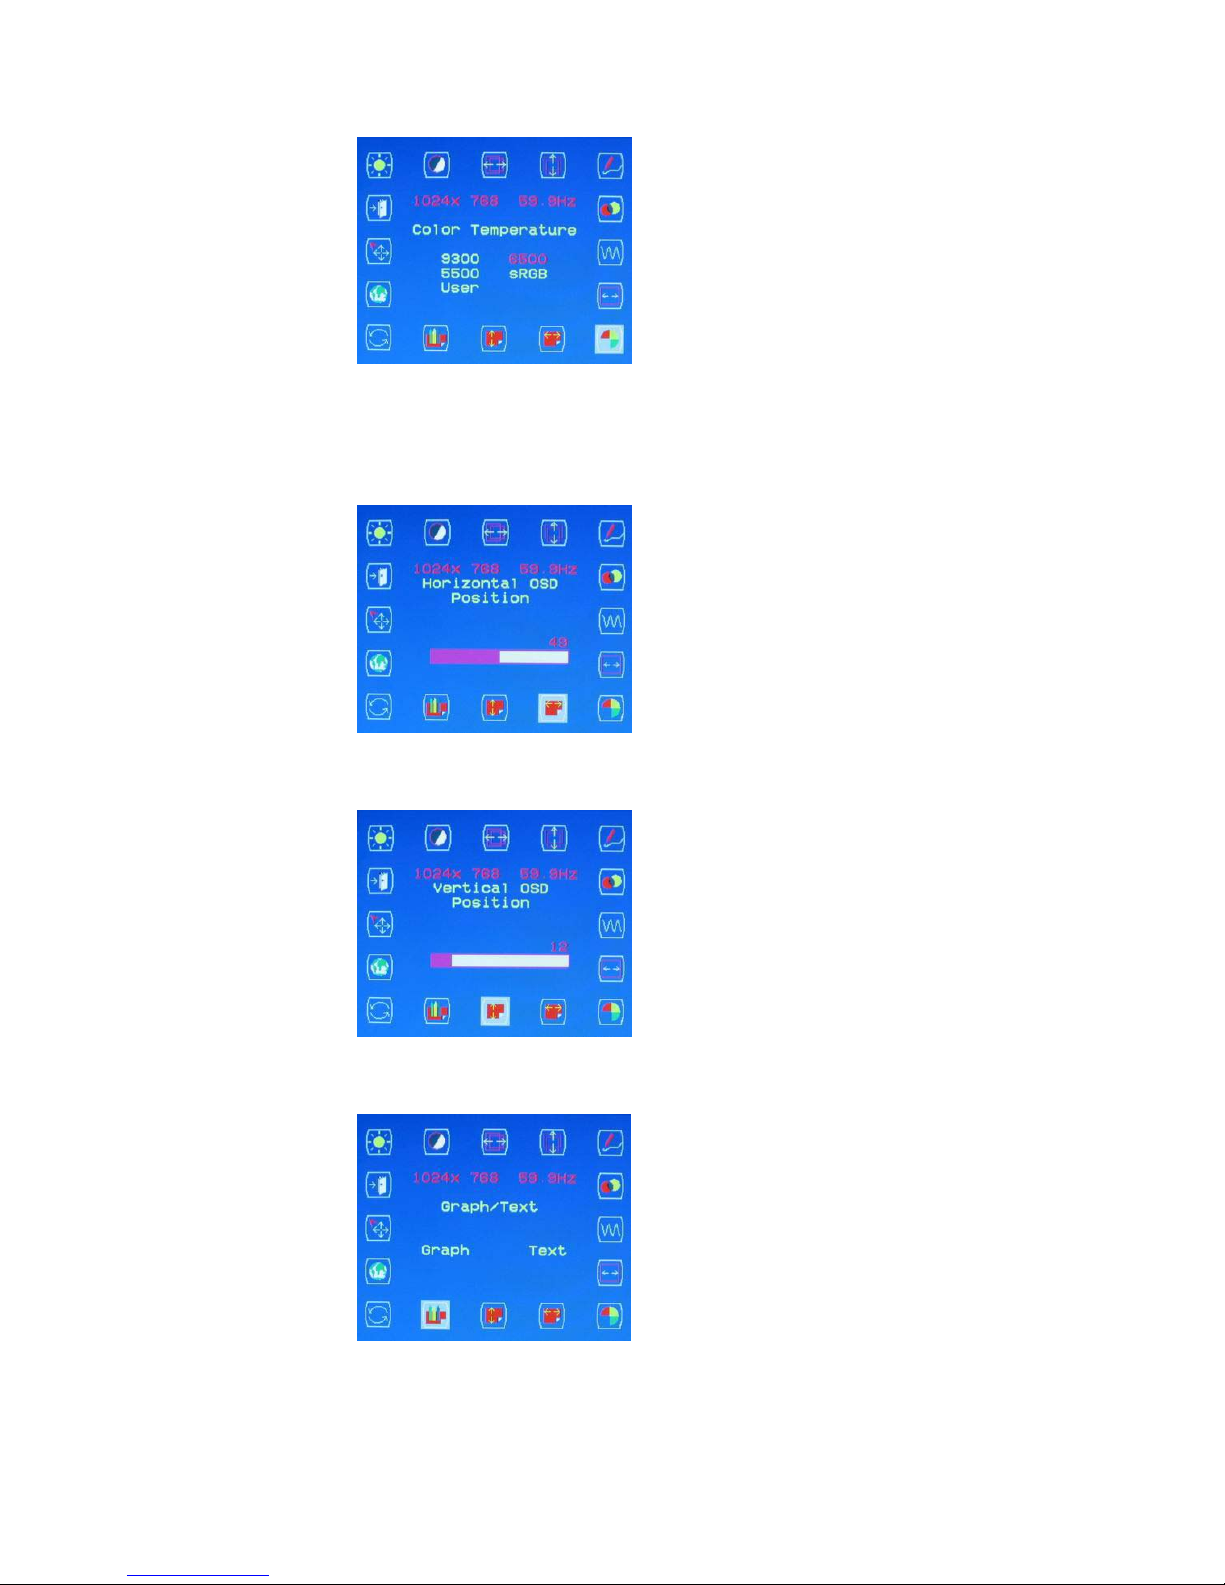
Color Temperature Selection
P.S. The color temperature of RGB can be adjusted in case of entering
“USER ”sub menu.
Horizontal OSD Position Adjustment
Vertical OSD Position Adjustment
Graphic/Text Selection
P.S. Suggest the user select“Text ”sub menu in case of the resolution being
640×350 or 640×400.

14
Recall Selection
P.S. Suggest the user to use“Recall ”icon, if the user doesn’t satisfy with the
adjustment.
Language Selection
Input Select Selection
Exit Selection

15
DVI-Input
Brightness Adjustment
Contrast Adjustment
OSD Transparency Adjustment
Color Temperature Selection
P.S. The color temperature of RGB can be adjusted in case of entering
“USER ”sub menu.

16
Horizontal OSD Position Adjustment
Vertical OSD Position Adjustment
Recall Selection
P.S. Suggest the user to use“Recall ”icon, if the user doesn’t satisfy with the
adjustment.
Language Selection

17
Input Select Selection
Exit Selection
CVBS Input / S-VIDEO Input
Brightness Adjustment
Contrast Adjustment

18
Color Adjustment
Hue Adjustment
Sharpness Adjustment
OSD Transparency Adjustment

19
Color Temperature Selection
P.S. The color temperature of RGB can be adjusted in case of entering
“USER ”sub menu.
Horizontal OSD Position Adjustment
Vertical OSD Position Adjustment
Recall Selection
P.S. Suggest the user to use“Recall ”icon, if the user doesn’t satisfy with the
adjustment.
Table of contents
Other AG Neovo Monitor manuals

AG Neovo
AG Neovo PN-55D User manual

AG Neovo
AG Neovo SX-15G User manual

AG Neovo
AG Neovo H-W22 Instruction Manual

AG Neovo
AG Neovo X-19 User manual

AG Neovo
AG Neovo SX-15 User manual

AG Neovo
AG Neovo F-415 User manual

AG Neovo
AG Neovo SX-17P User manual

AG Neovo
AG Neovo SX-19P User manual

AG Neovo
AG Neovo F-417 User manual

AG Neovo
AG Neovo RX-24 User manual

AG Neovo
AG Neovo DS-55 User manual

AG Neovo
AG Neovo X-24E User manual

AG Neovo
AG Neovo C-17 User manual

AG Neovo
AG Neovo PM-48 User manual

AG Neovo
AG Neovo RX-Series User manual

AG Neovo
AG Neovo ME-2401 User manual

AG Neovo
AG Neovo ME-2701 User manual

AG Neovo
AG Neovo F-419 User manual

AG Neovo
AG Neovo RX-W32 User manual

AG Neovo
AG Neovo SX-19 User manual


