AG AstroPC PRO User manual

AstroPC PRO user Manual
AG

Brief introduction to AstroPC PRO
The AstroPC PRO microcomputer runs under the Windows 10 PRO operating system and
is designed for wireless control of astronomical devices (mounts, cameras, autoguides,
focusers and other astronomical devices).
The AstroPC PRO is a lightweight, wireless astrophotography controller that provides all
the basic modes for capturing deep sky objects (DSO) using multi-vendor applications
and equipment. AstroPC PRO supports a large number of astronomical applications and
equipment from different manufacturers. And the usual work in the environment of the
Windows 10 PRO operating system makes working with AstroPC PRO easy and
comfortable. Simply connect to the AstroPC PRO remote desktop via WiFi, and control
your astronomy equipment from your favorite astronomy applications, just like on the big
desktop!
To connect to the remote desktop of AstroPC PRO, a smartphone, tablet, laptop or any
other computer with WiFi on board is suitable. You can also connect to the remote
desktop of AstroPC PRO via the Internet.
By default, AstroPC PRO operates in Wifi hotspot mode. AstroPC PRO also has a system
of through power distribution with overload protection, for connecting various
astronomical devices, such as a mount, camera, focuser, and others. On one of the panels
of the AstroPC PRO case there is a power button, a power LED and 4 power output
connectors for connecting various astronomical devices. On the other panel, there is a
power input connector, three USB 3.1 ports, a USB Type C port, an HDMI2.0 port, and
an RJ45 2.5G Ethernet network port.

Initial use
By default, the AstroPC PRO WiFi module works in open access point mode.
Immediately after the system boots, the SSID “AstroPC” access point becomes
available for discovery and connection. To connect to the AstroPC PRO desktop from
any device, the standard Microsoft Remote Desktop client application is used. For
Windows devices, the Microsoft Remote Desktop client application is built into the
operating system. For Android and iOS devices, the Microsoft Remote Desktop client
is free and must be installed.
Power supply
The supply voltage for AstroPC PRO is 12V. All four power outputs are standard
5.5mm x 2.1mm and can be used to power the other astronomical equipment
simultaneously. The AstroPC PRO comes with four additional cables to connect
power to astronomical equipment.
Applications
By default, the AstroPC PRO system comes with a minimal set of free applications
and drivers that allows you to quickly connect and start working immediately with
SkyWatcher, Celestron, Meade, iOptron or Losmandy GoTo mounts, as well as
Canon, Nikon and ZWOASI cameras. Here is a complete list of free applications and
drivers installed in the AstroPC PRO system:
• Planetrium Cartes du Ciel ("CDC" , "SkyChart")
• ASCOM6.5SP1 platform
• EQmodfor Sky-Watcher and Orion MountsASCOMtelescope driver
• GS Server for Sky-Watcher and Orion Mounts ASCOMtelescope driver
• Sky-Watcher SynScanHand Controller ASCOMdriver
• SynScanAppASCOMtelescope driver
• Celestron ASCOM telescope driver
• Meade LX200 Classic and Autostar#495, and #497 ASCOMtelescope driver
• Meade LX200GPS and LX200R ASCOMtelescope driver
• iOptronCommander and ASCOM Driver Installer 7.0.0.0
• iOptron CEM60 and iEQ45 Pro ASCOMtelescope driver
• Losmandy Gemini ASCOM telescope driver
• FocusDreamPRO Focuser ASCOM driver

• FocusDream Focuser ASCOM driver
• GuideDream ST4 ASCOM driver
• N.I.N.A. astrophotography automation software
• PHD2 is telescope guiding software
•ZWO ASI Studio software
• ASCOM driver to support ZWO ASI Cameras, EAF, EFW and
USBST4.
• AWO ASI Camera Driver
Instructions for using these applications and drivers are available on the developer's websites.
In addition to these applications, you can install any other application easily and simply. The
best way to do this is to install the application from a USB flash drive.
Please take a look at the N.I.N.A.
N.I.N.A is an all-in-one system that can combine all your astronomical equipment and
processes into one easy-to-manage system!
The N.I.N.A application is used to automate the processes of controlling astronomical
equipment and astrophotography. N.I.N.A is an astronomical processor with great
capabilities. N.I.N.A. allows you to control the full range of astronomical equipment - from
mounts, cameras and focusers, to observatory domes.
A brief overview of the features of the N.I.N.A.
Application N.I.N.A. provides a full cycle of operations for astrophotographic observations:
• search for a subject in a convenient built-in atlas and framing
• turn on/off the equipment and align the polar axis
• pointing the telescope at the object and platesolving (pointing refinement)
• interaction with the guide program (PHD Guiding) to control guiding and dithering
and dome tracking of the telescope,
• meridian flip
• camera cooling, camera and filter wheel control while shooting an object
• automatic focusing and refocusing when external conditions change
• Parking of the telescope at the end of observations.

During the shooting of N.I.N.A. can recognize stars in images and track the quality of images
by the size of star images (HalfFluxRadius).
Basic setup
After installing the N.I.N.A., first of all, you should go to the “Settings” tab and set the most
important basic settings, such as telescope parameters (“equipment” tab) and observation site
coordinates (“General” tab), which can be taken from the configured program of the Cartes
du Ciel planetarium.
It is worth specifying the name of the profile instead of default, for example, the model of the
telescope and camera.
It is also worth setting the step size and focuser backlash in the "Autofocus" section. If the
telescope is installed in a dome, it is worth setting the basic dome settings in the "Dome" tab.
In the “Shooting” tab of the program settings, you can set the format, template and paths for
recording files, the parameters for meridian flip, the parameters of the visible image (so that it
is not too bright in the shooting window when auto image brightness stretching is enabled),
In the "Platesolve" tab, you can set the default platesolve program.

Hardware setup
The next step, after the basic setup of the program, you can configure the astrophoto
equipment in the main tab "Equipment".
First, set up the camera in the "Camera" tab (hardware drivers must be installed in advance).
Select the desired camera from the list of installed ones, configure its parameters in the
settings window (the “Settings” button to the right of the list of cameras) and you can turn it
on with the “Enable” button on the right.
Next, in a similar way, you need to select and connect all the installed equipment - the
focuser, the filter wheel, the telescope (mount). In the “Guide” section, you can connect to
the external autoguiding program PHD Guiding, which must be installed, enabled and
configured in advance. Interaction N.I.N.A. with PHD Guiding allows you to visually display
the guiding graph in the program's shooting window and stop / start guiding when dithering.
Sky atlas
To prepare a program of upcoming observations and quickly walk through the objects, a
handy sky atlas is built into the program.
Objects in the atlas can be selected by a number of characteristics (constellation, size,
brightness, minimum height above the horizon ...), or simply by catalog name.

In the Sky Atlas, to the right of each object, a graph of its visibility is displayed, taking into
account the dark time of the day for planning the time of its observations. On the left in the
atlas window, information about the current visibility conditions (moon phases, start and end
times of astronomical twilight) is always visible.
From the atlas window, you can quickly aim at the selected object, add it as a target for the
series, or transfer its coordinates to the crop window.
Shooting window
You can shoot frame-by-frame and control the continuous shooting process in the “Shooting”
window. On the Image tab, you see the results of the survey, the Guide panel with the guiding
schedule, and the Shooting panel with manual frame-by-frame controls. The Image panel has
tabs and buttons for manual and automatic focusing, platesolving. Here you can see in the
loop shooting mode how the telescope is pointed at the object, correct the aiming and
focusing, monitor the quality of the received images, and align the polar axis.

Useful Tools
In addition to impressive base features N.I.N.A., there are many additional tools that
greatly simplify the observation process.
These include the Polar Axis Alignment Assist plug-in, the Bakhtinov mask focus
assistant, a panel for quickly navigating through a list of bright stars to focus on, and a
powerful assistant to automatically capture optimal flat field shots.
The list of instruments will be updated as the program has, in addition to open source, an
API for creating plugins - third-party extensions. At the moment, 6 useful plugins have
already been created, including a polar axis alignment helper
(ThreePointPolarAlignment) and an event reporting tool for the GroundStation sequencer.
Connection and operation
To turn on the AstroPC PRO, you need to connect a 12V power supply to the power input
connector. After that, you need to press the power button and at the same time the green
LED of the AstroPC PRO panel should light up. The power on and boot process takes
approximately 30 seconds. After that AstroPC PRO is ready to work and now you can
connect to a remote working AstroPC PRO. To do this, you need to detect the AstroPC
WiFi network (SSID “AstroPC”), and connect to it from your device. Then, using the
Microsoft Remote Desktop client application, you can connect to the AstroPC remote
desktop using the following parameters: Computer name - AstroPC, UserName -
AstroPC, password - empty.
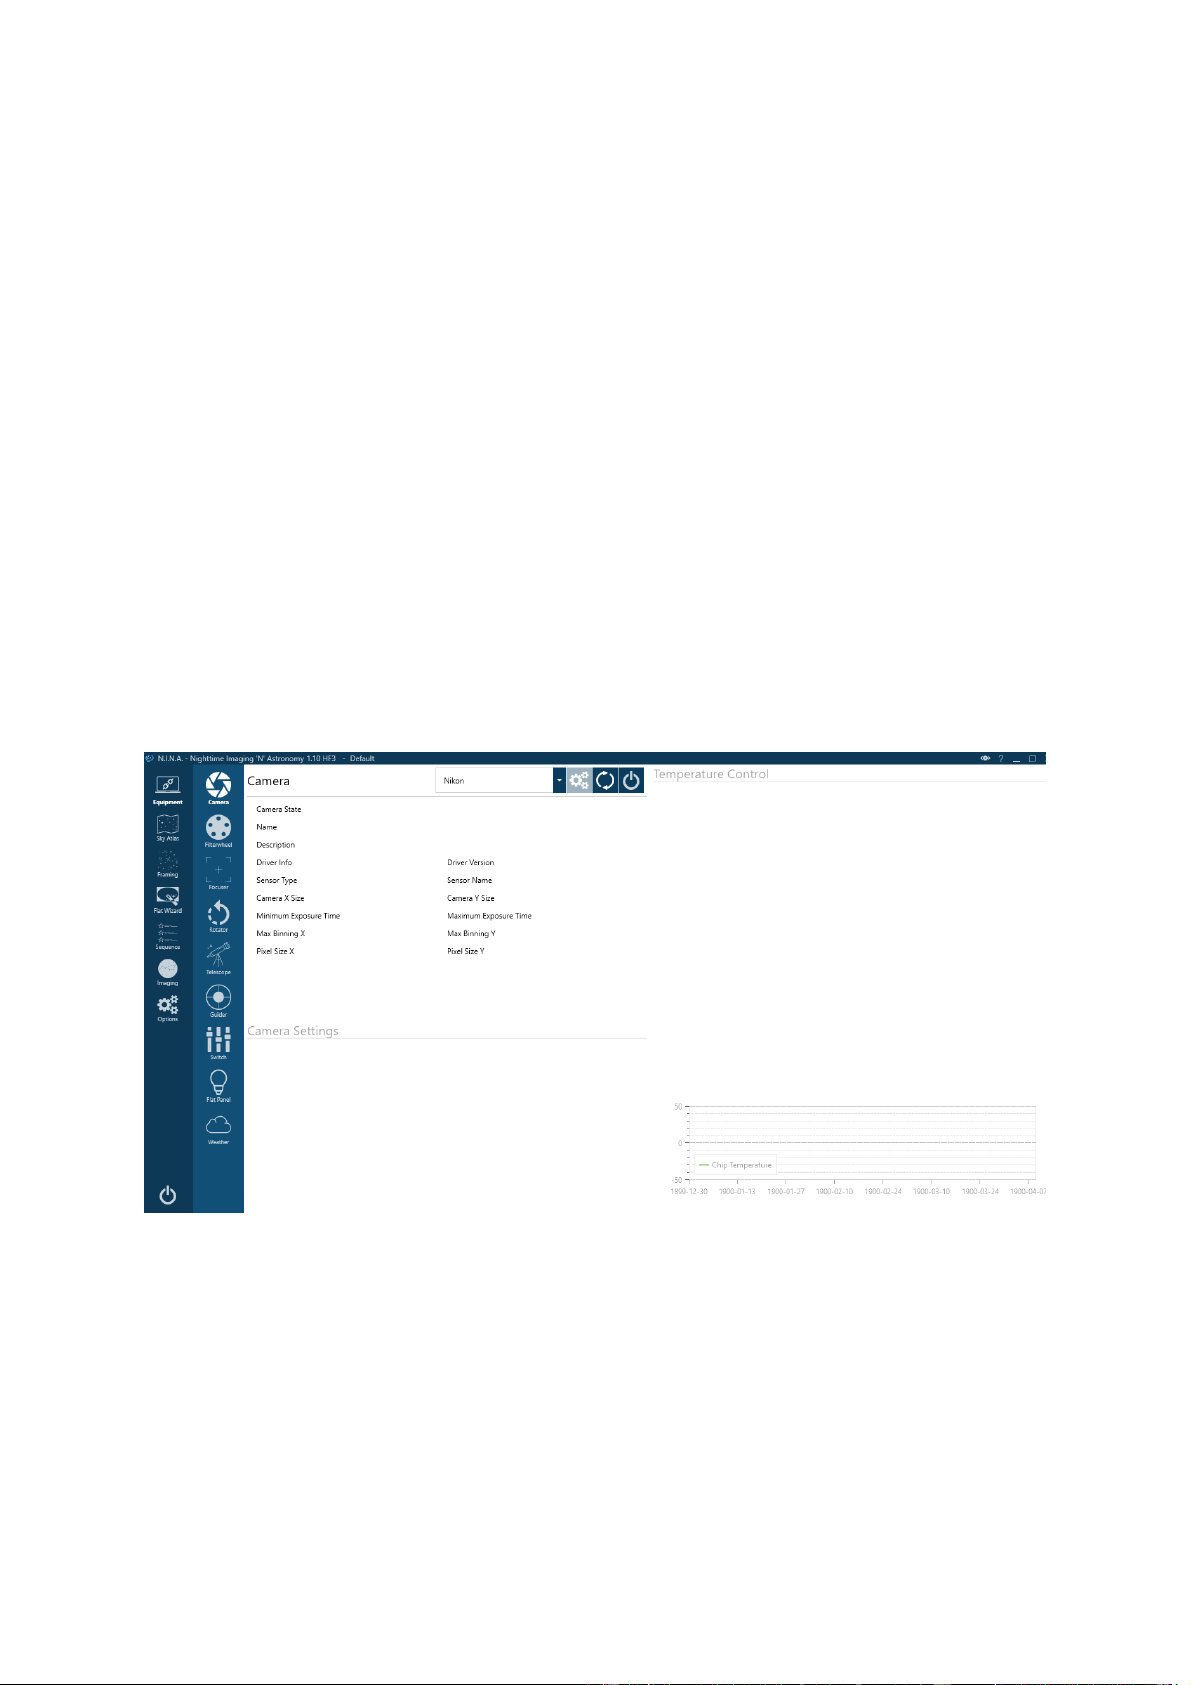
Below, for example, are screenshots of using AstroPC PRO with
SkyWatcher equatorial mount, Canon 600D SLR camera and ASI120MMMini
guide camera. The following applications and drivers are used to work with
this equipment:
• Planetrium Cartes du Ciel ("CDC" , "SkyChart")
• ASCOM 6.5SP1 platform
• EQmodfor Sky-Watcher and Orion Mounts ASCOMtelescope driver
• AWO ASI Camera Driver
• Canon EOS Utility Software
• PHD2 telescopeguiding software

• N.I.N.A. astrophotography automation software
An Android smartphone is used to connect to the remote desktop.

Specifications
Processor: Intel Celeron N5105 2.9GHz 4 Cores
Operating system: Windows 10 PRO
RAM: 8GB LPDDR4
HHD: SSD 128GB M.2 2280 NVMe
USB interfaces: USB 3.1 x 3 , USB Type C x 1
Wireless interfaces: Wi-Fi6 2.4G/5G dual-band, Bluetooth: 5.2
Video output: HDMI2.0
LAN: Ethernet 2.5G
Audio port: 3.5mm
Power connector: 12V 6A 5.5x2.1 mm x 4.
Dimension box (L x W x H): 150*79*20mm
www.astro-gadget.com
Table of contents
Popular Computer Hardware manuals by other brands

SilverStone
SilverStone ICEGEM 240P user manual

Panasonic
Panasonic CF-VEBC21Un operating instructions

Powerleap
Powerleap PL/586 133 installation guide

Akasa
Akasa Evo blue AK-922 installation instructions

Mellanox Technologies
Mellanox Technologies MCX312B-XCCS user manual

StarTech.com
StarTech.com PEX40GQSFDPI quick start guide