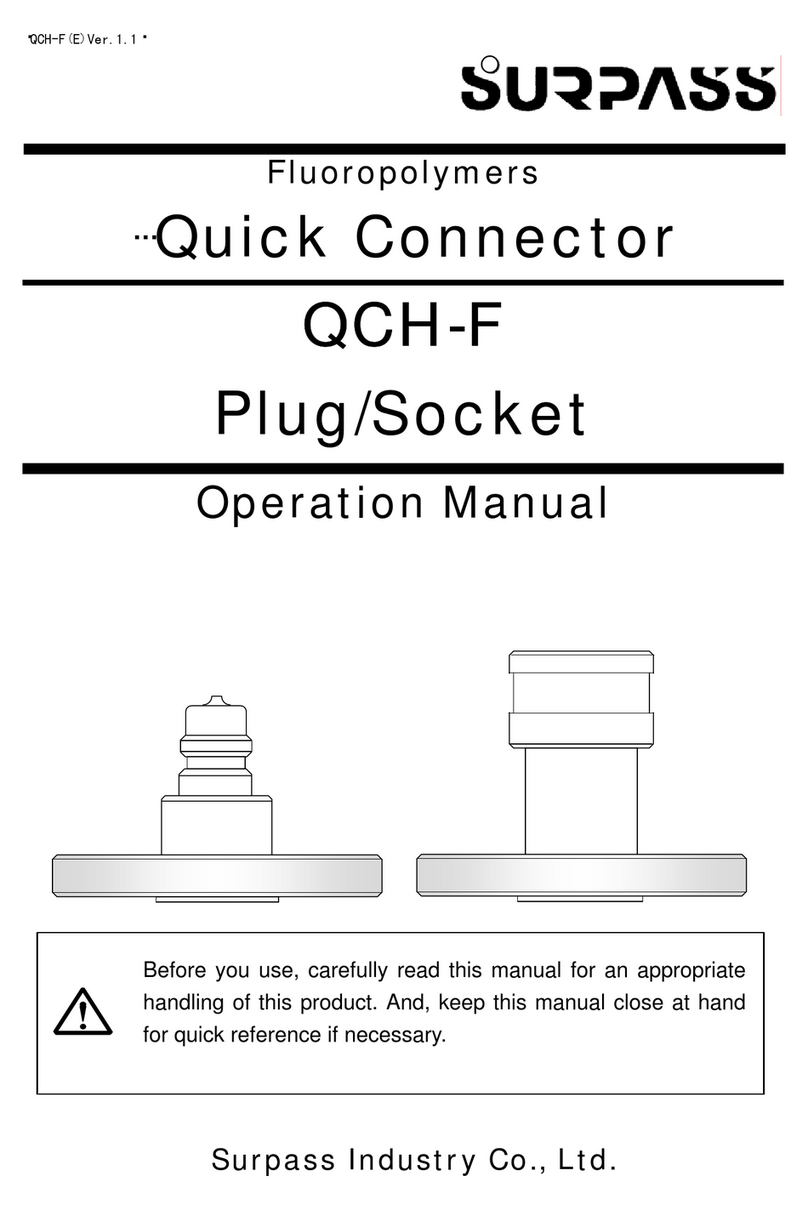
Agilent Technologies 85133E Service manual

Operating and Service Manual
Agilent Technologies
85133E/F/H
NMD-2.4 mm -f- to 2.4 mm
Flexible
Test Port Return Cables
Agilent Part Number: 85133-90017
Printed in USA
Print Date: February 2008
Edition 5
Supersedes: October 2007
© Copyright 1990, 2006 - 2008 Agilent Technologies, Inc. All rights reserved.

ii 85133E/F/H
Documentation Warranty
THE MATERIAL CONTAINED IN THIS DOCUMENT IS PROVIDED "AS IS," AND IS
SUBJECT TO BEING CHANGED, WITHOUT NOTICE, IN FUTURE EDITIONS.
FURTHER, TO THE MAXIMUM EXTENT PERMITTED BY APPLICABLE LAW,
AGILENT DISCLAIMS ALL WARRANTIES, EITHER EXPRESS OR IMPLIED WITH
REGARD TO THIS MANUAL AND ANY INFORMATION CONTAINED HEREIN,
INCLUDING BUT NOT LIMITED TO THE IMPLIED WARRANTIES OF
MERCHANTABILITY AND FITNESS FOR A PARTICULAR PURPOSE. AGILENT
SHALL NOT BE LIABLE FOR ERRORS OR FOR INCIDENTAL OR CONSEQUENTIAL
DAMAGES IN CONNECTION WITH THE FURNISHING, USE, OR PERFORMANCE
OF THIS DOCUMENT OR ANY INFORMATION CONTAINED HEREIN. SHOULD
AGILENT AND THE USER HAVE A SEPARATE WRITTEN AGREEMENT WITH
WARRANTY TERMS COVERING THE MATERIAL IN THIS DOCUMENT THAT
CONFLICT WITH THESE TERMS, THE WARRANTY TERMS IN THE SEPARATE
AGREEMENT WILL CONTROL.
DFARS/Restricted Rights Notice
If software is for use in the performance of a U.S. Government prime contract or
subcontract, Software is delivered and licensed as “Commercial computer software” as
defined in DFAR 252.227-7014 (June 1995), or as a “commercial item” as defined in FAR
2.101(a) or as “Restricted computer software” as defined in FAR 52.227-19 (June 1987) or
any equivalent agency regulation or contract clause. Use, duplication or disclosure of
Software is subject to Agilent Technologies’ standard commercial license terms, and
non-DOD Departments and Agencies of the U.S. Government will receive no greater than
Restricted Rights as defined in FAR 52.227-19(c)(1-2) (June 1987). U.S. Government users
will receive no greater than Limited Rights as defined in FAR 52.227-14 (June 1987) or
DFAR 252.227-7015 (b)(2) (November 1995), as applicable in any technical data.

85133E/F/H iii
CAUTION
The cable center conductor is fragile and will be seriously damaged if the
cable is stretched, bent too tightly, or bent too often. Cables break when the
bend radius is too small—less than 2.5” (6 cm) for 1.85 mm cables, and less
than 4” (10 cm) for 2.4 mm cables.
Use the following guidelines with cables:
• Never coil the cable too tightly.
• Never allow the cable to hang down from an instrument test port, or a
storage fixture, or while holding it.
• Never bend the cable an excessive number of times.

iv 85133E/F/H
Printing Copies of Documentation from the Web
To print copies of documentation from the Web, download the PDF file from the Agilent
web site:
•Gotohttp://www.agilent.com.
• Enter the document’s part number (located on the title page) in the Search box.
• Click Search.
• Click on the hyperlink for the document.
• Click the printer icon located in the tool bar.

Contents
85133E/F/H 1
1. General Information
The Cable Sets . . . . . . . . . . . . . . . . . . . . . . . . . . . . . . . . . . . . . . . . . . . . . . . . . . . . . . . . . . . . . . . . . . . . . .1-2
85133E . . . . . . . . . . . . . . . . . . . . . . . . . . . . . . . . . . . . . . . . . . . . . . . . . . . . . . . . . . . . . . . . . . . . . . . . . .1-2
85133F . . . . . . . . . . . . . . . . . . . . . . . . . . . . . . . . . . . . . . . . . . . . . . . . . . . . . . . . . . . . . . . . . . . . . . . . . .1-2
85133H . . . . . . . . . . . . . . . . . . . . . . . . . . . . . . . . . . . . . . . . . . . . . . . . . . . . . . . . . . . . . . . . . . . . . . . . . .1-2
Connector Designators . . . . . . . . . . . . . . . . . . . . . . . . . . . . . . . . . . . . . . . . . . . . . . . . . . . . . . . . . . . . . .1-2
Clarifying the Terminology of a Connector Interface . . . . . . . . . . . . . . . . . . . . . . . . . . . . . . . . . . . . . .1-3
Incoming Inspection. . . . . . . . . . . . . . . . . . . . . . . . . . . . . . . . . . . . . . . . . . . . . . . . . . . . . . . . . . . . . . . . . .1-3
Preventive Maintenance . . . . . . . . . . . . . . . . . . . . . . . . . . . . . . . . . . . . . . . . . . . . . . . . . . . . . . . . . . . . . .1-4
Replaceable Parts. . . . . . . . . . . . . . . . . . . . . . . . . . . . . . . . . . . . . . . . . . . . . . . . . . . . . . . . . . . . . . . . . . . .1-4
2. Specifications
Environmental Requirements . . . . . . . . . . . . . . . . . . . . . . . . . . . . . . . . . . . . . . . . . . . . . . . . . . . . . . . . .2-2
Electrical Specifications. . . . . . . . . . . . . . . . . . . . . . . . . . . . . . . . . . . . . . . . . . . . . . . . . . . . . . . . . . . . . . .2-2
Supplemental Characteristics. . . . . . . . . . . . . . . . . . . . . . . . . . . . . . . . . . . . . . . . . . . . . . . . . . . . . . . . . .2-3
Center Conductor Pin Depth . . . . . . . . . . . . . . . . . . . . . . . . . . . . . . . . . . . . . . . . . . . . . . . . . . . . . . . . .2-3
3. Use, Maintenance, and Care of the Cables
Electrostatic Discharge . . . . . . . . . . . . . . . . . . . . . . . . . . . . . . . . . . . . . . . . . . . . . . . . . . . . . . . . . . . . . . .3-2
Visual Inspection . . . . . . . . . . . . . . . . . . . . . . . . . . . . . . . . . . . . . . . . . . . . . . . . . . . . . . . . . . . . . . . . . . . .3-3
Look for Obvious Defects and Damage First. . . . . . . . . . . . . . . . . . . . . . . . . . . . . . . . . . . . . . . . . . . . .3-3
Inspect the Mating Plane Surfaces . . . . . . . . . . . . . . . . . . . . . . . . . . . . . . . . . . . . . . . . . . . . . . . . . . . .3-3
Precision Slotless Connectors (2.4 mm) . . . . . . . . . . . . . . . . . . . . . . . . . . . . . . . . . . . . . . . . . . . . . . . . . .3-4
Cleaning Connectors . . . . . . . . . . . . . . . . . . . . . . . . . . . . . . . . . . . . . . . . . . . . . . . . . . . . . . . . . . . . . . . . .3-5
Gaging Connectors. . . . . . . . . . . . . . . . . . . . . . . . . . . . . . . . . . . . . . . . . . . . . . . . . . . . . . . . . . . . . . . . . . .3-7
Connector Gage Accuracy. . . . . . . . . . . . . . . . . . . . . . . . . . . . . . . . . . . . . . . . . . . . . . . . . . . . . . . . . . . .3-7
When to Gage Connectors . . . . . . . . . . . . . . . . . . . . . . . . . . . . . . . . . . . . . . . . . . . . . . . . . . . . . . . . . . .3-7
Gaging Procedures . . . . . . . . . . . . . . . . . . . . . . . . . . . . . . . . . . . . . . . . . . . . . . . . . . . . . . . . . . . . . . . . .3-8
Making Connections . . . . . . . . . . . . . . . . . . . . . . . . . . . . . . . . . . . . . . . . . . . . . . . . . . . . . . . . . . . . . . . .3-10
How to Make a Connection. . . . . . . . . . . . . . . . . . . . . . . . . . . . . . . . . . . . . . . . . . . . . . . . . . . . . . . . . .3-10
How to Separate a Connection. . . . . . . . . . . . . . . . . . . . . . . . . . . . . . . . . . . . . . . . . . . . . . . . . . . . . . .3-12
Handling and Storage . . . . . . . . . . . . . . . . . . . . . . . . . . . . . . . . . . . . . . . . . . . . . . . . . . . . . . . . . . . . . . .3-12
Avoiding Cable Movement . . . . . . . . . . . . . . . . . . . . . . . . . . . . . . . . . . . . . . . . . . . . . . . . . . . . . . . . . .3-13
4. Replaceable Parts
Ordering Replaceable Parts. . . . . . . . . . . . . . . . . . . . . . . . . . . . . . . . . . . . . . . . . . . . . . . . . . . . . . . . . . . .4-2
Ordering One Cable in a Cable Set . . . . . . . . . . . . . . . . . . . . . . . . . . . . . . . . . . . . . . . . . . . . . . . . . . . .4-2
Returning a Cable or Cable Set to Agilent . . . . . . . . . . . . . . . . . . . . . . . . . . . . . . . . . . . . . . . . . . . . . . .4-3
Contacting Agilent . . . . . . . . . . . . . . . . . . . . . . . . . . . . . . . . . . . . . . . . . . . . . . . . . . . . . . . . . . . . . . . . .4-3
Information About Network Analyzers. . . . . . . . . . . . . . . . . . . . . . . . . . . . . . . . . . . . . . . . . . . . . . . . .4-3
A. Connector Care Quick Reference
Principles of Microwave Connector Care . . . . . . . . . . . . . . . . . . . . . . . . . . . . . . . . . . . . . . . . . . . . . . . . .A-2

Contents
85133E/F/H
2

85133E/F/H 1-1
1General Information

1-2 85133E/F/H
General Information
The Cable Sets
The Cable Sets
The Agilent 85133E/F/H flexible cable sets are designed for use with Agilent network
analyzers that have male NMD-2.4 mm test ports.
85133E
The 85133E set contains a single cable. Use it when a DUT is connected, with the
appropriate adapter, directly to the test set test port. See Figure 1-1.
85133F
The 85133F set contains two cables. Each is shorter than the 85133E cable. Use the
85133F cables when a DUT is connected between cable ends. See Figure 1-1.
Figure 1-1 Cable Configurations
85133H
The 85133H set contains a single cable – the -f- to -m- cable from the 85133F cable set. It is
shorter than the 85133E single cable. See Figure 1-1.
Connector Designators
NMD Connectors
NMD denotes a connector that has larger than standard coupling threads for greater
stability. NMD connectors are used on test cables, test ports, test port adapters, and test
port cables.
Female slotted NMD test port connectors are used on the test set end of adapters and
cables, and cannot be connected to standard male connectors.
Male NMD connectors are used on test sets (as test ports), and on the DUT end of adapters
and cables. Male connectors have both the larger threads (for use with test port adapters)
and standard threads (for direct coupling to a DUT).

85133E/F/H 1-3
General Information
Incoming Inspection
PSC Connectors
PSC denotes a precision slotless connector. Precision slotless connectors are metrology
grade connectors that have better electrical performance, better repeatability, and are
more durable than slotted connectors.
Clarifying the Terminology of a Connector Interface
In this document and in the prompts of the PNA calibration wizard, the gender of cable
connectors and adapters is referred to in terms of the center conductor. For example, a
connector or device designated as 1.85 mm –f– has a 1.85 mm female center conductor.
8510-series, 872x, and 875x ONLY: In contrast, during a measurement calibration, the
network analyzer softkey menus label a 1.85 mm calibration device with reference to the
sex of the analyzer’s test port connector—not the calibration device connector. For
example, the label SHORT(F) refers to the short that is to be connected to the female test
port. This will be a male short from the calibration kit.
A connector gage is referred to in terms of the connector that it measures. For instance, a
male connector gage has a female connector on the gage so that it can measure male
devices.
Incoming Inspection
Verify that the shipment is complete by referring to Table 4-1 on page 4-4.
If the case or any device appears damaged, or if the shipment is incomplete, notify Agilent.
See “Contacting Agilent” on page 4-3. Agilent will arrange for repair or replacement of
incomplete or damaged shipments without waiting for a settlement from the
transportation company.
When you send the cable set to Agilent, include the following information:
• your company name and address
• the name of a technical contact person within your company, and the person’s complete
phone number
• the model number and serial number of the cable set
Table 1-1 Clarifying the Sex of Connectors: Examples
Terminology Meaning
Short –f– Female short (female center conductor)
Short (f) Male short (male center conductor) to be connected to female port

1-4 85133E/F/H
General Information
Preventive Maintenance
• the part number and serial number of the device
• the type of service required
•adetailed description of the problem
Preventive Maintenance
The best techniques for maintaining the integrity of the cables include:
• routine visual inspection
• cleaning
• proper gaging
• proper connection techniques
• proper storage
All of the above are described in Chapter 3. Failure to detect and remove dirt or metallic
particles on a mating plane surface can degrade repeatability and accuracy and can
damage any connector mated to it. Improper connections, resulting from center conductor
values being out of limits (see Table 2 on page 2-4), or from bad connections, can also
damage cable connectors.
Replaceable Parts
See Table 4-1 on page 4-4 for a complete list of cable set contents and their associated part
numbers (you can order a single cable rather than the entire cable set), and for
recommended items not included with the cable set. Refer to “Contacting Agilent” on
page 4-3 for information about communicating with Agilent.

85133E/F/H 2-1
2Specifications

2-2 85133E/F/H
Specifications
Environmental Requirements
Electrical Specifications
Table 2-1 Environmental Requirements
Parameter Limits
Operating temperature +20 °C to +26 °C (+68 °F to +79 °F)
Storage temperature −40 °C to +75 °C (−40 °F to +167 °F)
Altitude
Operation < 4,500 meters (≈15,000 feet)
Storage < 4,500 meters (≈15,000 feet)
Relative humidity Always non-condensing
Operation Up to 80% at 30°C
Storage Up to 95% at 40°C
Table 2-2 Electrical Specifications
Cable SWR Return Loss
(dB) Insertion
Loss (dB)a
a. f = frequency in GHz.
Frequency Range
(GHz)
85133E ≤1.44 ≥15 ≤0.1 + 0.57√f
+ 0.02fDC to 50
85133F ≤0.1 + 0.38√f
+ 0.017f
85133H

85133E/F/H 2-3
Specifications
Supplemental Characteristics
Table 2-3 lists supplemental performance characteristics. These are not specifications, but
are intended to provide additional information useful to your application. Supplemental
characteristics are typical (but not warranted) performance parameters.
Center Conductor Pin Depth
Center conductor pin depth is the distance the center conductor mating plane differs from
being flush with the outer conductor mating plane. See Figure 2-1 The pin depth of a
center conductor can be in one of two states: either protruding or recessed.
Protrusion is the condition in which the center conductor extends beyond the outer
conductor mating plane. This condition will indicate a positive value on the connector gage.
Recession is the condition in which the center conductor is set back from the outer
conductor mating plane. This condition will indicate a negative value on the connector
gage.
Table 2-3 Supplemental Characteristics (1 of 3)
Cable Cable Length Approximate
Electrical Length Magnitude and
Phase Stability
With a 90°
Benda,b
a. (f) = frequency in GHz.
b. With a 90°, 2.5-inch bend radius.
Random Use
Magnitude and
Phase Stabilitya,c
c. After three 90°, 2.5-inch bend radius/straighten cycles.
Minimum
Recommended
Bend Radius
cm in m ft cm in
85133E 97.2 38.25 1.125 3.690 <0.15 dB Change
<0.17°(f) + 0.5°
<0.07 dB Change
<0.09°(f) + 0.5°
6.352 2.5
85133F 62.9 24.75 0.7376 2.418 <0.08 dB Change
<0.08°(f) + 0.5°
<0.04 dB Change
<0.04°(f) + 0.5°
85133H
Table 2-3 Supplemental Characteristics (2 of 3)
Cable Set Number
of Cables Test Set End Connector Type DUT End Connector Type
85133E 1 NMD-2.4 mm -f- Slotted PSC-2.4 mm -f- Slotless
85133F 2 NMD-2.4 mm -f- Slotted NMD-2.4 mm -m- and
PSC-2.4 mm -f- Slotless
85133H 1 NMD-2.4 mm -f- Slotted NMD-2.4 mm -m-

2-4 85133E/F/H
Specifications
Supplemental Characteristics
Figure 2-1 Connector Center-Conductor Pin Depth
Table 2-3 Supplemental Characteristics (3 of 3)
Center-Conductor Pin Depth
Precision
Connector Allowable Recessiona
a. Center conductor shoulder behind outer conductor mating plane.
Allowable Protrusion
mm in mm in
NMD-2.4 mm -f- -0.000 to -0.056 -0.0000 to -0.0022 0.0000 0.0000
NMD-2.4 mm -m- -0.0025 to -0.0254 -0.0001 to -0.001
PSC-2.4 mm -f- -0.0025 to -0.0254 -0.0001 to -0.001

85133E/F/H 3-1
3Use, Maintenance, and Care of the
Cables

3-2 85133E/F/H
Use, Maintenance, and Care of the Cables
Electrostatic Discharge
Protection against ESD (electrostatic discharge) is essential while connecting, inspecting,
or cleaning connectors attached to a static-sensitive circuit (such as those found in test
sets).
Static electricity can build up on your body and can easily damage sensitive internal
circuit elements when discharged. Static discharges too small to be felt can cause
permanent damage. Devices such as calibration components and devices under test
(DUTs), can also carry an electrostatic charge. To prevent damage to the test set,
components, and devices:
•always wear a grounded wrist strap having a 1 MΩresistor in series with it when
handling components and devices or when making connections to the test set.
•always use a grounded, conductive table mat while making connections.
•always wear a heel strap when working in an area with a conductive floor. If you are
uncertain about the conductivity of your floor, wear a heel strap.
•always ground yourself before you clean, inspect, or make a connection to a
static-sensitive device or test port. You can, for example, grasp the grounded outer shell
of the test port or cable connector briefly.
•always ground the center conductor of a test cable before making a connection to the
analyzer test port or other static-sensitive device. This can be done as follows:
1. Connect a short (from your calibration kit) to one end of the cable to short the center
conductor to the outer conductor.
2. While wearing a grounded wrist strap, grasp the outer shell of the cable connector.
3. Connect the other end of the cable to the test port.
4. Remove the short from the cable.
Refer to Chapter 4 for part numbers and instructions for ordering ESD protection devices.
Figure 3-1. ESD Protection Setup

85133E/F/H 3-3
Use, Maintenance, and Care of the Cables
Visual Inspection
Visual Inspection
Visual inspection and, if necessary, cleaning should be done every time a connection is
made. Metal particles from the connector threads may fall onto the mating plane surface of
the connector when it is disconnected. One connection made with a dirty or damaged
connector can damage both connectors beyond repair.
Magnification is helpful when inspecting connectors, but it is not required and may
actually be misleading. Defects and damage that cannot be seen without magnification
generally have no effect on electrical or mechanical performance. Magnification is of great
use in analyzing the nature and cause of the damage and in cleaning connectors, but it is
not required for inspection. Use the following guidelines when evaluating the integrity of a
connector.
Look for Obvious Defects and Damage First
Examine the connector first for obvious defects and damage: badly worn plating on the
connector interface, deformed threads, or bent, broken, or misaligned center conductors.
Connector nuts should move smoothly and be free of burrs, loose metal particles, and
rough spots.
What Causes Connector Wear?
Connector wear is caused by connecting and disconnecting the cable. The more use a
connector gets, the faster it wears and degrades. The wear is greatly accelerated when
connectors are not kept clean, or are connected incorrectly.
Connector wear eventually degrades performance of the cable. Replace cables with worn
connectors.
The test port connectors on the network analyzer test set may have many connections each
day, and are therefore also subject to wear. It is recommended that an adapter be used as a
test port saver to minimize the wear on the test set’s test port connectors.
Inspect the Mating Plane Surfaces
Flat contact between the connectors at all points on their mating plane surfaces is required
for a good connection. Look especially for deep scratches or dents, and for dirt and metal
particles on the connector mating plane surfaces. Also look for signs of damage due to
excessive or uneven wear or misalignment.
Light burnishing of the mating plane surfaces is normal, and is evident as light scratches
or shallow circular marks distributed more or less uniformly over the mating plane
surface. Other small defects and cosmetic imperfections are also normal. None of these
affect electrical or mechanical performance.
If a connector shows deep scratches or dents, particles clinging to the mating plane
surfaces, or uneven wear, clean and inspect it again. Cables with damaged connectors
should be repaired or discarded. Determine the cause of damage before connecting a new,
undamaged connector in the same configuration.

3-4 85133E/F/H
Use, Maintenance, and Care of the Cables
Precision Slotless Connectors (2.4 mm)
The female 2.4 mm connectors in the cable sets are metrology-grade, precision slotless
connectors (PSC). Precision slotless connectors are used to improve accuracy. A
characteristic of metrology-grade connectors is directly traceability to national
measurement standards through their well-defined mechanical dimensions. With PSCs on
test ports and standards, the accuracy achieved when measuring at 50 dB return loss
levels is comparable to using conventional slotted connectors measuring devices having
only 30 dB return loss. This represents an accuracy improvement of about 10 times.
Conventional female center conductors are slotted and, when mated, are flared by the male
pin. Because physical dimensions determine connector impedance, this change in physical
dimension affects electrical performance, making it very difficult to perform precision
measurements with conventional slotted connectors.
The precision slotless connector was developed to eliminate this problem. The PSC has a
center conductor with a solid cylindrical shell, the outside diameter of which does not
change when mated. Instead, the center conductor has an internal contact that flexes to
accept the male pin.

85133E/F/H 3-5
Use, Maintenance, and Care of the Cables
Cleaning Connectors
Cleaning Connectors
Clean connectors are essential for ensuring the integrity of RF and microwave coaxial
connections.
1. Use Compressed Air or Nitrogen
WARNING
Always use protective eyewear when using compressed air or
nitrogen.
Use compressed air (or nitrogen) to loosen particles on the connector mating plane
surfaces.
You can use any source of clean, dry, low-pressure compressed air or nitrogen that has
an effective oil-vapor filter and liquid condensation trap placed just before the outlet
hose.
Ground the hose nozzle to prevent electrostatic discharge, and set the air pressure to
less than 414 kPa (60 psi) to control the velocity of the air stream. High-velocity
streams of compressed air can cause electrostaticeffects when directed into a connector.
These electrostatic effects can damage the device. Refer to “Electrostatic Discharge”
earlier in this chapter for additional information.
2. Clean the Connector Threads
WARNING
Keep isopropyl alcohol away from heat, sparks, and flame. Store in a
tightly closed container. It is extremely flammable. In case of fire, use
alcohol foam, dry chemical, or carbon dioxide; water may be
ineffective.
Use isopropyl alcohol with adequate ventilation and avoid contact with eyes,
skin, and clothing. It causes skin irritation, may cause eye damage, and is
harmful if swallowed or inhaled. It may be harmful if absorbed through the skin.
Wash thoroughly after handling.
In case of spill, soak up with sand or earth. Flush spill area with water.
Dispose of isopropyl alcohol in accordance with all applicable federal,
state, and local environmental regulations.
Use a lint-free swab or cleaning cloth moistened with isopropyl alcohol to remove any
dirt or stubborn contaminants on a connector that cannot be removed with compressed
air or nitrogen. Refer to Table 4-1 on page 4-4 for part numbers for isopropyl alcohol and
cleaning swabs.
a. Apply a small amount of isopropyl alcohol to a lint-free cleaning swab.
b. Clean the connector threads.
c. Let the alcohol evaporate, then blow the threads dry with a gentle stream of clean,
low-pressure compressed air or nitrogen. Always completely dry a connector before

3-6 85133E/F/H
Use, Maintenance, and Care of the Cables
Cleaning Connectors
you reassemble or use it.
3. Clean the Mating Plane Surfaces
a. Apply a small amount of isopropyl alcohol to a lint-free cleaning swab.
b. Clean the center and outer conductor mating plane surfaces. Refer to Figure 2-1 on
page 2-4. When cleaning a female connector, avoid snagging the swab on the center
conductor contact fingers by using short strokes.
c. Let the alcohol evaporate, then blow the connector dry with a gentle stream of clean,
low-pressure compressed air or nitrogen. Always completely dry a connector before
you reassemble or use it.
4. Reinspect
Inspect the connector again to make sure that no particles or residue are present.
This manual suits for next models
2
Table of contents
Other Agilent Technologies Cables And Connectors manuals

Agilent Technologies
Agilent Technologies 34398A RS-232 User manual

Agilent Technologies
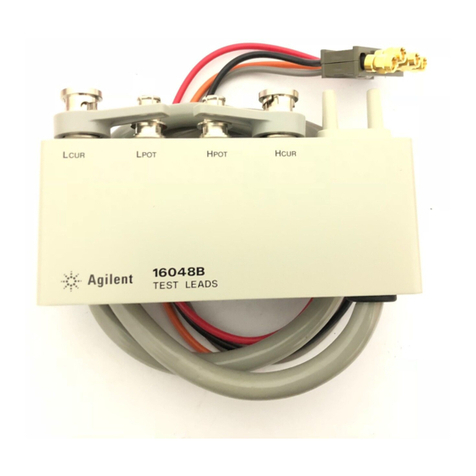
Agilent Technologies 16048B Quick start guide

Agilent Technologies
Agilent Technologies E5346A Installation and operation manual

Agilent Technologies
Agilent Technologies N6314A User manual

Agilent Technologies
Agilent Technologies G3180B Operating instructions

Agilent Technologies
Agilent Technologies N9039A Quick start guide