2
Contents
3 What’s in the box?
4 AGR520 series product overview – Front
AGR520 series product overview – Rear
5 AGR720 series product overview – Front
AGR720 series product overview – Rear
6 Quick start & installation guide.
11 Setting up your vehicle – Truck,
Motorhome & Caravan
13 Detailed operating instructions
14 Navigation map view explained
15 Junction view explained
Truck and Motorhome & Caravan screen
graphics
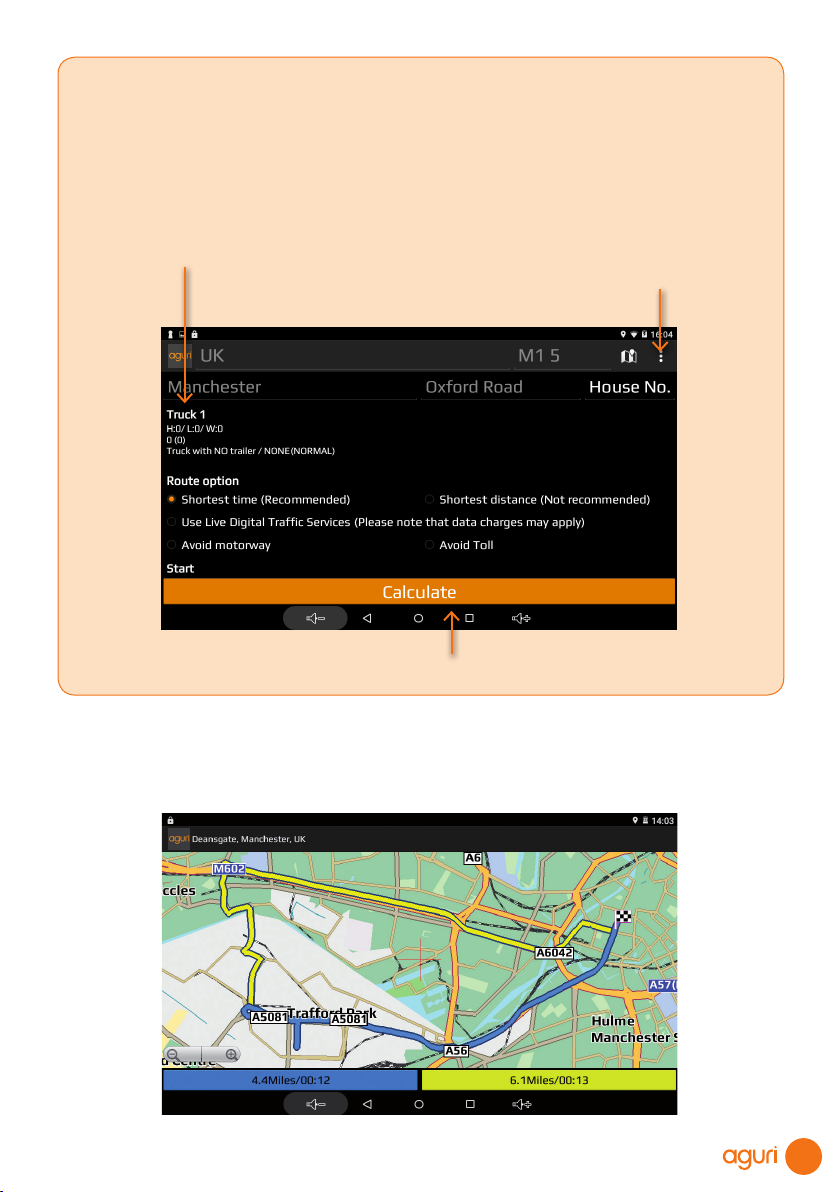
16 Calculating a route
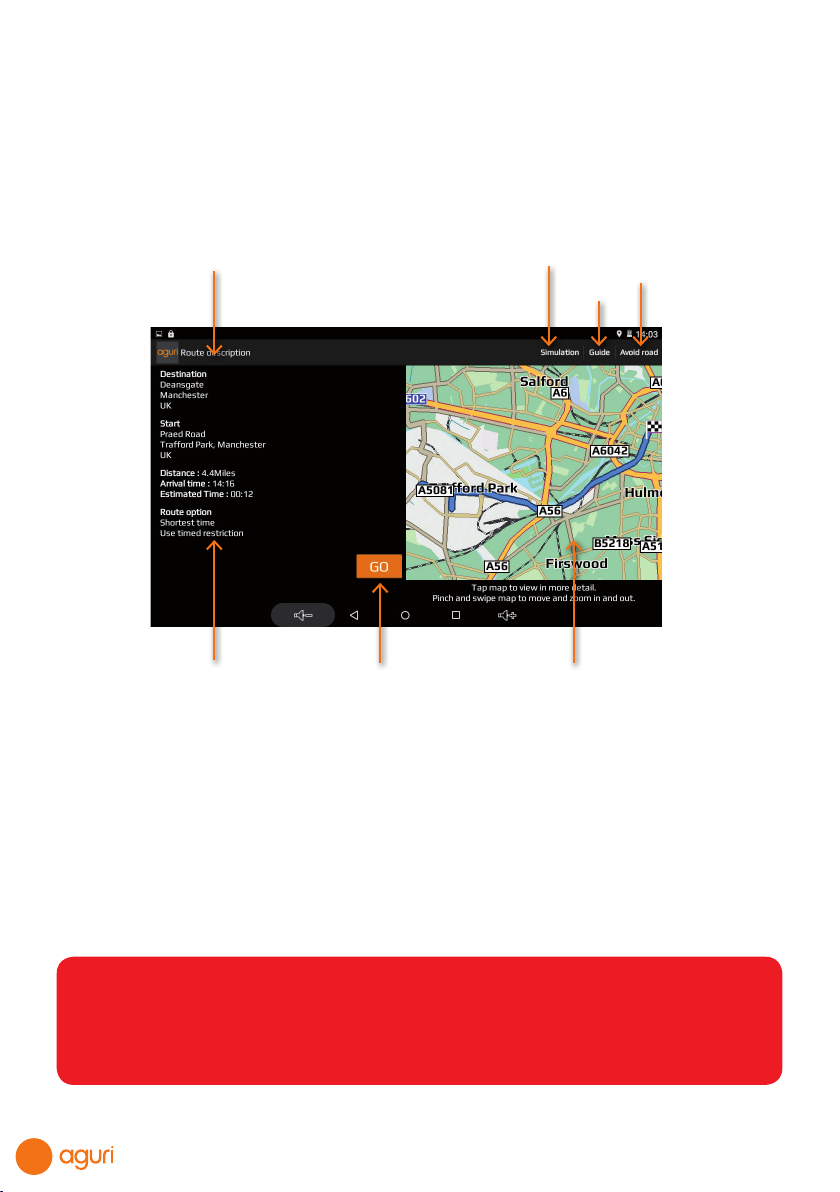
17 Summary screen explained
18 Setting ‘Home’ and ‘Ofce’ addresses
Last journey & Clear route
19 Multi-stop route generator
22 Using and routing by Favourites
23 Using Recent routes
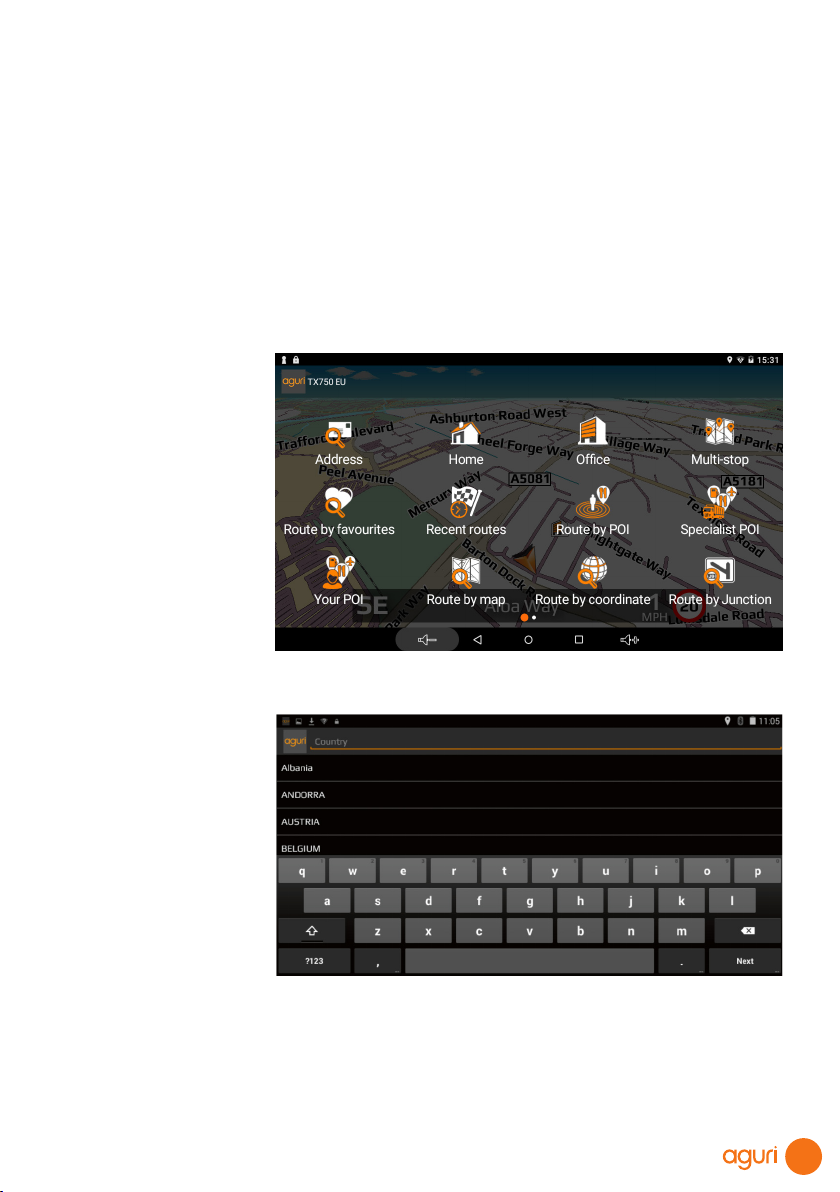
24 Route by Points of interest (POI)
26 Route to Specialist POIs including The
Camping & Caravanning Club & The
Caravan Club sites
28 Route using map
Route to junction
29 Route by co-ordinate
Recalculate route
30 Environmental settings
31 Setting up your vehicle – Motorhome &
Caravan Edition
32 Setting up your vehicle – Truck Edition
33 Tunnel category settings – Truck Edition
34 Brightness
Volume
Language & voice settings
35 Select map view - 2D or 3D
MPH/KMH – select speed/distance unit
type
Location Icon - select an icon to
represent your vehicle
Lane view
Speed trap alert settings
Route alarm
Alert audio
36 E Speed - User speed alert
Tight bend alert – Truck, Motorhome &
Caravan
Journey history
Report mobile speed traps
Live Digital Trafc service
Show POI icons on map
37 GPS status
Live Digital Trafc
Manage software – Check unit version
details
38 Adjust ETA
39 Mini-drop down menu
39 DVR dash cam operation AGR720
44 DVR dash cam operation AGR520
45 Connect to and Browsing the internet
46 Updating the mapping and Speedshield
speed trap database
47 Registering for Google Play and
downloading ‘Apps’
48 Digital Live Trafc services & Mobile
speed trap reporting
49 Tethering your device with an Android
Smart Phone
50 Tethering your device with an iPhone
51 Using Live Digital Trafc services
Using Mobile speed trap sharing
52 Add your own POIs to AGR720
55 Disposal of Old Electrical & Electronic
Equipment
Service under warranty