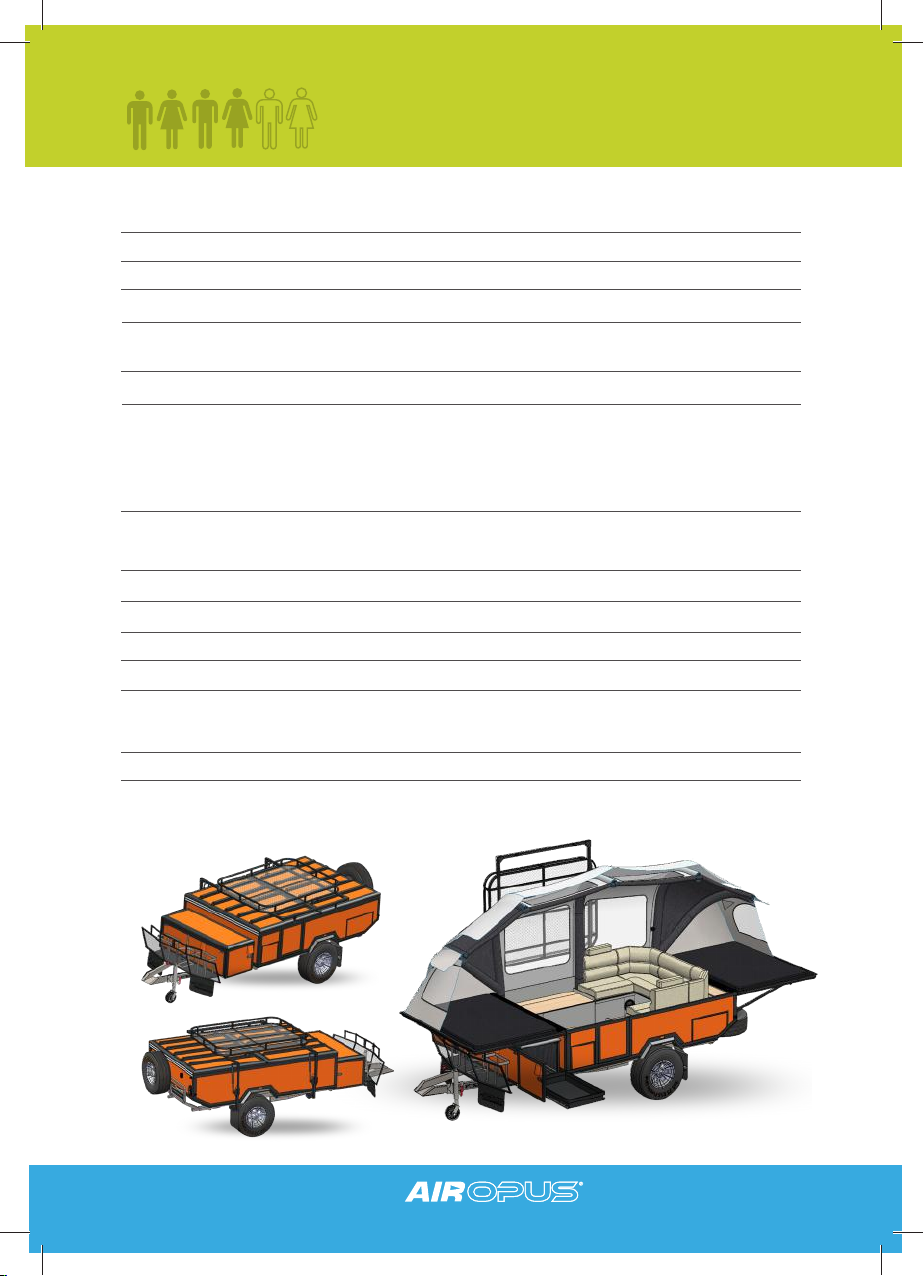
SPECIFICATIONS - OP4
4opuscamper.com.au
TENT INFLATION TECHNOLOGY
Colour Orange, Blue, Grey, Black
Body Work Baked enamel finish
Box Material Main body aluminium frame & composite panel exterior,
with galvanlized steel chassis and draw bar
Dimension (Lid Closed) 5100 (5600 inc. spare wheel) x 2100 x 1450mm
Dimension (Lid Open) 6140 x 2100 x 3200mm
Ground clearance 310mm
Ride Height 1540mm
Chassis 500 x 1870 x 720mm
Drawbar 2600 x 1390 x 100mm
Bed Size 1260 x 1830m x2
Features
Coupling Articulating Poly block
Suspension Independent Coil Spring Suspension
Shock Absorber Quad Shock: Dual Gas Shock Absorber per side
Kitchen Fully Stainless Steel Kitchen with 4 burner stove
& sink with electric tap with slide out extension
Water System 2 x Electric Water Pump
Water Tank 2 x 80L Stainless Steel Tank
Water Tank Guard 1.5mm checker plate
Fridge Tray 880 x 540 x 450mm
Stabiliser Legs 4 x Drop down lockable
Jockey Wheel Adjustable height swing up
Jerry Can Holder 2 x 20L
Gas Bottle Holder Twin 9kg adjustable gas bottle holders
Stone Guard Front Surface coated with anti chip deadener
Wheels & Tyres 15” Alloy Wheels 235/75R15 All Terrain Tyres
Spare Wheel 15” Alloy 235/75R15 All Terrain Tyre
Brake System 12” Electric brake with hand brake and electric break
away switch
Lights LED
Portable Toilet Standard
External Shower Water supplied from tank