Airphx CID 75k Troubleshooting guide

1 | Page
AIRPHX
CID 75k User & Installation Guide
Rev 1.7 ● February 22, 2021

2 | Page
Please note: Coverage capacity can vary by location based on a number of
factors including facility layout, air circulation and bio-burden. Contact an
AIRPHX representative to discuss capacity at your particular location.
1 Pre-Installation Check List
Please check the shipping box that your AIRPHX CID 75k arrived in for damage. If
any damage is found, please contact your AIRPHX representative prior to
installation 855-424-7749 (855-4 AIRPHX).
Included in the box
oCID 75k
oEasy mount wall bracket (preinstalled on the unit)
oMounting hardware
oAC power cord
oCID 75k Quick Reference Guide
oAIRPHX 7 Day Timer User Guide
oAnnual supply of filters
oWelcome card
oComplete Indoor Disinfection decal
Choose a central mounting location that has good, continuous airflow but is not too close
to any strong air supply or return vent. The mounting location should be at least four feet
from any adjacent wall and at least twelve inches from the ceiling.
Check to see if an existing 120-volt outlet is nearby to the location. If not, one may need
to be added.
Do not install the unit near or within areas with high humidity levels.
Specifications
Capacity
75,000 ft3
Frequency 50/60 Hz
Nominal Power (W) 52
Nominal Power (V) 120VAC
Nominal Power (A) 0.5
Weight 9 lbs.
Height 11 in
Width 16 in
Depth 5.5 in
CFM 40

3 | Page
Contents
1Pre-Installation Check List ..................................................................................2
2Notice .................................................................................................................5
3 Notice cont. ........................................................................................................6
4Modes of Operation ...........................................................................................7
Run Mode:..............................................................................................................7
Run Mode switch settings: .................................................................................7
7 Day Timer Mode:.................................................................................................7
7 Day Timer switch settings:...............................................................................7
5Modes of Operation cont. ..................................................................................8
Standby Mode: .......................................................................................................8
Conditions that can cause the CID 75k to go into standby: ...................................8
6 Operations & Controls........................................................................................9
On/Off Switch:........................................................................................................9
Active Indicator: .....................................................................................................9
7 Day Timer Switch:................................................................................................9
Filter Indicator/Switch:...........................................................................................9
Filter Note:..............................................................................................................9
7Operations & Controls cont............................................................................. 10
Service Indicator/Switch:..................................................................................... 10
Fault Indicator/Switch: ........................................................................................ 10
Example of clearing a fault: ................................................................................. 10
System faults examples: ...................................................................................... 10
8Installation Overview....................................................................................... 11
The mounting kit contains:.................................................................................. 11
9Installation Overview cont............................................................................... 12
Provided Parts: .................................................................................................... 12
Recommended tools: .......................................................................................... 12

4 | Page
10 Installation Procedure ..................................................................................... 13
Step by Step Procedure:...................................................................................... 13
LCD Display: ......................................................................................................... 13
11 Installation Procedure Fig 1............................................................................. 14
12 Installation Procedure Fig 2............................................................................. 15
13 Filter Replacement and Reset Procedure........................................................ 16
Filter Location...................................................................................................... 16
14 Filter Replacement and Reset Procedure cont................................................ 17
15 Filter Replacement and Reset Procedure cont................................................ 18
16 Plasma Chamber Replacement and Reset Procedure..................................... 19
17 Plasma Chamber Replacement Process cont. ................................................. 20
18 Plasma Chamber Replacement Process cont. ................................................. 21
19 Plasma Chamber Replacement Process cont. ................................................. 22
20 Q&A ................................................................................................................. 23
21 Q&A cont. ........................................................................................................ 24
Warranty.................................................................................................................. 25
Disclaimer................................................................................................................ 27

5 | Page
2 Notice
This User & Installation Guide contains basic information for the safe installation
and operation of the AIRPHX CID 75k. The operation and installation of this
equipment is the sole responsibility of the end-user. Please read this guide in its
entirety before installing and operating the equipment.
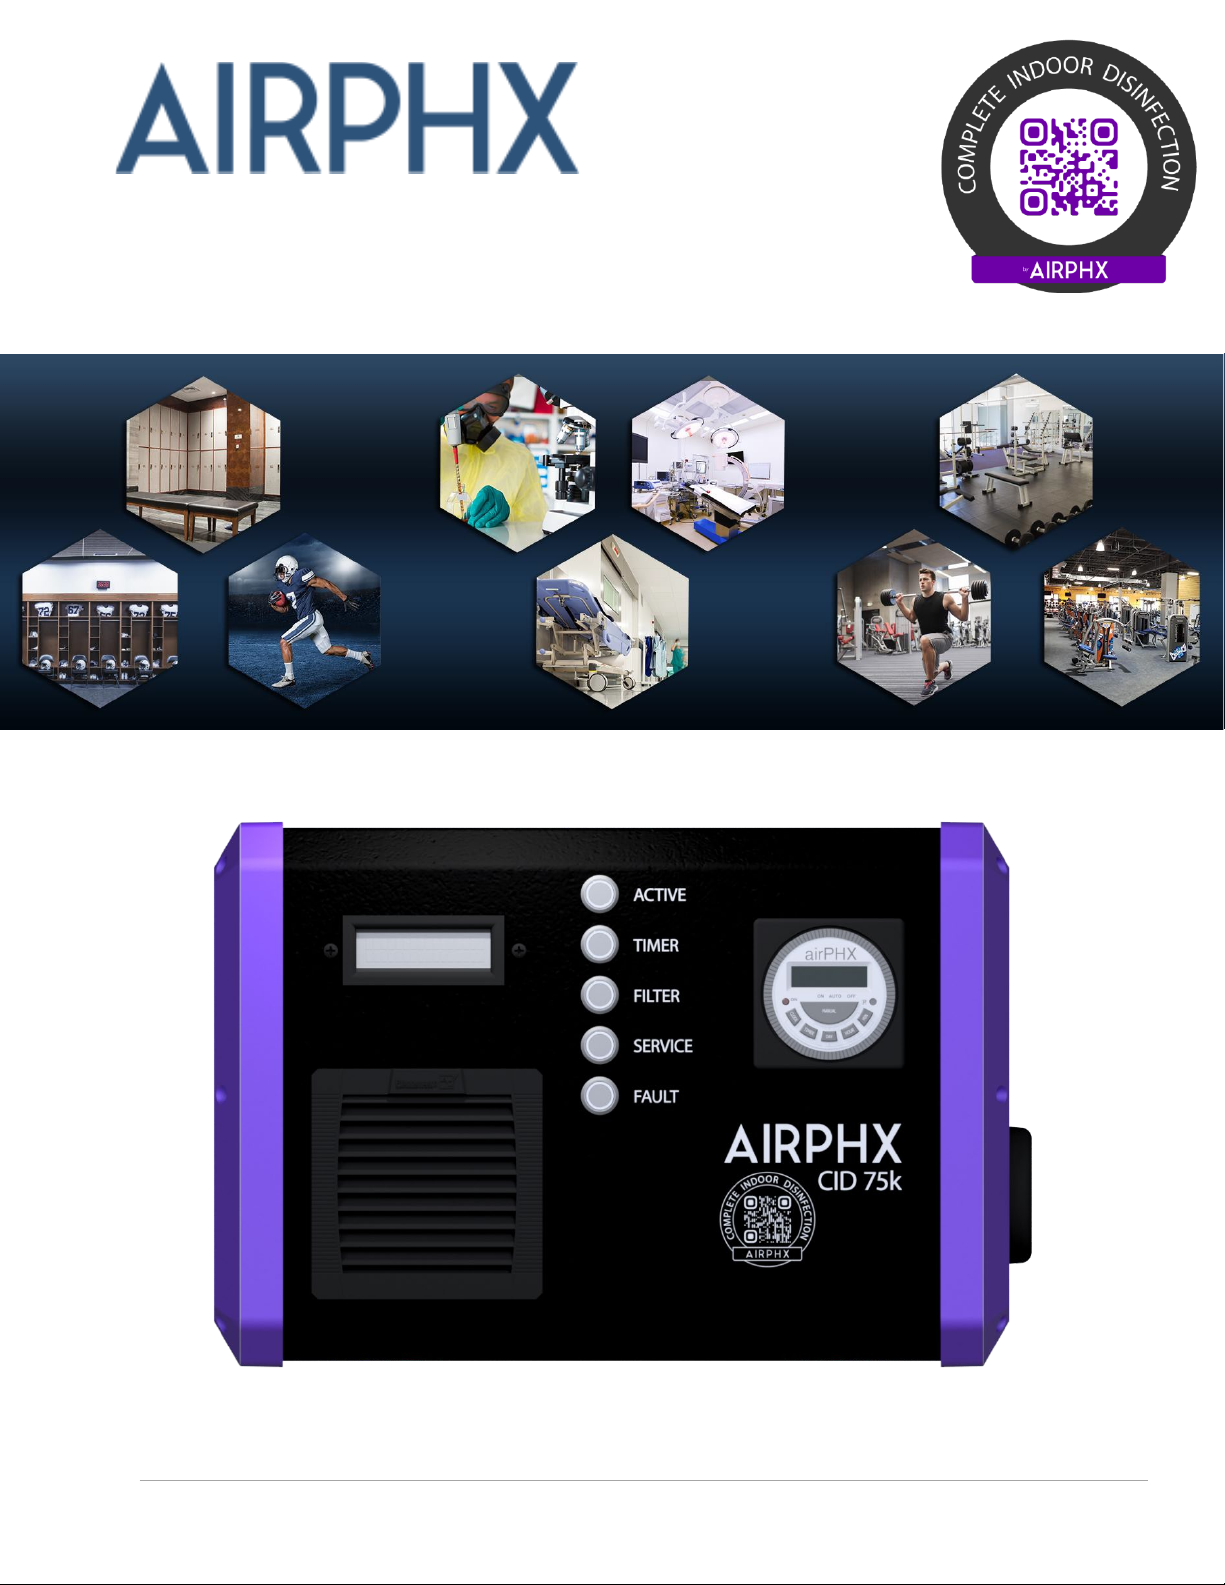
The AIRPHX CID 75k is intended to provide complete indoor disinfection (CID) in
treatment spaces with 75,000 cubic feet. In areas that are significantly smaller, it is
recommended that the unit be operated using the timer.
The AIRPHX CID 75k should never be exposed to liquids. If using cleaning products or
liquids near or around the unit, please turn the CID 75k off prior to cleaning.
Please follow all recommendations for the mounting and installation of the CID 75k unit.
If you have any question about the installation, please contact your AIRPHX
representative at 855-424-7749.
Find a central location for the CID 75k within the treatment area.
oAvoid locations with high humidity, like swimming pools, whirlpools, and showers.
High moisture levels can damage the CID 75k’s plasma chamber.
oMount the unit at least four feet from an adjacent wall, and twelve inches from
the ceiling. For Americans with Disabilities Act compliance, it is recommended that
the unit be mounted with the base at least 80 inches from the floor.
The CID 75k requires a standard 120-volt outlet. Please verify the following electrical
requirements prior to the installation of the CID 75k unit.
oVerify the voltage of the outlet. The CID 75k requires a standard 120- volt outlet
with a ground and draws only 1/2 amp, therefore it can be part of an existing
circuit.
oIf a new outlet is installed, please make certain that the outlet meets all local,
state, and national electrical codes.
oVerify that the outlet is not part of a circuit that may be overloaded. Large power
fluctuations associated with overloaded circuits can damage the CID 75k.
oDo not use a cord adapter that defeats the earth ground on the provided power
cord.

6 | Page
3 Notice cont.
The filter on the CID 75k generally needs to be replaced every 30 days unless otherwise
specified. There is a Filter LED Indicator, located on the front of the unit, that will
illuminate red as a reminder to change the filter. Depending on the environment in the
treatment space, it is possible that filter may need to be changed more or less frequently.
When the Filter LED indicates that it is time to change the filter, remove the filter and
hold it up to the light. If light can easily be seen through the filter, it can be used for
another 30 days.
The AIRPHX CID 75k is designed to be mounted on a wall using the included mounting
hardware.
To protect against injury, all repairs to the CID 75k must be performed by qualified
service personnel. Please contact your AIRPHX representative with any service request.
Do not open the CID 75k for any reason. Doing so may put you at risk of injury and will
void the warranty.
If there is an issue with the unit, please contact your AIRPHX representative.
Do not introduce foreign objects into the unit’s intake or exhaust ports.
Keep the air inlet and exhaust of the CID 75k clear of obstructions.
Additional filter and replacement plasma chambers can
be purchased from our online store. Please contact your
AIRPHX representative at 855-424-7749 or visit our
online store - https://www.airphx.com/shop
If further assistance is required, please contact your AIRPHX representative at 855-
424-7749 or visit our website https://www.airphx.com/FAQs, where additional
information can be found including user guides as well as helpful videos.

7 | Page
4 Modes of Operation
The CID 75k has three modes of operation.
Run Mode: In this mode of operation the CID 75k will run continuously. The
Active LED will illuminate green.
Run Mode switch settings:
The power switch, located on the left side of the unit, is in the ON position
(Switch Indicator will illuminate red).
The 7 Day Timer switch is in the OFF position and its LED is not illuminated.
7 Day Timer Mode: In this mode of operation, the CID 75k will be controlled by
the schedule that has been programmed into the 7 Day Timer. The 7 Day Timer
mode is ideal for small areas of treatment and applications where you may want to
run the unit at specific times and days. As example, night only.
7 Day Timer switch settings:
Both the power and the 7 Day Timer switches are in the ON position.
The Timer Switch LED will be illuminated green. The Active LED will
illuminate green when in a scheduled run period.

8 | Page
5 Modes of Operation cont.
Standby Mode:In standby mode, the CID 75k is powered on but both the
plasma chamber and the unit turbine are off.
Conditions that can cause the CID 75k to go into standby:
1. The filter has not been checked within 15 days of the Filter LED Indicator
illuminating red. At this point, the filter will need to be checked and changed
if dirty and the filter reset procedure must be performed. Please refer to the
section in this guide, Filter Replacement and Reset Procedure for more
details.
2. The unit has been in operation for a year and it is time to replace the plasma
chamber. In this situation, the Service LED will illuminate red indicating it is
time to service the unit.
3. The CID 75k 7 Day Timer is enabled, and an off-schedule program is running.
4. The fault monitoring circuit has detected a fault with the CID 75k. In that
case, the Fault LED will illuminate red, and a fault message will be displayed
on the LED screen located on the front of the unit. Please refer to the
section in this guide, Fault Indicator for more details.
In all conditions, the unit will resume operations once the condition is cleared.

9 | Page
6 Operations & Controls
On/Off Switch:
The On/Off switch controls the on/off function of the CID 75k. This switch is
located on the left side of the unit and will illuminate red once pressed, turning the
CID 75k on.
Active Indicator:
The Active Indicator will illuminate green whenever the plasma chamber is active,
and the unit is producing disinfecting molecules. The Active Indicator will
illuminate red if a fault has been detected within the plasma chamber.
7 Day Timer Switch:
The 7 Day Timer LED switch controls the on/off function of the 7 Day Timer. The
switch will illuminate green once pressed, turning the timer on. Once on, the
operation of the CID 75k is controlled by schedules programmed into the 7 Day
Timer. During an off-schedule program, the unit will go into standby awaiting an
on-schedule program to resume and the Active LED will not be illuminated.
Filter Indicator/Switch:
The Filter Indicator will illuminate green when the CID 75k is first turned on and
remain green for 30 days of operation. At 30 days of operation, the Filter Indicator
will illuminate red as a reminder to check the unit’s intake filter and change if dirty.
Filter Note:
If the filter is not checked within 15 days of the Filter Indictor illuminating red, the
unit will go into standby mode until the filter is checked and changed if dirty, and
the filter reset procedure is completed. Please refer to the Filter Replacement and
Reset Procedure section in this guide for further details and instructions.

10 | Page
7 Operations & Controls cont.
Service Indicator/Switch:
The Service Indicator will illuminate green when the CID 75k is first turned on and
remain green for 1 year of operation. At the end of a year of operation, the Service
Indicator will illuminate red as a reminder to change the unit’s plasma chamber.
Please refer to the section in this guide Plasma Chamber Replacement and Reset
Procedure for further details.
Fault Indicator/Switch:
The Fault Indicator will illuminate red when a fault has been detected within the
CID 75k. Details about the fault will be displayed on the unit’s LCD display location
on the front of the unit. Some faults can be reset after they have been cleared by
pressing the Fault Indicator button.
Example of clearing a fault:
Removing the plasma chamber exhaust grill while the unit is powered will cause a
fault. To clear this fault, the grill must first be reinstalled, and the Fault LED button
must be pressed. Please note that the fault will remain if the reset button is
pressed while the grill is still off.
In the case of a fault that does not clear, it is recommended that you contact your
AIRPHX representative for further assistance.
System faults examples:
Plasma chamber power supply failure.
Plasma chamber power supply cooling fan failure.
Plasma chamber fan failure.
Plasma chamber exhaust grill safety switch.

11 | Page
8 Installation Overview
The CID 75k mounts to a wall utilizing a small two-piece Vesa mount (provided).
The mount comes preinstalled on the CID 75k. To install the wall mount section of
the Vesa mount, you must first remove the wall mount section from the back of
the unit. This is done be separating the two halves of the mount. To separate the
two halves, you must first remove the two Phillips screws located on the bottom of
the bracket.
The mounting kit contains:
1. Wall Mount Bracket (already attached to the unit).
2. Four enclosure Threaded Anchors
3. Four Phillips Screws
CID 75k
Wall Mount
Bracket
Wall
Threaded Anchors

12 | Page
9 Installation Overview cont.
Provided Parts:
Vesa Mount
4 Self Drilling Threaded Drywall Anchors
4 Phillips Screws
Recommended tools:
Level
Pencil
Long Phillips Screwdriver
Punch or Scratch Awl
Drilling Threaded
Drywall Anchor
Phillips Screw
Wall Mount
Section
Phillips Locking
Screws
Top of Mount
CID 75k
Mount
Section
Preinstalled on
the CID 75k
Note: The wall mount for
your unit may vary from the
one shown here.

13 | Page
10 Installation Procedure
Step by Step Procedure:
In the example below, Threaded anchors are used to mount the CID 75k to drywall.
1. Find a central location for the CID 75k within the treatment area. Be mindful
of any obstructions that may be within the wall.
2. Remove the wall mount section of the Vesa mount that came preinstalled
on the back of the CID 75k. This is done by removing the two Phillips screws
located on the bottom of the bracket as seen in Fig 1.
3. Place the wall section of the mount against the wall.
4. Using a level, level the bracket and mark four of the smaller holes. It does
not matter if you use the four inner or outer holes.
5. The Threaded Anchors are designed to self-drill into drywall using a Phillips
screwdriver. It may be easier to start the anchor if you make a small hole
first using a Scratch Awl.
6. Screw the anchors in all the way until the outer rim of the anchor is flush
with the drywall.
7. Using a Phillips screwdriver, place all four screws through the wall mount
section and then into each anchor. Tighten all four screws until they a snug.
Be certain to use a level during the final tightening process to ensure the
mount is level.
8. Once the mount is secured to the wall, align the section of the mount on the
back of the CID 75k so that it slides down from the top onto the section of
the mount that is mounted on the wall as shown in Fig 2. The CID 75k will
slide down onto the wall mounted section from the top.
9. The installation is complete. The CID 75k can be plugged in and turned on.
LCD Display:
If upon installation the LCD Display is blank, with the unit powered on, please press
the Fault Indicator to initiate display mode.

14 | Page
11 Installation Procedure Fig 1
Fig 1.
Wall Mount
Locking Screws

15 | Page
12 Installation Procedure Fig 2
Wall
Fig 2.
Top
Wall Section of the
Vesa Mount
Threaded Anchors
CID 75k Section of
the Vesa Mount

16 | Page
13 Filter Replacement and Reset Procedure
Filter Location
1. Turn the CID 75k off.
2. Locate the intake filter housing on the front of the unit. The front grill must
be removed to gain access to the filter media.
3. Pull on the top outer edges of the grill carefully to remove it as shown in Fig
1A.
4. Replace the filter media if dirty as shown in Fig 1B. To determine if the filter
can be used for another 30-day cycle, hold the filter up to the light. If light
can easily be seen through the filter, it can be used for another 30 days.
5. Replace grill by carefully hinging on to the bottom of the housing first and
snapping it into place on the top (reverse order of removal).
6. Once the filter has been checked and replaced if necessary, power the unit
on. The Filter Indicator will still be illuminated red at this point.
7. To reset the Filter Indicator, press the Filter LED reset button located on the
front of the unit. The Filter Indicator will change from red to green indicating
the filter reset procedure has been completed.
Filter Reset
Button
Intake Filter
Housing
Pull here
to remove

17 | Page
14 Filter Replacement and Reset Procedure cont.
Fig 1A.

18 | Page
15 Filter Replacement and Reset Procedure cont.
Fig 1B.

19 | Page
16 Plasma Chamber Replacement and Reset Procedure
1. Turn the power switch off on the CID 75k.
2. Carefully remove the replacement plasma chamber from the box it was shipped
in.
Note: The plasma chamber contains a glass element and is very fragile. If the
shipping box or plasma chamber looks damaged, please contact your AIRPHX
representative for a replacement.
3. The plasma chamber is located behind the exhaust grill located on the right side
of the unit. This grill must be removed to gain access to the plasma chamber as
shown in Fig 1C.
4. Using a Phillips screwdriver, loosen and remove all four screws that secure the
exhaust grill in place as shown in Fig 1D.
5. The end of the plasma chamber (tube) will be exposed once the grill is
removed. Grasp the end of the tube and pull it straight out of the unit.
6. With the new plasma chamber in hand, align the contacts on the plasma
chamber with the two notches in the enclosure, making certain that the label
on the plasma chamber is facing towards you as shown in Fig 1E.
7. Keep the plasma chamber in a straight orientation as you slide it into the unit.
You will feel the plasma chamber come to a stop once it is in its contact socket.
Push the plasma chamber in until fully seated.
8. Replace the exhaust grill taking note of the alignment of the tab on the grill
itself as shown in Fig 1F.

20 | Page
17 Plasma Chamber Replacement Process cont.
Plasma Chamber
Exhaust Grill
Fig 1C.
Fig 1D.
Exhaust Grill
Screws
Other manuals for CID 75k
1
Table of contents
Other Airphx Air Cleaner manuals
Popular Air Cleaner manuals by other brands

AtmosAir
AtmosAir Rainier Summit R1 User Guide & General Maintenance

Livington
Livington AirPurifier Deluxe instructions

Bionaire
Bionaire BAP1200T-CN Instruction leaflet

Professional Products
Professional Products UV-C Sterilux Air manual

PureAiro
PureAiro GUARDIAN 350 Installation & operation manual

Sharp
Sharp FP-F30Y Operation manual