w w w . a i r p l a y e r . n e t
6
reLOAD™ Low Battery IndicatorreLOAD™ Low Battery Indicator
reLOAD™ Low Battery IndicatorreLOAD™ Low Battery Indicator
reLOAD™ Low Battery Indicator
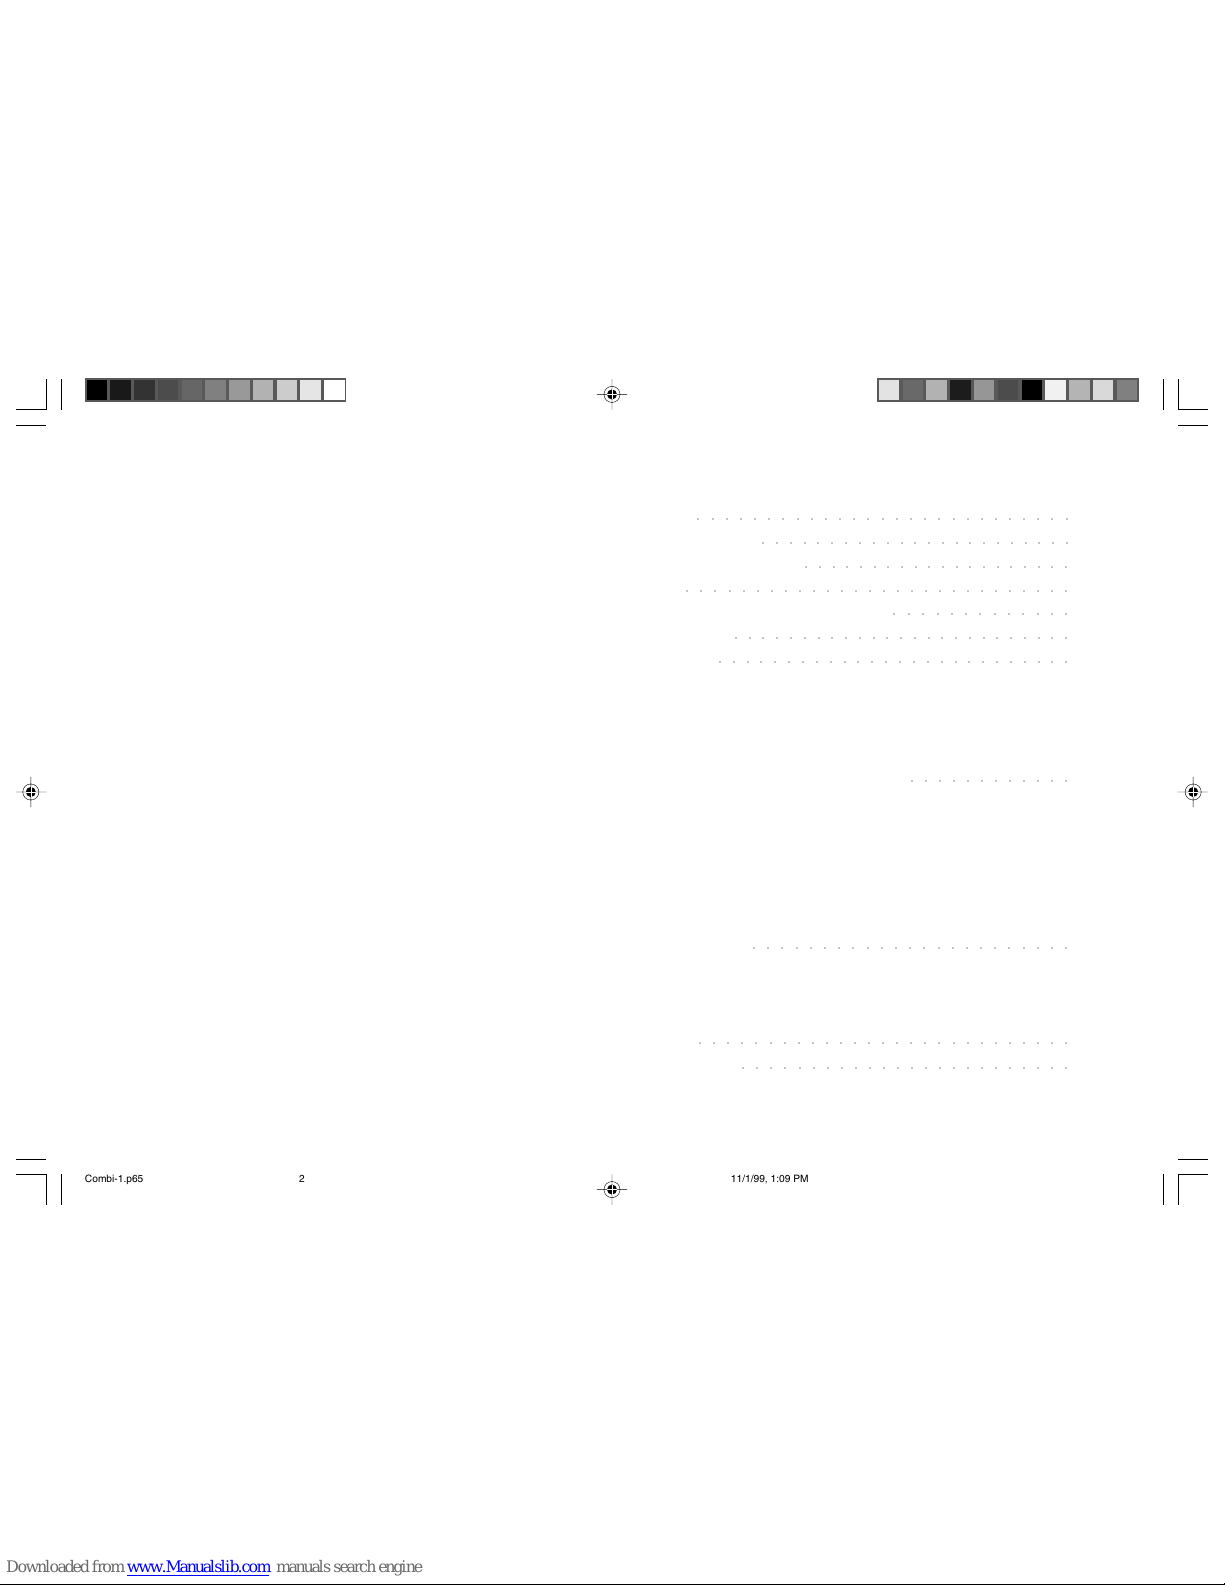
When the battery is low, AIRPLAY™ begins to flash the “reLOAD” Low Battery Indicator
once every 3 seconds. When this occurs, it’s ti e to install a new battery into the
reLOAD™ battery bay (refer to the “Battery Replace ent” section of this User Manual).
Auto-PauseAuto-Pause
Auto-PauseAuto-Pause
Auto-Pause
AIRPLAY™ will auto atically pause ost ga es and the reLOAD™ Low Battery
Indicator will flash for as long as possible, pro pting the user to install a new battery in
the reLOAD™ battery bay (refer to the “Battery Replace ent” section of this User
Manual).
Auto-RepeatAuto-Repeat
Auto-RepeatAuto-Repeat
Auto-Repeat
Clicking the PROGRAM key and then clicking one of the 4 triggers or 4 standard control
keys i ediately afterward puts that key or trigger into “Auto-Repeat” ode. Fro
then on during the session, the pressed key auto atically repeats at 10 Hz (10 ti es a
second) when held down by the user.
Any nu ber or co bination of the 4 triggers and 4 standard control keys can be set to
Auto-Repeat. To set ultiple triggers or keys to Auto-Repeat, click the PROGRAM key
and then click a trigger or control key to set Auto-Repeat on, then click the PROGRAM
key again and then click the next trigger or control key which you want to Auto-Repeat.
Continue to repeat this process until you have turned Auto-Repeat on all of the desired
triggers and keys.
The Auto-Repeat ode of operation ay be cancelled for any key by repeating the
PROGRAM sequence. Click the PROGRAM key and then click the desired trigger or
control key to turn off the Auto-Repeat ode.
Progra able (Macro) SequencesProgra able (Macro) Sequences
Progra able (Macro) SequencesProgra able (Macro) Sequences
Progra able (Macro) Sequences
One “ acro” sequence of keystrokes ay be recorded and assigned to any one of the 4
triggers or 4 control keys. The axi u duration of the sequence is 5 seconds, with a
axi u nu ber of keystrokes of 20. The recording sequence records the keystrokes,
order and ti ing. Playback is at 100% of the recording speed. Once the sequence is
recorded, it can be played back, si ply by pressing the assigned key. Recording is done
as follows:
1. Press (hold down) the PROGRAM key, click one of the 4 triggers or one of the
4 control keys.
2. Release the PROGRAM key.
3. Enter the keystroke sequence you wish to have progra ed.
4. Click the PROGRAM button to end the recording.
Once recording has ended, AIRPLAY™ discards any ti e delays at the beginning and
the end of the recording, and assigns the sequence to the selected key. The sequence
ay be cleared by repeating the steps above while o itting step 3. Once cleared, the
assigned key resu es its original function.
Only one acro sequence ay be stored at a ti e. If a second acro sequence is
recorded, the first acro sequence will be lost.
Power-DownPower-Down
Power-DownPower-Down
Power-Down
After 5 inutes of inactivity (no keys being pressed or clicked), AIRPLAY™ powers
down auto atically (turns off). This feature is designed to save battery power when
AIRPLAY™ is not in use.
When AIRPLAY™ is restarted again by clicking the POWER/CHANNEL key, all
previous acro sequences are lost and all keys return to their default, non-repeating,
functionality.
Radio Communications
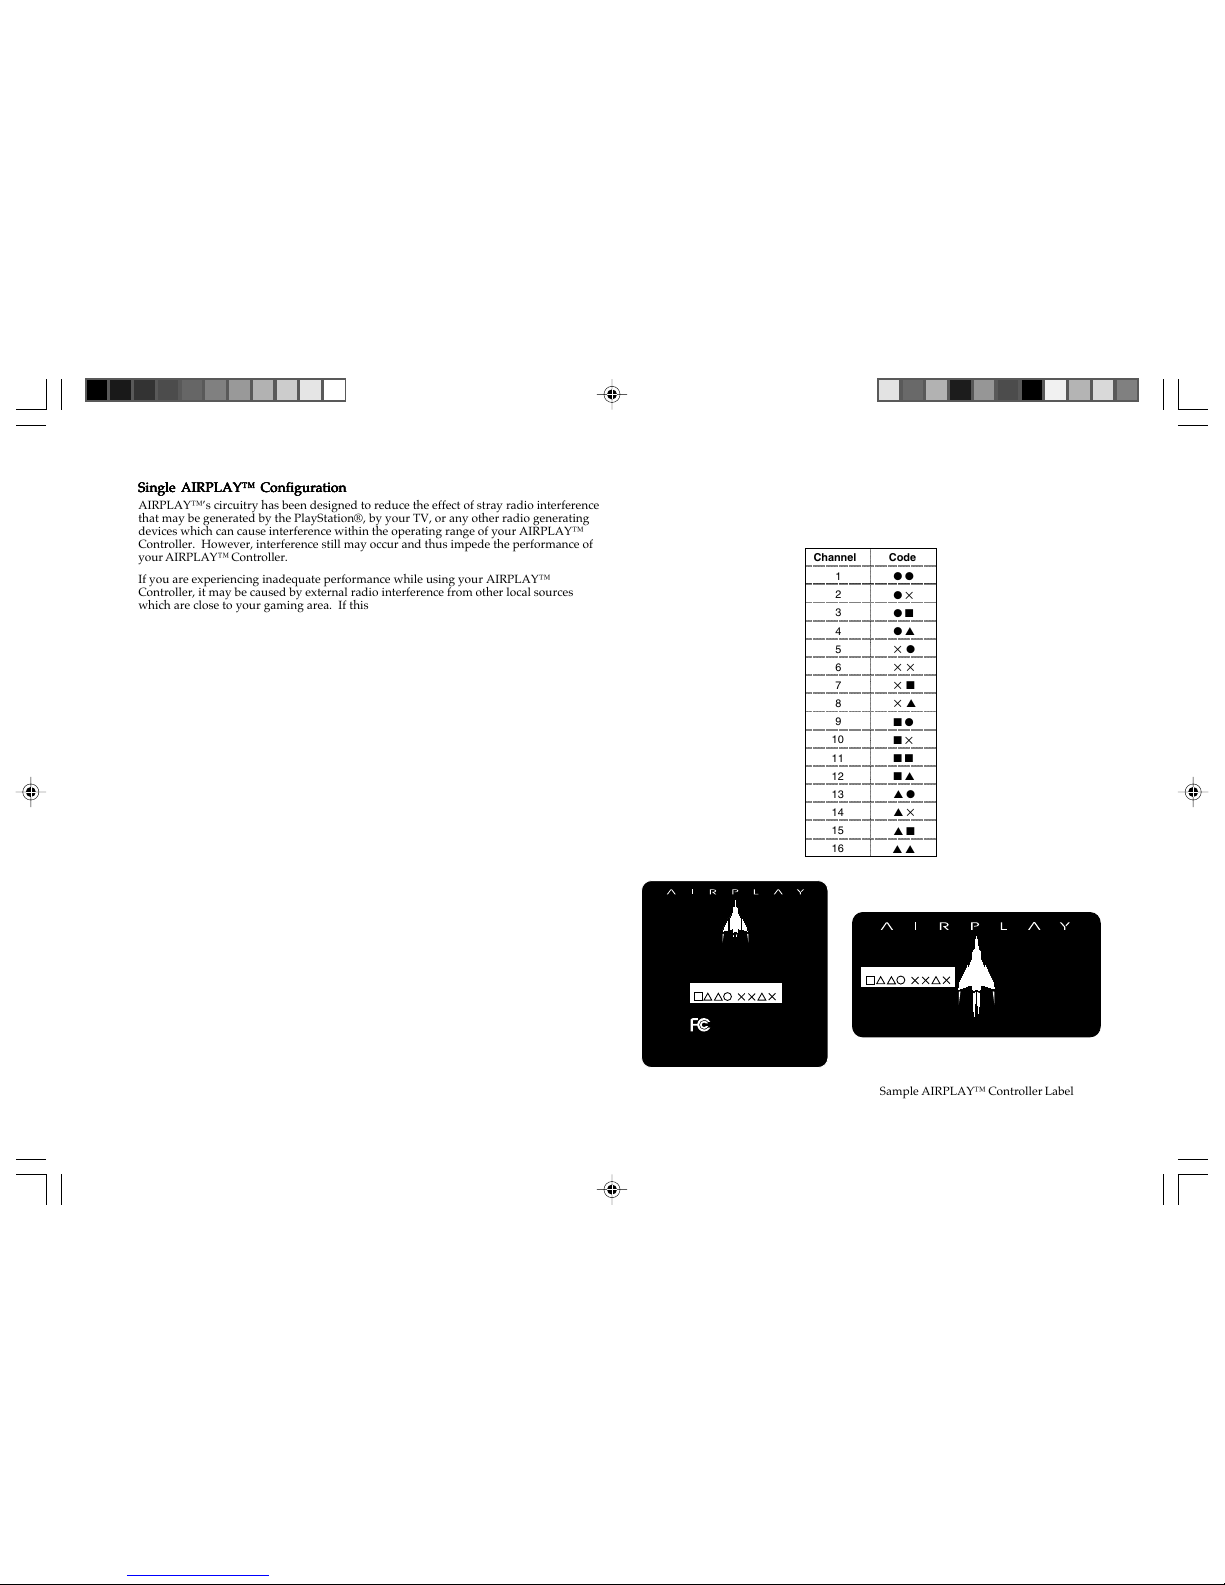
AIRPLAY™’s radio design supports 16 user channels. Sixteen channels are required for
several reasons.
1. During Standard operation of one AIRPLAY™ Controller, the 16 channels allow users
to select channels with ini al interference in their areas fro other rogue radio
frequency e itting devices (single AIRPLAY™ Configuration).
2. During Dual operation of two AIRPLAY™ Controllers, the 16 channels allow users to
select channels with ini al interference fro other nearby AIRPLAY™ Controllers
(dual AIRPLAY™ Configuration).
3. Other possibilities of operation include:
•ultiple AIRPLAY™ Controllers connected to the sa e PlayStation® using one
MULTITAP™ extender or
•the extre e case in which there are any AIRPLAY™ Controllers connected to
two cable-connected PlayStation®s, each with 8 users (both MULTITAP™
extenders used on both ports of both PlayStation®s - Multiple AIRPLAY™
Configuration).
Refer to each of the following sections as they apply to your use of the AIRPLAY™
Radio Wireless Controller for PlayStation® ga e consoles.
(NOTE: AIRPLAY™ pauses ost ga es by sending a START key press to the
PlayStation®. If AIRPLAY™ auto atically pauses your ga e, you ay
un-pause ost ga es by pressing the START key.)
(NOTE: During the recording process, the AIRPLAY™ Controller DOES NOT
trans it the recorded sequence to the receiver. We suggest the following
approach when recording acro sequences. Pause the current ga e record
your acro using the instructions above on your AIRPLAY™ Controller, then
unpause and test the acro in the ga e.)
(NOTE: To te porarily disable the auto atic Power-Down feature, press the
PROGRAM button, click the SELECT button and then release the PROGRAM
button. The inute you anually Power-Down AIRPLAY™ or re ove it’s
battery, the Power-Down Mode feature will return by default.)
Combi-1.p65 11/1/99, 1:12 PM6