manuals.online logo
Brands
  1. Home
  2. •
  3. Brands
  4. •
  5. Airsmart Technology
  6. •
  7. Radio
  8. •
  9. Airsmart Technology R801W-3DI User manual

Airsmart Technology R801W-3DI User manual

Popular Radio manuals by other brands

Grundig G6 AVIATOR owner's manual

Grundig

Grundig G6 AVIATOR owner's manual

Makita DMR114 instruction manual

Makita

Makita DMR114 instruction manual

PURE Move R3 manual

PURE

PURE Move R3 manual

Motorola CP040 Detailed service manual

Motorola

Motorola CP040 Detailed service manual

Bosch GPB18V-5C Operating/safety instructions

Bosch

Bosch GPB18V-5C Operating/safety instructions

Ocean Digital WR-230 user manual

Ocean Digital

Ocean Digital WR-230 user manual

Realistic TRC-457 owner's manual

Realistic

Realistic TRC-457 owner's manual

Uniden AX 144 owner's manual

Uniden

Uniden AX 144 owner's manual

SIGNIFY EA2173 instruction manual

SIGNIFY

SIGNIFY EA2173 instruction manual

auna multimedia 10026443 user manual

auna multimedia

auna multimedia 10026443 user manual

GME TX680 instruction manual

GME

GME TX680 instruction manual

Motorola MTM5 00 Series Basic service manual

Motorola

Motorola MTM5 00 Series Basic service manual

Tivoli Audio ONE+ owner's manual

Tivoli Audio

Tivoli Audio ONE+ owner's manual

Sirius Satellite Radio SDVK1 installation guide

Sirius Satellite Radio

Sirius Satellite Radio SDVK1 installation guide

Sirius XM RAdio EDGE user guide

Sirius XM RAdio

Sirius XM RAdio EDGE user guide

Trevi XF 100 user guide

Trevi

Trevi XF 100 user guide

EisSound KBSound iSelect user manual

EisSound

EisSound KBSound iSelect user manual

Kirisun DM588-02 user manual

Kirisun

Kirisun DM588-02 user manual

manuals.online logo
manuals.online logoBrands
  • About & Mission
  • Contact us
  • Privacy Policy
  • Terms and Conditions

Copyright 2025 Manuals.Online. All Rights Reserved.

Tube Queen AM/FM Radio & Bluetooth Speaker
Large collectible table-model Hi-Fi stereo radio /Bluetooth speaker
R801W-3DI
Tube Queen AM/FM Radio & Bluetooth Speaker
Product
Introducti
on
Tube Queen is a large table-model radio /Bluetooth speaker produced by our company.
This product uses the Hi-Fi concept and draws experience from Germany's excellent
radio design style in the 1950s to 60s. The product uses electronic tube to make power
amplifier and signal strength received indicator.
This product is a high-sensitivity radio with FM stereo reception and high-quality
Bluetooth speaker, but also a Hi-Fi tube amplifier that may be used separately. In case of
connection with external high-quality speaker, it can form a set of high-fidelity stereo
system.
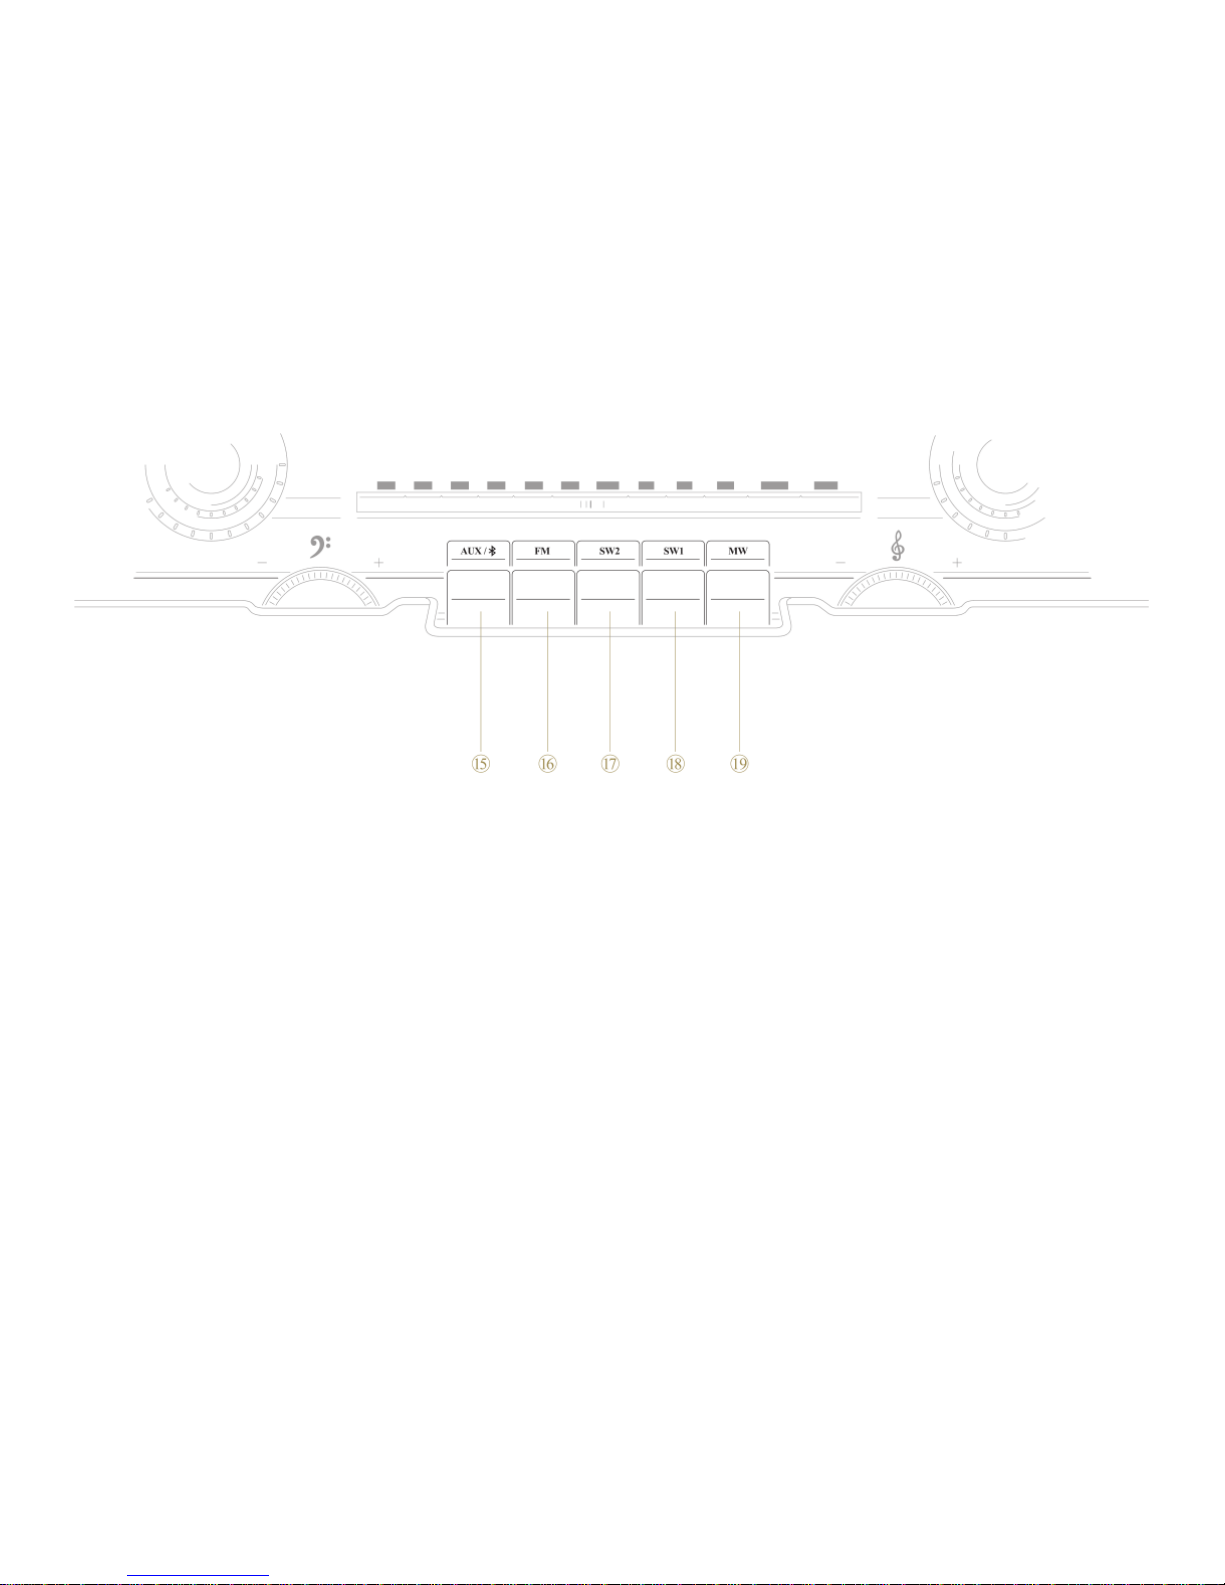
This product is a multi-frequency radio that has four frequencies, namely, FM (FM)
stereo, medium wave (MW), shortwave 1 (SW1) and shortwave 2 (SW2), and uses
vacuum tube (commonly known as "cat’s eye") tuning indicator.
This product is also a high-quality Bluetooth audio speaker. Its Bluetooth program uses
the CSR 4.0 Bluetooth module that supports aptx lossless transmission. Hence, it can
guarantee excellent audio effect via Bluetooth.
This product uses high-power vacuum tube to make post amplification, so the output
power is strong. Coupled with the high-quality loudspeaker, and excellent circuit and
electro-acoustic design, this product has acquired sound effect unique to radio set. In
connection with stand-alone high-quality audio speaker, the Hi-Fi sound effect can be
achieved.
Table of
Contents
06
08
10
12
13
14
14
15
15
17
17
18
18
19
20
Picture Illustrations
Radio use instructions
Quick Guide
External antenna use
AFC function
External CD or other signal source
Bluetooth speaker use
Volume control
Loudspeaker System instructions
Product maintenance and safety
Radio case maintenance and use
Main technical indexes
Packing list
Common faults and removal
Radio knowledge
Figure 1
①Medium wave external antenna port
②FM antenna port
③FM internal/external antenna transfer
switch
④Short-wave proximity and remote
switch
⑤Right channel inner /outer speaker
transfer switch
⑥Right channel speaker port
⑦Auxiliary input
⑧Left channel speaker port
⑨Left channel inner /outer speaker
transfer switch
⑩Power port (in)
⑪230/115V transfer switch (Note: only
adjust under professional guidance)
Figure 2
⑫Bluetooth /AUX / FM stereo and mono
FM transfer switch and AFC switch
⑬Power switch / volume adjustment
⑭Bass tuning
⑮Auxiliary input / Bluetooth function
switch
⑯FM transfer switch
⑰Short wave II transfer switch
⑱Short wave I transfer switch
⑲Medium wave transfer switch
⑳High volume tuning
○
21 Shortwave frequency fine tuning
○
22 Tuning knob
○
23 Cat’s eye tuning instructions
○
24 Radio station indication
Quic
k
Start
Guid
e
1
Power supply voltage
2
Power switch and sound adjustment
(Figure 1) ⑩is the powerport (in), which may be
connected with 230V or 115V alternating current
(AC) by use of standard three-pin plug (random
configuration). Before use, please check if the
voltage transfer switch (Figure 1) ⑪is consistent
with the alternating current (AC). When the voltage
transfer switch is at 115V position, it can adapt to
110 - 120V/60HZ alternating current (AC); when the
voltage is at 230V position, it can adapt to
220-240V/50HZ alternating current (AC); the
switch’s factory setting is 230V (Note: only adjust
under professional guidance)
Panel (Figure 2) ⑬is the power switch and
volume knob. By clockwise rotation, turn
the power on, and by counterclockwise
rotation, turn the power off. After power
on, continue to rotate to the right to
increase the volume to an appropriate
location (the volume knob is normally
adjusted to around ten o'clock direction).
Due to the use of vacuum tube amplifier,
vacuum tube needs about 30 seconds for
warming up before normal operation.
Therefore, the radio speaker will make a
sound 30 seconds later. Note that the
volume can’t be turned to the maximum
during these moments.
3
4
5
Wave selection
Search for radio broadcasting
Bluetooth play/ CD play and
auxiliary input
Front panel (Figure 2) ⑮- ⑲five key
switches are function and wave
selection keys. When a key is pressed,
the radio will start working under the
corresponding function or wave.
(Figure 2) ⑯-⑲when a certain wave switch is pressed,
adjust the tuning button, (Figure 2) ○
22 to search for
your favorite radio station. When the "cat’s eye" (Figure
2) ○
23 shows the maximum, it means the tuning has
reached the optimal state.
See page 14: use of Bluetooth
function, CD and auxiliary
input.
Radio use
instructio
ns
1
When the machine is used as a radio, it is of paramount
importance to place the machine and the external antenna
correctly. Otherwise, you may not receive any radio programs,
or only receive bad one! It is recommended to use the machine
close to window as much as possible. If it is impossible to use
the machine near the window, a group of external antennas will
be of great importance. The more professional the antenna and
antenna installation, the better the machine performance. In
addition, in case of connection with external antenna or not, it
should also be noted that the switch position for “internal/
external” antenna on the back of the machine must be correct!
Listen to FM broadcasting
This machine has equipped with built-in FM line. If the radio is placed
close to the window in the general urban area (not far from the radio
transmitting station), there is no need to use external antenna
generally. When external antenna (random accessory) is used, turn the
rear③(Figure 1) to the external (EXTERNAL) position. The external
antenna of this machine can also be connected with dedicated external
antenna or dedicated cable antenna. Press the (Figure 2) ⑯key switch
on the front of the machine to be in FM wave, and adjust the tuning
knob to the range of 87--108MHZ for its radio programs. Turn the
transfer switch (Figure 2) ⑫to FM position to be in ordinary FM state.
Turn to FM St position to be in stereo FM state. If the FM St effect is
not good enough, the switch can get a higher Signal to Noise Ratio
(SNR) at FM
2
Listen to medium wave broadcasting
Press (Figure 2) ⑲switch to be in medium wave band, and turn the knob
(Figure 2) ○
22 to listen to the radio programs within the range of
530-1610KHZ. This series of machine has high magnetic antenna. The AM
external antenna can also be used. Connect the two lines of the antenna to the
antenna clip, as shown in the figure below. Adjust the antenna to the best
direction, and then adjust the knob on the antenna (with external antenna for
tuning) to get the best signal. When the outdoor antenna is used, make
connection from (Figure 1) ①, and adjust the direction of external antenna to
get the clearest radio broadcasting.
3
Listen toAM shortwave broadcasting
The shortwave shared FM antenna (using external telescopic antenna for best effect) is
used as same as FM. This machine has shortwave 1 and shortwave 2. Press the front
keyboard switch ⑱to be in shortwave 1 , press the front keyboard switch ⑰to be in
shortwave 2, and adjust the tuning knob ○
22 to find the desired radio broadcasting. In
shortwave 1, the radio programs within the range of 4.5-12MHZ can be received
(Figure 2). In shortwave 2, the radio programs within the range of 12-24MHZ can be
received. When the radio broadcasting is received, please turn the short or long distance
switch ④on back of the machine to LONG-DISTANCE position. When the machine
is close to the station with strong signal, please turn the short or long distance switch to
the SHORT-RANGE position. Otherwise, it may cause overload . The (Figure 2)
"fine-tuning knob" may also be adjusted for fine-tuning in order to receive program in
the best state. The factory status is "remote".
Medium Wave antenna
connection diagram
Ground wire
Medium Wave antenna
Medium wave antenna
Medium Wave antenna
input diagram
Ground wire