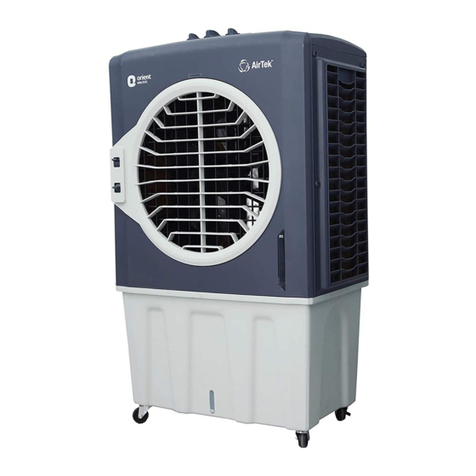
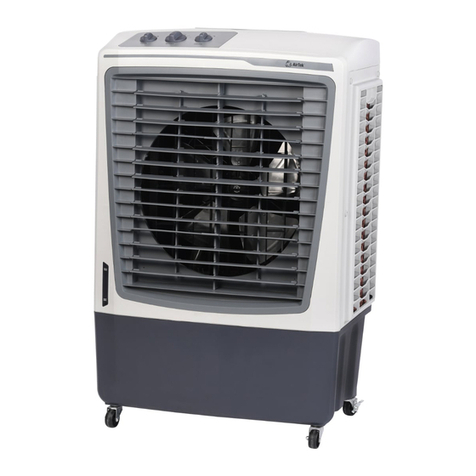
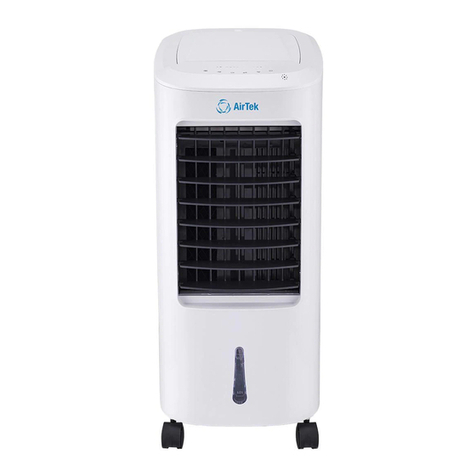
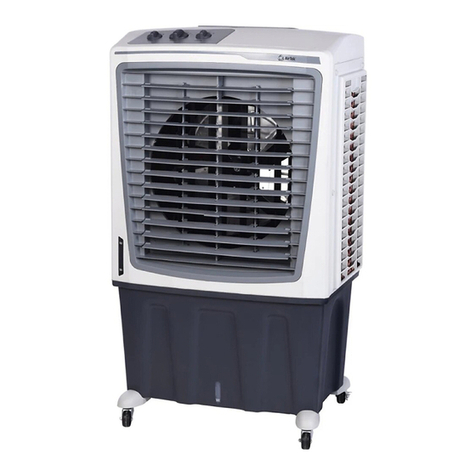
AirTek MOB-10KDCR Instruction manual

MOBILE AIR CONDITIONER
INSTRUCTION MANUAL
(Digital model)
IMPORTANT: Please read these instructions carefully before use.
Due to continuous research and development the specifications
herein are subject to change without notice.
1

CONTENTS
Specification .......................................................................................................................................
Before use ............................................................................................................................................ 3
Parts ..................................................................................................................................................... 5
Installation .......................................................................................................................................... 7
Operation ........................................................................................................................................... 10
Control panel ..................................................................................................................................... 10
Drainage ........................................................................................................................................... 15
Maintenance ...................................................................................................................................... 16
Trouble shooting .............................................................................................................................. 18
Service &warranty ............................................................................................................................ 0
Specification
SPECIFICATION
Model # MOB- 0KDCR MOB- 0KDCHR
Cooling capacity 10000BTU/hr 10000BTU/hr
Heating capacity /10000BTU/hr
Power consumption for
cooling mode*
1100W 1100W
Power consumption for
heating mode*
/ 1050W
Flow rates (max. speed) 360m3/h 360m3/h
Humidity removal capacity 1.0L/h 1.0L/h
Recommended room size 1 -15m 1 -15m

noise level <=54dbA
Power supply 0- 40VAC/50Hz/1 phase
Compressor Rotary
Refrigerant R-407C
Refrigerant load* 450g 430g
Fan speed 2
Timer 1-1 hours
Thermostat* 16-31℃
Net weight 3 kg 33kg
Product dimension 37.7 × 38.5 × 75 cm
Carton dimension 44.5 × 53.5 × 76.5 cm
REMARK:
1. Heating capacity is only for the model with heating function, i.e., model MOB-10KDCHR.
. The data marked with "*" may vary for technical reasons: for greater precision, please
refer to the rating label placed on the back of the unit.
3. Measuring condition for above is:
Cooling - Dry ball 7 ,Wet ball 19 ( Rh47% )℃ ℃
Heating - Dry ball 0 ,Wet ball 15 ( Rh58% )℃ ℃
Before use
Important safety instructions
1. Transport the unit in an upright position only, and leave it in an upright position
for at least 3 hours before first use.
. Always place the unit on an even surface.
3. An opening in a window or wall is required to accommodate the exhaust hose to
expel the exhaust air.
4. Make sure the unit is connected to an earthed power supply of the correct rating.
(Please refer to the rating label located on the backside of the unit).
5. Operate this unit in an ambient temperature of 16~36oC.
6. Your air conditioner has been designed to be used only in a house, office and
similar conditions and it should not be used for any other purpose.
7. Never unplug the air conditioner while it is working, this could damage the
electronic circuits.
8. DO NOT damage the power cord.
9. DO NOT use this unit for functions other than those described in this instruction
manual.
10. DO NOT tilt the unit. (Fig.1)
11. DO NOT cover or obstruct the appliance’s inlet and outlet grilles. (Fig. )
1 . DO NOT use the unit in a wet room, such as bathroom or laundry room to avoid
3

the risk of shock. (Fig.3)
13. DO NOT bend or crush the exhaust hose while in use.
14. DO NOT sit or place articles on the unit.
15. DO NOT touch the unit with wet or damp hands or with bare feet.
16. DO NOT let chemical substances come into contact with the unit.
17. DO NOT use the unit in the presence of inflammable substances or vapor such as
alcohol, insecticides, petrol, etc.
18. DO NOT use the plug to start or stop the unit.
19. DO NOT pull the supply cable or place it near a source of heat, always unroll it
completely to avoid dangerous overheating. If the supply cord is damaged, it
must be replaced by the service agent or a similarly qualified person, in order to
avoid a hazard.
0. ALWAYS use the switch on the control panel to start or stop the unit.
1. ALWAYS keep an air path of at least 50cm from walls, furniture or curtains.
(Fig.4)
. ALWAYS turn off the product when not in use.
3. ALWAYS turn the unit off and remove the main plug after use, before cleaning,
carrying out maintenance or moving location.
4. If the electrical socket is different from the plug, have a professionally qualified
electrician replace the socket with a suitable one. Avoid the use of adapter plugs, multiple
sockets and /or extension leads.
5. The filter must be used with the product at all times, when removing it for
clearing always turn the unit off and unplug the main plug from the socket.
6. For those who are not aware of the danger that might occur from the usage of an
electrical appliance, should use the product under guidance and supervision.
THE MANUFACTURER DISCLAIMS ANY RESPONSIBILITY. IF
THE ABOVE INSTRUCTIONS ARE NOT FOLLOWED.
FIG.3
FIG.4
50cm
5
0
cm
WALL
4
F I G . 2
F I G . 1

Energy Save
1. Please use the unit in the recommended room size (Please refer to the
SPECIFICATION.)
. Do not locate air conditioner where furniture or other objects can obstruct the air
flow.
3. Keep blinds/curtains closed during the sunniest part of the day.
4. Close the fireplace damper, floor and/or wall grilles, so cool air does not escape
through the chimney or duct work.
5. Keep the filters clean.
6. Avoid opening doors frequently.
7. Each person present in a room provides between 100Watts and 150Watts of heat,
consequently, the more people there are in the room, the less effective the unit
will be in cooling;
8. Set the unit to maximum cooling and high speed ventilation for the initial startup,
than adjust the unit to a comfortable setting.
Parts
Front view Back view
23
4
1
5
9
8
7
6
Front view
1. Control panel
. Adjustable vertical/horizontal louvers
3. Convenient carry handles
4. Wheels for easy mobility
5

Accessories
The adhesive tape is only available for the foam strip window panel in the
accessories.
Rear view
1. Air filter
. Exhaust air port
3. Cord wrap around hooks
4. Wheels
5. Water stopper (rubber plug inside + drain cap outside)
6
(1)Drain hose for
continuous drainage
(3) Round Adapter
(5) drain tray
(6) Vent connecter
(4) Cap for round adapter
(7*) Adhesive tape (optional)
(8)Exhaust hose
( ) Foam strip-for filling the open window space and
with hole for connection to exhaust hose. (optional
accessory)
(9) Extendable Plastic window
panel 3 pieces in one set.
(Optional accessory)
(9) Extendable Plastic window
panel 3 pieces in one set.
(Optional accessory)

Installation
Mounting of the exhaust hose
This unit is a mobile air conditioner, it can be moved from room to room so the
cooling can follow you anywhere. The mounting is easy,please refer to either of the
following methods:
(1) Using the foam strips (Temporary Mounting)
5
0
c
m
Foam strips
A apt or
FIG.5
(need picture)
Place the foam strips on the window. Connect the exhaust hose through the hole in the
foam strips allowing the exhaust air flow outside the room.
Should the foam strips be too large, cut off the extra part to fit the window.
( ) Using the extendable plastic window panel (Temporary Mounting)
(i) Plastic window panel (optional accessory)
7
(optional)

The complete set of extendable plastic window panel comes in 3 pieces. The length of
the panel can be extended to suit the window space. Place the plastic window panel
on the window space. Install the round adaptor to the hole on the panel. Connect the
exhaust hose through the hole on the panel allowing the exhaust air flow outside the
room.
(ii)Wall installation (Permanent Mounting)
WALL INSTALLATION
1. Exhaust Port
. Vent Connecter
3. Exhaust Hose
4. Round Adapter
NOTE: Round adaptor mounts on inside wall.
1) Drill a hole (about dia.135mm) in the wall/glass to fit the round adaptor. It is
recommended to ask qualified technician to drill the hole to ensure safety and to
avoid cutting into a support beam or electrical wires.
) Insert the round adaptor through the hole and mark the screw positions on
wall/glass.
3) Remove the round adapter and drill four screw holes at these marks.
4) Mount the round adaptor and secure with the screws.
5) Twist the exhaust hose into the round adapter clockwise until it is secured.
6) When not in use, unscrew the exhaust hose from the round adapter and place the
8
Round adapter

round adapter cap over the hole.
Note:
1. The supplied exhaust hose can be extended from 370mm to 1500mm. It is
recommended to use the hose in the shortest possible length.
. Prevent any bow or bend (to the extent as shown in fig.9) in the middle of the
exhaust hose, as this will trap exhaust air which will radiate into the room and
cause the unit to shut off automatically.
FIG.9
Warning:
The length of the exhaust pipe is specially designed according to the specification of
this product. Do not replace or lengthen it with your own private hose as this could
cause the unit to mal-function.(Fig.10)
FIG.10
9

Operation
Control panel
LED Indicator
1. “ST” Set temperature
. “RT” Room temperature
3. “LO” Low fan speed
4. “HI” High fan speed
5. “AUTO” Auto function
6. “COOL” cooling function
7. “DRY” Dehumidification function
8. “FAN” (for the model without heating function) / “HEAT” (for the model with
heating function)
9. “TIMER” Timer ON
10. “RUN” Unit ON
Buttons
11. Temperature UP
1 . Temperature DOWN
13. Fan speed
14. Mode
15. Timer
16. Power ON/OFF
17. Temperature display
18. Remote controlling signal receiver
10
17 18

OPERATING AND FUNCTIONS
Plug the air conditioner into a suitable socket.(refer to the rating label)
The compressor is an essential element in the production of cold air. The appliance is
fitted with an overheating feature that delays start up by three minutes.
To protect the compressor from overheating or freezing, the compressor will only
operate when the room temperature is between 16°C-36° C.
Sensor button and LED indicator functions
ON/OFF Button: Press to turn the unit on or off.
Temperature up button: Press to raise the thermostat temperature setting. (only in
“COOL” or “HEAT” mode)
Temperature down button: Press to lower the thermostat temperature setting. (only
in “COOL” or “HEAT” mode)
SPEED button: Press to select either low (LO) or high (HI) fan speed.
MODE button: Press to select either "AUTO", "COOL",”DRY”, "FAN" or “HEAT”
(for the unit with heat function) mode. Select AUTO mode to activate the pre-set
thermostat setting. Select “COOL” or “HEAT” to set the thermostat to your preferred
temperature.
TIMER button: Press until the desired time (1 to 1 hours) appears on the LED
display. The timer can be used to switch the unit either ON or OFF when the set time
expires.
TIMER ON: Sets the timer so the unit will turn on later. Press the TIMER button
when the unit is off. Hold the TIMER button down until the desired number of hours
is displayed. The unit will turn on when the set time is reached.
TIMER OFF: Sets the timer so the unit will turn off later. Press the TIMER button
when the unit is on. Hold the TIMER button down until the desired number of hours
is reached. The unit will shut off when the set time is reached.
"ST" (Set Temperature) LED light: The light comes on when the TEMPERATURE
UP or TEMPERATURE DOWN buttons are pressed and the LED display shows the
new thermostat temperature setting.
11

"RT" (Room Temperature) LED light: The light comes on when the current room
temperature is shown.
"LO" LED: The light comes on when the low fan speed is selected.
"HI" LED: The light comes on when the high fan speed is selected.
"AUTO" LED: This comes on when the (preset) AUTO MODE is selected. If the
ambient temperature is higher than 3° C the unit will work in cooling mode. If the
ambient temperature is below or equal 3° C, the unit will work in heating mode (for
the unit with heating function) or ventilation mode (for the unit without heating
function).
"COOL" LED: This comes on when the cooling function is selected.
"DRY" LED: This comes on when the dehumidifier function is selected.
"HEAT" LED: This comes on when the heating function is selected. (for the unit
with heating function)
"TIMER" LED: This comes on when the timer function is activated.
“RUN” LED LIGHT: Illuminates when the unit turns on.
If this light starts to flash, the unit will begin to beep and then shut down. This means
that the unit’s condensation tank is full and the unit cannot drain. The light will
remain flashing and the unit will remain off until the condensation water is drained
from the unit. Please refer to the CLEANING THE UNIT section in this manual for
further information.
NOTE: Sleep function
Cooling mode: The Sleep function is designed to gradually increase the
thermostat temperature by ° C each hour, and hence the room temperature will
be adjusted in the first two hours only. (When the set time elapses, the unit will
shut off.)
Heating mode: The Sleep function is designed to gradually decrease the
thermostat temperature by ° C each hour, and hence the room temperature will
be adjusted in the first two hours only. When the set time elapses, the unit will
shut off.
NOTE: This unit has a three-minute compressor delay protection circuit,
consequently, the compressor may take up to three minutes to start when first turned
1

on or changing modes.
For the unit with heat function this product is also equipped with a de-frost function.
When using the heating function at low ambient temperature, the heating might be
interrupted briefly to melt the frost. If this happens, just wait for the heating mode to
pick up again. As the appliance has to heat up, the fan will stop for 15- 0 seconds
when you switch to the heating mode.
Remote control
SETTING UP
1. Remove the cover from the back of the remote control.
. Insert two AAA batteries (batteries not included).
3. Insert the power plug of the unit into an outlet.
4. Always point the remote control towards the unit when you want to use it.
5. Make sure that there is nothing obstructing the signal path.
6. The maximum distance between remote control and appliance is 4 meters.
7. Remove the batteries if the remote control is not going to be used for some time.
A change in the function is usually indicated by a beep.
Note:
• Do not abuse the remote control.
• Do not expose the remote control to direct sunlight or leave it next to a radiator or
other source of heat.
• Do not use rechargeable batteries as they differ from standard dry cell batteries in
shape, size and performance.
• Be sure to replace the batteries with two new batteries of the same type.
Remote control functions
13

1. LCD Display
. Mode selection button: Press this button to select AUTO , COOL , DRY
or HEAT functions (for the unit with heat function)
3. Temperature UP and Down setting buttons: Press "+" to increase temperature;
Press "-" to reduce temperature.
4. Fan speed selection button: Press this button to select the fan rotation speed.
5. Sleep function button: Press once to switch to set sleep function. Press twice to
switch off the sleep function.
6. "ON Timer" button: Set the Timer On function as follows: the remote control unit
is switched off; no time shown on the display. Press "ON Timer" button > On
Timer signal flashes. > Press "Hour" button until the required time is shown. >
Press "ON Timer" button to set the desired time > ON Timer signal stops
flashing.
Press "ON Timer" button again will cancel the "ON Timer" setting.
7. "OFF Timer" button: Set the Timer OFF function as follows: the remote control
unit is on; no time shown on the display. Press "OFF Timer" button > OFF Timer
signal flashes on display > Press "Hour" button until the required time is shown >
Press "OFF Timer" button to set the desired time > OFF Timer signal stops
flashing.
Press "OFF Timer" button again will cancel the "OFF Timer" setting.
8. "ON/OFF" power button: This button switches the remote control unit "ON" and
"OFF". When the remote control unit is switched on, the last setting used will be
displayed.
9. "Hour" button: When "ON Timer" or "OFF Timer" signal flashes on the display,
press the "Hour" button to set the desired time.
10. "Minute" button: together with the "Hour" button to set the real time clock; set
the real time clock as follows; the remote control unit is off; press “ONTIMER”
and “OFFTIMER” buttons simultaneously and hold them down at least
seconds>clock signal flashes> Press "Hour" button until the required time is
shown> Press "Minute" button until the required time is shown> press
“ONTIMER” and “OFFTIMER” buttons simultaneously again and hold them
down at least seconds > clock signal stops flashing, the real time was set;
Regulating air flow direction
The horizontal louvers can be adjusted up and down by gently moving them to the
desired position to help direct airflow. The vertical louvers can be adjusted left or
right by using the handle at the bottom of the louvers.
14

Drainage
When the product is in cooling mode, dehumidification will be performed
simultaneously, during this process water will be accumulated inside the product.
When the water reaches the preset level, the compressor will stop and only the fan
will operate. The Alarm indicator(“RUN” LED LIGHT start to flash, the unit will
begin to beep ) turns on, the air conditioner switches itself off. To reset the unit for
normal operation, drain the water using one of the following methods:
( ) Drain Tray
1. Turn off the unit when the Alarm indicator turns on.
. Position the supplied drain tray flat on the floor, beneath the drain hole.
3. Remove the drain cap and rubber plug from the drain hole, allowing the water to
drain out to the drain tray.
4. When the drain tray is almost full, put the rubber plug back to the drain hole and
empty the tray.
5. Repeat the above procedures if required.
15

1. drain hole(rubber plug inside);
2. drain cap
3.drain hose
4.drain tray
(2) Drain Hose
1. Remove the drain cap and rubber plug rom the drain hole.
2. Connect the drain hose to the drain hole allowing the water to drain out to
a desired location. The drain hose may be extended i required.
3. A ter draining, put back the rubber plug and drain cap. The Alarm indicator
should now be o . The unit is now capable o normal operation.
Maintenance
Important Note: Always unplug the unit from the mains before maintenance or
cleaning.
Before cleaning the unit, turn it off and unplug it from the outlet.
For safety reasons, never wash the air conditioner by hosing it down or wiping it with
a dripping wet sponge or cloth.
Cleaning the exterior surfaces
• Use a soft damp cloth to wipe the body clean.
16

• Never use aggressive chemicals, petrol, detergents, chemically treated cloths or
harsh cleaning solutions – these may cause permanent damage to the external surface.
Cleaning the filter
The air filter located on the back of the unit, collects dust contained in the air. To keep
the dust from clogging the unit, your unit must always be used with its air filter.
• The build up of dust reduces the efficiency of the air conditioner. Therefore, the air
filters must be cleaned every two weeks, and more often if the machine operates in a
dusty atmosphere.
• If the filters are obstructed, the air conditioner will be less efficient.
• To remove the air filter, place fingers in the notch just under the top of the air filter
handle and pull up.
• Clean the filter with a vacuum cleaner. If the filter is very dirty, you can wash it in
warm water (never hotter than 40oC or soapy water). Make sure that the air filter is
completely dry before putting it back in the unit.
• Do not bend the filter.
NOTE: The filter comes with an additional charcoal screen, which removes foul odors
and smoke in the air. Remove the charcoal screen before washing the air filter, by
sliding the screen out.
Important Note: Never operate the unit without the filter fitted.
LONG TERM STORAGE
At the end of the season, or when you do not plan to use the unit for an extended
period of time, we recommend that you take the following steps:
• When the unit is not required for an extended period, it should be correctly stored.
• Unplug the unit. Completely drain the condensed water. Clean the filter.
• On a warm sunny day operate the unit in fan mode for a couple of hours to dry it out
completely.
• Storage hooks are provided on the rear of the housing for coiling the power cord
when not in use.
•Always unwind the cord completely before use.
17

Trouble shooting
If the air conditioner is not working properly, it is usually due to a minor problem that
the user can handle. Before calling customer service, please check the following
points.
Problem Probable Causes Solutions
The air conditioner
is not working.
1. Plug not properly inserted
into power socket.
2. Insufficient amount of
amperage to start unit.
3. Water tank is full / alarm
light is on.
1.Plug the appliance in properly.
2.Check fuses refer to rating label).
3.Drain unit.
The air conditioner cuts
out.
1. Unit is too close to wall or
another object.
2. The appliance is covered.
3.The "timer off" function has
been activated.
4.Room temperature is not
between 61°F and 97°F /
16°C and 36°C.
1. Unit should be at least 500mm
away from walls and objects.
2. Unit will overheat if the waste air
cannot fully vent.
3. Press the power button to turn the
unit on.
4. Switch the unit back on when
room temperature is between 61°-
97°F/ 16°C and 36° C.
Unit does not seem
to cool e ectively
1.Is the room too large?
2.Is there direct sunlight
onto the unit?
3.Are windows or doors
open?
4.Is there another heat
source in the room?
5.Is the ilter dusty or
contaminated?
6. Is the air intake
blocked?
1.Use in the room within
recommended size;
2.(close curtains and pull down
blinds)
3.4. Close them;
5.Clear the ilter;
6. Check and remove the
obstacle.
Too Noisy Is the unit positioned on
an uneven hard loor
sur ace creating vibration?
A so t carpeted sur ace may
absorb excessive vibration.
The "RUN" LED
indicator light
lashes and the
alarm sounds.
The condensation tank is
ull and the unit can not
drain. This sa ety eature
turns o the conditioner to
protect it and prevent the
tank rom over lowing.
Drain unit rom the drain plug at
the back o the unit.
18

The LED display shows
the unit is set but it is
not running.
The "timer on" feature is
activated.
This is normal. Push the Power
button to turn the unit on and
deactivate the "timer on" feature.
"E1" Displayed on LED
Panel
Evaporator sensor fault. Contact authorized customer service.
"E2" Displayed on LED
Panel
Room temperature sensor
fault.
Contact authorized customer service.
"E5" Displayed on LED
Panel
Overheating protection fault. Contact authorized customer service.
"E7" Displayed on LED
Panel
Water tank is full. Drain the water tank. The appliance
will switch on when the water tank
has been emptied.
BS plug wiring instruction: (for shipment with BS plug only)
Should it be necessary to change the plug, please note the wires in the mains lead are
accordance with the following code:
BROWN=LIVE GREEN AND YELLOW=EARTH BLUE=NEUTRAL
As the colors of the wires in the mains lead of this appliance may not correspond with
the colored markings identifying the terminals in your plug processed as following:
1. The BLUE wire is the NEUTRAL and must be connected to the terminal, which is
marked with the letter N or colored BLACK.
. The BROWN wire is the LIVE and must be connected to the terminal which is
marked with letter L or colored RED.
3. The GREEN/YELLOW is the EARTH and must be connected to the terminal
which is marked with letter E or colored GREEN or GREEN/YELLOW.
4. Always ensure that the cord grip is positioned and fastened correctly. If a 13A(BS
136 )fused plug is used it must be fitted with 13A fuse. If in doubt consult a
qualified electrician.
Wiring for a 13Amp plug (BS 136 )
19

Please note The Earth Terminal is marked with letter E or Earth symbol.
Service &warranty
0
This manual suits for next models
1
Table of contents
Other AirTek Air Conditioner manuals
Popular Air Conditioner manuals by other brands

Soleus Air
Soleus Air KC-15U owner's manual

Frigidaire
Frigidaire FAK103J1V4 owner's guide

Mitsubishi Electric
Mitsubishi Electric MSZ-LN18VG2W operating instructions

Frigidaire
Frigidaire FFRE0533S1E0 Use & care guide

Haier
Haier HDU-42HT03/H Operating & installation manual

Bimar
Bimar CP120 Instruction booklet

Carrier
Carrier ASBFE600BA owner's manual

Mitsubishi Electric
Mitsubishi Electric MSC-GE20VB operating instructions

Frigidaire
Frigidaire FAS155K1A1 Factory parts catalog

Soleus Air
Soleus Air GM-PAC-10E2 operating instructions

Mitsubishi Electric
Mitsubishi Electric MFZ-KA25VA Service manual

LG
LG LMU180CE owner's manual