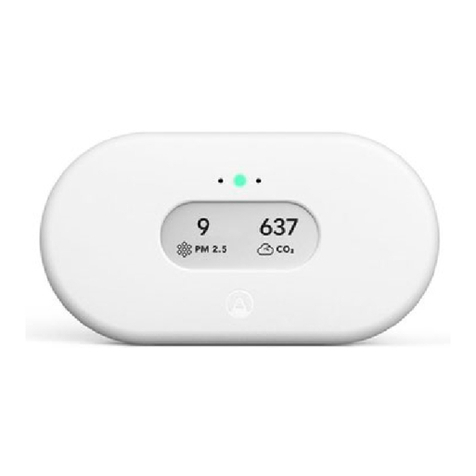
Airthings View Series User manual

User Manual
Version 1
24 February 2022
View
series
Indoor air quality and radon monitors
Congratulations on taking this important step toward living a healthier life.
By keeping track of your indoor air quality and/or radon levels, you can make healthier decisions in the spaces
where you spend most of your time. Increased productivity and energy levels, better quality sleep, and resistance
to illness are just a few of the benets. Lessening your exposure to radon will reduce your risk of lung cancer.
Your Airthings View device provides you with the information you need on the display, your phone and the
Airthings Dashboard. Or you can simply wave in front of the device for a visual indication of your levels.
Breathe better, live better,
The Airthings team
GET IN TOUCH
For technical support or if you have any questions or comments that we did not answer
here, you can reach us the following ways:
Chat bubble on the
airthings.com
website
Visit our support forum
help.airthings.com
WHAT'S IN THE BOX
FEATURES AND CONTENT
1. Customizable display
2. Glow signal
3. Motion sensor
4. Air inlets
5. Battery compartment with 6 AA batteries
(included)
6. USB cable port
7. Reset button
8. Individual serial number
9. Mounting bracket
10. One-time battery tab
Sleeve & hangtab x 1
External box x 1
Cable x 1
Regulatory booklet x 1
Batteries x 6
Silica bag x 1
3M sticker x 3
User manual x 1
Translucent sticker x 2

VIEW SERIES SETUP
Step 1 - Download the Airthings App
Download or update the Airthings App
from the Apple App Store or Google Play
Store and create an account.
Step 2 - Setup
Pull the battery tab on the device and
follow the in-app instructions to connect
the device to your smartphone and your
WiFi. You can also power your device
using the supplied USB cable. There may
be a rmware update when you start the
device.
Note: You can leave the batteries in when powering over USB,
but the batteries will not be recharged. Your device will
automatically swap between battery power and USB power.
Step 3 - Placement
Your View device can be placed wherever
you want to measure your air quality,
such as your night stand, on the wall in
the baby room, or on a shelf in the living
room. It should be kept away from very
dusty environments, and performs best if
cleaned with a dry or damp cloth once in
a while. View Plus and View Radon should
be kept out of damp environments above
85% humidity to avoid damage to the
radon sensor.
Step 4 - Calibration
Some sensors will need time, usually
around a week, to calibrate after power-
up. See more details in the product sheet
for your device.
The various sensors have dierent
sample rates (how often it records a data
point) and accuracy. The radon sensor in
particular is built for long-term
monitoring. Although you can read the
early data samples, they are likely to be
inaccurate. Radon will often vary
To mount your View on a wall: Fix the
mounting bracket to the wall. Make sure
you use appropriate screws for your wall
type. Do not place it close to vents or
windows. Minimum 1 meter / 3 feet
distance.
signicantly from day to day, and even
month to month. Buildings can be
diagnosed for radon by measuring all
living areas - e.g., living rooms and
bedrooms - for at least one week. For a
more accurate value, this should be
followed by a long-term measurement
(for at least 2 months) in the room with
the highest radon value.
DAILY USE
Congurable Display
The display can be congured to show the sensor values you
care most about. Conguration is done in the Airthings
Dashboard or App. The display will update up to every 2.5
minutes, depending on the sensor sample interval and the
sensors shown on the display. It will sometimes icker
completely to refresh itself. This is normal and does not mean
your device is operating incorrectly.
Note: The calm tech, e-paper display does not require power to show an image. If
your View device suddenly loses power, for example if the USB connector is
removed and there are no batteries in the compartment, then the display will
simply keep displaying whatever image it had when loss of power occurred. The
display will update as normal when power is restored to the product.
Using your View as a hub for other
Airthings devices
When powered over USB, and connected to WiFi, your View
device will act as a SmartLink hub for other supported
Airthings devices (Wave Mini, Wave Plus, Wave Radon 2nd

gen). This is a great way to keep all your Airthings devices
continuously connected and accessible. Use the Airthings
App to select which Airthings devices to link to your View.
Reset button
A short press of the reset button (for about half a second) will
toggle through various useful information on the display.
Note that a short press will not reset the device.
A long press of the reset button will reset your device
completely, reverting it back to its factory state. This removes
any locally stored personal data, such as your WiFi password.
It will not remove the device from your online account. When
you hold the reset button, a countdown will show up on the
display letting you know when the reset will take place. If you
release the button before the countdown has nished, the
reset will be canceled.
Wave function
Wave in front of your device for a quick visual indication of
your indoor air quality levels. The glow signal will light up
according to the overall air quality (green means good, yellow
means fair, and red means poor), and the display will change
to show any levels that are fair or poor.
For details on sensor thresholds go to
help.airthings.com
Airthings App
Your app will update automatically as long as your device is
connected to a WiFi network. The Airthings App includes
sensor values, historical graphs, and long and short-term
averages. Use the app to congure your View, set up
notications based on sensor values, and more.
Airthings Dashboard
INTEGRATIONS
All Airthings View devices share data to your mobile device as well as the Airthings Dashboard—a free online
platform that provides quick access to view, customize and analyze sensor data from multiple Airthings devices. Go
to
airthings.com/dashboard
for more info.
The Airthings View oers the possibility to use Amazon Alexa and Google Assistant to read out your latest sensor
measurements from any Airthings device that is connected via a Hub or View product. Limitations to languages
and regions apply. Please visit airthings.com for the latest requirements and limitations.
The Airthings View also supports IFTTT, allowing users to create or access useful recipes for their device to follow,
and integrate with third-party products.
Sign up for our newsletter for the latest updates.
The Airthings web dashboard lets you view, customize and
analyze the sensor data from all of your devices at a glance.
You’ll also have access to trends and advanced analytics. Find
out more at
airthings.com/dashboard
Sensors
Read more about how to use and interpret the values
reported by the sensors in your View device
here
.

COMMON QUESTIONS AND TROUBLESHOOTING
You can nd answers to many common questions here:
help.airthings.com
If you have other questions, you can contact the Airthings support team using the chat bubble on our web page, in
the app, or by sending an email to
support@airthings.com
TROUBLESHOOTING
CATEGORY PROBLEM / RESOLUTION
Adding to
your account
I can’t nd my View device when trying to add it to my app.
Bluetooth must be enabled on your smartphone. For Android, GPS location must be
enabled for Bluetooth low energy to function properly.
You are not close enough to the device or there is wireless interference. Keep your
phone less than 1m / 3 ft away from the device and search for it again.
The device is already registered to another account.
I am unable to connect my View to WiFi.
Your View device is only able to connect to 2.4 GHz WiFi networks. If you have a dual
band router with both 2.4 GHz and 5 GHz bands, make sure they have dierent
names.
Also, make sure your router DNS settings are correct and that you are connecting to
your primary network.
Using your
View as a
hub for
other
Airthings
devices
I don’t see my Wave device when linking it to the View.
Bluetooth must be enabled on your smartphone. For Android, GPS location must be
enabled for Bluetooth low energy to function properly.
You are not close enough to the Wave device or there is wireless interference. Keep
your phone less than 1m / 3ft away from the Wave device and search for the device
again.
Exit the “Link device” screen and re-enter to try again.
I don’t see my other View device when linking it to the View.
A View device is only able to connect by WiFi, and cannot be linked to an Airthings
Hub, or another View device acting as a hub.
I don’t see data coming from the Wave devices when linked to my View.
Make sure the linking process was completed successfully in the app.
The Wave device might be out of range. Move the device close to the View for an
hour and check if the App device overview indicates a Hub connection by showing a
signal strength bar, then move the Wave back to its place and verify signal strength
in the app. If the connection stops again, you might need to move the Hub to a
dierent place.
Make sure your View is connected by WiFi. You can tell by checking that data from
the View is regularly updated in the app.
Also, make sure it is powered by USB. Your View will stop its hub functionality
whenever it is only powered by batteries.
I set my View to the wrong region. What should I do?
Please contact customer support to have it manually reset. After a region reset, any
Wave devices must be unlinked and the View unpaired from your account before
starting the setup over again.
Display My display is ickering at times
This is normal, and is an eect of the display technology used.
My View is without power and batteries, but the display is still showing.
This is normal, and is an eect of the display technology used.
My display is showing dierent values than those shown in the App.
The App can sometimes take longer to update than the display, especially if the
device is powered by batteries.
Noise from
the device
My View will sometimes make a slight fan noise, is this normal?
View Plus and View Pollution uses a particle sensor with a small fan, which can
sometimes be heard if held close to the ear or in a particularly quiet room.
COMMON QUESTIONS
What is the range of the View when used as a hub?
The View will typically be able to reach linked Airthings devices anywhere in most homes. Tests show that in most
cases the range should be more than enough for a large family home. Range may vary
depending on wall and oor materials, wireless interference, placement, and other factors.
How many devices can be connected to a View used as a hub?
The View can support up to 10 devices being connected to it.
What devices can be linked to the View when used as a hub?

The Wave Plus, Wave Mini and Wave Radon devices can be linked to your View.
Wave 1st gen (serial number 2900x) and other View devices cannot be linked to the View. If you own multiple View
devices, these will send data to your account in the Airthings cloud over WiFi independently.
Can I retrieve data locally from the View?
This is unfortunately not possible. The data is encrypted in transit to the Airthings cloud and is retrieved again
through the Airthings Wave app or web dashboard at
https://dashboard.airthings.com
.
Can I retrieve data over Bluetooth from the View, like I can with Wave devices?
No, View devices only support data transfer over WiFi. Bluetooth is only used for initial setup and conguration.
How often will Wave devices send data through the View when used as a hub?
The Wave devices send in data every 5 minutes. Radon data (24 hour rolling average) is sent every hour.
The Bluetooth word mark and logos are registered trademarks owned by the Bluetooth SIG, Inc. and any use of such marks by Airthings is under license.
Copyright Airthings ASA, 2022
Other manuals for View Series
4
Other Airthings Measuring Instrument manuals