manuals.online logo
Brands
  1. Home
  2. •
  3. Brands
  4. •
  5. Aiwa
  6. •
  7. Cassette Player
  8. •
  9. Aiwa HS-TA483 User manual

Aiwa HS-TA483 User manual

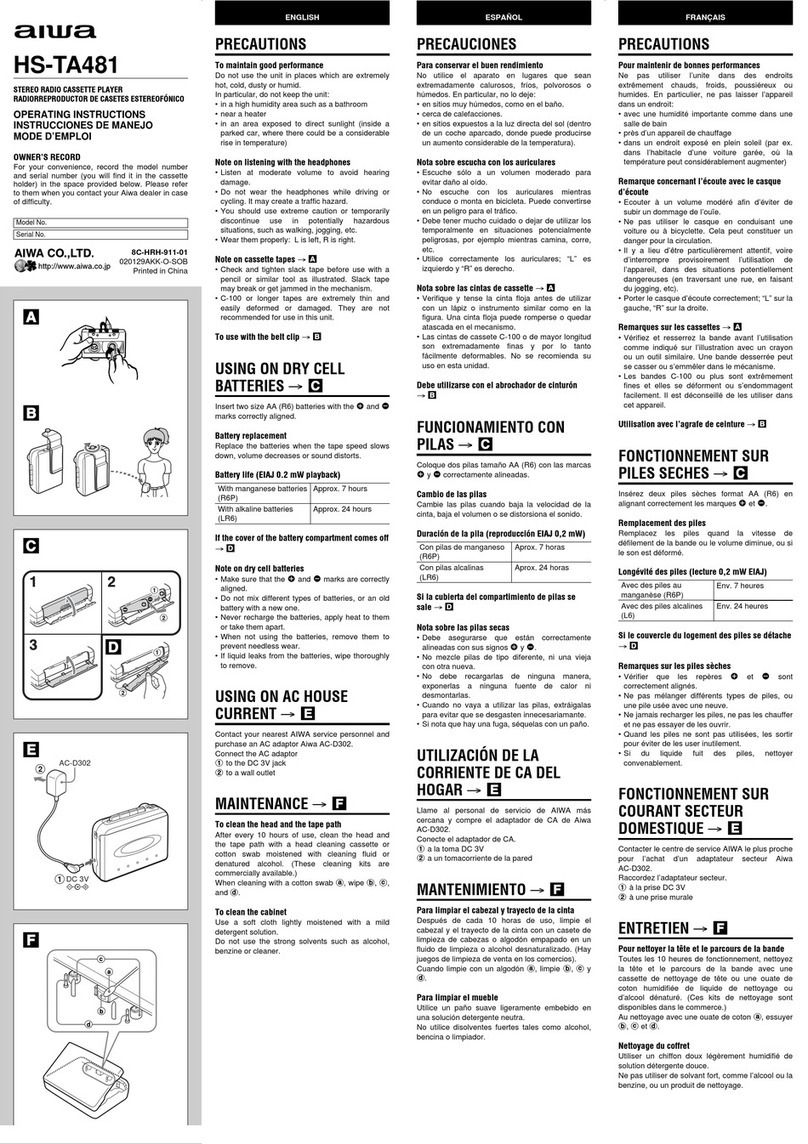
anua OWNER’S RECORD
For your convenience, record the model number (you will find
it on the rear of your set) and the serial number (you will find it
inside the cassette holder of your set) in the space provided
below. Please refer to them when you contact your AIWAdealer
in case of difficulty,
HS-TA483W
STEREO RADIO CASSETTE PLAYER
RADIORREPRODUCTOR DE CASETES ESTEREOF6NIC0 Model No.
Serial No.
OPERATING INSTRUCTIONS
INSTRUCCIONES DE MANEJO
MODE D’EMPLOI Tl Pararetirarla. 4=7’ I
88-HRF-901 -01
971021 AWY-X9
Printed in Indonesia AIWA CO.,LTD.
PRECAUTIONS
To maintain good performance
Do not use the unit in places which are extremely hot, cold, dusty or
humid. In particular, do not keep the unit:
●in ahigh humidity area such as abathroom
●near aheater
●in an area exposed to direct sunlight (eg.,inside aparked car, please
be careful because it may become extremely hot.)
Note on listening with the headphones
●Listen at moderate volume to avoid hearing damage.
●Do not wear the headphones while driving or cycling.
It may create atraffic hazard.
●You should use extreme caution or temporarily discontinue use in
potentially hazardous situations, such as walking, jogging, etc.
●Wear them properly: Lis left, Ris right.
Note on cassette tapes ❑
●Take up any slack in the tape with apencil or asimilar tool before
use. Slack tape may break or jam in the mechanism.
●C-100 or longer tapes are extremely thin and easily deformed or
damaged. They are not recommended for use in this unit.
POWER SOURCES
The unit may be powered by two size AA (R6) batteries or AC house
current using the optional AC adaptor AIWA AC-620/AC-302.
To use with dry cell batteries ❑
1Open the cover of the battery compartment@ on the rear of the
unit.
2Insert two size AA (R6) batteries with the 0 and Oproperly
aligned,
3Close the cover.
Battery replacement
The batteries need replacement when:
the OPE/BATT indicator changes to E(red), tape speed slows down,
volume decreases, sound becomes distorted, playback function fails to
operate.
Note on dry cell batteries
Ifthe dry cell batteries are not handled properly, there maybe adanger
of leakage or explosion. Observe the following precautions and handle
the batteries correctly.
●Make sure that the 43 /Omarks are correctly aligned.
●Do not mix different types of batteries, or an old battery with anew
one.
●Never recharge the batteries, apply heat to them or take them apart.
●When not using the batteries, remove them to prevent needless wear.
●If liquid leaks from the batteries, wipe thoroughly to remove.
ReemrJazo de Ias pilas Replacement des piles
Les piles doivent &re remplacdes quand:
I’indicateur OPE/BATT passe A E (rouge),lavitesse de la bande ralentit,
Ie volume baisse, Ie son est d6form6, Ies fonctions de lecture ou
d’inversion ne marchent plus.
Remarque concernant Ies piles sbches
Si Ies piles sdches ne sent pas manipuldes correctement, il peut yavoir
des risques d’explosion ou de fuite. Observer les precautions suivantes
et manipuler Ies piles correctement.
●S’assurer que Ies marques 43/Osent correctement aligndes.
●Ne pas m61anger diffdrents types de piles, ni une pile usag6e avec
une neuve.
●Ne jamais recharger Ies piles, Ies chauffer ou Ies ddmonter.
●Lorsque Ies piles ne sent pas utilis6es, Ies retirer pour &iter une
usure inutile.
●Si un Iiquide fuyait des piles, I’essuyer consciencieusement pour
I’enlever.
Alimentation sur Ie courant secteur ❑
Branchez I’adaptateur d’alimentation secteur en option (AIWAAC-620/
AC-302) sur la prise DC 3V 0+33 de I’appareil et sur la prise secteur.
PRECAUCIONES PRECAUTIONS
Pour maintenir de bonnes performances
Ne pas utiliserI’appareilclansdes endroitsextr~mement chauds, froids,
poussi6reux ou humides. En parficulier, ne pas Iaisser I’appareil clans
un endroit:
●Tri?s humide, comme clans une sane de bain. .
●Prds d’un appareil de chauffage.
●Expos6 aux rayons directs du soleil comme clans I’habitacle d’une
voiture garde en plein soleil.
Remarque concernant I’dcoute avec Ie casque
●Ecouter Aun volume mod&6 afin d’6viter Ies dommages auditifs.
●Ne portez pas Ies Acouteurs quand vous conduisez ou Aw510.Cela
pourrait provoquer un accident de la circulation.
●Nous vous recommandons d’t?tre tr?w prudent ou d’arr&er
temporairement I’utilisation de I’appareil clans des situations ~risque
potentiel, en marchant, en faisant du jogging par exemple.
●Porter Ie casque d’6coute correctement; “L” sur la gauche, “R” sur la
droite.
Remarque sur les bandes de cassettes ❑
●Enlever Ie mou de la bande avec un stylo ou un objet similaire avant
I’utilisation. Une bande avec du mou risque de se rompre ou de se
predre clans Ie mdcanisme.
●Les bandes des cassettes C-100 ou plus Iongues sent extri)mement
fines et facilement deformable ou endommageable. Elles ne sent pas
recommand6es avec cet appareil.
Las piias necesitan ~eemplazarse cuando:
el indicador OPE/BAIT cambia aE(rojo), la velocidad del reproductor
es mds Ienta, et volumen disminuye, cuando el sonido est~
distorsionado, cuando la funci6n de reproducci6n deja de operar.
Nota sobre Ias piias
Si no maneja adecuadamente Ias pilas, puede existir el peligro de que
se fugue su electr61ito o de que exploten.
Tenga en cuenta Ias precauciones siguientes ymaneje correctamente
Ias pilas.
●Cerci6rese de alinear correctamente Ias marcas 0/ O.
●No mezcle diferentes tipos de pilas, o una pila vieja con otra nueva.
●No recargue nunca Ias, no Ias caliente, ni Ias desarme.
●Cuando no vaya autilizar Ias pilas, extri4igalas para evitar que se
descarguen innecesariamente.
●Si se fuga Ifquido de Ias pilas, I(mpielo completamente.
Para utilizar un tomacorriente de CA H
Conecte la clavija un adaptador de alimentaci6n de CA optional (AC-
620/AC-302 AlWA) en la toma DC 3V @-C55 de la unidad yenchtifelo
en un tomacorriente de CA,
Para conservar el buen rendimiento
No utilice el aparato en lugares que scan extremadamente calurosos,
fr[os, polvorientos ohumedos. En particular, no 10deje:
●en sitios muy humedos, como en el baiio.
●cerca de calefacciones.
●en sitios expuestos ala Iuz directs del sol (como dentro de un vehiculo
estacionado, donde la temperature puede subir excesivamente).
Cuidado en la escucha con Ios auriculares
●Escuche s610a un volumen moderado para evitar dafio al oido.
●No escuche con Ios auriculares mientras conduce o anda en bicicleta.
Puede convertirse en un peligro para el tr~fico.
●Debe tener mucho cuidado odejar de utilizar temporalmente en
situaciones potencialmente peligrosas, por ejemplo mientras camina,
corre, etc.
●Utilice correctamente ios auriculares; “L” es izquierdo y“R” es derecho.
To use on AC house current H
Connect the optional AC adaptor (AIWA AC-620/AC-302) plug to the
DC 3V 6H33 jack of the unit and plug the AC adaptor in to an AC wall
outlet.
Notas sobre Ios casetes ❑
●Tense la cinta con un Mpiz uotro objeto similar antes de utilizarla.
Una cinta floja podria romper oatascarse en el mecanismo.
●Las cintas C-100 o de mds Iargo son extremadamente finas ytienden
adeformar odailarse fticiimente. No se recomienda utilizarlas con
esta unidad.
SPECIFICATIONS SPECIFICATIONS
ESPECIFICACIONES
Frequency range FM: 87.5-108 MHz
AM: 530-1710 kHz
Maximum output 20mW+20mW(EIAJ/16Q)
15 mW +15 mW (EIAJ/32Q)
Power source Battery DC 3V, size AA (R6) X2
Domestic AC power (using the optional AC
adaptor: AIWA AC-620/AC-302)
Battery life Manganese batteries (size AA, R6P) Approx.
9hours (EIAJ, 1mW output, playback mode)
Alkaline batteries (size AA, LR6) Approx. 22
hours (EIAJ, 1mW output, playback mode)
Maximum dimensions 117 X86,7X 33,2 mm
(W) X(H) X(D) (45/8 X3’/2 X15/18inches)
Weight Approx. 155.3g, 5.40z (excluding batteries)
Accessories Stereo headphones (1)
Beit clip(1)
The specifications and external appearance of this unit are subject to
change without notice.
Gama de frecuencias
Salida mdxima
Fuentes de aiimentaci6n
FM: 87,5-108 MHz
AM: 530-1710 kHz
20 mW +20 mW (EiAJ/16 ohmios)
15 mW +15 mW (EIAJ/32 ohmios)
3VCC, pilas tamailo AA (R6) X2
Tensi6n de CA de la red (utilizando un
adaptador de CA optional: AC-620/
AC-302 AlWA)
Pilas de manganeso (tamafio AA, R6P)
Aprox. 9horas (EIAJ, salida de 1mW, modo
de reproducci6n)
Pilas alcalinas (tamailo AA, LR6) Aprox. 22
horas (EIAJ, saiida de 1 mW, modo de
reproducci6n)
117 X86,7X 33,2 mm
Aprox, (excluyendo Ias pilas) 155,3g
Auriculares est6reo (1)
FM: 87,5-108 MHz
AM: 530-1710 kHz
20mW+20mW(EIAJ/16$2)
15 mW +15 mW (EIAJ/32 Q)
Pile 3V CC, taille AA (R6) X2
Alimentation secteur (en utilisant
I’adaptateur de tension optionnel: AIWA
AC-620/AC-302)
Piles manganbse (taille AA ,R6P) Env. 9
heures (EIAJ, sortie de 1 mW en mode de
lecture)
Piles alcaline (taille AA ,LR6) Env. 22 heures
(EIAJ, sortie de 1 mW en mode de iecture)
117 X86,7X 33,2 mm
Env. (saris Ies piles) 155,3g
Ecouteurs st&40 (1)
Plage de fr6quence
Puissance de sortie
maximum
Source d’alimentation
FUENTES DE ALIMENTACION ALIMENTATION
L’appareil fonctionne sur deux piles taille AA (R6) ou sur secteur AI’aide
de I’adaptateur secteur optionnel AIWA AC-620/AC-302.
Alimentation sur piles sbches ❑
1Ouvrir Ie couvercle du compartment des piles @hI’arritwe de
l’appareil.
2Mettre Ies deux piies tailie AA (R6) en place en respectant la
polarit60 et O.
3Fermer Ie couvercle.
Le couvercle du compartment des piles peut se d6tacher
Dans ce cas, i’attacher comme indiqu6 clans ❑.
La unidad puede funcionar con dos pilas tamailo AA (R6) ,0con
corriente alterna utilizando el adaptador CA optional AIWA AC-620 o
AC-302.
Para usarse con pilas ❑
1Abra la cubierta del compartimiento para pilas @en la parte
posterior de la unidad.
2Inserte dos pilas tamaiio AA (R6) con Ias marcas 0 y o
debidamente alineadas.
3Cierre la cubierta.
Duraci6n de Ias pitas Dur6e de vie des piles
if the cover of the battery compartment comes off
Reattach it as illustrated in ❑.
OPE/BAll indicators ❑
The three indicators light up in turn to show the amount of remaining
power of the batteries.
IBa~ew power IHigh ~Low 1
Sise desprende la cubierta dei compartimiento de Ias pitas Dimensioned mtiximas
(An) X(Ai) X(Prf)
Peso
Accesorios
Dimensions maximum
(L) X(H) X(P)
Masse
Accessoires
Vu6ivala acolocar como se ilustra en E.
Indicadores OPE/BAll ❑
Lostres indicadores se iluminan por turno para mostrar la energia que
queda en ias pilas.
IEnemiadelai)ilaIAlta ~Baia ~
Indicateurs OPE/BATT ❑
Les trois indicateurs s’allument tour ~tour pour indiquer la capacit6
des piles.
Capacit6despiles Elevde ~Faible
indication de
OPE/BAll y:ine)~ :~:’nne)~ ::;:
Presilla para el cintu;in (1)
Las espscificaciones yel aspecto extemo de esta unidadestti sometidos a
cambio sin previo aviso.
Attache-ceinture (1)
Les specifications et I’apparence externe de cet appareil sent sujettes
~changement sams notification.
OPE/BAIT
Indication :::”’ ~::!: +;:dmpw)
FM STOF#OAM I
4
Modo de inversi6n @
CZJ: Ambas caras se reproducirtm repetidamente.
=: Ambas caras se reproduciri% una vez.
La reproduccirh se detiene al final de la cara posterior.Si cambia
de cara durante la reproducci6n de la cara posterior, la cinta se
detendrd,
PREPARATION ❑Reverse mode 0
CJ: Both sides are played back repeatedly.
=: Both sides are played back once.
Playback stops at the end of the reverse side. When you change
the playback side during reverse side playback, the tape will stop.
PREPARATIVES ❑
Conexi6n de Ios auriculares
Conecte Iosauriculares suministrados ala toma 0.
PREPARATION ❑Mode d’inversion 0
Cl): Les deux faces sent Iues de manidre rdp&de.
0: Les deux faces ne sent Iues qu’une seule fois.
La lecture s’arr~te Ala fin de la face arrir%e. Si vous changez de
face pendant la lecture de la face arridre, la bande va s’arr~ter.
Pour choisir Ie type de la bande 0
NORM: Pour une bande Type 1(normales).
H1/MTL: Pour une bande Type 11(haut /CI02) et Type IV (m6tal),
Connecting the headphones
Connect the supplied headphones to the Ojack, Connexion des dcouteurs
Connecter Ies dcouteurs fournis 21la prise (?.
Processeur multi-son (M.S.P)
Vons pouvez dcouter de la musique avec quatre modes diff6rents
d’dgalisation (CLASSIC, POP, ROCK, JAZZ).LJtilisezIes~lecteurM.Sop
pour s61ectionner un mode d’dgalisation selon la source d’dcoute. Le
voyant verf indique Ie mode s61ectionn&
CLASSIC: MrYange bquilibrb de la plage des hautes frdquences Ala
plage des basses frdquences. R6gler sur ce mode pour Ie
plus faible effet d’accentuation.
POP: Met Ies basses et moyennes frdquences en valeur.’
ROCK: Met Ies basses frdquences en valeur.
JAZZ: Met Ies basses frdquences en valeur, mais I’amplification
des basses est plus importance.
Multi sound processor (MS.P)
You can enjoy musicwith four different equalization modes (CLASSIC,
POP, ROCK, JAZZ). Turn the M.S.P selector switch to select an equali-
zation mode according to the listening source. The indicator shows that
the mode was selected.
CLASSIC: Round, balanced mix from high range to low range. Good
for classical music. Set to this mode for the least empha-
sized effect.
POP: Emphasizes low and midranges.
ROCK: Emphasizes the low ranges.
JAZZ Emphasizes the low ranges with greater bass effect.
Processor de sonido multiple (M.S.P)
Usted puede disfrular de la musics en cuatro diferentes modos de
ecualizaci6n (CLASSIC, POP, ROCK, JAZZ). Deslice el selector M.S. P
para seleccionar et modo de ecualizaci6n de acuerdo con la fuente
que se escuche. El indicador verde muestra qu6 modo se seleccion6.
CLASSIC: Redondo, mezcla balanceada desde una gama aita a una
gama baja. Apropiado para musics cldsica. Establezca este
modo para obtener el efecto mtis acentuado.
POP: Enfatiza gamas medias ybajas,
ROCK: Enfatiza la gama baja,
JAZZ: Enfatiza lagama con una mayor amplification de Ios graves.
To select the tape type 0
NORM: For Type 1(normal) tapes.
H1/MTL: For Type 11(high/ CK32) and Type IV (metal) tapes.
Para seleccionar el tipo de cinta @
NORM: Para cintas de Tipo I(normales).
H1/MTL: Para cintas de Tipo II (alto /C02) et Tipo IV (m6tal).
RADIO RECEPTION ❑RADIORRECEPCION ❑RECEPTION RihDIO Q
1Set the TAPE/RADIO switch to RADIO.
2Set the FM ST/FM/AM switch to select aradio band.
3Turn the TUNING control to tune into astation.
4Adjust the volume.
1R6gler Ie commutateur TAPE/RADtO sur RADIO.
2R6gler Ie commutateur FM ST/FM/AM pour choisir la gamme
d’onde.
3Tourner Ie ri?glage TUNING pour accorder une station. ,
4Ajuster Ie volume.
Aprr% I%coute de la radio
R6gler Ie commutateur TAPE/RADIO sur TAPE pour mettre I’appareil
hors tension.
Lors de I%coute d’une 6mission FM st6r60
●R6gler Ie commutateur FM ST/FM/AM sur la position FM ST.
●Si Ie signal FM str%do est faible ou ddformi$ rdgler ce commutateur
sur la position FM. Le son sera monaurai mais la deformation sera
rdduite.
Pour une meilleure r6ception ❑
FM: Le cordons des r5couteurs sert d’antenne FM. Le maintenir
6tendu et Ie positioner de faqon approximative pendant la
rdception radio.
AM: Ii y a une antenne int6gr6e AI’appareii. Tourner I’appareil pour
trouver la position qui offre la meilleure ri$ception.
1Ponga el selector TAPE/RADIO en RADIO.
2Ponga el selector FM ST/FM/AM en la banda deseada.
3Gire el control TUNING para sintonizar una emisora.
4Ajuste el volumen.
Despu6s de la escucha
Ponga el selector TAPE/RADIO en TAPE afin de desconectar la
alimentaci6n.
Para escuchar emisiones de FM estr%eo
●Ponga el selector FM ST/FM/AM en la posici6n FM ST.
●Si la seilal de FM est&eo es ddbil oesttt distorsionada, ponga este
selector en la posicirh FM. Elsonido serd monoaurai, pero la distorsi6n
se reducird.
Para mejorar la recepcir5n ❑
FM: El cable de Ios auriculares funciona como antena de FM.
Mant6ngalo extendido yco16quelo adecuadamente durante la
radiorrecepci6n.
AM: La unidad tiene incorporada en su interior una antena de barra
de ferrita. Gire la unidad hasta encontrar la posici6n que
ofrezca la mejor recepci6n.
PLAYBACK ❑REPRODUCC16N ❑
1Abra el portacasete einserte un casete.
@Cara frontal 0Caraposterior
Cuandohayainsertadoelcasete,presioneiigeramenteelportacasete
para cerrario.
2Ponga el selector TAPIURADIO en TAPE.
3Presione el bot6n +* PLAY para Iniciar la reproducci6n.
4Ajuste el volumen,
LECTURE ❑
After listening
Set the TAPWRADIO switch to TAPE to turn off the power.
1Open the cassette holder and insert acassette,
~Front side 0Reverse side
When the cassette is inserted, press the cassette holder lightly to
close it.
2Set the TAPE/RADIO switch to TAPE.
3Press the+* PLAY button to start playback.
4Adjust the volume.
1Ouvrir Ie compartment ?rcassette et insr%er une casaette.
0Face avant 0Face arri&e
Quand ia cassette est ins&6e, appuyer Mg&ement sur la porte du
compartment pour Ie fermer.
2R6gler Ie commutateur TAPIYRADIO sur TAPE.
3Appuyer sur la touche +~ PLAY pour commencer la lecture,
4Ajuster Ie volume.
When listening to FM stereo broadcasting
●Set the FM ST/FM/AM switch to FM ST position,
●If the FM stereo signal is weak and distorted, set this switch to FM
position. The sound will be monaural but distortion will be
reduced.
To stop the tape
Press the ■STOP button. For better reception ❑
FM: The headphone cord functions as the FM antenna.
Keep it extended and position it appropriately during radio
reception,
AM: There is abuilt-in antenna inside the unit. Turn the unit to find the
position which gives the best reception.
Pour arr&er la bande.
Appuyer sur ia touche ■STOP.
Pour changer la faced reproduire Q
Pendant la lectureouen mode d’arr&, rdglez la position du commutateur
FWD/REV.
FWD: Pour reproduire la face avant.
REV Pour reproduire la face arrhre.
Bobinage rapide
Appuyez sur la touche 44 ou -pour avancer rapidement la bande
vers i’arrkve ou I’avant.
Para parar la cinta
Presione el bot6n ■STOP.
Para cambiar la cara ala que desee reproducer @
Durante la reproducci6n, o en el modo de parada, seleccione la posici6n
de FWD/REV.
FWD: Para reproducer la cara frontal.
REV Para reproducer la car aposterior.
To change the side to be played back @
During playback or stop mode, set the FWD/REV switch.
FWD: To playback front side.
REV: To playback reverse side, MAINTENANCE ❑
Fast winding
Press the +or -button to fast forward or rewind the tape.
IMANTENIMIENTO QENTRETIEN Q
●Clean the piayback head 0, the pinch roller 0, and the capstan 0
regularly (every 10 hours of use) for optimum sound quality. Use a
cotton swab 0lightly moistened with cleaning fluid or denatured
alcohol.
●When the case becomes dirty or stained, use asoft cloth lightly
moistened with amild detergent solution, and wipe clean,
Do not use strong solvents (alcohol, benzine, thinner, etc.) to clean
the case.
Bobinado r%pido
Presione ei bot6n +oMpara hater que la cinta avarice
r~Didamente o~ara rebobinaria.
●Para obtener sonido de 6ptima calidad, Iimpie la cabeza de
reproducci6n 0, Ios rodillos de presi6n 0, yIos ejes de arrastre O
con regularidad (cada 10 horas de utiiizaci6n). Emplee un palillo de
algod6n 0Iigeramente humedecido en Ifquido Iimpiador o en alcohol
desnaturalizado.
●Cuando se haya ensuciado omanchado la caja, utilice un pafio suave
Iigeramente humedecido en una solucih que contenga un detergence
suave, yIfmpiela.
No emplee disolventes fuertes (alcohol, bencina, disoivente, etc.) para
Iimpiar la caja.
●Pour obtenir une qualit6 sonore optimale, nettoyer r6gulitwement
(toutes Ies dix heures d’utilisation) la t&e de lecture 0ies galets
presseurs @et Ies cabestans O. Utiliser un coton-tige 016g&ement
imbib6 d’un Iiquide de nettoyage ou d’alcool d&ratur6.
●Quand Ie coffret est sale ou couverf de t~ches, utiliser un chiffon
16g&ement imbib6 d’un Iiquide de nettoyage et essuyer.
Ne pas utiliserde dissoivants puissants (alcool, benzine, diluant, etc.)
pour nettoyer Ie coffret.
FWD/REV switch Rewind Fast forward
When set to FWD Mu
When set to REV u b ICommutateur FWD/REV IRebobinaae IAvarice rdr)ide I
Selector FWD/REV Rebobinado Avarice rtipido
Cuando se coloca en FWD wu
Cuando se coloca en REV uM
R6g16sur FWD wu
R4g16sur REV uw
When the tape advances or rewinds to the end, the -, -buttons
are not released. Press the NSTOP button to release them.
Quand la bande est entibrement bobinde ou rebobin&e, Ies touches
-et >ne sent pas Iib&r&es. Appuyez sur la touche ■STOP pour
Ies lib~rer.
Cuando la cinta haya avanzado completamente ose haya rebobinado
hasta el final el bot6n 440- no se desenganchard. Presione ei
bot6n ■STOP para soltarlo.

This manual suits for next models

1

Other Aiwa Cassette Player manuals

Aiwa CSD-MD30 User manual

Aiwa

Aiwa CSD-MD30 User manual

Aiwa HS-TX686 User manual

Aiwa

Aiwa HS-TX686 User manual

Aiwa HS-PS201 User manual

Aiwa

Aiwa HS-PS201 User manual

Aiwa HS-PS11 User manual

Aiwa

Aiwa HS-PS11 User manual

Aiwa HS-TA193 User manual

Aiwa

Aiwa HS-TA193 User manual

Aiwa HS-PS211 User manual

Aiwa

Aiwa HS-PS211 User manual

Aiwa HS-TX406 User manual

Aiwa

Aiwa HS-TX406 User manual

Aiwa RM-77 User manual

Aiwa

Aiwa RM-77 User manual

Aiwa CS-P70 User manual

Aiwa

Aiwa CS-P70 User manual

Aiwa CSD-FD89 User manual

Aiwa

Aiwa CSD-FD89 User manual

Aiwa HS-AP1MK7 User manual

Aiwa

Aiwa HS-AP1MK7 User manual

Aiwa HS-GS192 User manual

Aiwa

Aiwa HS-GS192 User manual

Aiwa TP-VS615 User manual

Aiwa

Aiwa TP-VS615 User manual

Aiwa HS-PS173 User manual

Aiwa

Aiwa HS-PS173 User manual

Aiwa CSD-ED87 User manual

Aiwa

Aiwa CSD-ED87 User manual

Aiwa HS-SP350 User manual

Aiwa

Aiwa HS-SP350 User manual

Aiwa CSD-EL33 User manual

Aiwa

Aiwa CSD-EL33 User manual

Aiwa HS-SP370 User manual

Aiwa

Aiwa HS-SP370 User manual

Aiwa HS-TA183 User manual

Aiwa

Aiwa HS-TA183 User manual

Aiwa HS-GS292 User manual

Aiwa

Aiwa HS-GS292 User manual

Aiwa HS-TX491 User manual

Aiwa

Aiwa HS-TX491 User manual

Aiwa HS-PS173 User manual

Aiwa

Aiwa HS-PS173 User manual

Aiwa CSD-EX150 HR User manual

Aiwa

Aiwa CSD-EX150 HR User manual

Aiwa CSD-A170 LH User manual

Aiwa

Aiwa CSD-A170 LH User manual

Popular Cassette Player manuals by other brands

Panasonic RX-DT30 Service manual

Panasonic

Panasonic RX-DT30 Service manual

THOMSON RK102CD operating instructions

THOMSON

THOMSON RK102CD operating instructions

Sony CFS-B15 - Am/fm Stereo Cassette Recorder operating instructions

Sony

Sony CFS-B15 - Am/fm Stereo Cassette Recorder operating instructions

Kenwood X-SG7G Service manual

Kenwood

Kenwood X-SG7G Service manual

Sony Sports Walkman SRF-88 Limited warranty

Sony

Sony Sports Walkman SRF-88 Limited warranty

Optimus SCP-98 owner's manual

Optimus

Optimus SCP-98 owner's manual

Panasonic RQ-SX32 operating instructions

Panasonic

Panasonic RQ-SX32 operating instructions

Sharp JC-130HBK Service manual

Sharp

Sharp JC-130HBK Service manual

Curtis RCD338 Specification sheet

Curtis

Curtis RCD338 Specification sheet

Panasonic RX-FT510 operating instructions

Panasonic

Panasonic RX-FT510 operating instructions

Rotel RD-1001 owner's manual

Rotel

Rotel RD-1001 owner's manual

Sony TC-TX595 operating instructions

Sony

Sony TC-TX595 operating instructions

Denon DRR-M33 operating instructions

Denon

Denon DRR-M33 operating instructions

Pyle Pro PT-659DU user manual

Pyle Pro

Pyle Pro PT-659DU user manual

Yamaha MT100II Operation manual

Yamaha

Yamaha MT100II Operation manual

SAL RRT 11B instruction manual

SAL

SAL RRT 11B instruction manual

Panasonic RXFT530 - RADIO/DUAL CASS-LOW operating instructions

Panasonic

Panasonic RXFT530 - RADIO/DUAL CASS-LOW operating instructions

Sanyo MCD-Z250F Service manual

Sanyo

Sanyo MCD-Z250F Service manual

manuals.online logo
manuals.online logoBrands
  • About & Mission
  • Contact us
  • Privacy Policy
  • Terms and Conditions

Copyright 2025 Manuals.Online. All Rights Reserved.