AKA SIGNUM MFD 7272M GT User manual

Attention!
Please read this
manual thoroughly.
Firmware version 2.06
Discriminating Metal Detector
SIGNUM MFD 7272M
CLASSIK/GT/ICB
Manual (En)

Contents
GENERAL INFORMATION & DIFFERENCES...4-5
APPLICATION...5-6
PACKAGE CONTENTS...7
TECHNICAL SPECIFICATIONS...7-8
GETTING STARTED...8
POWER SUPPLY...8-9
CONTROLS AND CONNECTIONS...9-10
EXTERNAL REGULATOR INSRUCTION...11
DISPLAY BUTTONS...12-13
DISPLAY SCREEN...13-14
LANGUAGE SELECTION...14
CT SENSITIVITY , PB SENSITIVITY, VOLUME...14-16
GROUND BALANCE...17-18
BALANCING PROCEDURE...18-24
DISCRIMINATION MODE AND SETUP...24-25
SEARCH MODE «ALL METAL»...26
DYNAMIC AND STATICMODES OF OPERATION...26-28
MODE «TURBO»...28-29
MODE«ECONOMY»...29-30
MODE S ALGORITHM...30-31
MULTI-FREQUENCY...31-32
PARAMETER MENU (*SEARCH OPTIONS * DISPLAY SETTINGS * SOUND SET-
TINGS)...32-39
ADDITIONAL MENU (ADD. MENU) (* MENU OPTIONS * TONE SETTINGS *
TONE SETTINGS ST * OTHER SETTINGS * GS FILTER SETTINGS * DEEP ALGORITHM
SETTING)...39-44
USER PROGRAMS...44-46
DEEP PROGRAM (DP)...46-47
DEEP PROGRAM SETTINGS (* CHANGE SOUND SIGNALS DP * CHANGE FILTER PA-
RAMETERS DP * RECOMMENDATIONS FOR TARGET SIGNALS)...47-51
USING THE HODOGRAPH FOR IDENTIFICATION...51-52
REPLACING THE COIL...53-54
SEARCH AND IDENTIFICATION METHODS...54-58
SEARCHING FOR METAL OBJECTS WITH LARGE EDDY CUR-
RENT LOOPS...58-60
EXAMPLES OF SOME COMMON TARGET VDI`s...60-62
WARRANTY...62-63
QA/QC certicate...64

GENERAL INFORMATION
Metal detector SIGNUM MFD 7272M GT is designed to search for
and identify metal objects in the dielectric (dry sand, wood, etc.)
and low conducting media (soil, brick walls, etc.).
e manufacturer of metal detectors, AKA company and the center for
repair and maintenance service of metal detectors are located only in
Russia. For export, we have developed a more reliable metal detector,
specically for sale to the foreign market.
On the basis of the "Classic version", our specialists released a specially
upgraded Signum 7272M GT. is is a more reliable model of the met-
al detector, with an improved component base. Additional protection
against dust and moisture is installed.
DIFFERENCES
from Signum 7272M (classic)
e main dierence between the GT version and the standard version is
that we modify each device instrumentally, due to this the stability and
accuracy of the device have increased, which allows us to record weaker
signals. e analogue regulator allows to result the gain in accordance
with the ground conditions, also partial dust and moisture protection is
added, (it does not provide complete water protection). ermal stability
is improved. High recovery speed (optional).
As a result, we get the following features:
1 Increase of the device sensitivity. 2 Quiet signals are better recorded.
3 Greater performance on hard ground.
4 Work in a heavily littered with large iron place without losing small
targets.
5 Wider setting range through the use of a current switch and an ana-
logue regulator.
from Signum 7272M (pro)
1. Aer conducting a series of studies, we do not set the external speed
switch and Normal (factory) mode and made the Fast mode (speed-up)
- optional.
2. Own element base.
4

5
3. Enhanced protection against dust and moisture from dropping it.
4. Lighter and more reliable iron bar.
from Signum 7272M (ICB)
ICB- Is simplied version of GT. In ICB only external regulators are
absent. (coil current switch and general gain control.)
APPLICATION
• Criminal;
• Engineering;
• Housing and community services, construction and re-ghters to
search for underground utilities, pipelines, cables, manhole wells etc.
• Archaeology and treasure search.
e device is designed to operate under the following conditions:
- Ambient temperature from -10 up to +40°c (-4 to 122 F);
- Relative humidity up to 98 per cent at temperature of 25°c (77 F);
- Atmospheric pressure from 650 to 800 mm Hg.
Signum MFD 7272M is an eddy current selective metal detector oper-
ating on the principle of induction balance. e main distinguishing
feature of the model is the use of the original soware and hardware
multi-frequency technology (MFT) allowing the use of any sensors we
produce, regardless of their operating frequency of size. at is, the de-
vice itself adjusts to the sensor.

6
e main search mode of the device is dynamic, i.e. object detection
occurs only with constant movement of the sensor.
To determine the exact location of the detected object, the device has a
static mode of operation.
e device has two types of indication of object detection:
- sound programmable multi-mode
- visual (hodograph, VDI index, rating (level) of the PC signal)
e device implements two independent search channels: RT and ST.
e RT channel (real time, RT) is a detection channel and
operates in real time, i.e. sound indication is issued synchronously with
the movement of the sensor over the object. e sound indication in this
channel is a single-tone signal, the volume and frequency of which can
change as the object approaches the sensor. e duration of the sound
from the object can be judged on its approximate size.
When the signal from the object in the RT channel exceeds the level of
the set threshold value, the ST channel begins to work.
e ST channel (short tone, ST) is an object type identication channel.
If the threshold level of the signal from the object is exceeded, it is iden-
tied in the ST channel, then a short sound signal of the corresponding
tonality is issued, and the hodograph is displayed on the display screen.
e frequency of the short tone indicates the type of object (high tones
- non- ferrous metal, low tone - ferrous metal). e number of tones is
set by the user (by default - 4 tones for non-ferrous metals and 1 tone for
ferrous metal).
Each channel has its own independent sensitivity adjustment.
“catch” the object and indicate to the operator that there is something.
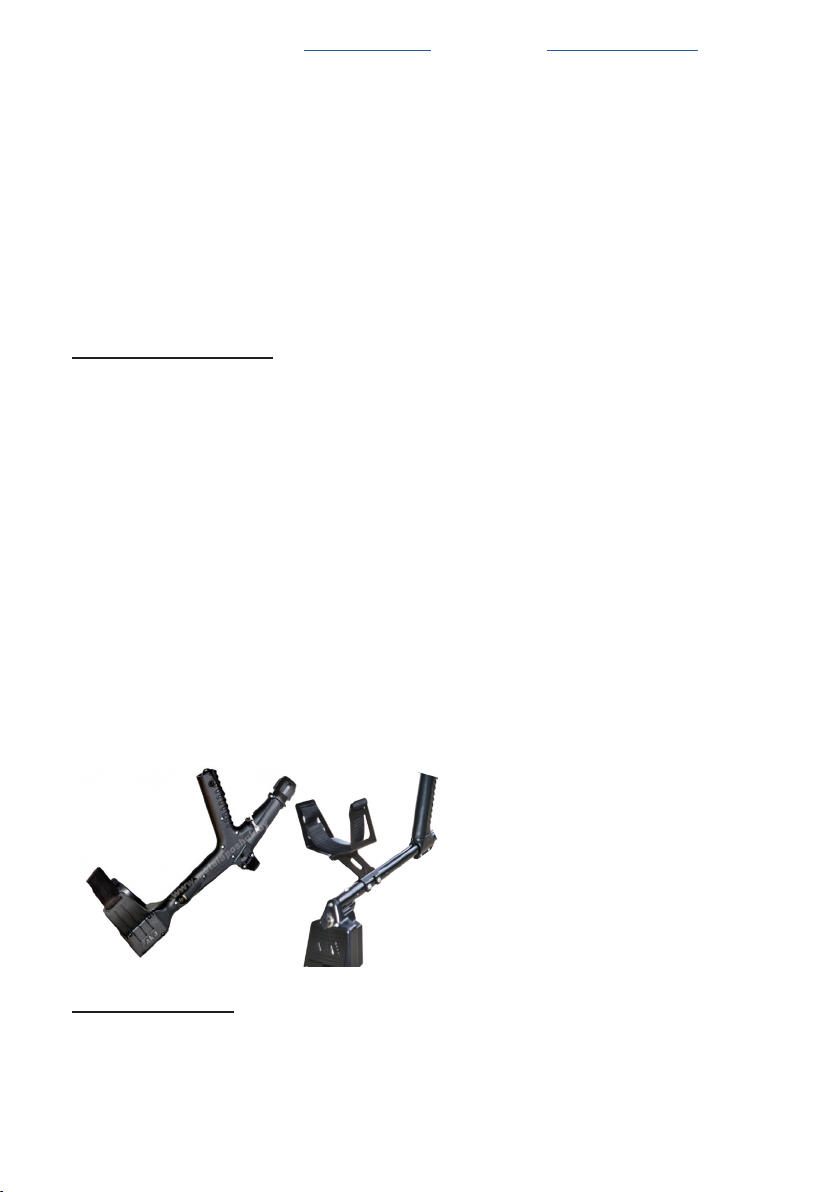
e Signum MFD 7272M GT is equipped with a programmable switch
mode of operation of the sensor at high current (Turbo), which allows to
ere are two-frequency and three-frequen
cy coils of dierent sizes in the assortment
of the company. Frequency switching is
carried out by a toggle switch, which is
located on the coil itself. After switching the
frequency, it is necessary to re-balance the
ground.

7
improve the ratio of useful signal / noise and increase the search depth.
Also in the device there is the possibility of compiling 4 options for cus-
tom search programs.
Also in the device there is the possibility of compiling 4 options for cus-
tom search programs. e metal detector is equipped with manual and
automatic ground balancing systems with the possibility of programma-
ble speed auto-tracking (AT).
PACKAGE CONTENTS
• e electronic unit with a telescopic pole...1 ea.
• Search coil - eddy current transducer (ECT)...1 ea.
• Magazine for 6 batteries (type AA)*...1 ea.
• Operators Manual...1 ea.
*) batteries sold separately
TECHNICAL SPECIFICATIONS
e maximum detection range of metal objects (air test with coil Ø260mm
DD) via RT:
• 25 mm dia. coin - 60 cm;
• Helmet - 150 cm;
Operating frequency range, kHz: -1.5...22
Indication modes:
• sound, 6 modes(RT, RT-M, RT-М99, RT-SТ, RTL-SТ, ST-P);
• visual (LCD display with a resolution of 128x64 pixels).
Search modes:
• All metals;
• sectored discrimination with 2 ° step
Control modes:
• Dynamic programmable;
• Static with adjustable threshold.
Power Supply: - 6 batteries (type AA (LR6));
Continuous operation time: - 6-7 hours in Turbo mode (Rechargeable
batteries 2500 mAh) – - 16-18 hours in normal mode.

8
Overall dimensions, mm: - up to 30-40 hours in economy mode
• Telescopic rod - 1200 (max.);
• Electronic unit - 120х70х115;
• Search coils - Ø 260 / Ø 380 / 150*260 / 240*320 / Ø 150
Weight of the device(without batteries): - 1400 g. (telescopic pole)
- 1160 g. (S-shaped pole)
e device allows the ability to work in water depths of up to 2,5 meters,
without submerging the control box.
GETTING STARTED
Assemble the metal detector. To do this:
- install the appliance in a metal bar;
- tighten the Collet Chuck;
- install the inner (plastic rod) sensor;
- install the rod with the sensor in a metal bar to desired length, using
the tabs and holes in the rod
- tightly and evenly wrap the sensor cable around the rod. Freely hang-
ing cables can Cause falsing;
- connect the sensor connector to the electronic unit
WARNING! Do not over tighten the attachments and ttings for the tel-
escopic sha. is applies in particular to the plastic bolt for the search
coil and sha collets.
Unlike the classic version
(plastic) anks to the metal
armrest, your metal detector
will not only become lighter,
but also it will be more relia-
ble in operation.
POWER SUPPLY
e device is powered using 6 AA
batteries or 6 rechargeable NIMH. Rechargeable batteries and charger

9
are not included and must be purchased
separately. We recommend that you use
NiMH batteries from SANYO, ANS-
MANN 2500 capacity-VARTA or 2850
Ma/h. e use of standard alkaline bat-
teries is possible but not cost eective as
the rechargeable batteries pay o aer 4-5
recharges.
When using batteries, with a capacity of 2500 Ma/h, continuous opera-
tion is approximately 16 hours in the main mode, 30-40 hours in econo-
my mode, 6-7 hours in Turbo mode.
e consumption of the device also depends on the operating fre-
quency of installed sensor. At high frequencies, consumption decreases,
and at low frequencies, it increases.
Several recommendations on the use of nickel-metal hydride batteries:
- Remember that due to the self-discharge nature of the batter capacity
falls (by About 5% per day, so it is advisable to charge batteries before
each use.
-DO NOT use rechargeable batteries that have different capacities in the
same set. WARNING!
When connecting the battery magazine to the device connector insure
the battery is properly connected (polarity is indicated on the battery
cartridge) and insure the voltage source is correct. In the case of
incorrect polarity or improper voltage the device can be damaged.
CONTROLS AND CONNECTIONS
e device can be delivered in two design options (Fig. 2). In the rst
version (in the gure on the le) the option “compactness without
disassembly” is implemented due to the displacement of the middle
part of the bar into the armrest. e second option (in the gure on the
right) has a slightly lower weight and improved mechanical balance. e
company reserves the right to change and introduce new options for the
design of the device.

10
On the front panel of the device there is a liquid crystal graphic indi-
cator (with a resolution of 128x64 pixels) and 11 control buttons. e
manufacturer reserves the right to change the design of the panel and
control buttons without prior notication.
On the back panel of the de-
vice there are a connector for
connecting a sensor, a switch
on / o the device and a serial
number. Only the GT model
has a switch for supplying cur-
rent to the coil and an addi-
tional gain control. (g. 3).
(g. 3).

11
EXTERNAL REGULATOR INSTRUCTION
Only for Signum GT
All controllers are analog, that is, they work regardless of the parameters
are set in the menu.
1) ere is a current switch to the coil at the bottom of the control box,
ere are two positions. or 6 options for sensor current value:
a) economy \ economy - 40%
b) norms \ norms - 40%
c) Turbo \ Turbo - 40% Switching.
e “ forward” position = current state set in MENU. (economy \ norms
\ turbo) e “back” position is approximately minus 40% of the set in
the MENU.
e “back” position is applied:
a) e search on litter.
b) Mineralized soils (in combination with the program mode “Econo-
my”).
c) For the operational determination of dubious goals.
2) An additional gain control is located on the back of the body. Attention!
Gain control is NOT linear!
All gain values are given from the gain in the MENU of the device.
e minimum value is the position all the way to the le to the bottom
white point. About 25% of the Gain.
Lateral white point - 100% gain.
e maximum value when turning all the way to the right. 200% of the
gain.
Note.
e gain and device sensitivity are NOT linearly dependent.
Increasing the gain by 2 times - the sensitivity by 2 times will NOT in-
crease! Warning:
Turning the gain control may cause short beeps. is is not a defect.

12
Fig. 4
DISPLAY BUTTONS
Sets the sensitivity of the ST (short tone) channel
Sets the sensitivity of the threshold RT channel (Real Time)
Sets the volume of the audio (short press) and On./O. illu-
minations (long press)
Select the Discrimination edit mode
Switch between all metals/discrimination
Button for moving through the menu and changing the value
of parameters, On./ O. Turbo mode, and On./O. Economy
mode (long press)

13
Move through the menu and change the settings, as well as
turn on/o the S Algorithm
Confirms the selected settings. Selects a menu item. In
search mode switches between Static and dynamic (Pin-
point) modes.
Switches between User Programs if there is a version of the
soware with a Deep Program - On./O. Deep Program by
a long hold from any other search program.
Access the Ground Balance modes
Button to enter the Main Menu
DISPLAY SCREEN
In search mode the display device displays the Hodograph information
of detected objects and information about the current operation modes
(Fig. 5)
VDINumber Signal level
Battery charge level
T-Turbo mode is enabled (see page 14)
Number of the current user
program 1-4 (see page 14) Fig. 5
A-enabled auto adjustment ground balance
(see page 17)
С – Static Mode enabled (pinpoint) (see page 13)
S – S-Algorithm enabled (see page.
1
4)
М – Metal Trash mode is enabled (see page 16)

14
VDI-number “Visual Discrimination Indication”. is is the index of
electrical conductivity of the object or the angle between the vertical axis
and the predominant direction of the hodograph (time curve). In this
case, hodographs which are on the le side of the screen have a negative
VDI, and the right - have a positive VDI number. e amplitude of the
signal, from detected objects, is displayed in standard numerical units
LANGUAGE SELECTION
e instrument soware allows you to
select Russian or English language
for displaying information.
In order to change the language of
information display, when
turning on the device, press and
hold the button until the language selection menu appears. Using the
buttons until the language selection menu appears. Using the
buttons
select the desired language, and press the button to x your
choice.
Remember that when you change the language, the device will automatical-
ly return to the factory settings.
ST SENSITIVITY, RT SENSITIVITY / VOLUME
is section introduces the three main parameters that you’ll use most
oen. For each of these settings there is an individual button on the
control panel.
SENSITIVITY ST [1..14]. Increasing the value of this parameter allows

15
you to identify search objects at a greater depth. It has the value from 1
to 14. Remember that with an increase in the identication sensitivity of
the device, not only the search depth increases, but the possibility of
the appearance of inter-
ference from power lines
and from false alarms
from dierences in min-
eralization of the soil, as
well as when the coil hits
the objects.
SENSITIVITY RT
[0..9]. is option allows
you to perform
detection sensitivity) and threshold adjustment (depth of tone of your
device. e threshold tone is a signal from the detection channel that
Fig. 6 gives you information that the device has detected a metal object.
From the moment of detection and along the movement of the coil,
the volume of the threshold tone rises, having the highest value above
the center of the target. With a gain of experience working with the
device, a combination of the threshold tone and the tone of the identi-
cation signal, as well as the duration and volume level of the threshold
will be able to give you more complete information about the size and
relative depth of the target, and even about the presence of two targets
with a single identication signal. In most cases, we recommend setting
the value to 6-7.
Some recommendations for the sensitivity of the device:
Select the optimal sensitivity at the search location, based on the rule
"the highest value possible for stable operation of the device in this place".
It is also recommended to reduce the sensitivity of the device in plac-
es heavily littered with metal. Due to the strong emitting from a large
amount of surface iron, the device is unlikely to be able to detect at max-
imum sensitivity a useful target located deeper than this iron, despite

the fact that in a clean place it can easily cope with this task, and even
with a margin. At the same time, a small non-ferrous target (for exam-
ple, a small medieval coin) lying at the same level or slightly higher than
iron, the device at maximum sensitivity may simply not distinguish in
the general signal received by the coil from these objects. Whereas the
device at reduced sensitivity will detect this useful target without being
blinded by the iron located near or below it. To reduce the blindness of
the device in places with a large amount of metal debris, use to reduce its
sensitivity not only adjust the ST and RT channels, but rst of all, reduce
the current by turning on the “Economy” mode (see below) and reduce
the gain in the device menu (see below).
All of the above can be summed up in one phrase: a high level of sensitivity
does not always guarantee high search eciency. Use this adjustment ap-
propriately for the situation and the search task.
VOLUME[1..9]. is setting adjusts the overall volume of the audio
response from detected objects. Select the value based upon individual
comfort preference.e current values of these parameters are displayed
on the screen above the relative buttons (Fig.6).
To change any of these settings press the appropriate button. e val-
ue of the selected option is highlighted on the screen with a rectangle
around the appropriate value.
16
Press the button and to set the required value.
In order to exit the parameters simply click the button again. When nei-
ther the RT, ST or Volume values are displayed on screen - the buttons
will now on / o modes for the Turbo
and S-al gorithm, (see below)

17
GROUND BALANCE
Balancing the device to the ground is the single most important part of
the device settings for accurate search results. Improper ground balanc-
ing can result in decreased responses to targets and may result in insta-
bility as well as an increase in false ground signals.
To explain the basic physics behind the ground balance procedure.
Every object has its own shape, conductivity and magnetic component,
which together are called the VDI (Visual Digital Index). Remember
that the VDI is the angular response that is numerically equal to the an-
gle of deection of the signal vector time curve (hodograph display) on
the vertical axis. e soil, or ground, depending on the degree of miner-
alization (presence of iron oxides) imposes its signal on the target signal
thus changing the VDI upscale. is is especially true on small or deep
targets, as well as large highly conductive targets (copper, silver, alumi-
num). is can actually push these high VDI targets up and over into
the high negative VDI range known as “VDI wrap around”. To minimize
this eect, it is crucial to perform a proper and accurate ground balance
procedure.
e basic objectives of balancing:
1. Make the soil 'invisible' to the instrument, i.e. exclude false signals from
the ground where there is no target.
2. Install the correct (standardized) reference system number for the VDI.
When receiving a signal from both the ground and a detected object the
detector must subtract mathematically the signal from the ground in order
to display a correct VDI indication of the detected target.
Keep in mind that when performing “air tests” inside aer the detector
has been previously balanced in soil may result in incorrect VDI read-
ings. is is due to the correction factor for the VDI previously set in the
last ground balance. is may result in the loss or “invisibility” of large
aluminum, silver and copper targets. If the ground setting is too posi-
tive the VDI will be oset positive and vice versa if the ground balance
is negative. is may also lead to targets air testing as iron, as well as a
false increase in sensitivity when air testing.
Remember that for every 1 degree of ground balance oset from the 0 or
neutral point we get a corresponding increase or decrease in the

18
VDI scale for a given target. IE a 1 degree+ ground balance will
increase the VDI by +1. For example, if you are air testing a large copper
coin that would normally give a VDI of +82 to +84 but is now air testing
with a VDI of -86. e result is that the device ground balance is set +10 to
+12 degrees too positive for performing an accurate air test.
Balancing with a piece of ferrite is required before performing an “air
test” of the device.
Put the device on a non-metal surface, turn on automatic ground bal-
ance mode, count to three, then bring the ferrite to the center surface of
the coil from a distance of 25-30 cm (10”to12”) to complete the balanc-
ing procedure. In the absence of ferrite, a piece of red brick or red red
ceramics can be used. In the absence of these items, you can take a CD,
and in a search mode, hold them at in front of the coil. If the CD gives
a vertical hodograph and VDI of 0 (+1 or -1), then the device is ready
for “air” tests.
If the VDI of the CD diers from these values, then in auto
GB click and adjust the phase of the ground balance in the
desired direction. When the VDI of he CD is at 0 (+1 or – 1) your device
is ready for air testing.
BALANCING PROCEDURE
1. Find a metal-free area. You can nd it by the threshold tone response
in RT mode. On an unbalanced device there will be a response to the
clean ground, however the sound will be so and “diused”, without a
strong localization. While the sound would be sharp and with a strong
increase in sound above a metal object. Select an area with no localized
sharp threshold tone increase while swinging the search coil 5-10 cm to
the le and to the right above the ground. If there is no localized sharp
threshold tone increase then the area is suitable for balancing.

19
2. Having found the metal-free area, raise the coil 30-40 cm above the
ground press wait for 3 seconds, and move the coil to the
ground smoothly but not too slow.
Warning! Do not move the coil to the ground closer than 10% of the search
coil diameter (for the search coil Ø26 cm – 2-3 cm). This is related to the
change in the pattern of the search coils physical interaction with the
ground in what iscalled the “Close Zone” and it may impact balancing
accuracy resulting in false responses in clean areas with high levels of
sensitivity.
If there is no tone or it does not sound during lowering, but sounds
when moving up, repeat the procedure. Follow the ground vector on the
screen during the process. Its shape should be a strait, slightly trem-
bling line, on the horizontal axis of the ground scale. If it makes
sharp angles or is “chaotic” on the screen, this means that you are trying
to balance near a metal object in the ground. In this case, the device
may perform a ground balance, however it will be incorrect and you
will notice multiple false signals from the ground. If this occurs, simply
re-balance the detector in an area clear of any metal targets.
Attention! In automatic balancing mode, do not turn off the device.
Otherwise, the balance data will notbestored in the device memory. Once
you have chosen a clean location to balance the detector and have done
so, note the value in the lower left hand corner of the ground
balance screen Now, should you choose to ground balance again later
on and there is a sharp difference between this value now, as compared
to the previous ground balance, there is a good reason to suspect that
there was metal close by and you will need to ground balance again. If
the coil all the same was a metal object, giving an automatic balance
(items with VDI close to 0, e.g. foil), the device will give two consecutive
tones, similar in tone to that of iron in the search mode, while at the
same time the screen will display an exclamation point within a
triangle. Accordingly, you will need to ground balance again on a clean

spot of land. Aer balancing, in the lower le corner of the screen
will display a numerical value of balance (phase), this is the amount by
which the device will adjust the VDI, excluding the eect of the soil.
It should be noted that the average phase angle ground balance is dierent
for each instance of the device and can also depend on the technological
variability in parameters of the coil and the ambient temperature.
However do not forget that your device remains in the automatic bal-
ancing mode and at any moment may deem it was time to rebalance to
your shovel, boots, or hunting partner. If you want to review the results
and values of the current automatic. to enter manual mode
and disable automatic balancing. In the upper right corner
of the screen will appear Minstead of the letter A.
To exit the ground balancing, click
Switching between modes is as simple as performing
successive clicks of
While in the manual balance mode by pressing
and one is able to adjust
the ground balance in the proper direction.
Bob the coil vertically above the ground
(rising to 20 -30cm / dropping by 3-5cm),
making sure that the vector of the soil is
along the horizontal axis and that the hum
is gone when raising or lowering the coil.
- Vector of improperly balanced soil (g. 7)
- Vector of properly balanced soil (g. 8)
(g. 7)
(g. 8)
20
This manual suits for next models
2
Table of contents
Other AKA Metal Detector manuals
Popular Metal Detector manuals by other brands

Garrett
Garrett Pro-Pointer AT 1140900 owner's manual

Bounty Hunter
Bounty Hunter DISCOVERY 2200 owner's manual

Makro Detektor
Makro Detektor JEOHUNTER 3D Dual System user guide

Bounty Hunter
Bounty Hunter Ultra Mag Sharp Shooter owner's manual

REX
REX RELICSCAN user guide

Tesoro
Tesoro Bandido II Operator's instruction manual