Akai AK-VD7KG User manual

7 kg Vented Clothes Dryer
INSTRUCTION MANUAL
MODEL: AK-VD7KG

After Sales Support
(AU) 1300 886 649 (NZ) 0800 836 761 | tempo.org/support
Contents
05 General Safety Instructions
07 Unpacking
08 Product Overview
10 Installation
15 Instructions
20 FAQs and Troubleshooting Guide
22 Other Useful Information

After Sales Support
(AU) 1300 886 649 (NZ) 0800 836 761 | tempo.org/support
3
General Safety Instructions
IMPORTANT! READ CAREFULLY AND KEEP FOR FUTURE REFERENCE
Read this manual thoroughly before first use, the safety precautions enclosed herein
reduce the risk of fire, electric shock and injury when correctly adhered to. Keep the
manual in a safe place for future reference, along with the completed warranty card
and purchase receipt. If applicable, pass these instructions on to the next owner.
Always follow basic safety precautions and accident prevention measures when
using an electrical appliance, including the following:
Electrical safety and cord handling
• Voltage: Make sure your outlet voltage and circuit frequency correspond to the
voltage indicated on the appliance rating label and your outlet socket is properly
earthed. If this is not the case, do not use the dryer.
• Separate circuit: We strongly recommend you connect the appliance to a separate
circuit serving only this appliance. This provides the best performance and prevents
overloading the house wiring circuits that could cause a fire hazard from overheating.
• Electrical hazard: Do not insert any objects into the appliance.
• No extension cord: Do not use this appliance with a power adaptor or extension
cord. CAUTION: If such a device must be used, the cord or outlet device must be
positioned so that it is not subject to splashing or ingress of moisture.
• Protect the power cord. Do not kink or damage the power cord. Position the cord
out of the way so no one steps on or places anything on the cord or against it. Do
not run the cord under floor coverings. Arrange the cord away from traffic areas
where it will not become a trip hazard.
• Damage: Do not operate the appliance after it malfunctions or has been dropped
or damaged. In case of damage, contact our after sales support centre for advice.
• Damaged cord: If the power supply cord is damaged, do not attempt to change
it yourself. A damaged cord or plug must be replaced by the manufacturer or a
qualified person in order to avoid a hazard.
• Disconnect: Unplug the clothes dryer from the power supply after use, before
cleaning, servicing or moving the appliance. To disconnect, turn the appliance off,
switch off the power outlet and remove the plug from the power outlet. Grip the
plug when disconnecting; do not pull on the cord. After disconnection, wait at least
two minutes before turning the appliance back on again.
• RCD: Unless your home is already fitted with a residual current device (safety
switch), we recommend installing an RCD with a rated residual operating current
not exceeding 30 mA to provide additional safety protection when using electrical
appliances. See your electrician for professional advice.
Usage conditions and restrictions
• Domestic use only: This appliance is intended for household use only. It is not
suitable for commercial, industrial or trade use. Do not use it for anything other than
its intended purpose (drying domestic quantities of washing), and only use it as
described in this manual.

After Sales Support
(AU) 1300 886 649 (NZ) 0800 836 761 | tempo.org/support
4
General Safety Instructions (Cont.)
• Indoor use only: Do not use the appliance outdoors.
• Usage restriction: The appliance is not intended for use by persons (including
children) with reduced physical, sensory or mental capabilities, or lack of
experience and knowledge, unless they have been given supervision or instruction
concerning use of the appliance by a person responsible for their safety.
• Children: Supervise children to ensure they do not play with the dryer. Close
supervision is necessary when any appliance is used by or near children.
• Installation requirements: Do not install the appliance in a tight fitting cabinet. Do
not install it near heat sources such as radiators, heaters, air ducts or direct sunlight.
Place the clothes dryer on a flat, firm, dry and stable floor in a well ventilated area. Do
not place it on any soft material such as foam or plastic.
• Ventilation: The dryer has ventilation openings in the base. Ensure that vents are
not blocked or covered by newspapers, tablecloths, curtains, carpet, etc.
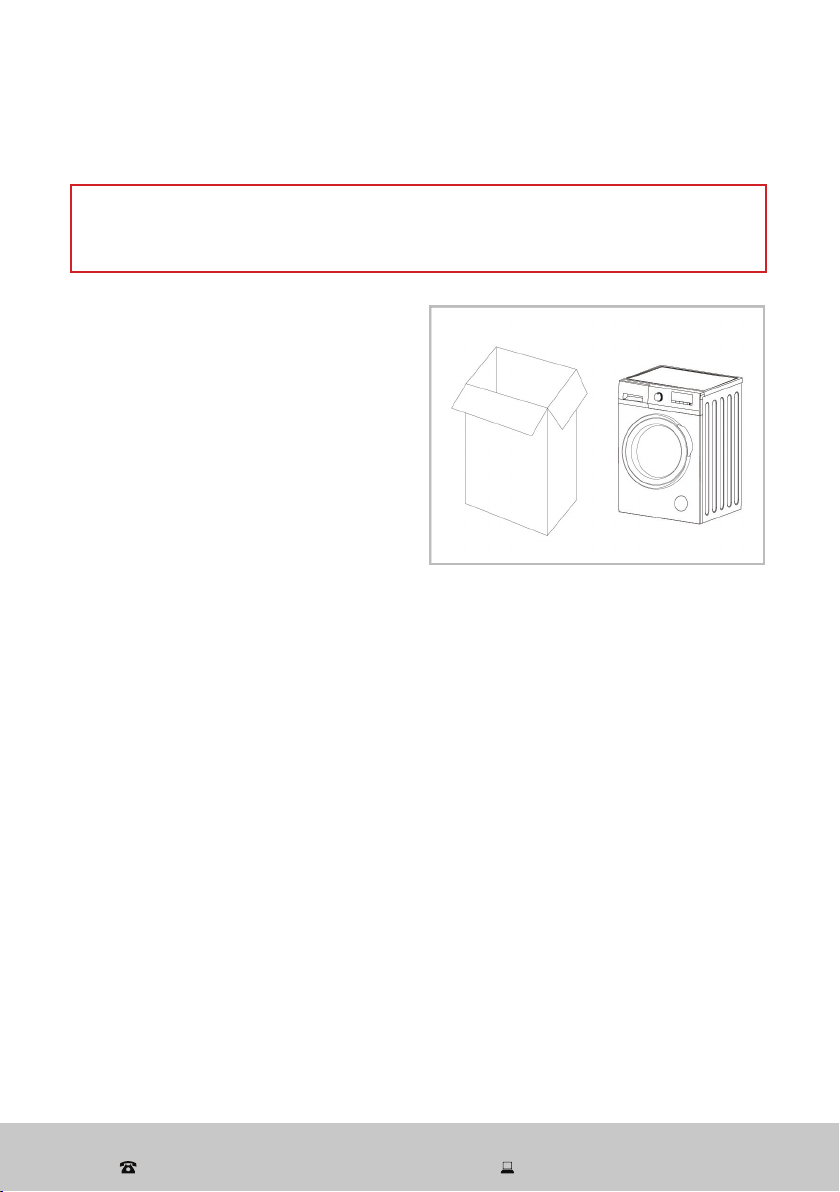
• Before use: Make sure to remove transport packaging at the rear of the dryer.
WARNING: Before loading the dryer, always ensure no pet or young child has
climbed into it. Do not overload the clothes dryer.
• Suitability for tumble drying: Only load suitable items into the clothes dryer. See
the box on the opposite page for which items and materials are unsuitable for the
clothes dryer and may present a fire risk.
• Preparation: Make sure all pockets of clothing to be dried are empty. Hard, sharp
objects such as coins, safety pins, bra wires, nails, screws, lighters or matches
must be removed as they can cause extensive damage to the dryer.
WARNING: Any damage or malfunction resulting from foreign objects is not
covered by your warranty and may lead to expensive repairs.
• No open flames: Do not place open flame sources such as candles on the dryer.
• Hot surface: Parts of the appliance may be hot after a long drying cycle. Always
ensure children are kept away from the machine. Do not store plastic, paper or
clothing that may burn or melt on top of the dryer during operation.
• Cool down: The final part of a clothes dryer cycle occurs without heat (cool down
cycle) to ensure that the items are left at a temperature that will not damage them.
WARNING: Never stop the clothes dryer before the end of the drying cycle unless
all items are removed quickly and spread out so the heat is dissipated.
• Subsequent cycles: After turning off the power supply to the clothes dryer, wait at
least two minutes before turning it back on again.
• Lint filter: WARNING! The lint filter must be in place when drying. It must be
cleaned before or after each use.
• Service/repair: Except for the filters that require cleaning, this appliance contains no
user-serviceable parts inside. Do not attempt to open, disassemble or repair it your-
self; only have it serviced by qualified personnel, call our after sales support centre.
The appliance should not be tilted or turned sideways during use or maintenance.

After Sales Support
(AU) 1300 886 649 (NZ) 0800 836 761 | tempo.org/support
5
General Safety Instructions (Cont.)
CAUTION!
The items listed below are UNSUITABLE for clothes drying. They can cause fire
in the dryer or extensive damage. DO NOT place them in the clothes dryer.
:Items containing foam rubber (also known as latex foam) or similarly textured
rubber-like materials — when heated, these materials can spontaneously combust
and cause a fire.
:Items that have been spotted or soaked with cooking oil, or with highly flammable
substances — these substances constitute a fire hazard. Highly flammable
substances used in domestic environments include acetone, alcohol, petrol,
kerosene, some stain removers, dry-cleaning solvents, turpentine, waxes, wax
removers and some hair care products. (This also includes items that have
previously been cleaned or spotted with dry-cleaning solvents or other flammable
or explosive substances.)
:If it is unavoidable that fabrics that contain vegetable or cooking oil, or that have
been contaminated by hair care products, be placed in a tumble dryer, they
should first be washed in hot water with extra detergent — this will reduce, but not
eliminate, the hazard. The ‘cool down’ cycle of a clothes dryer should be used to
reduce the temperature of the items. They should not be removed from the clothes
dryer or piled or stacked while hot.
:Undergarments that contain metal reinforcements (such as underwire bras), which
can come loose during drying and damage the clothes dryer.
:Plastic articles such as shower caps or waterproof baby bibs.
:Rubber-backed articles, clothes fitted with foam rubber pads, pillows, galoshes
and rubber coated tennis shoes.
:Fabric softeners or similar products, unless specifically recommended by the
product manufacturer for use in a clothes dryer to eliminate the effects of static
electricity.
• WARNING: This appliance must not be supplied through an external switching
device, such as a timer, or connected to a circuit that is regularly switched on and off
by a utility.
• CAUTION: Do not overload the dryer: the maximum amount of dry textile material
that can be dried in one load is 7.0kg.
• Misuse: Improper use or installation may result in the risk of fire, electric shock
and/or injury. We accept no liability for any eventual damages or injury caused by
improper use or handling, or by any other noncompliance with the instructions in
this manual.

After Sales Support
(AU) 1300 886 649 (NZ) 0800 836 761 | tempo.org/support
6
General Safety Instructions (Cont.)
Important safety advice regarding installation
• Install the dryer in a dry, well ventilated area, away from heat and direct sunlight.
• Do NOT install the appliance:
:behind a lockable door, sliding door or a door with a hinge on the opposite side of
the dryer, in such a way that a full opening of the tumble dryer door is restricted.
:in a tight fitting cabinet
:in an area where it will be exposed to water or weather, which could cause
permanent damage
:in an area where gas or flammable substances are used
:directly on top of a washing machine.
• All electrical connections must be made by qualified personnel and all instructions
in this manual as well as local safety regulations are observed.
• Exhaust air must not be discharged into a flue which is used for exhausting fumes
from appliances burning gas or other fuels.
CAUTION!
• Do not use the tumble dryer if industrial chemicals have been used for cleaning.
• Do not dry unwashed items in the tumble dryer.
• Do not allow lint to accumulate around the tumble dryer. Clean the filter after every use.
• Adequate ventilation has to be provided to avoid the backflow of gases into the
room from appliances burning other fuels, including open fires.
This symbol alerts you to take care as oil-affected items can ignite
spontaneously, especially when exposed to heat, such as in a clothes
dryer. The items become warm, causing an oxidation reaction in
the oil. Oxidation creates heat. If the heat cannot escape, the items
can become hot enough to catch fire. Piling, stacking or storing oil-
affected items can prevent heat from escaping and so create a fire
hazard.
CAUTION: HOT SURFACES!
Parts of the appliance can become hot during use and retain heat for
some time after turning off. Do not touch hot surfaces!
To avoid scalding and creating a fire risk, do not stop the dryer before
the end of the drying cycle, as parts of it may get hot during use. If you
must remove items during the drying cycle, open the door, remove
them quickly, and spread them out so that the heat is dissipated.
The door window may be hot after a long drying cycle. Please ensure
children are kept away from the machine.
Do not use any combustible substances (for example, spray cans)
close to the dryer while it is in operation. If gas has escaped from the
can, do not touch the plug or start/pause the appliance.

After Sales Support
(AU) 1300 886 649 (NZ) 0800 836 761 | tempo.org/support
7
Unpacking
Unpacking the clothes dryer
CAUTION: EXTREMELY HEAVY!
A team lift or mechanical aid is required when moving this appliance.
Keep the appliance as upright as possible during transportation.
• This product has been packaged to
protect it against transportation damage.
Remove all packaging materials from
around the appliance and inside the
drum, including the foam base (Fig. 1).
• Keep the original packaging carton and
materials in a safe place. It will help
prevent any damage if the product
needs to be transported in the future,
and you can use it to store the appliance
when it is not in use. In the event thatthe
packaging materials are to be disposed
of, please recycle them where possible.
• Plastic wrapping can be a suffocation hazard for babies and young children, so
ensure all packaging materials are out of their reach and disposed of safely.
• Remove any tapes securing the power supply cord and vent hose and all accessory
parts from the drum.
Checking the package contents
• Check all parts of the package against the scope of delivery list on the following
pages and ensure you have received all items.
• Check the clothes dryer for any damage from transportation. Unwind the power
cord to its full length and inspect it for damage. Do not use the appliance if the
appliance or its cord has been damaged or is not working properly. In case of
damage, or if anything is missing, please contact our after sales support centre for
advice on examination, repair or return of the damaged product.
• Read this manual to familiarise yourself with all the parts and operating principles
of the machine. Pay particular attention to the safety instructions on the previous
pages.
Fig. 1Fig. 1

After Sales Support
(AU) 1300 886 649 (NZ) 0800 836 761 | tempo.org/support
8
Product Overview
Scope of delivery
Clothes dryer
1 Control panel
2 Viewing window
3 Front housing
4 Lint filter (inside drum)
5 Door lock (inside)
6 Tumbling drum (inside)
5
3
4
NOTE: Due to continued product improvement, images
and illustrations in this manual may vary slightly from
the product purchased. All images in this manual are
for reference purposes only. Parts are not necessarily
pictured to scale.
1
2
6

After Sales Support
(AU) 1300 886 649 (NZ) 0800 836 761 | tempo.org/support
9
Product Overview (Cont.)
Scope of delivery (cont.)
7
8
Rear view
7 Thermostat reset button
8 Vent outlets
Accessories (not shown)
9 Vent hose
Documentation (not shown)
Instruction manual
Warranty certificate

After Sales Support
(AU) 1300 886 649 (NZ) 0800 836 761 | tempo.org/support
10
Installation
Unpacking
• This product has been packaged to protect it against transportation damage.
Remove all packaging materials from around and inside the appliance and keep the
packaging materials in a safe place. It will help prevent any damage if the product
needs to be transported in the future, and you can use it to store the appliance
when it is not in use. In the event that the carton is to be disposed of, please
recycle it where possible.
• Plastic wrapping can be a suffocation hazard for babies and young children, so
ensure all packaging materials are out of their reach and disposed of safely.
• Inspect the cord and plug for damage or wear before each use. Do not use the
appliance if the appliance or its cord has been damaged or is not working properly.
In case of damage, please contact our after sales support centre.
• Read all instructions in this manual and make sure you understand all warnings.
• Wipe the inside of the drum with a damp cloth to remove any dust from transport.
Important notes regarding installation
• Install the dryer in a dry, well ventilated area, away from heat and direct sunlight.
• Do NOT install the appliance:
:behind a lockable door, sliding door or a door with a hinge on the opposite side of
the dryer, in such a way that a full opening of the tumble dryer door is restricted
:in a tight fitting cabinet
:outdoors or in an area where it will be exposed to water or weather, which could
cause permanent damage
:in an area where gas or flammable substances are used
:near curtains or other obstacles
:directly on top of a washing machine.
• All electrical connections must be made by qualified personnel and all instructions
in this manual as well as local safety regulations are observed.
• Exhaust air must not be discharged into a flue which is used for exhausting fumes
from appliances burning gas or other fuels.
• This appliance MUST NOT be built in

After Sales Support
(AU) 1300 886 649 (NZ) 0800 836 761 | tempo.org/support
11
Installation (Cont.)
Fig. 2
Place the machine on solid, dry and level ground. The machine must stand perfectly
level on all four feet to ensure safe and proper operation. Incorrect installation may
cause vibrations and noise and may cause the machine to move about.
To determine whether levelling is necessary, place a spirit level on top of the dryer and
hold it upright against the housing to identify any inclinations. If the machine needs
levelling, proceed as follows (Fig. 3):
WARNING!
It is very important to level the dryer carefully, especially if your floor is uneven.
Failure to do so may result in the machine shaking and moving, or out-of-balance
problems.
WARNING!
The lock nuts on all four feet must be screwed tightly against the housing, otherwise
the machine may vibrate noisily during operation.
• Loosen the lock nut with
a spanner, turning it
anticlockwise to loosen.
• Adjust the foot by hand until
it makes close contact with
the floor. Turn it clockwise
to lower the foot or
anticlockwise to raise it.
• When the machine is level,
use a spanner to turn the
lock nut in a clockwise
direction to tighten.
Fig. 3
Levelling the machine
Freestanding, floor level installation
• Make sure the floor surface is firm, flat, dry and stable,
and there is an appropriate wall outlet nearby. Do not
place the appliance on soft material such as foam,
plastic or carpet, as this may block the air intake.
• Carefully stand the dryer upright and slide it into
position, leaving a space of at least 200 mm between
the dryer and any wall (Fig. 1).
• If placed in a room such as a bathroom, make sure
the room is well ventilated. Also ensure there are no
obstacles that obstruct the door of the dryer.
>200 mm

After Sales Support
(AU) 1300 886 649 (NZ) 0800 836 761 | tempo.org/support
12
Installation (Cont.)
Vent Hose Installation
Whilst drying, the tumble dryer is expected to vent a large amount of warm, very
moist air, which should be removed from the room as quickly as possible to prevent
condensation. In an extremely well-ventilated room, or close to an open window, this
may occur naturally.
However, it is generally better to carry the dryer’s exhaust outside via the vent hose
supplied with the appliance. The vent hose should end either temporarily at an
open window, or permanently at a fixed ventillation grille, fitted to an exterior wall or
window.
Fig. 4 Fig. 5
(A)
(C)
WARNING!
The hot air emitted from the tumble dryer can reach temperatures of up to 60°C. The
appliance must not be installed on floors — or placed near surfaces — that are not
resistant to high temperatures.
To simplify the installation, there is a choice of vent outlets: one at the back, the other
in the left hand side.
Attaching the vent hose
1. Connect the hose to whichever is the more convenient vent by pulling the ring nut
(Fig. 4, (A)) from the vent outlet at the back or side.
2. Align the arrows of hose and ring nut,
3. Festen the hose by screwing it in the direction of the arrow and pushing it firmly
into place (Fig. 5, (C)).
4. The unused vent should now be sealed with the special snap cover (Fig. 4, (B))
provided.
(B)

After Sales Support
(AU) 1300 886 649 (NZ) 0800 836 761 | tempo.org/support
13
Connecting to an outlet point
Once connected to the dryer, run the vent hose to the desired outlet point. When
attached to this outlet, the vent hose should have no more than two bends. If there
is not an existing outlet, and you wish to install one, see a qualified builder for
professional advice.
NOTE:
• To avoid condensation problems, it is essential that the dryer be fitted with the
flexible hose to carry its hot air outside the room.
• In order to prevent the appliance from overheating, it is important that the steam
exhaust is unobstructed.
• Ventilation must be provided to aviod the back flow of gases into the room from
appliances burning other fuels, including open fires.
• It is important not to connect the vent hose to, for example, a cooker hood, or a
chimney or flue pipe designed to carry the exhaust from a fuel burning appliance.
• Make sure that the vent hose is not squashed. If the hose is partially squashed,
drying efficiency will be reduced, resulting in longer drying times and higher
energy consumption.
• If the hose is completely squashed, the machine may stop. This is a safety feature
that has been applied to the tumble dryer.
• In addition, for appliances with ventilation openings in the base, there should be
no objects obstructing these openings, including carpets, rugs, or other flooring.
Installation (Cont.)
Fixing condensation issues
If the hose is long and the room temperature low, the moisture might condense inside
the hose. This is an unavoidable natural phenomenon.
• To prevent this water from lying in the hose or flowing back into the tumble dryer,
it is advisable to drill a small hole (with a diameter of approximatley 3 mm) at the
lowest point of the hose (Fig. 6, (D)).
• Place a small container below the hole.
• Empty this container regularly.
Fig. 6
(D)

After Sales Support
(AU) 1300 886 649 (NZ) 0800 836 761 | tempo.org/support
14
Electrical connection
This is a Class I electrical product, which has a power cord and plug with three pins,
including an earth pin.
Installation (Cont.)
• Once the clothes dryer is properly installed, plug the electrical cord into an
appropriately earthed three-pin wall socket, switch on the power at the socket and
try the machine according to the instructions below.
First Use
In order to remove any dust and grease, which may be in the drum from the
manufacture and transportation process, we recommend you run the dryer with some
clean, damp rags before using it for the first time with your laundry.
• Remove the polystyrene block and any materials from the drum.
• Make sure the dryer is properly connected and power is switched on at the outlet.
• Put some clean, damp rags into the drum.
• Select the 30 minutes dry program.
• Press the START/PAUSE button and let the program run to the end.
• Remove the rags and clean the lint filter (see page 22).
WARNING! This appliance must be earthed.
In the event of a malfunction or breakdown, earthing will reduce the risk of an
electric shock by providing a path of least resistance for the electric current.
This appliance is equipped with a cord having an equipment-earthing conductor
and an earthing plug. The plug must be plugged into an appropriate outlet that is
installed and earthed in accordance with all local standards and requirements.
Do not modify the plug under any circumstances. If the plug does not fit your
outlet, consult a licensed electrician and have the outlet changed.

After Sales Support
(AU) 1300 886 649 (NZ) 0800 836 761 | tempo.org/support
15
Instructions
Preparing the load
• Prior to loading the dryer, check that none of the items have the following symbols on
them, which indicate that items are UNSUITABLE for clothes drying (Fig. 7).
CAUTION!
Make sure you read all safety precautions in this manual and are aware of the items
(listed on page 7) that may NOT be placed in a clothes dryer as they cause a hazard.
Fig. 7
• The clothes dryer is intended only for drying textile material that has been washed
in water and well spin-dried. Dripping water may cause an electrical hazard. Thor-
oughly spin the laundry in your washing machine on a high spin speed, which can
reduce the drying time and save energy consumption.
• As the dryer heat may permanently set stains, ensure you check prior to drying.
• For uniform drying results, sort the laundry according to fabric type and drying
program. Separate dark and light coloured items as you would do when washing.
• Ensure that the items to be dried do not have combustible materials or foreign
objects (such as lighters, hair pins, coins) inside pockets.
• Turn items with zippers inside out, close zippers, hooks and eyelets, fasten
buckles and tie fabric belts. This will also help reduce impact noise when the items
hit against the turning drum.
Loading the dryer
• Make sure the lint filter is clean and properly in place. It must be cleaned regularly.
• To avoid items getting tangled up in the dryer, which results in uneven drying, we
recommend placing items into the dryer one at a time.
• Place small, delicate items in a mesh bag, but do not add too many to one bag. (It
is not recommended to dry underwire bras in a clothes dryer.)
• When drying delicate items or a very small load (<1.5kg), add a few lint-free cloths
to aid even drying.
• When drying large items such as blankets or sheets, include a few small items to help
balance the load. You may also need to open the dryer door and shake out the item
from time to time, then place it back in the drum to ensure even drying.
• When closing the dryer door prior to starting the unit, ensure that items are not
jammed in the door.
• To avoid creasing or static cling, do not over-dry your clothes.

After Sales Support
(AU) 1300 886 649 (NZ) 0800 836 761 | tempo.org/support
16
Instructions (Cont.)
• CAUTION: Do not overload the dryer: the maximum amount of dry textile
material that can be dried in one load is 7.0 kg (see the table below for some
reference weights). Keep in mind, though, that drying requires space for the
clothes to circulate. So for faster results, we recommend you only add fill the dryer
to half to two-thirds of its capacity.
Reference weights of dry textiles (Fig. 7)
Fig. 7

After Sales Support
(AU) 1300 886 649 (NZ) 0800 836 761 | tempo.org/support
17
Instructions (Cont.)
Control panel (Fig. 8)
Step-by-step guide to using the dryer
1. Program: Decide on a program according to the texture and weight of your drying
load (please refer to the table on pages 18 and 19 for details about the drying
programs). The corresponding light will then start to flash. If no other button has
been pressed within 10 minutes, the program will be switched off.
2. Sequence Indicator: These lights will illuminate in order to indicate which part of
the cycle is currently occuring; drying, cooling, end, filter.
3. Start/Pause: Press the START/PAUSE button to start the drying program, once all
of the necessary selections have been made. During operation, press the START/
PAUSE button to pause the dryer, for example, to add an item or to remove one.
When the dryer is in pause mode it is possible to change or restart a program.
When you have added/removed the item, close the door and press START/PAUSE
again to resume operation. The lights will flash, to remind you to press this button.
CAUTION: When pausing the dryer and opening the door, beware of hot surfaces
and hot steam escaping. Take utmost care to avoid scalding.
4. Delay: This button allows you to delay the starting of the program by up to twelve
hours. The countdown begins after you have pressed the Start/Pause button and
the corresponding lightilluminates. Press the button repeatedly to choose the
programme 3, 6 or 12 hours. This option must be selected after having selected the
program and before starting the cycle. The program can be delayed for 3, 6, or 12
hours - continue to press the delay button to continue this pattern until you reach
the desired delay time:
1
S
1:1
控制面板印
1
C
2 3
B
A
1 2 3
4 5 6
D
C
4 5
B
6
A
日 期
底号
借(通)用件登
出
旧底号
第 1
共 1
比 例
重 量数 量
材料:
会
准 化
批 准
字
日 期
日 期
数
核
工
校
更改文件号
17
.
05
.
24
1.薄膜理面的理效果均匀一致,以保被覆盖的印刷品有最佳清晰度。
2.薄膜具有良好的耐光性,在光照射下不易色,几何尺寸保持定。
3.薄膜要与溶、黏合、油墨等化学物接触,薄膜具有一定的化学定性。
4.薄膜外平整,无凹凸不平及,无气泡、孔及麻点等瑕疵。
技要求:
5.膜面无灰、、油脂等染。
6.覆膜品不能出起泡和脱膜象。
7.覆膜品表面不能生光度不一的亮点或点。
Control Panel Silkscreen SY-DV60Q5C-001
SY-DV60Q5C-001
聂巍
24mm
27mm
9.11mm
34mm
中山格仕日用器有限公司
8.适用机型:DV70Q5D(1082)、DV70Q5U(1033)、DV70Q5U(538)、DV70Q5D(999)
DV70Q5D(967)、DV70Q5D(919)、DV70Q5D(918)
Cotton Extra
Cupboard
Standard Cotton
Damp
Cotton Iron
Synthetic Extra
Synthetic
Air-Dry
Refresh
Silk
Anti-Bac
30 min
60 min
90 min
Synthetic Iron
Fig. 8
2
31
4
5
6

After Sales Support
(AU) 1300 886 649 (NZ) 0800 836 761 | tempo.org/support
18
Instructions (Cont.)
Program Options
Automatically Controlled Drying
This appliance can automatically detect the moisture in the load, and adjust the drying
time for optimal drying. Simply select the program according to the textiles being
dried. This system works best for cottons and synthetics, as well as the “Anti-Bac”
and “Silk” programs.
Time Controlled Drying
This option can be used to finish off the drying process for loads that are still slightly
damp at the end of a cycle. Select the 90 or 60 minute program for cottons, or the 30
minute program for synthetics.
Program Option Buttons
Depending on the program, different functions can be combined. These must be
selected after choosing the desired program and before depressing the Start/Pause
button. When these buttons are pressed, the corresponding indicator light(s) will come
on. When they are pressed again, the light(s) will go out.
Incorrect Option Selection
If you select an option that is not compatible with the program you have chosen, the
option will not be applied, and the corresponding light will not illuminate.
5. Delicate: This option can be used with the following programs: “Cotton Extra”,
“Cupboard”, “Standard Cotton”, “Damp”, “Cotton Iron”, “Synthetic Extra”,
“Synthetic” and “Synthetic Iron”. When this button has been selected, the
corresponding light will illuminate, and the temperature of the cycle will be reduced,
to protect delicate items. The “Delicate” option cannot be used with the “Quick”
option.
6. Quick: This option can be used with the follwing programs: “Cotton Extra”,
“Cupboard” and “Standard Cotton”. When this button has been selected, the
corresponding light will illuminate, and the drying time will be reduced by 3-5
minutes. The “Quick” option cannot be used with the “Delicate” option.

After Sales Support
(AU) 1300 886 649 (NZ) 0800 836 761 | tempo.org/support
19
Instructions (Cont.)
Program Max. Load # Type of Textiles
Cotton Extra 7.0 kg
Bathrobes and towels, cotton clothing or
textiles, jeans and other suitable items; larger
quantities or bulkier items that can withstand
high heat.
Cupboard 7.0 kg Bathrobes and towels, cotton clothing or
textiles, jeans and other suitable items
Standard
Cotton 7.0 kg Cotton clothing or textiles, jeans and other
suitable items
Damp 7.0 kg Knitted items and cotton clothes
Cotton Iron 7.0 kg Cotton sheets, linen, and starched laundry
Synthetic Extra 3.0 kg Synthetic sheets and linen
Synthetic 3.0 kg Textiles made of synthetic fibres
Synthetic Iron 3.0 kg Knitted items and other synthetic clothing
30 min, 60 min,
90 min 7.0 kg
A manual drying program which allows you to
set the drying time – recommended for thick
or multi-layered textiles. The default drying
time is 30 minutes, which can be extended in
30 minute steps.
Anti-Bac 4.0 kg Undergarments* and winter clothing
Silk 1.5 kg Silk items
Refresh 3.0 kg For refreshing everyday clothing, such as
shirts and undergarments*
Air-Dry 7.0 kg For refreshing or gently drying textiles
NOTES:
* Undergarments that contain metal reinforcements (such as underwire bras)
are unsuitable for clothes drying, as these metal pieces can come loose
during drying and damage the appliance.
# For loads that are less than 1kg, time-controlled drying is the most effective
program
Drying programs

After Sales Support
(AU) 1300 886 649 (NZ) 0800 836 761 | tempo.org/support
20
Instructions (Cont.)
At the end of the program
• At the end of each program, the appliance enters a 5-10 minute cool-down phase
during which cold air is circulated around the drum. This will ensure items are left at
a temperature that will not damage them.
• A buzzer sounds at the end of the program to remind you to unload the dryer.
• If the laundry is not removed at the end of the cycle,the dryer performs an anti-
creasing phase for a maximum of 30 minutes.
• If you do not remove the laundry, the dryer will stop automatically at the end of the
anti-creasing phase, and enter standby mode. The display light “Filter” will ligh up,
as a reminder to clean the lint fiilter.
• Once the laundry has been removed, set the program selector dial to “O” to switch
off the machine.
• Unplug the machine after each use.
Resetting the thermostat
When the dryer does not heat, try resetting the unit by pressing the RESET button
at the back of the unit (Fig. 9). This will activate the thermostat in order to reheat the
element.
Fig. 9
Table of contents
Other Akai Dryer manuals