Version : 2014.1
5
Instrucciones de servicio específicas del equipo -ES-
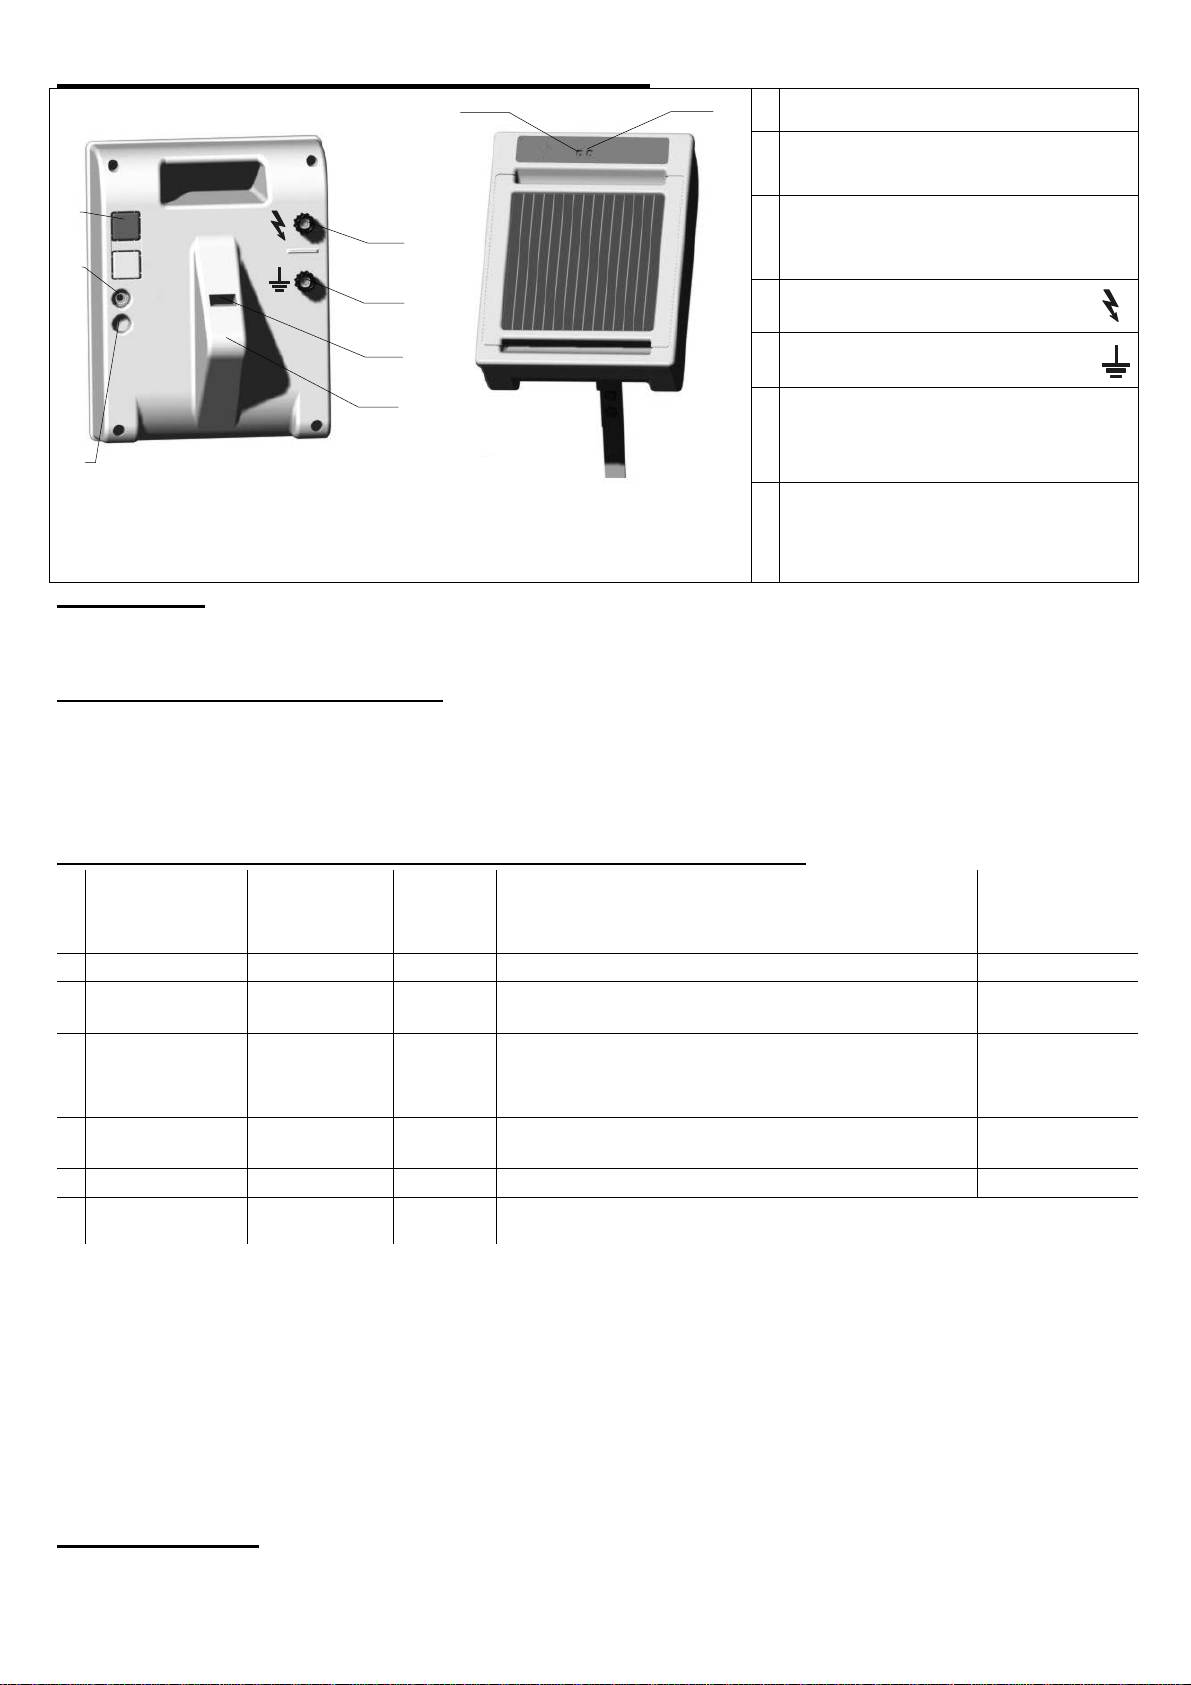
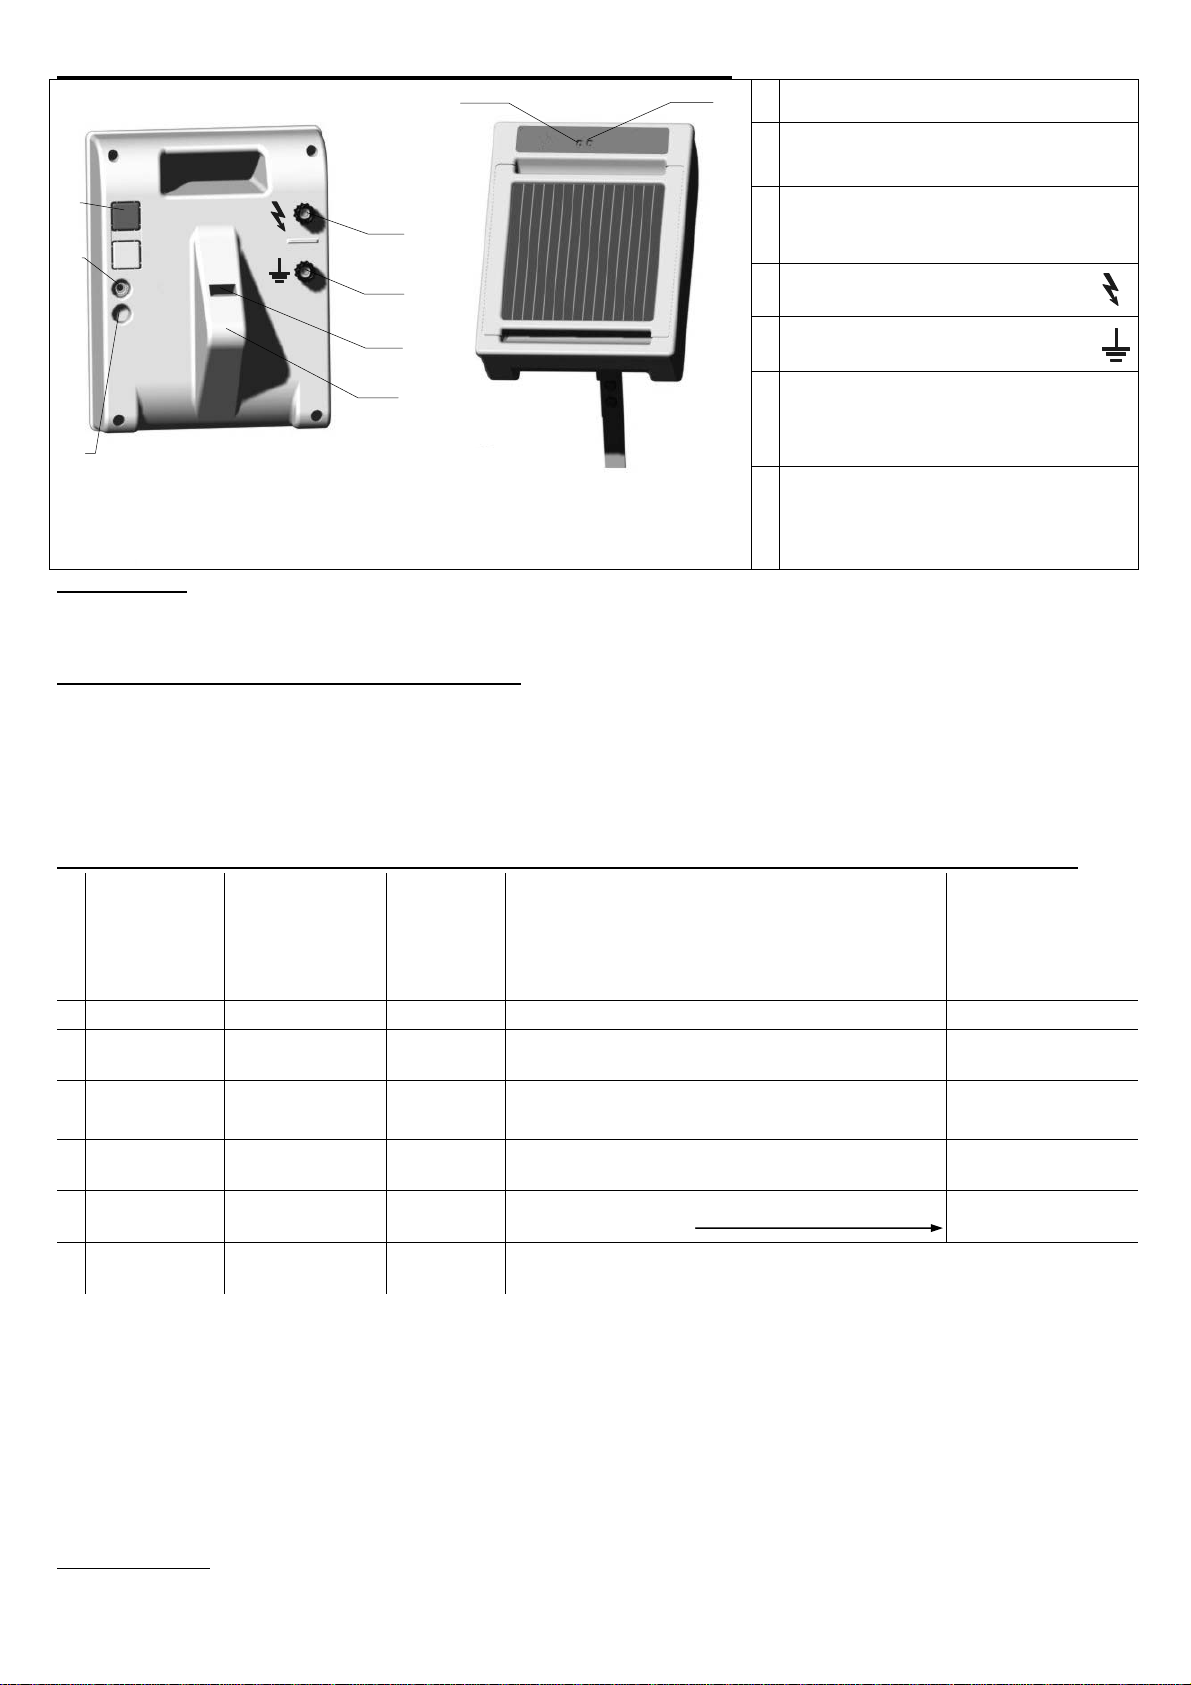
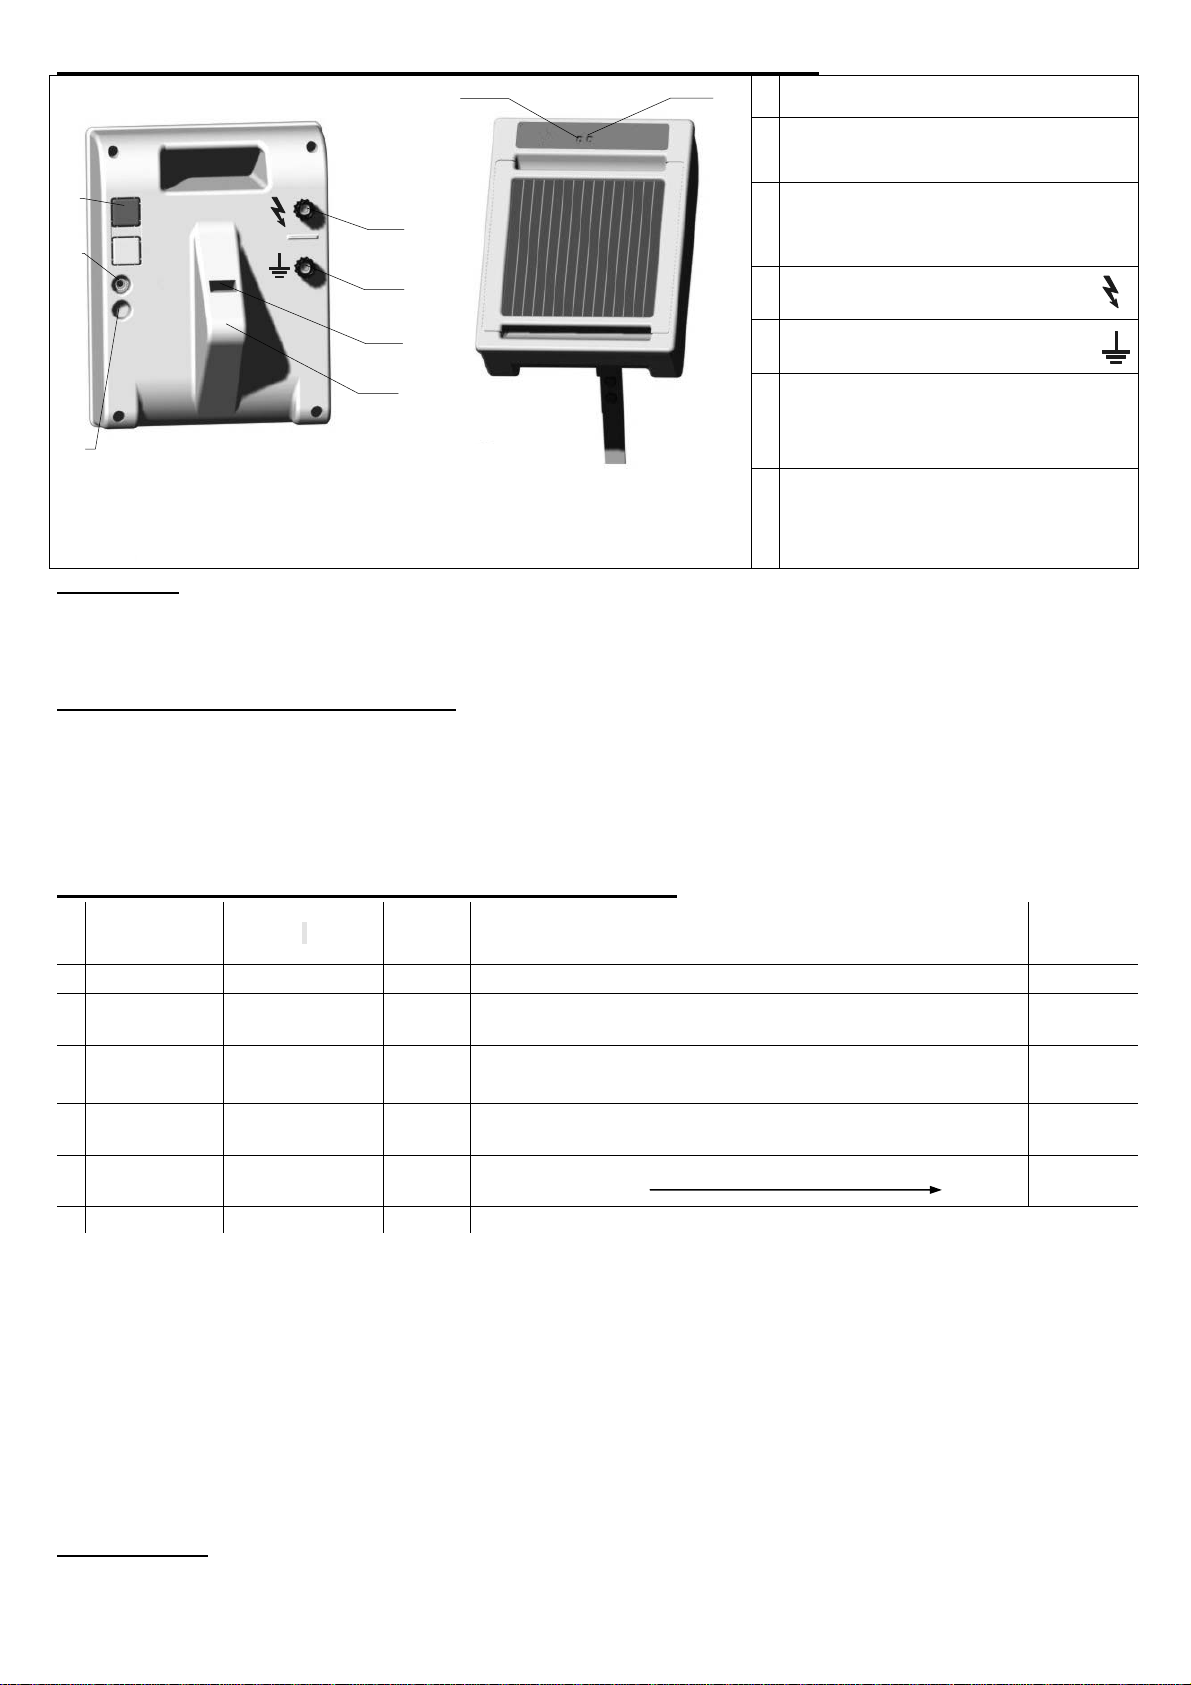
1Interruptor
conectado/desconectado
2Casquillo de carga con tapón de
cierre (protección contra la entrada
de insectos)
3
Taladro de sujeción para el tapón
de cierre durante el proceso de
carga con una fuente de
alimentación externa.
4Conexión al cercado
5
Conexión a tierra
6Lámpara de control
estado del acumulador
7Lámpara de control para la
tensión del cercado
a.) Montaje
Colocar el aparato en el soporte conformado (11), de modo que el aparato se encuentre en un ángulo de 45°. El panel
solar debe estar orientado al sol. En el comercio especializado se encuentra disponible como accesorio una pica de
tierra eléctrica y barra de soporte con el número de referencia 371022.
b.) Control del funcionamiento del equipo
Antes de poner en marcha por primera vez el aparato, es preciso que el aparato desconectado se cargue al sol durante
al menos 2-3 días para que se cargue la batería interna. En el comercio especializado se encuentra disponible como
accesorio una fuente de alimentación doméstica con el número de referencia 371 021. Con esta, también se puede
cargar el aparato en unas 12 horas. Para ello, se debe quitar el tapón (2), y volverlo a colocar una vez que termine el
proceso de carga. Poner en marcha el aparato sin cerca ni tierra, la luz de la cerca (7) parpadeará en verde. El aparato
funciona correctamente. En el caso de que la luz de la cerca (7) no parpadease o la luz de la batería (6) siguiese
parpadeando en rojo tras el proceso de carga, se debe llevar el aparato para que sea comprobado por un experto.
c.) Descripción del funcionamiento con la instalación de cercado conectada (cercado + tierra)
La lámpara del
acumulador (6)
parpadea en color
rojo
La lámpara del
cercado (7)
parpadea en color
verde
Se percibe un
sonido
periódico
Tensión de salida Acumulador
1 NO SÍ SÍ
> 2500 V = Requerimiento mínimo OK
2 NO NO
SÍ < 2500 V Averiguar la fuente de fallas con
ayuda del manual de instrucciones adjunto
(figura 2, página 5)
OK
3 SÍ SÍ SÍ
> 2500 V = Requerimiento mínimo y: Cargar en breve
4 SÍ NO SÍ < 2500 V Averiguar la fuente de fallas con
ayuda del manual de instrucciones adjunto
(figura 2, página 5) y:
Cargar en breve
5 SÍ NO NO
No hay impulsos, la protección contra
descarga completa está activada
Cargar
inmediatamente
6 NO NO NO
Ver b.) Control de funcionamiento del equipo, sin conexión del
cercado ni a tierra
En caso de que la lámpara del cercado (7) parpadee más rápidamente que aprox. una vez por segundo, debe
desconectarse el equipo inmediatamente y someterlo a una comprobación experta antes de su nueva puesta en servicio.
Si el aparato no se va a utilizar durante un largo período de tiempo, éste debe permanecer apagado bajo el sol o se
debe cargar con el adaptador de red que se puede adquirir opcionalmente. El cargador puede permanecer conectado
durante el período de inactividad. Limpie periódicamente el panel solar con un trapo húmedo. Al desechar el dispositivo,
la batería de plomo ácido-gel se debe eliminar de acuerdo con la normativa vigente.
¡Para este equipo vale una garantía de tres años, de acuerdo a nuestras condiciones de garantía!
¡Las indicaciones de seguridad, la conexión a tierra, la puesta en funcionamiento, el mantenimiento de las baterías y del
acumulador, las condiciones de garantía y las posibles fuentes de error véanse en las instrucciones de servicio adjuntas!
Direcciones de nuestra asistencia técnica:
AKO Tamargo , C/ Florez Estrada no 3, 33820 Grado – Asturias, Tel: 0985750505, Fax: 0985754731
Ne pas utiliser en stabulation!
2
4
5
10
11
7
6
3
¡Inapropiado para el uso en los corrales!