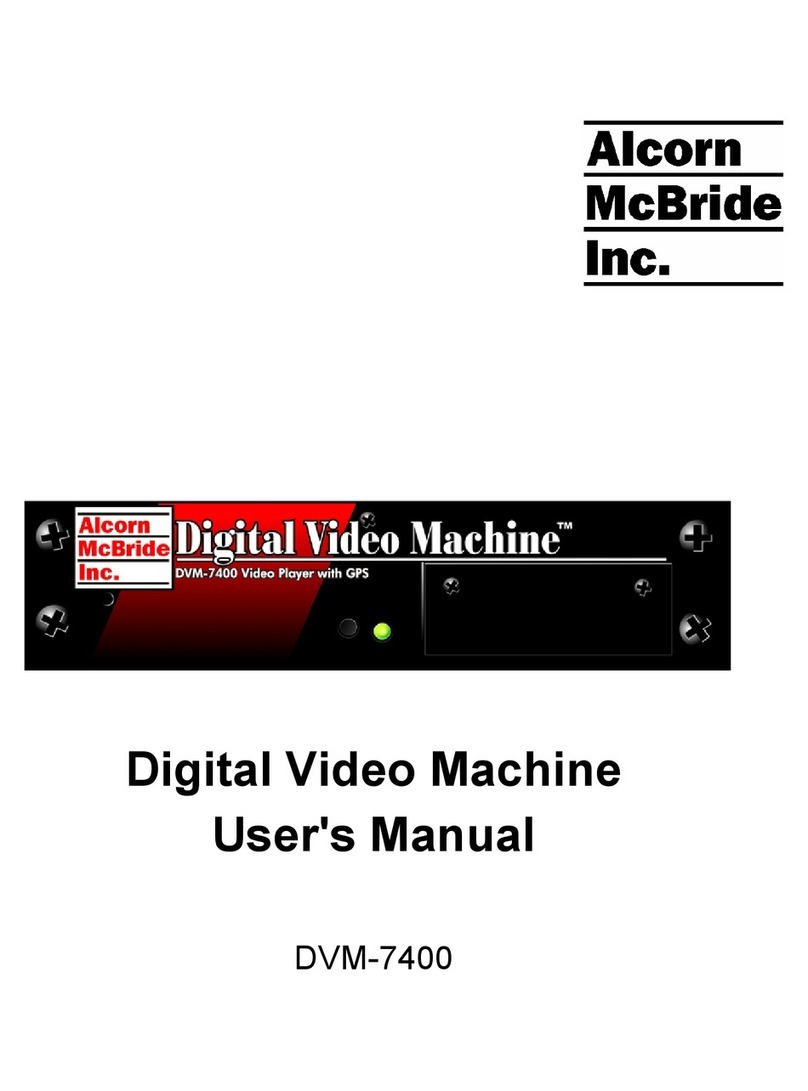
Alcorn Mcbride Digital Video Machine HD User manual

Digital
Video
Machine HD
Including the DVMHD-Pro
User’s Guide
by Alcorn McBride Inc.

Document Revision 3.3
January 2007
Copyright ©1998-2007 Alcorn McBride, Inc. All rights reserved. Digital Video Machine HD, and
the other Machine product line names are trademarks of Alcorn McBride Inc. Microsoft Windows,
Sony and Pioneer are trademarks of their respective owners.
Dolby Digital AC-3 is a registered trademark of Dolby Laboratories Licensing Corporation.
Every effort has been made to assure the accuracy of the information contained in this manual, and
the reliability of the hardware and software. Errors sometimes can go undetected, however. If you
find one, please bring it to our attention so that we can correct it for others.
Alcorn McBride Inc. reserves the right to make changes to these products, without notice, in order to
improve their design or performance.
Applications described herein are for illustrative purposes only. Alcorn McBride Inc. assumes no
responsibility or liability for the use of any of these products, and makes no representation or
warranty that the use of these products for specific applications will be suitable without further
testing or modification.
Our equipment is not intended for use in applications where a malfunction can reasonably be
expected to result in personal injury or damage to equipment. Customers using or selling Alcorn
McBride Inc. products for use in such applications do so at their own risk, and agree to fully
indemnify Alcorn McBride Inc. for any damages resulting from such improper use or sale.
Product Design:
Jim Carstensen, David Mayo, Jason Crew, Scott Harkless, Chris Harden, Jeremy Scheinberg, and
Martin Chaney
Documentation:
Chris Harden, Jason Crew, Scott Harkless, Joy Burke
Alcorn McBride Inc.
3300 S. Hiawassee, Suite 105
Orlando, Florida 32835
TEL: (407) 296-5800
FAX: (407) 296-5801
http://www.alcorn.com


i
Contents
Welcome .................................................................................. 1
Using this Guide............................................................................................................1
Specifications...................................................................................................1
Getting Started.................................................................................................1
Front Panel.......................................................................................................1
Rear Panel.......................................................................................................1
Detailed Command Summary..........................................................................1
General Command Summary..........................................................................2
Ethernet Control...............................................................................................2
Serial Control ...................................................................................................2
Playlists............................................................................................................2
Schedules ........................................................................................................2
Networking Your DVMHD................................................................................2
Transferring Files to the DVMHD.....................................................................2
Creating DTV Clips..........................................................................................2
Updating Operating System.............................................................................2
Troubleshooting ...............................................................................................2
Obtaining Technical Support.........................................................................................3
North America..................................................................................................3
International .....................................................................................................3
Specifications.......................................................................... 5
Getting Started ........................................................................ 7
What’s In the Box?........................................................................................................7
Power Supply Settings..................................................................................................7
Power-up Operation......................................................................................................7
Give AMI Terminal a Try!..............................................................................................7
Front Panel .............................................................................. 9
LED Indicators...............................................................................................................9
Removable Hard Drive Bay ..........................................................................................9
Rear Panel.............................................................................. 11
Power Switch ..............................................................................................................11
Unbalanced Audio Connectors...................................................................................11
Digital Audio Connector..............................................................................................11
HD Video Out Connector............................................................................................12
RGB-HV Mode Pinout (Non-Pro version only)...............................................12
Component (YPbPr) Mode Pinout.................................................................12
HD-SDI Output (DVMHD-Pro only).............................................................................12
RS-232 Serial Control Port .........................................................................................13
Ethernet Connector.....................................................................................................13
USB Connector...........................................................................................................13
VGA Monitor Output....................................................................................................13
Serial Control – RS232.......................................................... 15

ii
Ethernet Control.....................................................................17
Hardware and Software Requirements......................................................................17
AMINet Protocol .........................................................................................................17
Control Message Format............................................................................................17
Control Message Checksum ......................................................................................18
UDP Message Layer ..................................................................................................18
Control Message Response.......................................................................................18
Detailed Command Summary...............................................19
Pioneer / AMI Protocol................................................................................................19
Addressing Commands.................................................................................19
Version Request............................................................................................19
Set IP Address...............................................................................................19
Get IP Address..............................................................................................20
Select File......................................................................................................20
Play................................................................................................................20
Loop Play.......................................................................................................20
Stop ...............................................................................................................21
Still.................................................................................................................21
Pause.............................................................................................................21
Video Colorspace (non-Pro version only)......................................................21
Video Mute ....................................................................................................22
Audio Mute ....................................................................................................22
Sync on Green (non-Pro version only)..........................................................22
Active Mode Request ....................................................................................22
Chapter Request ...........................................................................................22
Video PID Set................................................................................................22
Audio PID Set................................................................................................23
Soft Reboot....................................................................................................23
Reset Video Card..........................................................................................23
Video Output Format.....................................................................................24
Error Codes...................................................................................................24
General Command Summary................................................26
Playlists ..................................................................................28
Extra Commands........................................................................................................28
Example Playlists .......................................................................................................29
Looping a Series of Videos............................................................................29
Playlist Example using ‘AND’ operator..........................................................30
Playlist Example using ‘AFTER’ operator......................................................31
Scheduler ...............................................................................32
The Basic Idea for Commands...................................................................................32
File Format / Tutorial ..................................................................................................32
Fields in Detail...............................................................................................33
Restrictions....................................................................................................37
Comments & Whitespace..............................................................................37
Order of Operations.......................................................................................37
Double Occupancy: When Two Events Occupy the Same Slot....................38
Loading New Schedules on the DVMHD ......................................................39
iii
Logging .......................................................................................................................40
Networking Your DVMHD ..................................................... 42
Connecting to the DVMHD via Ethernet.....................................................................42
Connecting to the DVMHD directly from a PC...............................................42
Connecting to the DVMHD Over a Local Area Network (LAN)/The Internet.44
Transferring Files to the DVMHD......................................... 46
Removable Hard Drive................................................................................................46
FTP Connection..........................................................................................................46
Transferring files via FTP with Internet Explorer............................................46
CD’s, DVD’s, and USB devices ..................................................................................49
Drive Configuration and Update.....................................................................49
Multiple DVMHD’s with Same IP Address..................................................................50
Updating Operating System................................................. 52
Creating DTV Clips................................................................ 54
Before Making Your Own Clips...................................................................................54
What is DTV?..............................................................................................................54
Video Formats................................................................................................54
Audio Format..................................................................................................55
The DTV Bitstream......................................................................................................55
Encoding Your Content...............................................................................................56
Transport Stream...........................................................................................56
Video Streams................................................................................................56
Audio Streams................................................................................................56
DVMHD.INI ............................................................................. 58
Troubleshooting.................................................................... 60

iv

Welcome 1
Welcome
Thank you for purchasing the Alcorn McBride Digital Video Machine HD, the
world’s first intelligent Digital Television (DTV) video playback unit. Building
on the strengths of our award-winning DVM line of digital video players,
Alcorn McBride engineers have created the first truly affordable solution for
dedicated small-format film replacement, high-definition video wall
applications, and the next generation of video distribution and point-of-sale
installations.
The following sections describe the structure of this User’s Guide, as well as
steps for obtaining technical support and important user information. Good
luck, have fun, and thanks for choosing Alcorn McBride!
Using this Guide
This User’s Guide has been divided into the following chapters:
Specifications
This section includes detailed technical specifications for the DVMHD,
including output types and frequencies.
Getting Started
Ready to see your new DVMHD in action? Just follow this simple guide to
display the sample 1080i clip included with your unit.
Front Panel
Logical, user-friendly front-panel indicators assist show operators and
maintenance crew in determining the current show status and any equipment
faults. This section describes the operation of the DVMHD front-panel LEDs,
as well as the removable hard drive bay.
Rear Panel
The DVMHD provides a myriad of interfaces for professional video sourcing.
This section describes the video, audio, and control interfaces on the rear panel
of the unit.
Detailed Command Summary
Here you will find a detailed description of all Pioneer / AMI commands that the
DVMHD supports. Once you decide how you want to control the DVMHD, this
section will provide the information needed choose which commands you need
to accomplish your goal.

2 Welcome
General Command Summary
Don’t need all the details? Here is a simple table of all supported Pioneer / AMI
commands supported by the DVMHD.
Ethernet Control
Here, you will find the details associated with controlling the DVMHD via
Ethernet using simple UDP packets.
Serial Control
This section describes how to use RS-232 to control and communicate with the
DVMHD.
Playlists
Playlists are lists of DVMHD commands, including video playback, audio/video
mute, etc. to be executed in order. This section describes the DVM Playlist
syntax, as well as sample Playlists to get you started.
Schedules
Schedules are used to issue commands to the DVMHD at specific dates and
times. This section will go into detail about how to create schedules, and will
also provide sample schedules.
Networking Your DVMHD
A simple guide that instructs you how to connect to the DVMHD over Ethernet.
A great deal of features can be accessed through this interface.
Transferring Files to the DVMHD
This section explains several methods for transferring video, schedule, and
playlist files to the DVMHD.
Creating DTV Clips
Having a user-friendly and reliable playback device is only half of the HD
puzzle. This section describes the necessary steps and specifications for creating
High Definition video and multi-channel audio content for the DVMHD.
Updating Operating System
This is a simple step-by-step guide on updating the DVMHD firmware and OS.
Troubleshooting
The DVMHD was designed for an extremely high level of reliability, but if
problems or questions arise, check out this section for a quick answer or
solution.

Welcome 3
Obtaining Technical Support
We hope you have as an enjoyable experience using the DVMHD as we did
designing it, but if you have any questions please don’t hesitate to contact our
technical support team.
North America
For… Contact… When?…
Telephone Support (407) 296-5800 M-F 9am–6pm (EST)
Fax Support (407) 296-5801 M-F 9am-6pm (EST)
Software Updates http://www.alcorn.com/support Any Time
International
Please contact your local Alcorn McBride distributor for technical support.

4 Welcome

Specifications 5
Specifications
Video
Decodes and Displays all ATSC DTV Formats: 720p, 1080i, 480p, etc.
Supports multiple data rates including 8/16vsb (see Playback Time section)
and able to playback 24p encoded material at
up to 1920x1080i @ 30fps or 1280x720p @ 60fps
MPEG-2 MP@HL at up to 50Mbps (gross bitrate)
Analog Audio
Unbalanced (+4 volts max. into 20K)
Less than 10 ohms impedance
16-bit linear quantization
96 dB Digital Dynamic Range
0-48 KHz Sample Rate
20-20,000 Hz +/- 0.5 dB Frequency Response
90 dB Signal-to-Noise Ratio
0.008% THD
Digital Audio
AES/EBU digital bitstream on XLR
Compatible with Dolby Digital AC-3, PCM, and MPEG Audio Formats
Digital Video (Pro version only)
SMPTE-292M HD-SDI on BNC connector
Playback Time
Based on an 40GB Drive
- 4.8 Hours @ 8vsb (19.394Mbps)
- 2.4 Hours @ 16vsb (38.788Mbps)
- 1.75 Hours @ Max Bitrate (50Mb/s)
Response Time
Less than 33ms, however video playback response depends upon encoding.
Typical video playback in less than 0.5 seconds.
Power
100-240 VAC, 50/60 Hz, 100 Watts
UL Listed Power Supply, CE Compliant
Physical
19"W x 16"D x 3.5"H, 30lbs.

6 Specifications
Control
RS-232 Serial (DB-9)
Ethernet (RJ-45)
Scheduler
Playlists
On-Screen Control
Connectors
YPbPr or RGB-HV (Software Selectable) Output (HDB-15)
HD-SDI (BNC – DVMHD Pro Only)
Unbalanced Audio Outputs (2xRCA)
Digital Audio Output (XLR)
Blackburst Sync Input (BNC)
10/100Base-T Ethernet (RJ-45)

Getting Started 7
Getting Started
What’s In the Box?
The DVMHD is shipped with the following items:
•This User’s Guide
•One (1) Hard Drive Docking Station
•One (1) Hard Disk keys
•One (1) Null Serial Cable (DB-9F ÆDB-9F)
•One (1) Null (Crossover) Ethernet Cable
•One (1) Line Cord
Power Supply Settings
The DVMHD is compatible with the 115VAC and 230VAC international power
standards. The DVMHD’s internal supply is auto-sensing, so there is no need to
set any external switches.
Power-up Operation
To turn on the DVMHD, complete the following procedures.
1. Plug the DVMHD into a standard wall outlet using the Line Cord.
2. Move the Power Switch to the ON (“|”) position (located next to line
cord connection).
3. The green front-panel indicator will blink to indicate that the DVMHD
is booting.
4. After approximately 45 seconds, the green, yellow and red indicators
will blink in succession, indicating that the DVMHD has completed the
boot process and is ready for commands.
NOTE: If step 4 does not occur, the DVMHD has experienced a serious error.
To determine the cause, connect a VGA compliant monitor to the VGA output
located next to the RS-232 connector. If you are unable to correct the error
based on the on-screen information, please contact your Alcorn McBride
distributor for technical support.
Give AMI Terminal a Try!
Want to make your introduction to the Digital Video Machine HD a breeze?
Download AMI Terminal - Alcorn McBride’s latest PC software for
communicating with the DVMHD and other Alcorn products. This Windows
application allows you to easily configure and control your new DVMHD with
the click of a mouse button.

This easy-to-use application can be downloaded from www.alcorn.com in the
support/software section. It is also available via the DVMHD’s Web and FTP
interfaces.
Let’s make the DVMHD play a test clip!
1. Connect the RS-232 cable (supplied with the DVMHD) to the port on the
DVMHD and your Windows PC.
2. Run AMI Terminal
3. Select DVMHD in the Product Selection dropdown box.
4. Click on the Configure button within the Communication Method section
and verify that the correct COM port is selected for your PC.
5. Type 1in the box next to the Search button, and then click Search. You
should see the command 1SE<0D> appear in the communication log at the
bottom of AMI Terminal. After approximately 1 second, the DVMHD
should respond with an R<0D> as in the above screenshot.
6. Click the Play button. Viola! Your DVMHD is now playing test clip #1!
NOTE: If you do not see any video output, but the DVMHD has acknowledged
the Play command (R<0D>), your display does not support
Congratulations! Now that you’ve played your first clip, please read on in this
guide to learn more about the advanced features of the DVMHD.
8 Getting Started

Front Panel 9
Front Panel
LED Indicators
The Digital Video Machine HD provides three (3) LED indicators.
LED Color Behavior Description
Off Idle
On Playing
Slow Blink Paused/Stilled
2 Blinks, Pause Waiting within Playlist
Status
Green
Fast Blink System Booting
Off No External Sync present
On Locked to External Sync
Sync Yellow
Blink Locking to External Sync
Off System Normal
On Fatal Disk Error
Error Red
Blink Bad Operating System
Removable Hard Drive Bay
The front of the DVMHD also contains the Removable Hard Drive Bay. This
feature allows you to update your DTV content from your PC. You can even
keep alternate removable drives to instantly switch program material.

10 Front Panel

Rear Panel 11
Rear Panel
The Digital Video Machine HD rear panel provides connections for audio/video
outputs, control cables, and power.
Power Switch
The DVMHD is “ON” when this switch is in the UP position (labeled “|”).
NOTE: When power-cycling the DVMHD, please wait 5-10 seconds before
turning the unit ON.
Unbalanced Audio Connectors
These 2 RCA-type phono connectors output a decoded version of the PCM or
MPEG audio stream. If any other stream type, including Dolby Digital surround
is played, no audio is output on these connectors. Dolby Digital Bitstream is
output from the Digital Audio Connector. You can connect a Dolby Digital
Bitstream Decoder to separate the channels.
Digital Audio Connector
This three-pin XLR connector provides the AES/EBU digital audio output.
During playback, if audio is present in the clip, the compressed bitstream is
output in AES/EBU packets. If Dolby Digital Bitstream is present in the clip,
then it is emitted on this connector. You can connect a Dolby Digital Bitstream
Decoder to separate the channels. If no audio is present, no data is output.
Pin Signal
1 Shield
2 +
3 -

HD Video Out Connector
This HDB-15 Female connector provides video in either the RGB or YPbPr
color space. In addition to the H and V-Sync signals, composite sync is present
in the “G” and “Y” signals. The pinout of this connector is as follows:
RGB-HV Mode Pinout (Non-Pro version only)
Component (YPbPr) Mode Pinout
HD-SDI Output (DVMHD-Pro only)
This connector provides a SMPTE-292M signal for connection to display
devices what support High-Definition Serial Digital inputs.
The cable and connectors used for this connection should be rated for use with
SMPTE-292M serial digital video. Examples of cables that meet this
requirement are Belden 8281, Belden 1694, and Gepco VSD2001.
The length of the cable should never be any longer than required, due to the high
frequency of the SMPTE-292M signal. In no cases should the length exceed
100m.
12 Rear Panel

Rear Panel 13
RS-232 Serial Control Port
This male DB-9 connector provides an RS-232 serial control connection. The
DVMHD will communicate using the Pioneer/AMI protocol. For information
about this using protocol, see the Pioneer / AMI Protocol section. The pinout
of this connector is as follows:
Pin Signal
1 N/C
2 RXD
3 TXD
4 N/C
5 GND
6 N/C
7 N/C
8 N/C
9 N/C
Ethernet Connector
This RJ-45 connector provides connection for a standard 100-Base TX Ethernet
cable. This cable would normally be connected to a hub, but may also be
connected directly to a PC’s Ethernet card using an Ethernet null, or “cross-
connect” cable, which is included with the DVMHD.
Ethernet is the primary mechanism for transfer of video data into the DVMHD,
and may also be used for control and monitoring. The DVMHD is shipped with
a factory default IP address of 192.168.0.254, which is useful for transferring
video across an Ethernet LAN, but must be changed if the Digital Video
Machine HD is to be connected to a router on the Internet. Refer to the
Networking Your DVMHD section of this manual for more information.
USB Connector
This connector can be used as an alternate method of loading files on the
DVMHD. Simply connect a USB storage device to the DVMHD with a
command0.bat file, and the files will be copied to the DVMHD upon start-up.
VGA Monitor Output
This connector provides the VGA output of the DVMHD. This output is helpful
for controlling the DVMHD locally as well as gathering information. Things
such as OS version, Network Information, and communication logs can be
viewed from here. To use this output, simply connect a standard PC monitor
that is able to handle an 800x600@60Hz VESA display format.
Other manuals for Digital Video Machine HD
1
Table of contents
Other Alcorn Mcbride DVD Player manuals

Alcorn Mcbride
Alcorn Mcbride Digital Binloop HD User manual

Alcorn Mcbride
Alcorn Mcbride DVM-7400 User manual

Alcorn Mcbride
Alcorn Mcbride Digital Binloop User manual

Alcorn Mcbride
Alcorn Mcbride A/V Binloop Uncompressed User manual

Alcorn Mcbride
Alcorn Mcbride DVMHD-8400 User manual

Alcorn Mcbride
Alcorn Mcbride Digital Video Machine HD User manual

Alcorn Mcbride
Alcorn Mcbride Digital Video Machine 4 User manual