AlcoSense OXIPRO 2 User manual

User Manual
OXIPRO 2 and 3
Fingertip Pulse Oximeter
OLED
Display
Battery cover
Power/mode
button
Ver 2.4 Revision date:25/01/2022
General Description
1
Operating principle
2
Features
4
6Setting options and alerts (NOT available on the OxiPro 1)
This Fingertip Pulse Oximeter is a non-invasive medical device intended to quickly and precisely measure the oxygen
saturation in arterial haemoglobin (SpO2) and Pulse Rate (PR). For use in hospital, clinical and home environments.
Oximeters use a series of standardised principles to establish SpO2 and Pulse Rate. By using Lambert Beer’s Law of Spectrum
Absorption Characteristics of Reductive Haemoglobin and Oxyhaemoglobin (HbO2) in visible and near-infrared light
wavelengths (660nm and 940nm respectively) in combination with Photoelectric Oxyhaemoglobin Inspection Technology with
Capacity Pulse Scanning and Recording Technology, the two different wavelengths of light can be focused onto a human finger
nail through a clip-on finger sensor (2 in the diagram below). The signal is measured using a photosensitive element (1 in the
diagram below) and displayed as human readable data on a screen aer processing through electronic circuits and a
microprocessor.
Operating Instructions
3
Installing the batteries and set up
1. Remove the battery compartment cover.
2. Insert two 1.5v AAA alkaline batteries (included) into the battery compartment. Ensure correctly alignment of the polarity
(positive and negative ends) of the batteries with the markings on the Oximeter. Incorrect insertion may cause damage to the
instrument.
Do NOT use rechargeable batteries as the output voltage is 1.3v per battery, not the required 1.5v. Only use good
quality, branded Alkaline AAA batteries and never mix old batteries with new batteries.
3. Close the battery compartment cover.
4. If you have an OxiPro 2 or 3 you may wish to check the pre-set alarm values meet your requirements and adjust if
necessary, instructions are given in Section 6 of this manual (not available on the OxiPro 1).
Performing a measurement
Remove nail polish or false nails before use as these will affect the accuracy of the reading.
1. Sit or lie down, remaining still until your body is relaxed.
2. Taking note of the picture below, squeeze the clamp to separate the two halves of the Oximeter.
3. Insert your index or middle finger into the Oximeter as far as it will go, with the finger nail facing the side with the screen.
4. Press the power button on the front of the Oximeter to turn it on.
5. Aer a few seconds your measurements will be displayed on screen. Please note it may take up to 60 seconds for the
readings to stabilise, readings should be taken when the blood oxygen value is stable for 5 seconds or longer. If the Oximeter is
powered on but no measurements are shown please see the Trouble Shooting section 12 of this user manual.
6. If you wish to rotate the orientation of the values displayed on screen see Section 5 of this user manual.
7. To turn off the Oximeter, simply remove it from your finger and it will turn off automatically aer 8 seconds.
8. Please replace the batteries when the battery symbol on screen shows low.
Haemoglobin saturation is the percentage between the
capacity of oxyhaemoglobin (HbO2) that compounded with
oxygen and that of all combinative haemoglobin (Hb) in
blood. In other words, it is the saturation of oxyhaemoglobin
in blood. It is a very important physiological parameter for
Respiratory and Circulation Systems. Many respiratory
diseases could reduce haemoglobin saturation in human
blood. Moreover, factors such as Automatic Organic
Regulation Malfunction caused by anaesthesia or trauma from
a major operation or examination can also cause problems in
oxygen supply, which might reduce human haemoglobin
saturation. As a result, symptoms such as migraine, vomiting
and asthenia might appear in patients. Hence, it is very
important to quickly know the haemoglobin saturation of
patients in clinical environments.
The fingertip pulse Oximeter is non-invasive, features low
power consumption, simple operation and portability. It is
only necessary for the patient to put one finger into the
photoelectric sensor for diagnosis and the display will directly
show the measured value of haemoglobin saturation. The
precision and repeatability of the Oximeter has been proven in
clinical trials.
Ref: YK-81A / YK-84C
ENSM80-84202007272/20082810.027/3.09.03.0053
1
2
• Displays SpO2, Pulse Rate (PR) and Perfusion Index (PI) (PI not on the OxiPro 1)
• Two-colour OLED display with six different display modes on OxiPro 2 and 3, LED screen on the OxiPro 1
• The OXIPRO 3 model features an accelerometer which enables the information on the screen to rotate based on the
position of the patient. (Not on OXIPRO 1 & 2 models)
• Low-power consumption; more than six hours continual operation with two alkaline AAA batteries
• Low voltage indicator
• If a finger is not inserted, the product will enter standby mode aer 8 seconds
• Small, light and portable
When inserting your finger, the finger nail surface must face the
surface closest to the display, away from the light source.
To maintain good hygiene please use medical alcohol to clean the
rubber before each test and clean the tested finger with medicl alcohol
before and aer the test. The rubber inside the Oximeter is of medical
standard which is non-toxic and anti-allergenic.
You can change the orientation of the values displayed on screen (display mode). When powered up, click the power button
once to change to the next display screen (please note: if you press and hold the power button instead of clicking it you will
enter the menu system shown in Section 6 below). Repeat the process to rotate between the six options shown below.
Please note: the OXIPRO 3 is equipped with an accelerometer and only features display modes 1 to 4 below. Screen
shots are for reference only and may differ slightly from those on the Oximeter.
1. Press and hold the power button for >3 seconds until you enter the parameter setup menu, shown in the Menu 1 diagram
below. Clicking the power button moves the “*” between the menu options, pressing and holding the power button selects the
options to adjust.
2. To change the alarm settings, press and and hold the power button for >3 seconds when the “*” symbol is shown next to
“Alm Setup” as shown in the Menu 1 diagram below. This will enter Menu 2, shown below. Click the power button until the “*”
symbol is next to the option you wish to change. To adjust the option press and hold the power button and the numbers will
change.
3. To exit the menu and confirm your changes, click the power button until the “*” is next to “Exit”, then press and hold the
power button for >3 seconds to exit the menu.
Video instructions can be found in the support section of our website: www.alcosense.co.uk/o2labs
Menu 1 Menu 2
Settings
Alm Setup
Alm off
off
off
OK
3
Beep
Demo
Restore
Brightness
Exit
*
Settings
Spo2 Alm Hi
Sounds Setup
Spo2 Alm Lo
PR Alm Hi
PR Alm Lo
+/- Exit
100
85
130
50
+
*
5Display modes (NOT available on the OxiPro 1)
7Technical Parameters
1. Display Type:OLED display
2. SpO2:Measurement range:70%~99%
Accuracy:80%~99%:±2% (Including 80%);
70%~79%: ±3% ;
Below 70% no requirement;
Resolution:1%
3. PR:Measurement range:30BPM~240BPM
Accuracy:±1BPM or ±1%(whichever the greater)
4. Parameters of LED probe
8. OXIPRO 3 only: Automatic startup: Within seconds of
inserting your finger in the device the Oximeter will start up.
9. OXIPRO 3 only: Accelerometer function: The display screen
will automatically rotate to the upright position based on the
position of the Oximeter.
10. Dimension:58mm×36mm×33mm
11. Operation environment:
Temperature: 5 ℃~ 40 ℃
Humidity: 15% ~ 80%
Atmospheric pressure: 86kPa ~ 106kPa
Transport, storage environment:
Temperature: -10 ℃~ 40 ℃
Humidity: ≤95%
Atmospheric pressure: 50kPa ~ 106kPa, non-corrosive
gas and well-ventilated environment.
12. Declaration:This product complies with IEC60601-1-2
EMC standard.
Wavelength
660±2nm
905±10nm
Radiation Power
1.8mW
2.0mW
RED
IR
This parameter can be especially useful to clinicians.
5. PI index measurement scope:0~20 (NOT available on
the OxiPro 1)
6. Power: 2 x AAA 1.5V alkaline batteries
7. Automatic standby: The product shuts off automatically
within 8 seconds of the finger being removed.
Diagram showing the Principle of Operation
1. Infrared-ray receiving tube (photosensitive element)
2. Visible and Infrared-ray transmitting tube
1 (Start) 2 3
4
5
6
Restoring factory default settings
Enter Menu 1 following the instructions above. Click the power button until “Restore” is shown on screen. Press and hold the
power button for >3 seconds. All settings will be set to factory defaults.

10 Classification
13 Statement
14 Aer-sales service
15 Company and contact information
11 Product Accessories
9Maintenance, storage and disposal
Safety and precautions for use
8
1. Do not use the Fingertip Pulse Oximeter near operational MRI or CT equipment.
2. Explosion hazard: Do not use the Fingertip Pulse Oximeter in an explosive atmosphere.
3. The Fingertip Pulse Oximeter is intended only as a supplementary tool in patient assessment. Patients should be
diagnosed in conjunction with clinical manifestations and symptoms.
4. Check the skin around the Fingertip Pulse Oximeter regularly to ensure that the circulation and skin are unaffected.
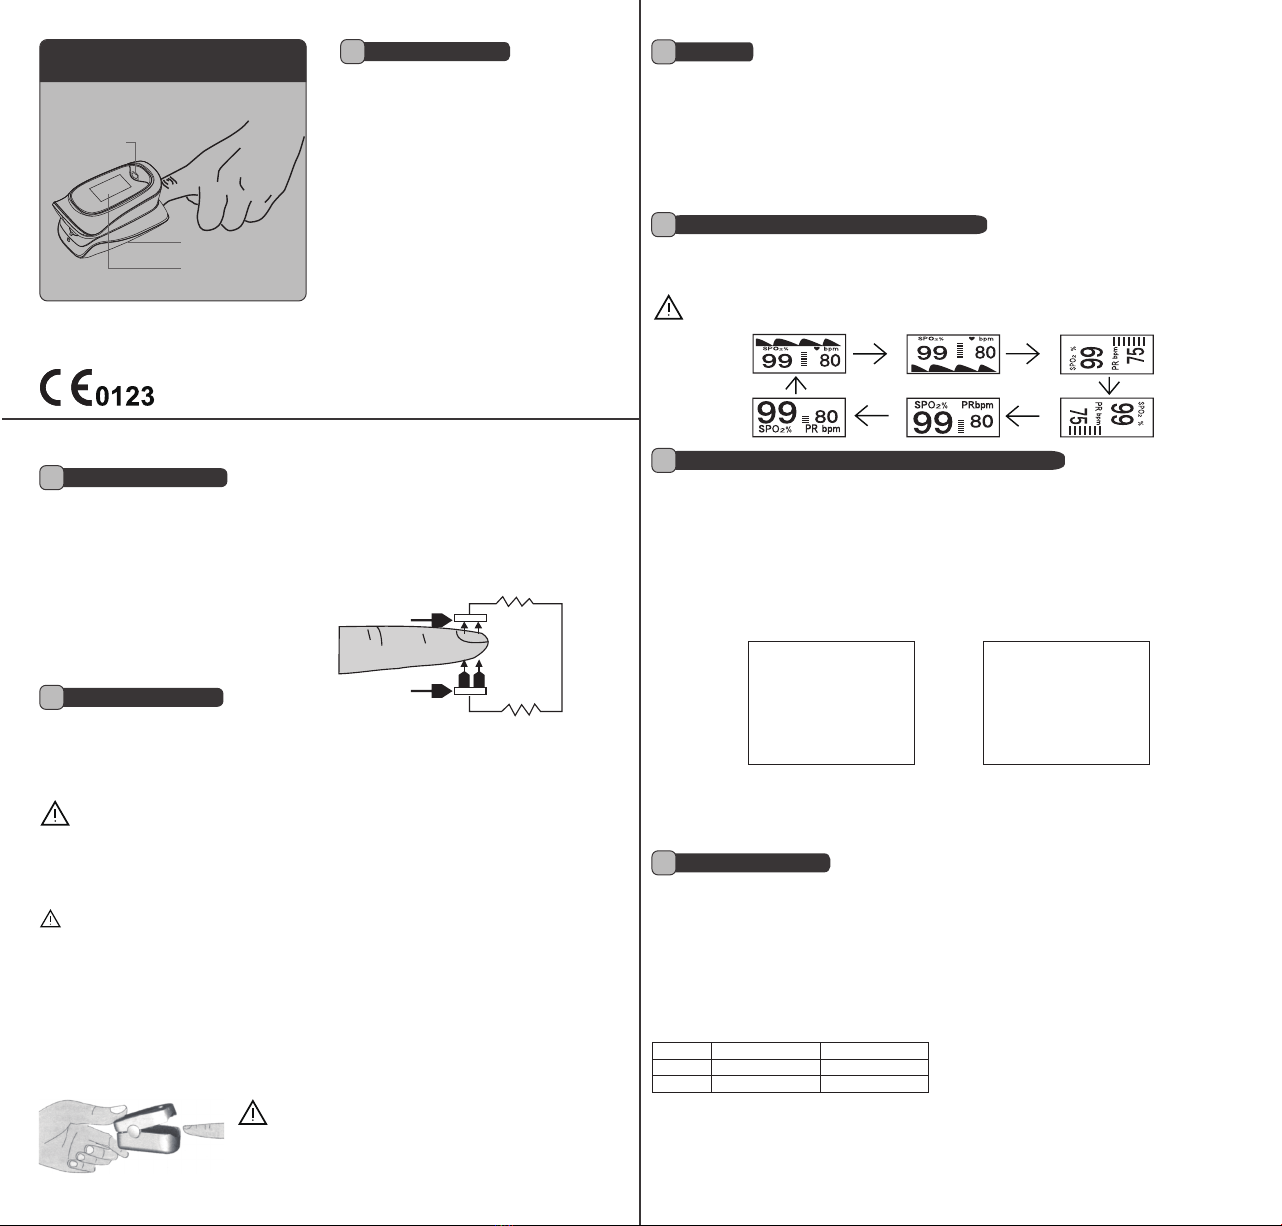
5. Do not drag the rubber surface against the skin while putting on or removing the Fingertip Pulse Oximeter sensor.. This may
cause inaccurate readings, injury or irritation.
6. Please read this manual carefully before operation and retain for future reference.
7. The Fingertip Pulse Oximeter is not designed for continuous monitoring.
8. Repeated use or the patient’s condition may require changing the finger used periodically. Check skin condition, circulatory
status, and correct alignment at least every 2 hours.
9. Do not autoclave, use ethylene oxide for sterilizing or immersing the Oximeter in liquid.
10. Significant levels of dysfunctional haemoglobins (such as carboxyl-haemoglobin or methaemoglobin) may cause
inaccurate readings.
11. Intravascular dyes such as indocyanine green or methylene blue may cause inaccurate readings.
12. SpO2 measurements may be adversely affected in the presence of high ambient light. Please shield the Oximeter from
direct sunlight or spot lights if necessary.
13. Finger movements or patient movement may cause inaccurate readings.
14. Electromagnetic interference, high frequency radio waves or interference caused by defibrillators may lead to inaccurate
readings.
15. Venous pulsations may cause inaccurate readings.
16. Inaccurate readings may be caused if the Oximeter is in the same limb where reduced blood flow are expected, for
example from a blood pressure cuff, arterial catheter or intravascular line.
17. Hypotension, severe vasoconstriction, severe anaemia, or hypothermia may cause inaccurate readings.
18. Inaccurate readings may be displayed in patients administered with Cardiotonic drugs aer cardiac arrest or if the patient
is experiencing heart quiver or flutter.
19. Painted nails may cause inaccurate SpO2 readings.
1. Management Class for Medical Devices: Ⅱequipment
2. Anti-electric Shock Type: Internally powered equipment
3. Anti-electric Shock Degree: Type BF equipment
1. Replace batteries when the low battery indicator is active.
2. Clean the surface of fingertip pulse Oximeter with medical alcohol before it is used to diagnose patients.
3. If the Oximeter will be stored for extended periods of time, remove the batteries from the device.
4. Store in accordance with the temperature, humidity and air pressure specified in the Technical Parameters.
5. Keep the product dry at all times. Moisture may affect its expected operational lifetime and damage the product.
Please follow local guidance on the recycling of the product, packaging, accessories and batteries. The
Oximeter and batteries require disposal as Electrical Waste and must not be disposed of in normal
recycling or waste.
1. One lanyard chord
2. One user manual
1. Repairs may only be undertaken by the factory or the company detailed in section 15 of this manual. Circuit diagrams etc
are not available.
2. Records of the certification and compliance documents for the product can be requested from the local service centre.
3. The operation, specification or design of the product may be changed without prior notice.
4. The instrument cannot be used for accuracy testing of other blood oxygen probe pulse & pulse blood oxygen monitors.
Exclusive UK and IE Distributor:
AlcoSense Laboratories
Part of Now Group UK Ltd
Unit 3, Maidenhead Enterprise Centre,
Cordwallis Street,
Maidenhead, Berkshire
SL6 7BE. United Kingdom
How to contact us
Telephone lines are open Monday to Friday 0900 to 1700 GMT, excluding back holidays.
Please email info@alcosense.co.uk or call 01628 778885 from the UK, or from Ireland call 01 513 7065. From outside the
UK or Ireland call +44 1628 778885.
Conditions of warranty
As standard your Oximeter comes with a one-year limited warranty from the time of purchase. To qualify for warranty
repair or replacement you must provide a valid proof of purchase from an authorised retailer with any warranty claim.
Warranty does not include the following:
• Fault caused by human factors including but not limited to accidental damage beyond reasonable wear and tear;
• Use of the product outside the specified environmental requirements.
• Due to disassembly or repair attempts made by those other than the authorised service centre.
• Products beyond the warranty period of one year from purchase.
• Products bought second hand.
• Products not bought from an authorised retailer.
If you have any problem, please email [email protected] or call 01628 778885 from the UK, or from Ireland
call 01 513 7065 (International (+44 1628 778885).
Please read user manual before using the instrument.
Follow the requirements listed in this user manual with regard to operation, storage, maintenance and environmental
requirements.
Ensure that users
Guidance and manufacturer’s declaration on electromagnetic radiation for other EQUIPMENT and SYSTEMS
The Fingertip Pulse Oximeter is designed to be used in specified electromagnetic environments.
Users of the Fingertip Pulse Oximeter must use it in the following environments.
Radiation Test
RF interference
CISPR 11
RF interference
CISPR 11
Compliance
Group 1
Class B
Electromagnetic environment-guidance
RF signal of Fingertip Pulse Oximeter is simply created by its internal
function. Therefore, its RF interference is very low and is not likely to
cause any interference to nearby electronic equipment.
The Fingertip Pulse Oximeter applies to all establishments,
including domestic establishments and those directly connected
to the public low-voltage power supply network that supplies
buildings used for domestic purposes.
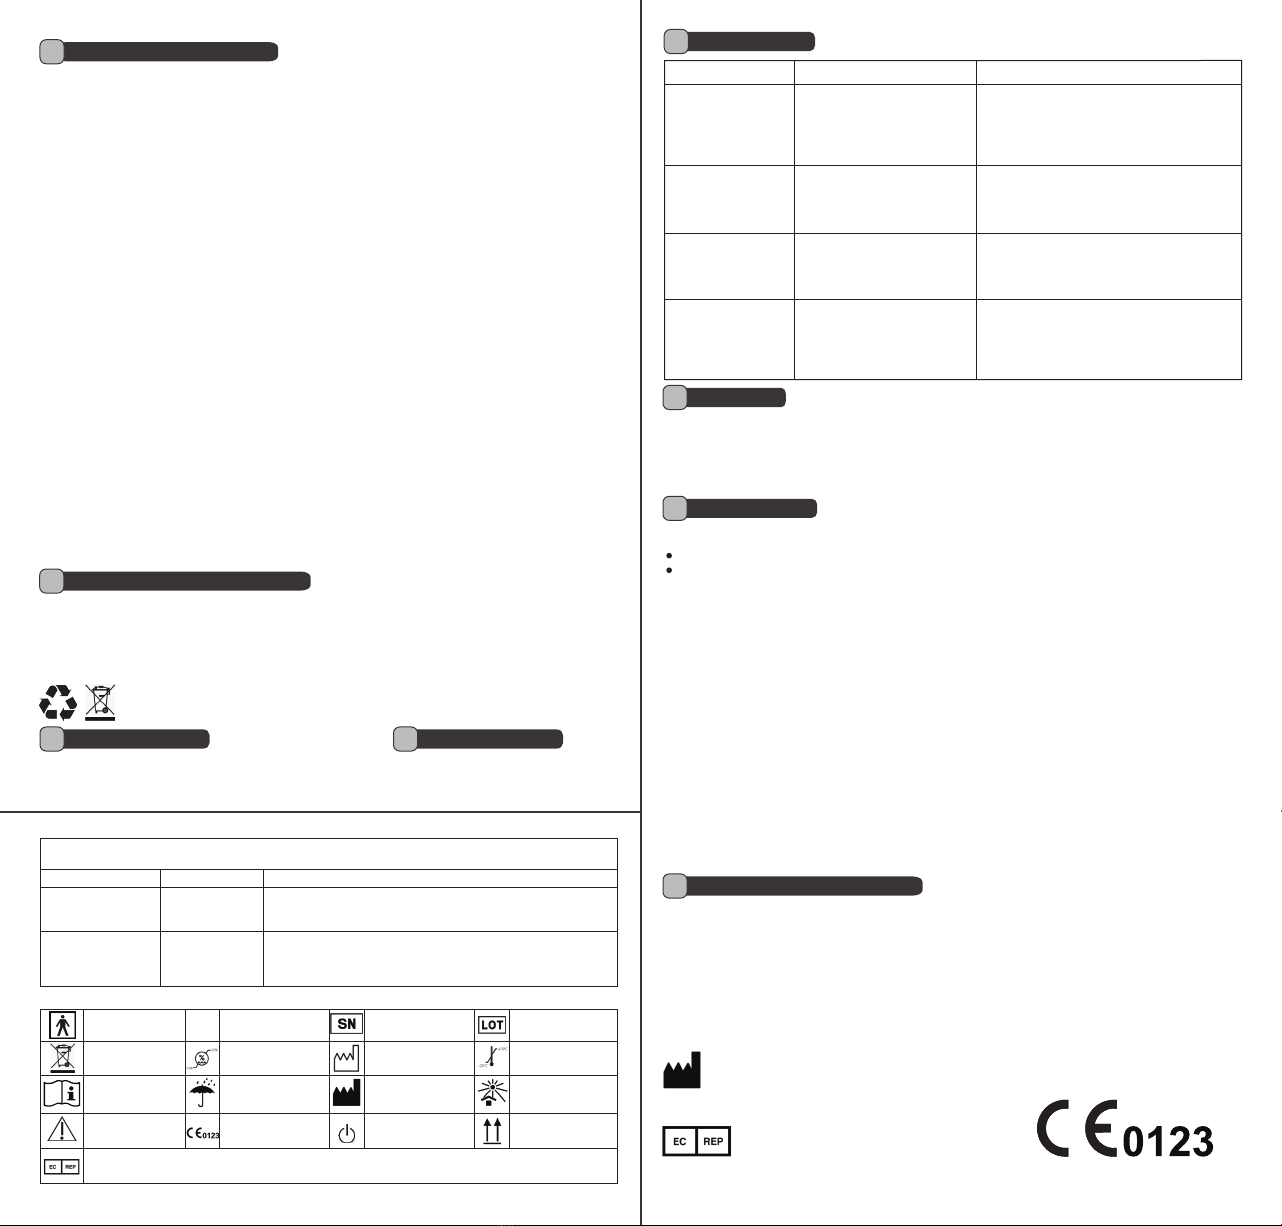
Symbols and Definitions
BF type
application part IP rating Serial number Lot number
Standby
Temperature range
Avoid sunlight
Store this way up
Date of manufacture
Manufacturer
European Union Representative
Humidity range
Keep dry
Product certification
Electrical waste
disposal required
Consult manual
Caution
IP22
Problem Possible reason Solution
SpO2 or Pulse Rate
cannot be shown
normally
SpO2 or Pulse Rate is
inconsistent
The Oximeter can not be
turned on
The Oximeter suddenly
turns off
1. Finger is not inserted correctly
2. Patient is wearing nail polish
3. Patient’s Oxyhemoglobin value is
too low to be measured
1. Battery power may be exhausted
2. Batteries might be installed
incorrectly
3. The Oximeter may be damaged
1. The product automatically shuts
off when no signal is detected for 8
seconds
2. Battery power may be exhausted
1. Try reinserting the finger or swapping fingers.
2. Make sure the finger is inserted the right way up.
3. Remove nail polish, if present, and try again.
4. Try more times. Verify the product is working
correctly on another person. If you are still
experiencing problems, seek medical assistance.
1. Try reinserting the finger or swapping fingers.
2. Sit down and keep the hands and body still.
3. Remove nail polish, if present, and try again.
1. Try inserting a finger in the Oximeter again.
2. If it still won’t power up, install new AAA Alkaline
batteries and insert finger again.
3. Contact us. Details can be found in section 15.
1. Install new AAA Alkaline batteries.
2. Reinstall the batteries, making sure they are
inserted the correct way round.
3. Contact us. Details can be found in section 15.
Xuzhou Yongkang Electronic Science Technology Co., Ltd
4F Building C8, 40 Jingshan Road, Economic and Technological Development Zone,
Xuzhou, China
The authorised representative of European Union:
Prolinx GmbH, Brehmstr . 56 , 40239 , Duesseldorf
Germany
Scope of application / Intended use
The fingertip pulse Oximeter can be used to measure human haemoglobin saturation and pulse rate through the finger. It can
be used in hospitals, at home, in schools and medical centres.
Contraindication: Not found
Please Note:
1. Images in this user manual may differ slightly from the actual instruments.
2. Technical parameters and appearance may change without prior warning.
Trouble shooting
12
1. Finger is not inserted correctly
2. Patient is wearing nail polish
3. The finger or patient may be
moving
email: info@alcosense.co.uk
UK Tel: 01628 778885
IE Tel: 01 513 7065
International: +44 1628 778885
Opening hours: Mon-Fri 0900-1700,
exc. bank holidays
Web: www.alcosense.co.uk/oxipro
This manual suits for next models
3
Popular Medical Equipment manuals by other brands

SHNING 3D
SHNING 3D Aoralscan 2 user manual

Datex-Ohmeda
Datex-Ohmeda S/5 Compact Anesthesia Monitor Technical reference manual

Drive
Drive Ultra Light Plus Owner's assembly and operating manual

Sirona
Sirona ORTHOPHOS XG 5 operating instructions

Otto Bock
Otto Bock 17KO1 Series Instructions for use

Esaote
Esaote 6420 Series Getting started