Figure 1 Figure 2 Figure 3
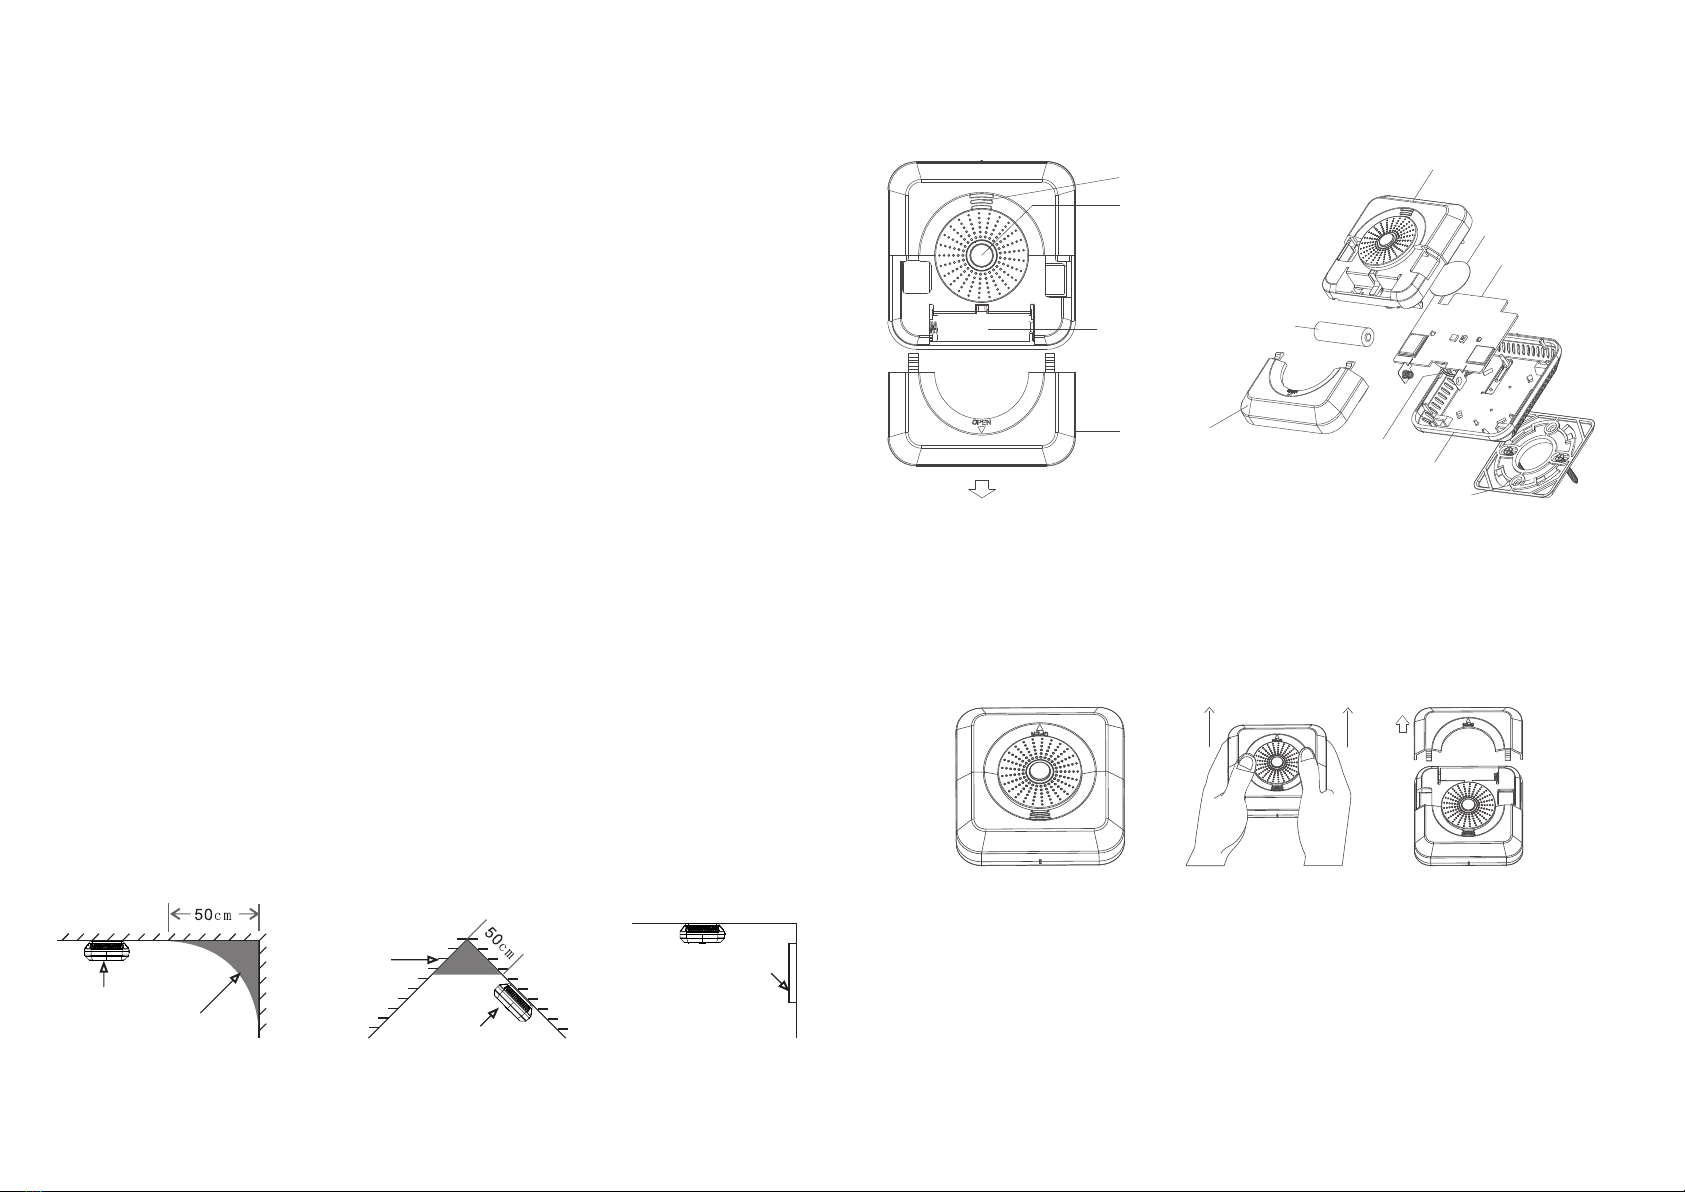
1.5. Installation: After the base is disassembled, place the base on the position where the button is
needed, and mark the mounting hole of the base. Then mark the two holes with the corresponding
mark, insert the rubber plug into the hole that has just been punched, and put the base. Fix the base
with screws and finally hang the corresponding base of the alarm. See below:
Ⅵ.Precautions
2, Instructions
2.1, Indicator status description
a) Standby state: 45S, LED flashes once.
b)Low voltage status: flash once every minute
(synchronized buzzer status).
c) Smoke alarm status: When the smoke
concentration reaches the alarm value, the LED
flashes rapidly. If not dissipated, the LED will
flash quickly until the smoke is dispersed or
someone presses the self-test button (mute) .
2.2, Buzzer description
a) Self-test status: the buzzer sounds 3 times
when it is self-tested.
b) Low voltage state: When the battery is low
pressure, it sounds every minute to indicate the
battery low voltage.
c) Smoke alarm status: When the smoke
concentration reaches the alarm value, the
buzzer sounds from small to large. If not
dissipated, the buzzer will continue to sound until
the smoke is dissipated or someone presses the
self-test button (mute).
2.3, Alarm test
When working normally, press the alarm self-test
button, the LED flashes3 times and the buzzer
sounds 3 times, indicating that the self-test is
successful. If you press the self-test button
without any status change, please check whether
the battery is normal. If the battery is not
powered, please replace the battery in time.
2.4, Smoke test
In the normal working, the intermittent smoke test
is performed. When the alarm detects that the
smoke enters, the interval of the LED flashing is
shortened from long to short (the buzzer does
not ring at this time). When it is detected that the
smoke concentration reaches the alarm value,
the buzzer rang from small to large.
2.5, The alarm description
When the smoke exceeds the set standard
value, the LED flashes and the buzzer sounds
from small to large. If the smoke has not
dissipated, the alarm will continue to alarm until
the smoke is dissipated or someone presses the
self-test button(mute).
Note: Since the alarm will consume a lot of
battery power after the fire alarm, it is
recommended to replace the battery after a
fire or a large amount of smoke triggers the
alarm to ensure the alarm can work normally.
1.Do not install the alarm in a place with high temperature, high humidity, large soot and large dust,
and keep the air environment around the alarm clean.
2.Avoid installing the alarm in a place where there are a lot of paint, thinner, etc., which will produce
glue suspension, etc., so as not to affect the normal monitoring of the alarm.
3.This product is a stand-alone photo-electrical smoke detection alarm. It can give an audible and
visual alarm when it fires, but it can't extinguish fire. We do not recognize any legal responsibility for
any property damage caused by fire.
Ⅶ.Troubleshooting
Ⅷ.Maintenance and care
1.After the alarm is installed, press the test button every month to test the alarm. If the fault is found, it
should be checked in time (see Chapter 6) or returned to the factory for repair.
2.Under normal circumstances, the battery life can reach more than 5 years, but harsh environments
such as high temperature and high humidity will shorten the use time.
3.When the alarm reports that the battery is under voltage, please replace the same type of battery in
time. After the replacement, press the self-test button to give an audible and visual alarm prompt,
which means the replacement is successful.
4.The alarm should be commissioned before installation, and should be properly kept before
installation. Corresponding dust, moisture and corrosion prevention measures should be taken.
5.In the event of an alarm malfunction or other problems, do not disassemble the alarm for repair.
Please disconnect the power supply and contact your local dealer for repair.
6.In the event of a fire and an alarm, it is recommended to replace the battery with a new one (if there
is a fire, the alarm will keep an alarm until the smoke is gone or no electricity is stopped).
Fault phenomenon
Alarm after power-on
"beep" sound after
power-on
The buzzer does not ring
or the volume is low after
the alarm
Press the alarm self-test
button does not alarm
The alarm sounds once
every minute
LED lights every 45 seconds
Cause Analysis
Serious pollution in the alarm maze
Large dust or water vapor in the alarm
installation room
Alarm circuit failure
Battery is too low
Alarm circuit failure
Battery low or alarm internal circuit
failure
The battery is not installed or the battery
is dead.
Battery voltage is too low
Alarm circuit failure
Battery low pressure alarm
Normal working condition
Method of exclusion
Cleaning alarm maze
Wait for the smoke and water vapor to
dissipate and re-power it or clean the
alarm maze and then power it on again.
Return to the factory for repair
Replace the same type of battery
Return to the factory for repair
Replace the battery. If the problem
persists after replacing the battery, the
internal circuit of the alarm is faulty.
If the problem is still reinstalled, please
check if the battery has power, replace
the battery and test again.
Replace the same type of battery
Return to the factory for repair
Replace the same type of battery
No need to deal with