manuals.online logo
Brands
  1. Home
  2. •
  3. Brands
  4. •
  5. Siemens
  6. •
  7. Smoke Alarm
  8. •
  9. Siemens PE-11C User manual

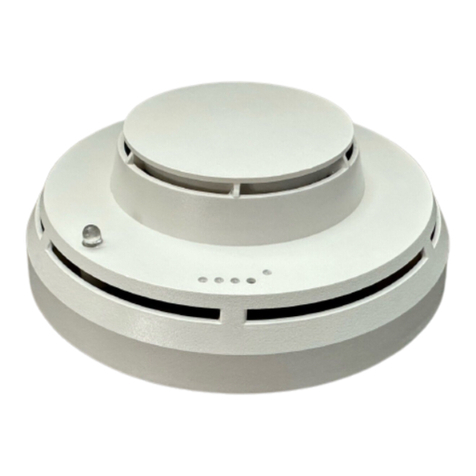
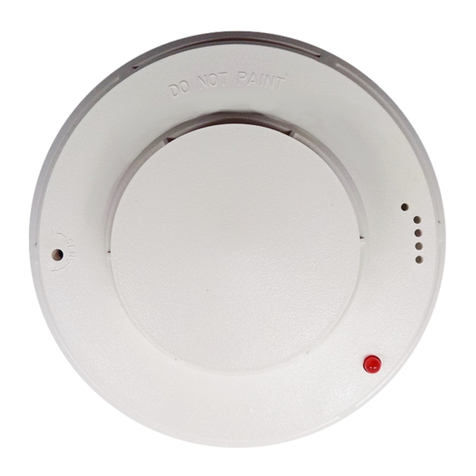
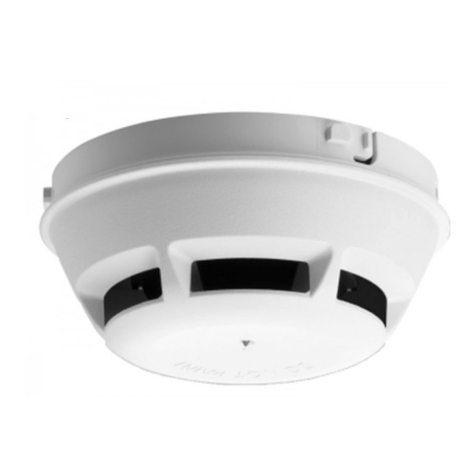
Siemens PE-11C User manual

These instructions are written in accordance with
the installation guidelines of NFPA No. 72, National
Fire Alarm Code, and CAN/ULC-S524, The
Installation of Fire Alarm Systems.
DETECTOR PLACEMENT
For a clear air, 0 to 4000 ft/min velocity applica-
tion, use 30 foot center spacing (900 sq ft) from
NFPA Standard 72 Chapter 5 and CAN/ULC-S524
as a starting point for a detector installation layout.
This spacing, however, is based on ideal conditions –
smooth ceiling, no air movement, and no physical
obstructions. In some applications, considerably
less area is protected adequately by each smoke
detector. In all installations, place the detector on
the ceiling, a minimum of 6 inches from a side wall,
or on a wall, 6 inches from the ceiling.
Follow the drawings provided or approved by
Siemens Building Technologies, Inc. or by its
authorized distributors.
See NFPA 72, National Fire
Alarm Code, Chapter 5 for additional guidance on
special issues such as beamed construction and high
stockpiling.
TO AVOID NUISANCE ALARMS:
DO NOT locate the PE-11C/PE-11T detector where
excessive smoke concentrations exist under
normal conditions, or in areas of prolonged high
relative humidity where condensation occurs.
DO NOT locate the PE-11C/PE-11T detector next
to an oil burner, kitchen, or garage where exhaust
fumes can trigger an alarm. Other causes of false
alarms are dust accumulation, heavy
concentrations of steam, heavy pipe or cigar
smoke, and certain aerosol sprays.
AIR CURRENTS
Before a detector can sense a fire, the products of
combustion or smoke must travel from the fire to the
detector. Since their travel is especially influenced
by air currents, consider the movement of air in the
design of the system.
Installation/Wiring Instructions
Models PE-11C/PE-11T
Siemens BuildingTechnologies
Fire Safety
P/N 315-095626-6
While combustion products tend to rise, drafts from
hallways, air diffusers, fans, etc., may help or hinder
the travel of combustion products to the detector.
When positioning a detector at a particular location,
give consideration to windows and doors, both open
and closed, and to influencing air movement. Never
install a detector in the air stream of a room air supply
diffuser. It is better to position a detector closer to an
air return.
SPECIFICATIONS
Environmental
Temperature: 320F (00C) to 1000F (380C).
Humidity: Up to 93% RH, non condensing
Air Pressure: No effect.
Thermal Alarm Temp.: 1350F (570C)
Electrical
Voltage: 16-27 VDC
Ripple: 3V peak-to-peak
Supervisory Current: 110µA max
Alarm Current: 33-50mA
Start-up Time: 50 seconds max
DETECTOR WIRING
The PE-11C/PE-11T should be connected as shown
in Figure 1 using the separate mounting base, Model
DB-11. Follow the control panel wiring connection
drawing installed on the inside face of each control
panel cover. See DB-11 instruction, P/N 315-094193,
for base mounting.
Duplicate wiring information is also
in the Installation, Operation, and Maintenance Manual
provided
with every control panel
.
Note any
limitations on t
he number of detectors and
restrictions on the use of remote devices
permitted for each circuit.
INSTALLATION / REMOVAL OF DETECTOR
TO INSTALL:
• Align LED in detector with LED symbol on base
and insert detector into base.
• Rotate detector counterclockwise while gently
pressing on it until the detector drops fully into
base.
2
• Then rotate the detector clockwise until it stops
and locks in place. Insert optional locking screw
(Order Model LK-11).
TO REMOVE:
• Loosen locking screw, if installed. Then rotate
the detector counter clockwise until stop is
reached.
• Pull detector out of base.
LED INDICATOR OPERATION
The PE-11C/PE-11T contains an LED indicator
capable of flashing either one of three distinct
colors: green, yellow, or red. Every seven
seconds, the microprocessor based detector
checks the following:
• for smoke in its sensing chamber
• that its smoke sensitivity is within the range
indicated on the nameplate label
• that its critical smoke sensing electronics are
operating.
Based on the results of these checks, the LED
indicator flashes as follows:
Flash
Color Condition
Flash
Interval
(Seconds)
Green
Normal supervisory operation.
Smoke sensitivity is within rated
limits.
7
Yellow
Detector requires service
(cleaning or repair) or is
operating beyond its
environmental specifications.
7-30
Red Alarm 2½
No
Flashes
Detector is not powered, or
requires repair. -
TESTING AND MAINTENANCE
To assure proper operation of the detector and
control panel, it is required that both the Sensitivity
test and the Functional test be conducted.
SENSITIVITY TEST
The PE-1C1/PE-11T monitors its smoke sensitivity
automatically and requires no test equipment. A
green flash of the detector LED about every seven
seconds indicates that the smoke sensitivity is
within its listed limits.
FUNCTIONAL TEST
To test the detector and control panel for functional
operation, use SIEMENS Test Gas, P/N 315-
282747. Follow the instructions on the gas
canister label.
CLEANING PROCEDURE
(See Figure 2)
1. Notify the proper personnel that the fire alarm
system is being serviced.
2. Remove the detector to be cleaned from its
base. (See removal section.)
3. Using a small blade screwdriver, remove the
cover from the rest of the detector by releasing
the 2 cover tabs located on the outside of the
cover. Separate the foam screen from the
cover.
4. PE-11C: Remove the labyrinth from the
sensing chamber by squeezing the labyrinth
sides along the release axis and pulling out.
PE-11T: Carefully remove the labyrinth/
thermal holder assembly being sure not to
damage or disconnect the thermal wires.
Figure 1 Installation And Wiring Diagram for PE-11C/PE-11T Conventional Detector
CAUTION:
1. Do not use looped wire under base
terminal 5. Break wire run to provide
supervision of connection.
2. When a remote relay is used to
control a critical system function, the
relay and its associated detector and
optional module(s) must be the ONLY
devices on the initiating circuit.
3
5. Clean dust from the detector cover, foam
screen, sensing chamber and labyrinth using
a brush, or by blowing with compressed air.
CAUTION: Do not use a compressed air
supply that may contain an oil
residue.
WARNING: Do not remove or loosen the two
screws on the rear of the detector,
or calibration will be lost.
NOTE: The insect screen and labyrinth may be
replaced with new parts, rather than be
cleaned. Contact Siemens Building
Technologies, Inc.'s Product Service to
order Detector Maintenance Kit, Model
DMK-11.
NOTE: Do not disconnect the thermal wires
from the detector.
6. Reassemble the detector by reversing the
steps used for disassembly, and reinstall in
its base.
7. Test the detector. (See Detector Testing
section of this instruction.) Reset the control
panel zone after each alarm.
NOTE: After applying or momentarily
interrupting power to the detector, it is
normal for it to take as long as 50
seconds for the LED to begin flashing
to indicate its operating status.
Figure 2 Disassembling of Photochamber
8. When all service has been completed, notify
personnel (See Step 1) that system service
has been completed.
CAUTION
NO FIELD REPAIRS OF THE DETECTORS
SHOULD BE ATTEMPTED. THE DETECTORS
ARE FACTORY REPAIRABLE ONLY.
TNEMPIUQELORTNOCELBITAPMOC
tnempiuqE
reifitnedIytilibitapmoC
gniriW/noitallatsnI
snoitcurtsnI
RE2-PC6-32539
0-513N/P
)3metsyS(53-PC22-209480-513N/P
*
)QI-LXM,LXM(1-MZC8-527090-513N/P
*
)QI-LXM,LXM(6B1-MZC5-553590-513N/P
)QI-LXM,LXM(4-MZC9-627090-513N/P
LXP5-131490-513N/P
)LXP(D4-CZP3-461490-5
13N/P
)LXP(B4-EZP5-560490-513N/P
*
LXS01-914290-513N/P
XE-LXS6-799590-513N/P
*
)LXS(R4-EZS4-034290-513N/P
)XE-LXS(X4-EZS4-810690-513N/P
)XE-LXS(XA8-EZS5-220690-513N/P
)3metsyS(53-UZ51-222
380-513N/P
reifitnediytilibitapmocehtsirebmunledomrotcetedehT.
*
seirosseccaetomertroppustonseodtnempiuqelortnoC;
.syalerrospmal.g.e
.seludomXNZ3-LXhtiwesuroftonsiT11/11
-EP:etoN
Siemens Building Technologies, Inc.
8 Fernwood Road
Florham Park, New Jersey 07932 P/N 315-095626-6
Siemens Building Technologies, Ltd.
2185 Derry Road West
Mississauga, Ontario L5N 7A6 Canada

This manual suits for next models

2

Other Siemens Smoke Alarm manuals

Siemens Cerberus DLO1191 Guide

Siemens

Siemens Cerberus DLO1191 Guide

Siemens FDA2 Series Technical manual

Siemens

Siemens FDA2 Series Technical manual

Siemens 5TC1292-7 User manual

Siemens

Siemens 5TC1292-7 User manual

Siemens FDOT421 User manual

Siemens

Siemens FDOT421 User manual

Siemens Cerberus DO1101A-Ex Parts list manual

Siemens

Siemens Cerberus DO1101A-Ex Parts list manual

Siemens ILP-1 User manual

Siemens

Siemens ILP-1 User manual

Siemens DELTA reflex SD9L Service manual

Siemens

Siemens DELTA reflex SD9L Service manual

Siemens OP921 User manual

Siemens

Siemens OP921 User manual

Siemens DELTA reflex SD230N Service manual

Siemens

Siemens DELTA reflex SD230N Service manual

Siemens OP121 User manual

Siemens

Siemens OP121 User manual

Siemens TITANUS SuperSens User manual

Siemens

Siemens TITANUS SuperSens User manual

Siemens FDA241 Technical manual

Siemens

Siemens FDA241 Technical manual

Siemens FDL241-9 Guide

Siemens

Siemens FDL241-9 Guide

Siemens Cerberus DBW1171 User manual

Siemens

Siemens Cerberus DBW1171 User manual

Siemens DI-3 User manual

Siemens

Siemens DI-3 User manual

Siemens Synco living AP260 User manual

Siemens

Siemens Synco living AP260 User manual

Siemens FDOOT241-9 User manual

Siemens

Siemens FDOOT241-9 User manual

Siemens TITANUS 3000 User manual

Siemens

Siemens TITANUS 3000 User manual

Siemens AD2-C11 User manual

Siemens

Siemens AD2-C11 User manual

Siemens DELTA reflex SD230N Service manual

Siemens

Siemens DELTA reflex SD230N Service manual

Siemens Cerberus Pyrotronics PB-1191 User manual

Siemens

Siemens Cerberus Pyrotronics PB-1191 User manual

Siemens DB721-CN User manual

Siemens

Siemens DB721-CN User manual

Siemens Cerberus DOT1151A-Ex Parts list manual

Siemens

Siemens Cerberus DOT1151A-Ex Parts list manual

Siemens DM1101 User manual

Siemens

Siemens DM1101 User manual

Popular Smoke Alarm manuals by other brands

ELRO CBFS58R instruction manual

ELRO

ELRO CBFS58R instruction manual

elsner elektronik Salva KNX TH Technical specifications and installation instructions

elsner elektronik

elsner elektronik Salva KNX TH Technical specifications and installation instructions

Smanos SMK-500 user manual

Smanos

Smanos SMK-500 user manual

Gira Dual Q user manual

Gira

Gira Dual Q user manual

BRK electronic 100S user manual

BRK electronic

BRK electronic 100S user manual

Kidde PI9000 Specification sheet

Kidde

Kidde PI9000 Specification sheet

Red Smoke Alarms R10 installation instructions

Red Smoke Alarms

Red Smoke Alarms R10 installation instructions

Doro Secure 291 quick guide

Doro

Doro Secure 291 quick guide

x-sense XS03-iWX user manual

x-sense

x-sense XS03-iWX user manual

Panasonic 3339 Specification sheet

Panasonic

Panasonic 3339 Specification sheet

Autronica AutroSense Micra 100 Installation handbook

Autronica

Autronica AutroSense Micra 100 Installation handbook

Busch-Jaeger ProfessionalLINE 6828 user manual

Busch-Jaeger

Busch-Jaeger ProfessionalLINE 6828 user manual

SST S250 Design manual

SST

SST S250 Design manual

Kidde KIR-OSHD Installation sheet

Kidde

Kidde KIR-OSHD Installation sheet

Mircom MGC MIX-4010 Installation and maintenance instructions

Mircom

Mircom MGC MIX-4010 Installation and maintenance instructions

Luxorparts 21130 manual

Luxorparts

Luxorparts 21130 manual

Kidde 918 user guide

Kidde

Kidde 918 user guide

Char-Broil 13201597 product manual

Char-Broil

Char-Broil 13201597 product manual

manuals.online logo
manuals.online logoBrands
  • About & Mission
  • Contact us
  • Privacy Policy
  • Terms and Conditions

Copyright 2025 Manuals.Online. All Rights Reserved.