10X8
ALEKO
®
Awnings
Awnings ALEKOPro-
m RETRACTABLE AWNINGS SIZES
ALEKO
®
Aw-
MANUAL ALEKO
®
Awnings ALE-
is.com RETRACTABLE AWNINGS
CUSTOMERS ALEKO
®
13X10 MANUAL ALEKO
®
Awnings
ALEKOProductis.com RETRACTABLE AW-
ALEKOProductis.com WE LOVE OUR CUSTOM-
SIZES 10X8 12X10 13X10 MANUAL
ALEKO
®
Awnings ALEKOProductis.
com RETRACTABLE AWNINGS SIZES 10X8 12X10 13X10 MANUAL ALEKO
®
Awnings ALEKOProductis.
com WE LOVE OUR CUSTOMERS ALEKO
®
Awnings ALEKOProductis.com RETRACTABLE AWNINGS
SIZES 10X8 12X10 13X10 MANUAL ALEKO
®
Awnings ALEKOProductis.com WE LOVE OUR CUS-
TOMERS ALEKO
®
Awnings ALEKOProductis.com RETRACTABLE AWNINGS SIZES 10X8 12X10
13X10 MANUAL ALEKO
®
Awnings ALEKOProductis.com WE LOVE OUR CUSTOMERS ALE-
KO
®
Awnings ALEKOProductis.com RETRACTABLE AWNINGS SIZES 10X8 12X10 13X10
MANUAL ALEKO
®
Awnings ALEKOProductis.com WE LOVE OUR CUSTOMERS ALE-
KO
®
Awnings ALEKOProductis.com RETRACTABLE AWNINGS SIZES 10X8
12X10 13X10 MANUAL ALEKO
®
Awnings ALEKOProductis.com WE
LOVE OUR CUSTOMERS ALEKO
®
Awnings ALEKOProductis.com
RETRACTABLE AWNINGS SIZES 10X8 12X10 13X10
MANUAL ALEKO
®
Awnings ALEKOProduc-
tis.com WE LOVE OUR CUS-
INSTALLATION AND
OPERATION OF
2-ARM UNITS
TABLE OF CONTENTS
Introduction .................................................................................................................. 1
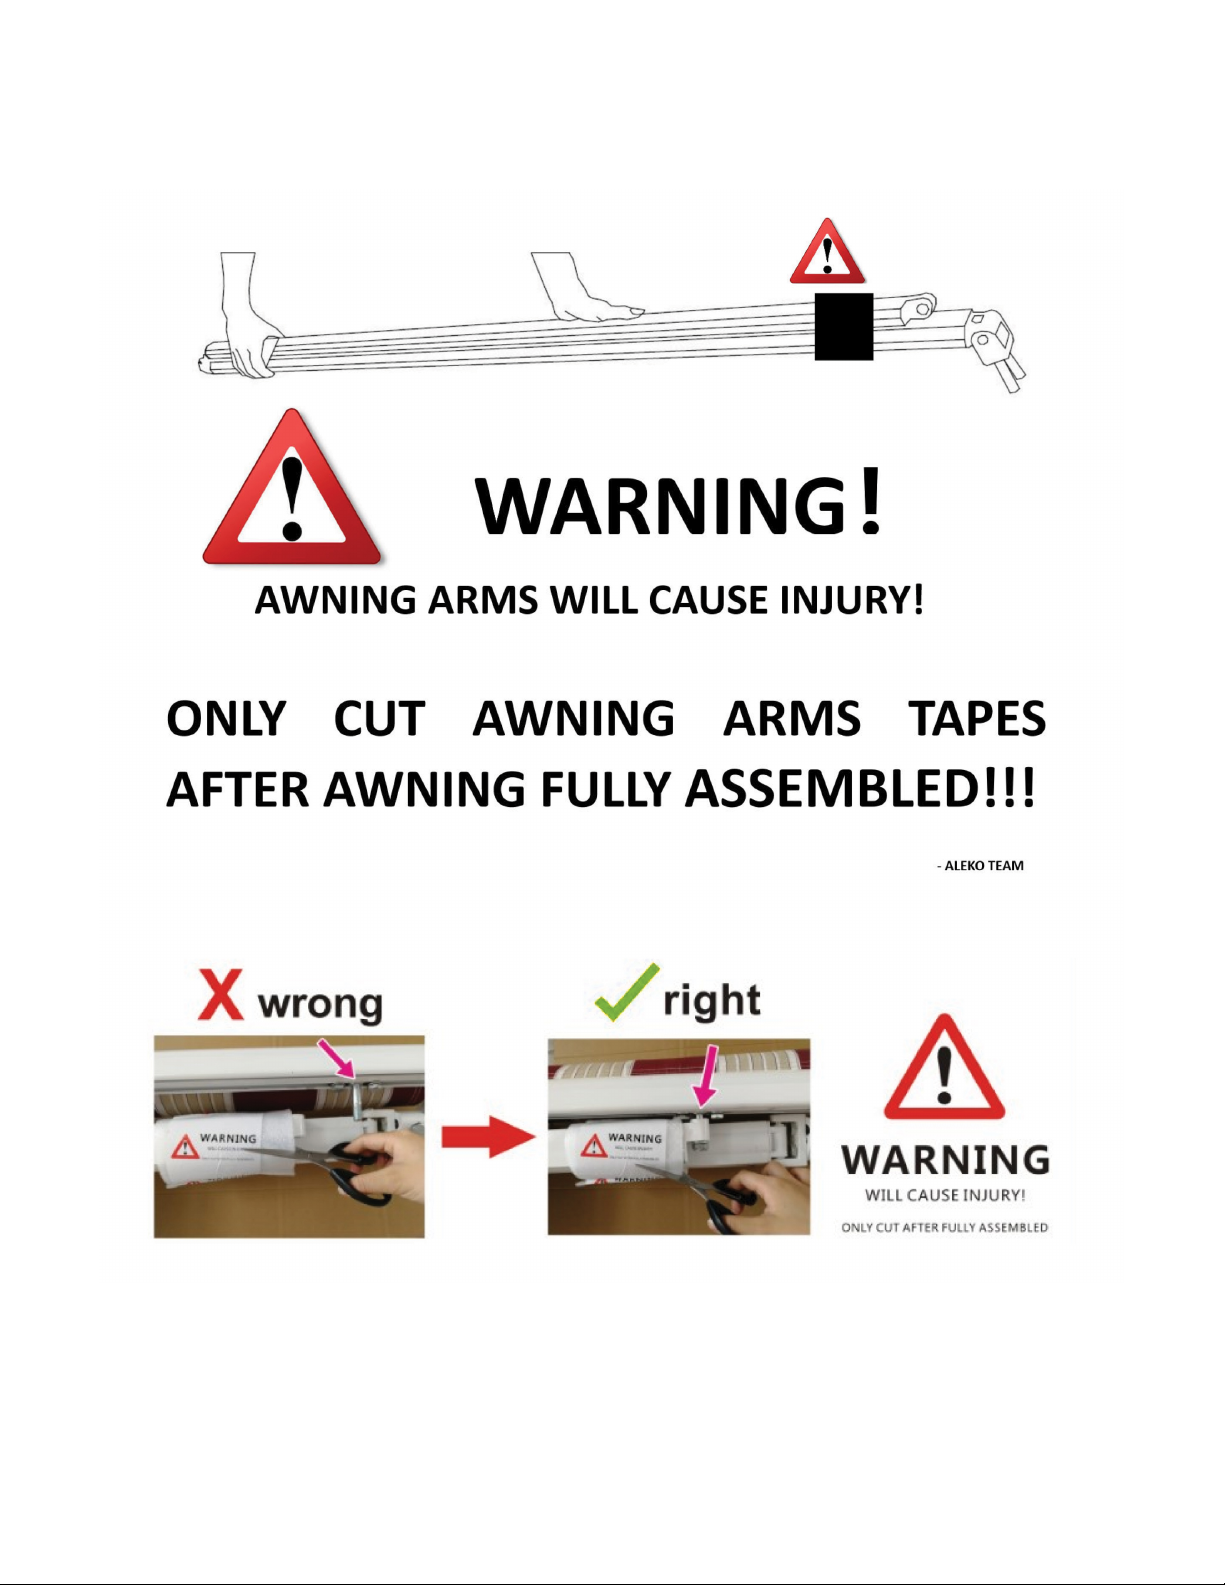
Warnings ....................................................................................................................... 1
Required Tools ............................................................................................................. 1
Parts Diagram .............................................................................................................. 2
Packing List and Warnings.................................................................................... 3 & 4
Assembly
Step 1 : Preparing Your Work Space ............................................................. 5
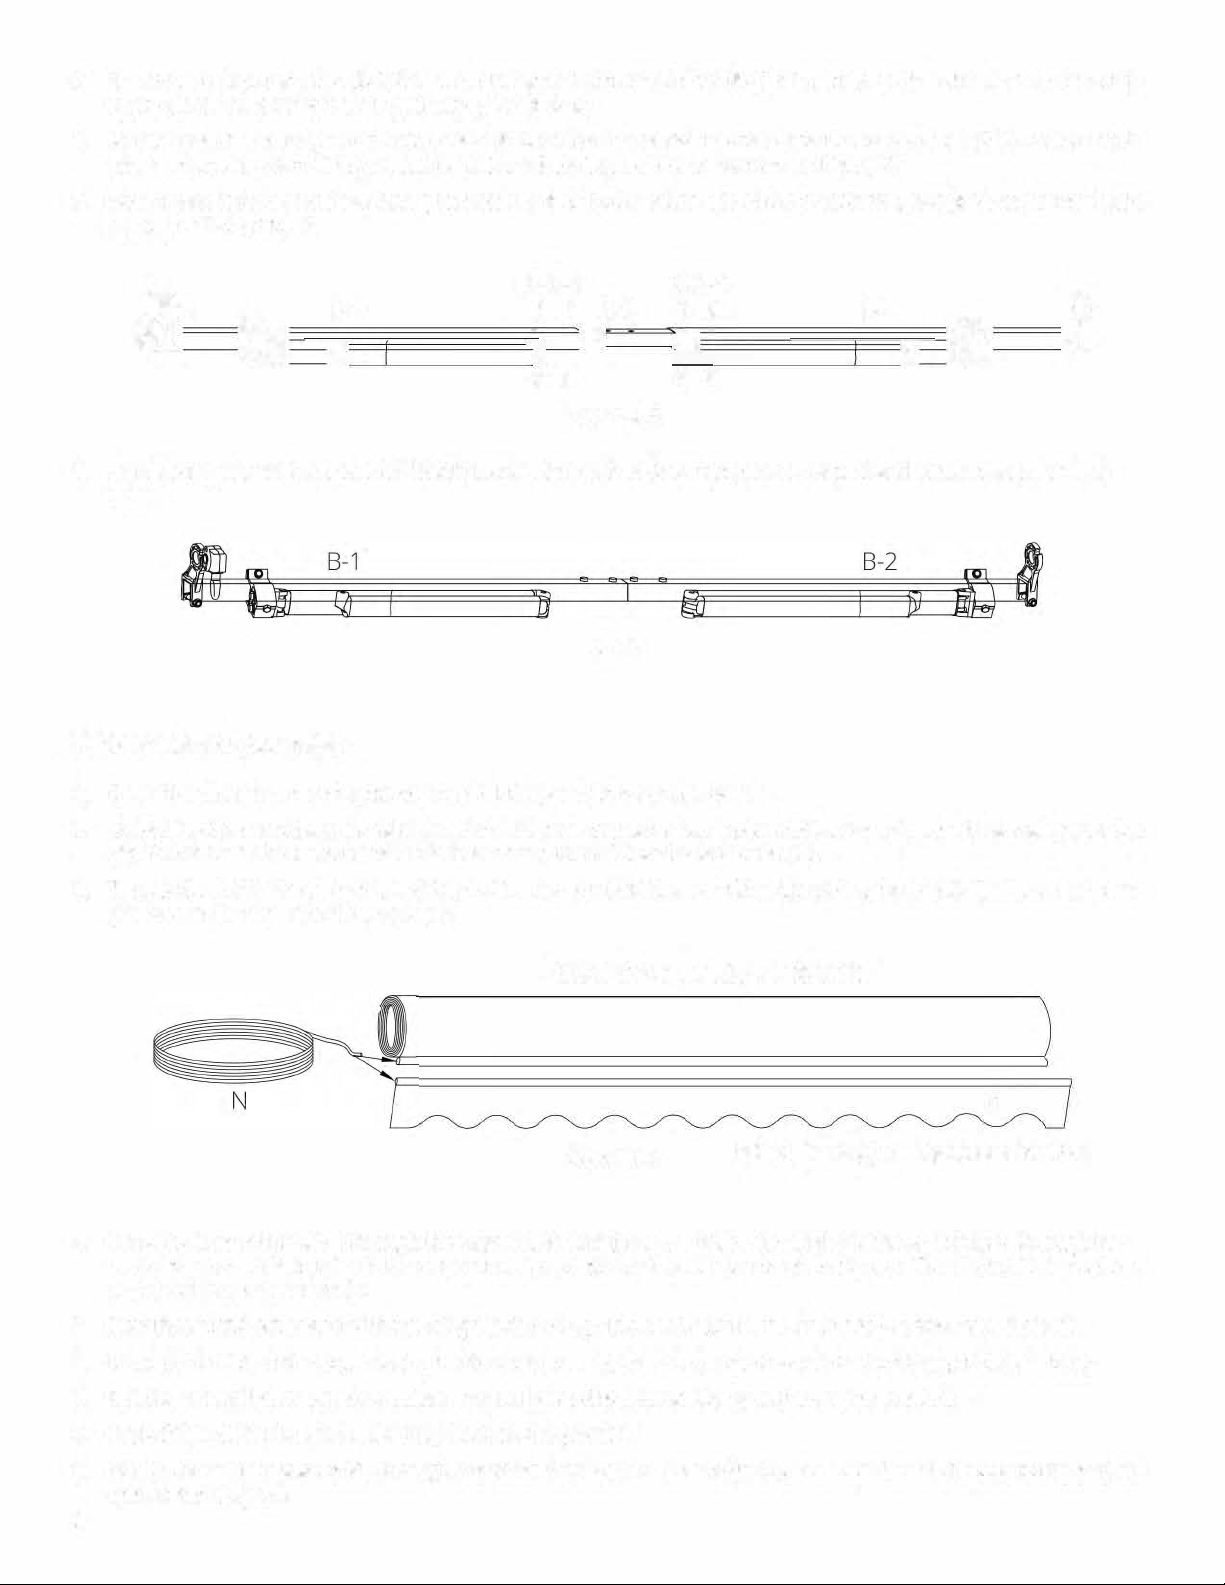
Step 2 : Connecting Roller Tubes ................................................................... 5
Step 3 : Connecting Front Bars ...................................................................... 6
Step 4 : Connecting Torsion Bars .................................................................. 6
Step 5 : Fabric Assembly ................................................................................. 7
Step 6 : Front Bar & Arm Assembly ............................................................... 8
Step 7 : Finishing Awning Assembly .............................................................. 8
Installation
Notes: ............................................................................................................... 9
Step 1: Measuring the Mount Site ............................................................... 10
Step 2: Drilling the Bolt Holes ...................................................................... 10
Step 3: Preparing For Mounting .................................................................. 11
Step 4: Mounting the Wall Brackets ............................................................ 11
Step 5: Mounting the Awning ....................................................................... 12
Common Mistakes ..................................................................................................... 13
ALEKO®
Optional Installation .................................................................................................. 12
Replacement Parts and Accessories......................................................................... 14
Repair Manual ............................................................................................................ 13