All American 910 Quick guide

INSTRUCTIONS & RECIPES
COOKING & CANNING
WIT
THE ALL-AMERICAN®
PRESSURE COOKER/CANNER
The professional quality deluxe cast
aluminum Pressure Cooker/Canners with
the exclusive “Metal-To-Metal” seal.
77L3

CAUTION! READ T ESE IMPORTANT SAFEGUARDS!
When using pressure cookers, basic safety precautions should always be followed:
1. Read all instructions.
2. Do not touch hot surfaces. Use handles and pot holders.
3. Close supervision is necessary when the pressure cooker/canner is used
near children.
4. Do not place the pressure cooker/canner in a heated oven.
5. Extreme caution must be used when moving a pressure cooker/canner containing hot liquids.
6. Do not use pressure cooker/canner for other than intended use.
7. This appliance cooks under pressure. Improper use may result in scalding injury. Make certain
unit is properly closed before operating. See Operating Instructions beginning on page 6 of this
booklet.
8. Never fill the unit over 2⁄3full when cooking; however, when cooking foods that expand such as
dried fruits, or vegetables, the unit must never be over 1⁄2full. One-half full means the food, as
well as all other ingredients and liquids combined. See Food reparation Instructions beginning on
page 8 of this booklet.
9. Do not cook foods such as applesauce, beans, cranberries, pearl barley, oatmeal or other cereals,
rice, split peas, noodles, macaroni, rhubarb, or spaghetti. These foods tend to foam, froth, and
sputter, and may block the pressure release device (steam vent). Refer to page 4 “Suitable Foods”
for additional information and listings.
10. Always check the pressure release devices for clogging before use.
11. Do not open the pressure cooker/canner until the unit has cooled and internal pressure has been
released. Gauge should read zero at this time. Remove pressure regulator weight. Any pressure in
the cooker can be hazardous. See Operating Instructions beginning on page 6 of this booklet.
12. Do not use this pressure cooker/canner for pressure frying with oil (broasting).
13. Always make sure that the pressure regulator weight vent pipe opening is clean and you can see
through it. Read page 6 “Cleaning Vent ipe.”
14. Never loosen wing nuts until the steam pressure gauge registers zero and you have allowed any
remaining pressure to escape by removing the ressure Regulator Weight.
15. Do not subject your cooker/canner to sudden extreme temperature changes as this will cause
expansion or contraction which can crack a cast aluminum utensil. Do not move a cooker from a
cold storage area directly onto a hot flame or element. Do not add cold water to a cooker/canner
which has boiled dry and is still hot. Do not cool a hot cooker/canner suddenly by pouring cold
water on it or wrapping cold wet towels around it.
16. When normal operating pressure is reached, turn the heat down so all the liquid, which creates
steam, does not vent out.
17. Be sure that handles are assembled and fastened properly before each use. Cracked, broken or
charred handles should and must be replaced. The No. 64 Bakelite wing nut should be threaded
into the No. 54 clamp bolt four (4) complete revolutions before bringing assembly into the hold
down position. When all the wing nuts are in hold down position, tighten all evenly.
18. ALL-AMERICAN ressure Cooker/Canners are NOT recommended for use on glass top/flat ranges
because its weight may cause the glass/ceramic to break. The diameter of the canner is also larger
than most burners, and may cause heat to transfer outward and damage the surrounding surface.
19. SAVE T ESE INSTRUCTIONS.

1
COOKING AND CANNING WIT EAVY CAST ALUMINUM
ALL-AMERICAN PRESSURE COOKER/CANNER
Table Of Contents
Important Safeguards.....................................................................................................................inside front cover
Warranty ..............................................................................................................................................................2
Model Information.................................................................................................................................................2
Warning Labels .....................................................................................................................................................3
About the ALL-AM RICAN Pressure Cooker...........................................................................................................4
Important Safety Precautions .................................................................................................................................6
Caring for your Cooker...........................................................................................................................................7
How to Use Your Cooker ........................................................................................................................................8
Cooking Instructions
Cooking Meat in the Pressure Cooker....................................................................................................................10
Cooking Vegetables in the Pressure Cooker ..........................................................................................................10
Cooking Grains in the Pressure Cooker..................................................................................................................10
Recipes for Pressure Cooking—Meats ...................................................................................................................12
Recipes for Pressure Cooking—Seafood ................................................................................................................14
Recipes for Pressure Cooking—Fowl .....................................................................................................................14
Recipes for Pressure Cooking—Soups, Dried Fruits & Vegetables............................................................................15
Recipes for Pressure Cooking—Desserts................................................................................................................16
Canning Instructions
Processing in the Pressure Canner ........................................................................................................................18
Canning Terms ....................................................................................................................................................18
Safety Tips for Home Canning ..............................................................................................................................19
Causes of Spoilage ...............................................................................................................................................19
ALL-AM RICAN Automatic Master Sealer ............................................................................................................20
Packing Cans or Jars ............................................................................................................................................21
Directions for Using Tin Cans ...............................................................................................................................21
Directions for Using Glass Jars..............................................................................................................................21
Labeling Cans and Jars.........................................................................................................................................22
Storing Cans and Jars...........................................................................................................................................22
Altitude Adjustment Chart....................................................................................................................................23
Timetables and Canning Instructions for Meat .......................................................................................................24
Timetables and Canning Instructions for Poultry....................................................................................................27
Timetables and Canning Instructions for Seafood...................................................................................................28
Preparing Fruits and Vegetables for Canning .........................................................................................................30
Timetables and Canning Instructions for Fruits ......................................................................................................31
Timetables and Canning Instructions for Tomatoes ................................................................................................33
Timetables and Canning Instructions for Vegetables...............................................................................................34
Recipes for Canning.............................................................................................................................................37
Questions and Answers on Home Canning ...........................................................................................................40
Repair Parts Price List ..........................................................................................................................................42
Parts Illustrations.................................................................................................................................................43
Charts and Tables ................................................................................................................................................44
Index ............................................................................................................................................inside back cover
CAUTION!
READ T IS BOOKLET BEFORE USING. IMPROPER USE MAY RESULT IN SCALDING INJURY. DO NOT
OPEN COOKER/CANNER UNTIL ALL PRESSURE IS RELEASED AND GAUGE IS AT ZERO. DO NOT
OVERFILL UNIT. BE SURE TO READ AND UNDERSTAND ALL OPERATING INSTRUCTIONS BEFORE
USING COOKER. READ T E IMPORTANT SAFEGUARDS ON T E OPPOSITE PAGE.

2
ALL-AMERICAN HEAVY CAST ALUMINUM PRESSURE COOKER/CANNER LIMITED WARRANTY
Th s qual ty pressure cooker/canner s des gned and manufactured to prov de many years of sat sfactory performance under normal use.
W scons n Alum num Foundry pledges to the or g nal owner that should there be any defects n mater al or workmansh p dur ng the first
year after purchase, we w ll repa r or replace t at our opt on. Th s pledge does not apply to damage caused by sh pp ng. To obta n serv ce
under the warranty:
1. Call the Customer Serv ce Department to obta n a Return Author zat on Number. Items returned w thout a Return Author zat on Number
w ll be refused.
2. Return pressure cooker/canner, postage prepa d, w th sales rece pt, Return Author zat on Number and a descr pt on of the
cla med defect to:
W scons n Alum num Foundry Co., Inc.
Consumer Products D v s on
Corner of S. 18th and Frankl n Streets
Man towoc, WI 54220
IMPORTANT — PLEASE READ
Any alterat ons, mod ficat ons or changes of any type made to the pressure cooker/canner or to any component thereof w ll vo d th s
warranty!
We want you to obta n max mum performance from us ng th s qual ty pressure cooker/canner, and we ask that you take the t me to read and
follow the operat ng nstruct ons. Fa lure to follow nstruct ons, damage caused by mproper replacement parts, abuse, or m suse w ll vo d
th s pledge. Th s warranty g ves you spec fic legal r ghts, and you may also have other r ghts wh ch vary from state to state. Th s s
W scons n Alum num Foundry's personal pledge to you and s be ng made n place of all other express warrant es.
DIMENSIONS, WEIG TS AND CAPACITIES OF ALL-AMERICAN PRESSURE COOKERS
MODEL 910 915 921 925 930 941
LIQUID CAPACITY (Qts.) 101⁄2151⁄2211⁄225 30 411⁄2
Inside Diameter, Inches 103⁄8125⁄8125⁄8125⁄8125⁄8151⁄4
Inside Height, Inches 75⁄871⁄2101⁄2111⁄214 133⁄4
Shipping Weight, lbs. 14 20 23 24 29 41
Will old:
Pint Jars 7 10 19 19 19 32
Quart Jars 47 7714 19
No. 1 Cans 14 22 35 36 44 73
No. 2 Cans 7 12 18 20 25 36
No. 3 Cans 3510 10 10 21
No. 10 Cans 11 1226
Please note: Jar counts are based on the Standard Mason Jar.
Record your model number here
UPC CODES
910 ........ 0 89149 00910 5
915 ........ 0 89149 00915 0
921 ........ 0 89149 00921 1
925 ........ 0 89149 00925 9
930 ........ 0 89149 00930 3
941 ........ 0 89149 00941 9

3
The warning label pictured below is located on the top of your pressure cooker. Please refer to the drawing below
for location placement of safety warning label. In the event that your pressure cooker ever requires replacement
labels, please contact the manufacturer and a new replacement label will be promptly sent out to you free of charge.
Instructions for placing the label on the unit will be included.
SAFETY WARNING LABELS

4
The ALL-AM RICAN Pressure
Cooker/Canner offers the busy
cook many money-saving
advantages:
Safe canning. Pressure cooking
provides the only safe method for
canning non-acid foods such as
vegetables, fish, meat and poultry. It
is perfect for canning in tin cans as
well as in glass jars.
Saves energy and time. The
pressure cooker prepares foods in a
fraction of the time required by other
cooking methods.
More healthy. Foods cook
quickly in a minimum amount of
liquid, helping foods retain flavor and
healthy nutrients.
Saves money. Budget cuts of
meat are quickly cooked to juicy
goodness in the pressure cooker. And
the high temperature makes meat
tender and flavorful without the use
of chemical tenderizers.
Saves clean-up. Since food
flavors do not mingle in live steam,
several foods may be prepared in
the cooker at the same time without
mixing flavors.
OT ER CANNING/COOKING
INFORMATION AND
RESOURCES
• County University/ xtension Office
(every county has one)
• xtension Agent/Home conomist
(Check local phone book for
number or call information)
• Library
Books under Canning, Food
Preservation, Home Canning
• Internet
National Center for Home Food
Preservation
http://www.uga.edu/nchfp/how/can_home.html
• Bookstores
Books under Canning, Food
Preservation, Home Canning
ABOUT TE
ALL-AMERICAN
PRESSURE COOKER/CANNER
SUITABLE FOODS
IMPORTANT INFORMATION (from No. 9 inside front cover):
It is especially important that you never cook rice, applesauce,
beans, cranberries, macaroni, rhubarb or spaghetti in your cooker.
There are many varieties of dry, hard beans and peas, examples of
which are pinto beans, black beans, lima beans, blacked-eyed peas,
kidney beans, lentils, soy beans, mung beans, small red beans, garban-
zo beans (chick peas).
In the interest of safety, do not use your cooker to cook the foods
listed above. These foods tend to foam, froth, and sputter and pieces of
food could block the safety or pressure release devices; therefore, we
urge you not to cook these foods in your pressure cooker.
Safety must be of first concern.
Please write to:
WISCONSIN ALUMINUM FOUNDRY
Consumer Products Division
P.O. BOX 246
MANITOWOC, WI 54221-0246
PLEASE READ T IS IMPORTANT STATEMENT:
Wisconsin Aluminum Foundry will not be held responsible for any
accidents, injuries, or any other problems resulting from the cooking of
any of the foods listed above.

5
Metal-to-metal seal
between the cove and
the pot means you
neve need to eplace
a b oken, c acked o
ha dened gasket.
The exclusive metal-
to-metal seal
imp oves with use if
p ope ly ca ed fo and
lub icated.
(See Page 6)
Cove secu ed with
la ge, stay-cool
Bakelite wing nuts.
Easy to ead p essu e gauge
Double thickness
edges
Bakelite top handle
The automatic p essu e cont ol
consists of the ound p essu e
egulato weight and the vent pipe.
The vent pipe is attached to the cove
and the p essu e egulato weight fits
on the vent top. (See page 8)
The ove p essu e plug will automatically vent steam if the vent
pipe becomes clogged. (See page 6)
Ext a heavy, high-
g ade cast aluminum
heats quickly, wea s
well, cleans easily,
and will not ust.
ANDLE SAFETY
IMPORTANT NOTICE
Only use the side handles to lift the pressure
cooker. This applies to the pressure cooker when
it is empty or contains items. N V R use the top
handle to lift the complete unit. The top handle is
used to remove the cover only.

6
For your own safety and to avoid
damaging the cooker, please read
these instructions carefully
before using.
Lubricate Before Using
Before using your cooker, lubricate the
metal-to-metal seal with petroleum jelly
or Vaseline to prevent the cover from
scratching or sticking. Apply a thin film
of lubricant to the edge inside the
cooker where the inside wall begins to
bevel out (see diagram below). Use
just enough lubricant to wet the edge,
but not enough to actually see it.
Place a similar amount of lubricant
on the threads of the bakelite wing
nuts and also on the metal face around
the opening. Wipe away excess
lubricant. This will help the wing nuts
turn more easily and hold the cover
securely to the cooker/canner, prevent-
ing steam leaks.
About the Metal-to-Metal Seal
The cover of your pressure
cooker/canner is designed to
seal tightly without the
use of a rubber gasket.
The metal
surfaces where the
cover and cooker
meet are beveled
to produce the
exclusive metal-
to-metal seal. As
a result, the cover
will wobble
slightly when placed
on the bottom before
the wing nuts are fully
fastened. When the cover is
properly seated, there is a small gap
between the cooker/canner and the cover
(see diagram above). To secure the
cover, gradually and evenly tighten two
opposite wing nuts at the same time,
maintaining the same size gap around
the entire unit where the cover meets the
bottom. Never tighten just one wing
nut at a time. A new cooker will
sometimes leak slightly around the
metal-to-metal seal. This will do no
harm, and should cease after being used
a few times.
Keep Safety Openings Clear
It is important to inspect the openings
to the overpressure plug, the vent pipe,
and the steam pressure gauge regularly
and to make sure steam can pass
through them.
Cleaning Vent Pipe
Before using cooker/canner, hold the
cover up to the light to see if the vent
pipe is clear. If you cannot see light
through the vent pipe, it may be
blocked. Carefully insert a piece of wire
in the vent pipe and run it gently in
and out to be sure the tube is clear and
unobstructed. You may wish to
purchase a #75 cleaning rod for this
purpose. Rinse with hot water.
Use Adequate Liquid/Water
It is critical to understand the impor-
tance of having water in the cooker
when in use. During cooking or
canning there must be at least 11⁄2"of
water (or the amount called for in the
recipe or canning instructions) in
the bottom of the cooker so
that the cooker won’t
boil dry due to steam
blow-off. If there is
not enough water
in the pressure
cooker and it
boils dry, the unit
will be ruined,
cannot be
repaired, and
must be replaced.
Filling Cooker
Pressure cooker should
never be more than 2⁄3full
when cooking foods like soups or
stews. When cooking foods which
expand, including all dried beans &
peas, such as pinto beans, fill cooker 1⁄2
full. Half full means the pot is 1⁄2full of
the beans and water combined,
resulting in occupying never more than
1⁄2of the total volume of the cooker.
Excess Pressure Inside Cooker
The selective Pressure Regulator
Weight is designed to release excess
steam at 18 pounds of pressure.
However, if the Vent Pipe becomes
clogged inside with food or grease
buildup, it will not function. If the
steam pressure gauge registers in the
CAUTION range and the selective
Pressure Regulator Weight has not
automatically released pressure, do the
following at once:
1. Turn off the heat source. Do not
move the pressure cooker!
2. Allow the cooker to stand until cold
to the touch (this may take an hour
or more). Only then is it safe to
remove the cover, and only remove
cover after the gauge reads at Z RO.
3. Clean the Vent Pipe and the steam
pressure gauge passage as described
above. You may purchase a new
Vent Pipe from the factory if needed.
Temperature Fluctuation
Do not subject your cooker to sudden
extreme temperature changes as this will
cause expansion or contraction which
can crack a cast aluminum utensil. Do
not move a cooker from a cold storage
area directly onto a hot flame. Do not
add cold water to a cooker which has
boiled dry and is still hot. Do not cool a
hot cooker suddenly by pouring cold
water on it or wrapping cold wet cloths
around it.
Open Cooker Safely
Be sure pressure has dropped to zero
and that you have removed the
selective Pressure Regulator Weight
before loosening the Bakelite wing
nuts. When removing cover, raise the
farthest edge first to protect face and
arms from steam.
Dropping The Cooker
If you ever drop your pressure cooker,
it must be examined for damage. If it is
dropped on a hard surface, call for a
Return Authorization number and
return the unit to Wisconsin Aluminum
Foundry with a note explaining that
the unit was dropped and that you
would like it examined. We will check it
thoroughly, including the selective
Pressure Regulator Weight and steam
pressure gauge, and notify you of our
findings and the repair charges.
IMPORTANT SAFETY PRECAUTIONS:
READ BEFORE USING PRESSURE COOKER/CANNER
TOP
BOTTOM
GAP
METAL-TO-METAL
SEAL
APPLY LUBRICANT
HERE, TO THE
BOTTOM ONLY

7
Metal-To-Metal Seal, Cleaning
And Maintenance
The metal-to-metal seal must be
lubricated periodically to prevent the
cover from sticking to the bottom as
a result of dryness. Lubricate the
metal-to-metal seal on the bottom
with petroleum jelly or Vaseline to
prevent scratching and sticking of
the seal. (See diagram page 4.) It is
recommended that a thin film be
applied every third or fourth use. The
metal-to-metal seal must not be
permitted to become dry, as this
could result in severe damage to the
metal-to-metal seal and make it very
difficult to remove the cover. Lack of
lubrication also makes it very difficult
to maintain a steam-tight seal.
It is also important to periodically
wipe off the metal-to-metal seal with
a clean towel to remove any build-up
of foreign material trapped in the
lubricant. You may use 0000 grade
steel wool and carefully go around
the seal to remove any build-up of
hardened lubricant. However, avoid
hard scrubbing of the metal-to-metal
seal to prevent damage.
Accuracy Of Steam
Pressure Gauge
ALL-AM RICAN pressure cooker
canners are weighted-gauge canners.
The pressure gauge is supplied as a
reference only for when the unit is
pressurized and timing for canning
may roughly begin, or when the
pressure has dropped to zero and the
lid may be safely removed. The
accuracy of your steam pressure
gauge is at + 2 pounds. Please refer to
information provided on page 8 under
“Using Cooker” - Item #2 - the bold
print. If you would like to have your
gauge tested you may contact your
county extension agent. If they are
unable to provide this service, you
will have to purchase a new gauge.
Discoloration And Pitting
Discoloration of aluminum inside is
harmless. It can be removed by
boiling a solution of one tablespoon-
ful of vinegar or two level table-
spoons cream of tartar in a quart of
water, or by scrubbing with an
aluminum cleaner or soap impregnat-
ed steel wool cleaning pad.
Pitting is caused by the interaction
of aluminum with other metals in the
presence of moisture. This can be
prevented by washing, rinsing and
drying the unit thoroughly after
every use. Always store the pressure
cooker in a dry area when not in use.
While pitting is not injurious to
health, if pitting becomes present and
you detect it in the metal, then we
recommend that the unit be returned
to the factory for examination. DO
NOT USE T E UNIT IF PITTING
IS PRESENT until it is determined
the extent of damage caused by
pitting.
Storage
The cover should be stored separate-
ly from the bottom or upside down
on the bottom to allow air circula-
tion. Always be sure the cover and
bottom are thoroughly dried to
protect against pitting and corrosion.
Protect the metal-to-metal seal from
being struck or dented.
OVERPRESSURE PLUG, NO. 2040
IMPORTANT INFORMATION
The overpressure plug releases if the vent pipe becomes blocked
and cooker/canner develops too much pressure. This is a protec-
tion that permits excess pressure to be released safely. If you
follow directions for using the unit properly, the plug will probably
never release.
A small amount of steam or moisture may be visible around the
overpressure plug as the pressure is starting to build inside the unit. It
is normal for the overpressure plug to leak steam until approximately 5
pounds is shown on the pressure gauge. If leakage continues beyond
that point, the cause may be:
1. The overpressure plug needs replacing if it is worn, cracked or
hard. We recommend that you replace the overpressure plug every 12
months, or before if it becomes hard or deformed. Never reuse a blown
overpressure plug.
2. Built-up food or grease may be in the opening. We recommend
that the opening in the cover where the overpressure plug fits be
cleaned with hot soapy water and a small brush at least once every
month during periods of use to maintain a clean opening. This clean-
ing/inspection is in addition, of course, to normal cleaning performed
after using the unit.
TO R MOV TH OV RPR SSUR PLUG: From the underside of the
cover, pull the plug out of its opening using your fingers. After cleaning,
reinsert the overpressure plug by pushing the round top side of the
overpressure plug into the opening from the underside of the cover. When
the overpressure plug is correctly in position, the indented portion will be
visible when the underside is viewed. Be certain to check, after inserting
plug, that the round top of plug and top lip are fully through the opening
so that the top lip is not folded under.
COV R TOP SID
TOP LIP
ROUND TOP OF PLUG
MARK D “AA”
BOTTOM OF PLUG
IS IND NT D
OV RPR SSUR PLUG
CARING FOR YOUR COOKER

8
OW TO USE YOUR COOKER
Check metal-to-metal seal for lubrica-
tion. (See pages 6-7). Check to make
sure vent pipe is clear. (See page 6)
Place Food And Water Inside
Place 11⁄2"of water (or the amount
called for in the recipe or canning
instructions) in bottom of cooker.
(Note: Whenever canning, add water
B FOR placing jars or cans into
cooker.) Always place a rack in
bottom of the pressure cooker with
the rim facing down when using
pans, canning jars, or tin cans. Never
allow these containers to stand
directly on the bottom of the cooker.
The rack is also useful for holding
meat or vegetables out of the water
while cooking.
Place Cover On Cooker
Place cover on cooker bottom so that
arrow on cover aligns with the arrow
on the bottom.1Gradually and evenly
tighten two opposite wing nuts at the
same time, maintaining the same
size gap around the entire unit where
the cover meets the bottom. Never
tighten just one wing nut at a
time.
Exhausting
There are two ways in which you
may use this pressure cooker, one
would be for cooking food and the
second would be for canning food in
either glass jars or metal cans.
The following instructions apply to
both methods; however, there is one
step that must be taken whenever
you are using the pressure cooker as
a pressure canner, and that is “after
placing lid on cooker, you must allow
steam to escape from the vent pipe
for 7 minutes before placing selective
pressure regulator weight on cover.”
his procedure is called “exhaust-
ing” and is necessary only when
canning food.
For more detailed CANNING
instructions, please refer to pages 18
and 22.
Using Cooker
1. Set the pressure regulator weight
over vent pipe, aligning the weight
so that the hole corresponding to
the desired pressure is directly over
the vent pipe.
2. Place pressure cooker over heat
source, and when the pressure
regulator weight begins to jiggle
and sputter, adjust the heat until it
jiggles only one to four times each
minute. The pressure regulator
weight will jiggle or rock when the
pressure is reached. N V R TURN
UP TH H AT TO TH POINT
THAT A CONSTANT FLOW OF
ST AM IS SCAPING, TH R BY
CAUSING TH PR SSUR R GU-
LATOR W IGHT TO B CON-
STANTLY IN TH “UP” POSITION.
R DUC TH H AT SO THAT
TH PR SSUR R GULATOR
W IGHT ONLY JIGGL S AND
SPUTT RS FROM ON TO FOUR
TIM S A MINUT .
xperience with the pressure
regulator weight will teach you
what setting on your stove will
maintain the proper pressure and
how long it takes to bring the
pressure cooker to the point where
the pressure regulator weight
jiggles or rocks. This will depend
on which size pressure cooker you
have and how much food your are
cooking.
Please understand that there
will not be an exact correlation
between the pressure shown
on the gauge to the corre-
sponding pressure setting on
the pressure regulator weight.
For example, even though you
have set the pressure regulator
weight at 10 lbs., the gauge
may show a range during the
cooking process of 8 to 12 lbs.
Do not expect the gauge to
always show the exact pres-
sure setting as the pressure
regulator weight, as the pres-
sure is changing within the
unit as the pressure regulator
weight jiggles and sputters,
which is simply a process of
constantly building up and
releasing pressure to maintain
the setting on the pressure
regulator weight.
Even in the situation where
the gauge is not registering
correctly for any reason, you
can be assured that the unit
will still operate at the pres-
sure regulator weight setting.
The basic reason that our
pressure cooker retains the
gauge is to provide additional
information as to the pressure
and temperature within the
unit, but you can be assured
that the unit is functioning at
the pressure regulator weight
setting.
Try to keep the pressure as
steady as possible by regulating
the amount of heat applied to the
cooker. At no time should the
pressure be allowed to rise
above 15 P.S.I. xcess pressure
should be decreased by turning
heat down. Remember, it is the
amount of heat applie to the
unit that regulates the pressure.
3. To count your cooking time, begin
from the first jiggle or rock of the
pressure regulator weight, and
when the food has cooked to
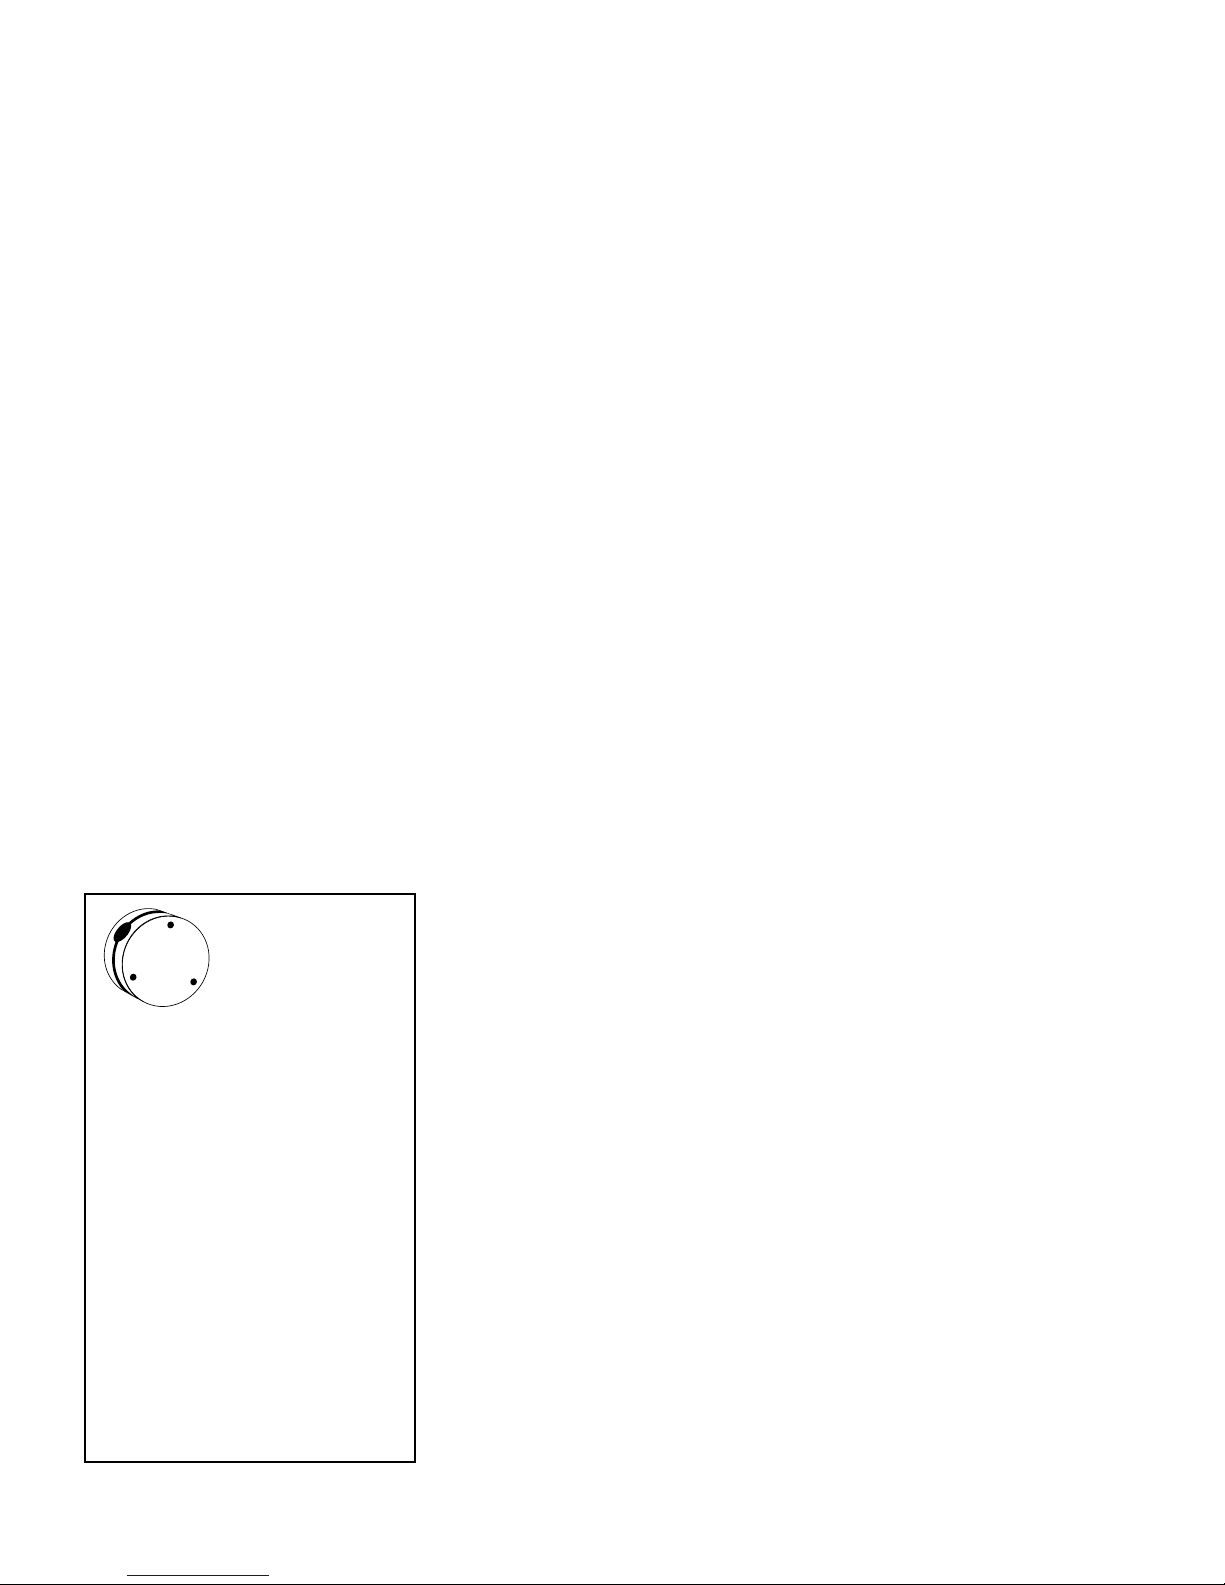
The pressure
regulator weight
lets you select one
of three pressure
settings.
Pressure Cooking Temperature
5 lbs. 228° F 107°C
10 lbs. 240° F 113°C
15 lbs. 250° F 118°C
When the pressure cooker
reaches the proper temperature,
the pressure regulator weight
will jiggle audibly, and you can
see the steam being released.
The pressure will be automatical-
ly maintained for proper pres-
sure cooking. The pressure
regulator weight itself never
requires adjustment or testing for
accuracy.
5
15
10
1This means that you have the cover and bottom correctly positioned together. (Older pressure cookers will have a linemark on the rim of the bottom.)

9
proper pressure for the correct period
of time, turn off the heat.
Reduce Pressure
WARNING: Steam escaping from the
vent pipe can scald or burn you and
the pressure regulator weight may be
hot. Protect your hand with a pot
holder or mitt.
When cooking is completed and
heat is off, reduce pressure as follows:
• After most normal cooking, permit
cooker to cool until steam pressure
gauge reads zero.
• After cooking soup, cereals, or any
food that might boil over in the
pans, turn heat off and permit
cooker to cool.
• After canning in glass jars, turn
heat off and permit cooker to cool
gradually until the steam gauge
drops to zero. Remove the selective
pressure regulator weight slowly
and do not release steam pressure
too rapidly as liquid will be drawn
from jars.
• After canning in tin cans, turn heat
off and release pressure as quickly
as possible by removing the
selective pressure regulator weight
with fork or hot pad.
Do not put cold cloths or water on
the cooker to hasten cooling. This
may crack the aluminum.
Do not move the pressure cooker
until the pressure is completely
reduced.
Opening Cooker Safely
CAUTION: Never loosen wing nuts
until the steam pressure gauge
registers zero, and you have allowed
any remaining pressure to escape by
carefully removing the selective
pressure regulator weight.
Remove cover, raising farthest
edge first to protect face and arms
from steam.
When the pressure regulator
weight is left on, a vacuum may
form inside the cooker making the
cover difficult to remove. To avoid a
vacuum, which will cause the cover
to be drawn to the bottom very
tightly, you must remove the pres-
sure regulator weight from the vent
pipe as soon as the pressure gauge
indicator reaches zero P.S.I. and then
remove the cover. The longer you
wait without removing the pressure
regulator weight, the more vacuum
will form, pulling the cover tighter
and tighter to the bottom.
Another reason that a cover sticks
to the bottom is that the metal-to-
metal seal has been permitted to
build up a coating of foreign material
such as dried grease, lubricating oil,
etc. Please refer to page 7 under the
section “Metal-to-Metal Seal,
Cleaning and Maintenance” for
complete instructions.
Removing a “Stuck” Cover
(due to a vacuum)
In the event that a vacuum forms,
use a large standard screwdriver to
pry the top loose. Place the end of
the screwdriver at an angle between
the cover and bottom near a wing
nut assembly. Do not go straight in
with the screwdriver or you will
damage the metal-to-metal seal.
Gently pry upward using the screw-
driver as a lever. Continue to pry
upward at each wing nut assembly
area uniformly so that the cover is
raised evenly. In most cases, the
cover should come off rather quickly.
If you need further assistance,
please call the factory.
OW TO USE YOUR COOKER

10
Meat
When cooking meats, place empty
cooker on stove to heat. Put fat in
bottom of cooker and sear meat on
all sides to seal in juices. Add 1⁄2"
water to bottom of cooker (or the
amount called for in the recipe), and
cook for time given in timetable or
recipe. Follow instructions under
How to use Your Cooker, page 6.
The length of cooking period for
meats depends on the amount and
distribution of the fat on the meat,
the amount of bone, toughness, size,
thickness of cut, and the position of
the meat in the cooker. Rolled roasts
require a longer cooking time per
pound than unboned roasts, and
short, chunky roasts require longer
cooking time than long, flat ones.
Due to the difference in surface area
of small roasts up to 3 or 4 pounds,
they require a longer cooking time
per pound than larger roasts.
Consequently, it is possible to give
only general rules regarding average
cooking time for meats. Average
times are about 8 to 10 minutes per
pound for rare, and at least 12 to 15
minutes per pound for well done.
With a little experimenting, you will
be able to regulate the cooking time
according to a particular cut of meat.
MEAT TIMETABLE
Beef ................................................Cook at 15 Pounds Pressure
Rump or chuck roast..........................12 to 15 min. per lb.
Corned beef ......................................12 to 15 min. per lb.
Ground meat loaf ..............................8 to 10 min. per lb.
Pot roast, thin....................................8 to 10 min. per lb.
Pot roast, thick ..................................10 to 12 min. per lb.
Fresh tongue ....................................35 to 45 min.
Tongue, smoked or cured ..................60 min.
Round steak, 1" thick ........................15 min.
Stew meat cubes................................15 to 20 min.
Hearts ..............................................15 to 20 min.
Lamb or Mutton
Shoulder roasts..................................10 to 12 min. per lb.
Stew cubes ........................................15 min.
Pork
Fresh ham ........................................12 to 15 min. per lb.
Loin roasts ........................................10 to 12 min. per lb.
Shoulder roasts..................................12 to 15 min. per lb.
Pork chops, 1" thick ..........................10 min.
Pork steak, 1" thick............................10 min.
Pork shanks ......................................20 to 30 min.
Spareribs
Spareribs ..........................................15 min.
COOKING IN T E PRESSURE COOKER
GRAIN TIMETABLE
Cook at 15 Pounds Pressure
Bulgur, Cracked Wheat ..................................................5-10 Minutes
Preparation: Wash. Place in pan. Cover grain with 1” of water. Add warm
water to bottom of cooker to level of rack. Never fill the pressure cooker
more than one-half full. This one-half includes the water and all ingredi-
ents.
Whole Wheat Berries & Other Whole Grains ..................35 Minutes
Preparation: Hard grains may be soaked overnight to reduce cooking time.
Cover grain in pan with 2" of water. Continue as above.

11
VEGETABLE TIMETABLE
Cooking Time (Min.)
Vegetable Preparation At 15 Pounds Pressure
Asparagus .............................Clean and wash. Use pan ...............................................................................1-3
Beans, green or wax ..............Wash and cut.................................................................................................2-3
Beets .....................................Wash, leaving root and 2" of stem on. Cook. Peel and
dice. Season with salt, butter, pepper, and a little
vinegar and sugar .............................................................New 12-18; Old 15-20
Brussels Sprouts.....................Wash ................................................................................................................2
Cabbage.................................Quarter and season with salt..............................................................................8
Carrots...................................Slice, put in pan. Season.........................................................Sliced 2; Whole 3-4
Cauliflower ............................Soak head 1⁄2hour in cold salt water. Divide sections.
Place in pan ...................................................................................................1-2
Celery....................................Wash and dice ...............................................................................................2-3
Corn-on-the-Cob ....................Clean and place on rack..................................................................................3-5
Hominy ........................................................................................................................................................30
Onions ..................................Place in pan. Season................................................................Sliced 3; Whole 10
Parsnips ................................Wash. Cook on rack.................................................................Sliced 3; Whole 10
Peas ......................................Shell and wash ..............................................................................................2-3
Potatoes, Irish........................Peel and place in pan..................................................................................10-20
Potatoes, scalloped........................................................................................................................................10
Potatoes, sweet......................Wash, peel, quarter or halve, cook on rack....................................................8-10
Pumpkin or Winter Squash.....Wash and remove seeds. Break in pieces and place in pan ...........................10-12
Rutabagas .............................Peel and wash....................................................................Sliced 5; Quartered 12
Spinach, Swiss Chard .............Wash thoroughly in several waters ....................................................................2
Turnips ..................................Slice or dice turnips. Use pan. Season with salt and a little sugar ......................4-5
COOKING IN T E PRESSURE COOKER
Vegetables
Prepare vegetables in the usual
manner and season. Pour about 1⁄2"
of water in the bottom of the cooker.
Place vegetables on rack or in a
metal pan resting on the rack.
For best color and texture, when
done cooking, turn the heat off,
allow pressure to reach zero, remove
the regulator weight, then remove
the cover, raising the farthest edge
first to protect face and arms from
steam. Do not allow the vegetables
to remain in the cooker once the
pressure is down to zero.

12
Meats
Pot Roast
4 lbs. beef for pot roasting
2 tbsp. drippings
4 tbsp. flour
2 tsp. salt
1⁄4tsp. pepper
1 cup celery, chopped fine
1⁄2cup carrots, cut in cubes
2 green peppers, diced
2 cups stewed tomatoes
1 medium sized onion, chopped fine
Enough water to fill bottom of
cooker to 1⁄2"
Dredge the meat on all sides with
flour, salt and pepper; put drippings
in cooker and brown meat on all
sides. Add green pepper and onion,
pouring water and stewed tomatoes
over meat. Cover cooker and cook for
about 60 minutes at 15 pounds
pressure. Release steam, open cooker
and add celery and carrots. Cook
another 10 minutes at 15 pounds
pressure.
Swiss Steak
13⁄4lbs. round steak
3 tbsp. butter or margarine
Flour to be pounded into meat
2 tbsp. flour for gravy
2 tsp. onion, chopped
1 tsp. salt
1⁄8tsp. pepper
1⁄2tsp. Worcestershire sauce
1 cup water for gravy
Brown the chopped onion in the
butter in an inset pan. Add meat and
brown as well. Lift meat from the
inset pan. Add 2 tablespoons of flour;
brown. Add 1 cup water; stir until
thoroughly blended, making a rather
thick gravy. Add seasonings and
meat. In the bottom of the pressure
cooker put water to just below height
of rack, and the pan of steak. Cook
for 40 minutes at 15 pounds pres-
sure. Reduce steam to zero; remove
meat and serve.
Rolled Beef Roast
Sear the roast (5 pounds) on all sides
in fat or drippings in the bottom of
the cooker. When partially seared,
dredge with flour and finish brown-
ing. Add salt, pepper and such
seasonings as desired. Put roast on
rack and add 1⁄2"of water. Seal cooker
and cook for 60 minutes at 15
pounds pressure. Let pressure
condense slowly. Use liquid in
bottom of cooker for gravy.
For smaller roasts cook a shorter time.
Chili Elegante
1 lb. ground beef
2 onions, chopped
2 tbsp. oil
1 green pepper, sliced into strips
2 cups diagonally sliced celery
1 clove garlic, minced
1 (16 oz.) can kidney beans,
undrained
1 (4 oz.) can mushrooms,
undrained
2 (16 oz.) cans whole tomatoes
1⁄2 cup red wine
2 tsp. salt
1-11⁄2tbsp. chili powder
Dash of cayenne pepper
Heat oil until hot; add beef and
cook until browned. Add onion,
celery, green pepper and garlic; saute
lightly. Drain beans and mushrooms,
reserving liquid; set beans and
mushrooms aside. Add unused
liquid, tomatoes, wine, chili powder,
salt, and cayenne to beef mixture;
stir well. Close cover of pressure
cooker securely and cook 20 minutes
at 15 lbs. pressure. Let pressure drop
of its own accord. Add beans and
mushrooms; heat to boiling. Serve
hot. Makes 6-8 servings.
Beef Stroganoff
1 lb. beef stew meat cut in 1" pieces
1 tbsp. flour
1 tbsp. oil
1 4-oz. can mushrooms, drained
(reserve liquid)
1 onion, medium, sliced
1 tsp. salt
1⁄4tsp. pepper
Dash ground marjoram
2 tsp. dry mustard
3 tbsp. catsup
1⁄2cup dairy sour cream
Roll beef in flour. Brown in hot oil
in cooker. Add enough water to
reserved mushroom liquid to mea-
sure 3⁄4cup. Use 11⁄2cups for 6-8 qt.
recipe. Add mushrooms, mushroom-
water mixture and remaining ingredi-
ents except sour cream to cooker.
Cover, when pressure gauge reaches
10 lbs., cook 20 minutes (or cook at
15 lbs. for 15 minutes). Cool cooker
for 5 minutes, then release steam.
Stir in sour cream; heat through.
Serve with noodles. Makes 4 servings
Barbecued Beef Short Ribs
3 lbs. beef short ribs, cut in pieces
2 tbsp. bacon fat
2 tbsp. onion, chopped
1 tbsp. green pepper, chopped
1 cup catsup
1 tsp. salt
1 tsp. celery seed
2 tbsp. brown sugar
2 tbsp. lemon juice
2 tsp. dry mustard
1 cup water
Brown short ribs in fat in cooker.
Pour off excess fat. Mix remaining
ingredients; pour over ribs. Cover,
when pressure gauge reaches 10 lbs.,
cook 45-50 minutes (or cook at 15
lbs. for 35-40 minutes). Cool cooker
for 5 minutes, then release steam.
Remove ribs. Mix 2 tablespoons flour
and 1⁄4cup cold water for each cup
liquid. Gradually stir into broth. Cook
until thickened, stirring constantly.
Makes 4 servings
PRESSURE COOKING RECIPES

13
Stuffed Green Peppers
4 green peppers
3⁄4lb. ground beef
1⁄3cup rice, cooked
1 tsp. salt
Dash pepper
1 egg
1⁄3cup onion, chopped
1 10 3⁄4-oz. can tomato soup
3⁄4cup water
Remove seeds and wash peppers.
Mix beef, rice, salt, pepper, egg,
onion and 1⁄3cup soup. Stuff peppers
lightly and place on rack in cooker.
Top each pepper with 1 tablespoon
soup. Mix remaining soup and water;
pour into cooker. Cover, when
pressure gauge reaches 10 lbs., cook
15 minutes (or cook at 15 lbs. for 12
minutes). Turn off the heat source
and wait for the steam gauge to read
zero, then release pressure. Makes 4
servings
Corned Beef and Cabbage
2 lbs. corned beef brisket
11⁄2cups water
4 carrots
4 potatoes, medium, cut in halves
4 cabbage, wedges
4 onion, small, whole
Place corned beef in cooker. Add
water. Cover, when pressure gauge
reaches 10 lbs., cook 60 minutes (or
cook at 15 lbs. for 45 minutes). Cool
cooker for 5 minutes, then release
steam. Add remaining ingredients.
Cover, when pressure gauge reaches
15 lbs., cook 5-8 minutes. Reduce
pressure instantly. Makes 4 servings
Whole am
A whole ham is very easily
prepared in the pressure cooker. Pour
1⁄2"of water in the bottom of cooker.
Place ham (about 10 pounds) on the
rack. Cover. Cook about 50 minutes
at 15 pounds pressure. A nice flavor
is added to the ham by crumbling up
three ginger snaps in kettle in which
ham is cooking.
Remove ham from cooker.
Remove the outside skin, sprinkle
ham with brown sugar and fine
cracker crumbs and stick cloves into
ham. Brown in oven.
Stuffed Round Steak
11⁄2lbs. round steak, cut thin
3 tbsp. butter or margarine
2 tsp. salt
1⁄4tsp. pepper
2 tbsp. minced onion
1 cup hot water
1 cup cracker or bread crumbs
1⁄3cup butter or substitute
1⁄3cup boiling water
1 tsp. salt
1⁄2tsp. pepper
Make a dressing of crumbs, melted
butter, water and seasoning. Season
steak with salt and pepper, spread on
dressing, roll and tie. Put butter in
cooker and brown onions, roll steak
in flour and brown with onions. Add
1⁄2"of hot water and cover cooker.
Cook for 15 minutes at 15 pounds
pressure.
Scalloped Potatoes and am
3 potatoes, medium
3 tbsp. flour
3⁄4tsp. salt
1⁄4tsp. pepper
1 cup ham, cooked, cubed
2 tbsp. onion, chopped
2 tbsp. butter or margarine
1 cup milk
Cut potatoes in thin slices (about 3
cups). Mix flour, salt and pepper. In
greased 11⁄2quart metal or heat proof
glass bowl, arrange 3 layers of
potatoes and ham, sprinkling each
layer of potatoes with part of flour
mixture and dotting with butter. Pour
milk over potatoes and cover bowl
with foil. Pour 11⁄2cups water in
cooker. Place bowl on rack in cooker.
Cover, when pressure gauge reaches
15 lbs., cook 18-20 minutes. Cool
cooker for 5 minutes, then release
steam. Garnish potatoes, if desired,
with paprika, chopped parsley or
grated Cheddar cheese. Makes 4
servings
Chop Suey
1 lb. pork and veal stew meat cut in
1" pieces
1 tbsp. oil
1 cup celery, cut in 1 in. pieces
2 onions, medium, sliced
1⁄2tsp. salt
Dash pepper
1 cup water
1 1-lb. can bean sprouts, drained
1⁄4cup soy sauce
3 tbsp. cornstarch
1⁄4cup water
Brown meat in oil in cooker. Add
celery, onions, salt, pepper and
water. Cover, when pressure gauge
reaches 10 lbs., cook 10 minutes (or
cook at 15 lbs. for 8 minutes). Cool
cooker for 5 minutes, then release
steam. Add bean sprouts. Simmer
uncovered 3 minutes. Add soy sauce.
Mix well. Mix cornstarch and water
in separate bowl. Gradually stir into
pork mixture. Cook until thickened,
stirring constantly. Serve with rice.
Makes 4 servings
Spiced Pork Roast
4 lbs. fresh pork loin
1 tbsp. mixed pickle spice
Salt and pepper
3 tbsp. butter or drippings
1 onion
Flour
Sprinkle the meat with salt and
pepper and dredge with flour. Put
butter in the bottom of cooker and
brown meat on all sides. Slice onion
over the meat; add 1⁄2"hot water and
spices tied in a cheesecloth. Seal
cooker and cook 45 minutes at 15
pounds pressure.
Leg of Lamb (5 Pounds)
Sprinkle meat with salt and pepper
and roll in flour. Brown meat in
bottom of cooker. Add 1⁄2"hot water
in bottom of cooker and cover. Cook
for 50 minutes at 15 pounds pres-
sure. If you have the lower end of
the bone broken, it makes it easier to
brown meat in cooker.
PRESSURE COOKING RECIPES

14
Veal Loaf
11⁄2lbs. ground veal
1 cup ground ham, raw or cooked
2 eggs
1 cup dried bread crumbs
1⁄3teaspoon nutmeg
Grated rind of 1⁄4lemon
Juice of 1 lemon
1 cup milk
1 tbsp. butter, melted
11⁄2tsp. salt
1⁄4tsp. pepper
1 pint strained tomato juice
Mix all ingredients except the
tomato juice in the order given. Place
loaf in a separate pan or dish; pour
the tomato juice over the loaf. Place
water in bottom of cooker almost to
top of rack and put meat in pan on
the rack. Seal cooker by fastening
cover properly. Cook for 30 minutes
at 15 pounds pressure.
Veal Roast
3 lbs. veal
1⁄2bay leaf
1 small onion
2 tbsp. flour
2 tbsp. catsup
1 tsp. salt
1 tbsp. drippings
1⁄4cup water in pan
Brown roast and onion in drip-
pings in a pan. Mix seasonings and
1⁄4cup water and add to pan. In
bottom of cooker put water to just
below top of the rack and pan
containing the roast. Cook for 30
minutes at 15 pounds pressure. Turn
off heat and allow pressure to return
to zero before removing the selective
Pressure Regulator Weight.
Seafood
Fried Perch
The fine bones of the fish are soft-
ened by the high temperature of
pressure cooking. Roll 6 cleaned
perch in salted flour and brown
quickly on the bottom of cooker, in
hot oil or drippings. Remove to a pan
and then place pan inside cooker.
Add water to cooker and cook for 15
minutes at 15 pounds pressure.
Serve with egg sauce.
Lobster
Plunge lobster into boiling water to
cover. Remove lobster and place on
rack in cooker with 2 cups boiling
water, salted. Place cover on cooker.
Allow steam to flow from Vent Pipe
for at least two minutes, to remove
all air from cooker. Process for ten
minutes at 10 pounds pressure.
Reduce pressure gradually and
remove lobster as soon as gauge has
returned to zero. Plunge lobster into
cold water but remove immediately.
Crack shell; clean and serve.
Fowl
Stewed Chicken
Place cut up stewing chicken into
pressure cooker, adding 1⁄2teaspoon
salt and 1⁄8teaspoon pepper. Cover
with boiling water and place cover on
cooker. Cook 40 minutes at 15
pounds pressure. Release steam
slowly. Gravy may be made by
adding 1⁄4cup of flour diluted with
enough cold water to pour easily.
Fried Chicken
Cut up chicken. Season with salt and
pepper and roll pieces in flour. Brown
in oil or drippings in bottom of
cooker. Adding four thin slices of
bacon cooked at the same time will
give a good flavor. Add 1⁄2"boiling
water and seal the cooker. If cooking
an older chicken, cook for 40 min-
utes at 15 pounds pressure; if
cooking a younger chicken, 10 to 15
minutes.
Browned Chicken Fricassee
One 41⁄2or 5 lb. chicken
4 tbsp. flour
3 tsp. salt
1⁄8tsp. pepper
4 tbsp. butter or margarine
4 cups cold water
1 large, peeled, quartered onion
Celery tops
Cut up chicken. Dredge each piece
with some of the flour combined with
2 teaspoonfuls of salt and pepper.
Brown on all sides in hot butter. Add
cold water, onion, a few celery tops,
and the remaining 1 teaspoon of salt.
Place cover on cooker and cook 40
minutes at 15 pounds pressure.
Release steam slowly. Move chicken
to a hot platter and cover with a
gravy made as follows:
Measure the chicken stock, having
first skimmed off any surface fat.
Add 2 tablespoons flour mixed to a
smooth paste in 3 tablespoons cold
water for every cupful of chicken
stock. Simmer 5 minutes while
stirring; add more salt and pepper if
needed. Serves 6.
PRESSURE COOKING RECIPES

15
Roast Fowl
Prepare bird for roasting, rinsing
inside and outside with cold water,
and wipe dry with clean cloth. Stuff
with desired dressing. The giblets
may be cooked separately in bottom
of cooker or may be added to the
dressing as desired. If giblets are left
whole, add 1⁄2"of boiling water and
seasoning. Place rack over giblets and
put chicken on rack. Cover, leaving
selective Pressure Regulator Weight
off until steam escapes freely. Replace
selective Pressure Regulator Weight
and bring to 15 pounds pressure. For
a young chicken, retain this pressure
for 20 minutes; for a chicken one
year old, retain pressure for 25
minutes; and for an older chicken, 35
minutes. Turn off heat and allow
hand on dial to return to zero. Put
chicken in pan and brown in oven for
a few minutes. While chicken is
browning, make your gravy in the
pressure cooker.
Soups
You will enjoy soups cooked in the
pressure cooker. Original flavors are
retained because of the short cook-
ing period.
NOT : DO NOT COOK SPLIT P A
SOUP IN YOUR COOK R, AS IT WILL
FOAM, FROTH AND SPUTT R. THIS
ACTION MAY CLOG TH V NT PIP .
Cream of Potato Soup
Cut potatoes in slices, add a large
slice of onion and cook for 5 minutes
at 15 pounds pressure in 1⁄2"of
boiling water. Mash and add thin
white sauce, season. Chopped
parsley may be added just before
serving.
Cream of Celery Soup
Dice 1 cup celery and cook in 1⁄2"
boiling water for 10 minutes at 15
pounds pressure. Add 2 cups of thin
white sauce; season and serve.
Vegetable Soup
1 cup lima beans
1 small stalk celery
2 quarts of water
3 carrots
2 onions
2 tbsp. barley
3 potatoes
1 tsp. salt
2 cups tomatoes, either
canned or fresh
1 small soup bone
Dice vegetables and place in clear,
cold water. Place soup bone in
cooker; cover with water. Cover
cooker and cook at 15 pounds
pressure for 15 minutes. Place diced
vegetables in cooker and cook
together for 10 minutes.
New York Clam Chowder
4 tbsp. butter or margarine
4 slices bacon, cut in pieces
1 Spanish onion, minced
2 potatoes, peeled and diced
2 green peppers, seeded and chopped
4 stalks celery, chopped
2 cloves garlic, minced
1 qt. clam broth or fish stock
1⁄2 cup dry red wine
2 cups canned peeled tomatoes,
chopped
1 tsp. oregano
1⁄2 tsp. thyme
2 cups minced clams, fresh or
canned
Melt butter in cooker. Add bacon,
onion, potatoes, peppers, celery and
garlic; cook, stirring, until onion is
translucent. Add clam broth, wine,
tomatoes, oregano and thyme. Cover,
cook 7 minutes at 15 lbs. pressure.
Remove from heat, cool 5 minutes
and reduce pressure slowly. Stir in
clams and heat through. Season to
taste with salt and pepper. Serve with
oyster crackers if desired. Serves 6
PRESSURE COOKING RECIPES

Fruits &
Vegetables
Compote of Dried Fruits
1 lb. (about 21⁄2cups) dried fruits
(prunes, peaches, apricots, apples)
2 cups water
1 tbsp. cornstarch
1⁄2 cup sugar
Pinch salt
Juice and grated peel of 1 lemon
Put your favorite assortment of dried
fruits in cooker and add water. Cover,
place over high heat until pressure
gauge reaches 15 lbs. Reduce heat
and cook for 10 minutes at 15
pounds pressure. Reduce pressure
instantly. Transfer fruit to a serving
dish using a slotted spoon. Mix
cornstarch with 1 tbsp. water and stir
into cooker. Add sugar, salt, lemon
juice and lemon peel. Cook, stirring,
until sauce is clear and thickened.
Pour over fruit. Serves 6
Acorn Squash
2 acorn squash
4 tablespoons butter or margarine
4 tablespoons brown sugar
1 teaspoon salt
1⁄4teaspoon pepper
Juice of 1⁄2lemon
Wash squash; cut in half length-
wise and discard pith and seeds. Fill
hollows with butter and brown sugar;
season with salt, pepper and lemon
juice. Pour 2 cups water into cooker
and place squash halves, cut side up,
on rack in cooker. Cover, place over
high heat until pressure gauge reaches
15 lbs. Reduce heat and cook 6
minutes (or cook at 10 lbs. for 8
minutes). Serves 4
NOT : The cooking time for acorn
squash will vary according to its size
and maturity.
Desserts
In steaming breads and puddings,
use molds large enough to allow for
expansion. Coffee cans are good. Fill
no more than 2⁄3full.
Chocolate Bread Pudding
11⁄2squares chocolate
2 cups cold milk
2 well-beaten eggs
1⁄2tsp. salt
2⁄3cup sugar
1⁄2tsp. vanilla
2 tbsp. butter or margarine
1⁄2cup bread crumbs
Add grated chocolate to cold milk
and heat until chocolate is melted.
Add salt, sugar and vanilla to beaten
eggs; mix until well blended. Add to
hot chocolate mixture. Melt butter in
pan. Put bread crumbs in buttered
pan and stir until crumbs are well
coated. Add chocolate mixture and
mix with bread crumbs. Place pan on
rack in cooker. Cover and cook for
10 minutes at 10 pounds pressure.
Boston Brown Bread
2 cups graham flour
1 cup cornmeal
1 tsp. salt
1 tsp. soda
1⁄2cup molasses
11⁄2to 2 cups buttermilk
1⁄4cup shortening (melted)
3⁄4cup seeded raisins
Measure and sift dry ingredients.
Mix molasses and buttermilk until
well blended, then add shortening.
Add liquid to dry ingredients, mixing
quickly. When well mixed, add
raisins and mix just enough to
distribute raisins. Put into greased
molds, filling about 2⁄3full. Place
greased covers on, having some
punctured to allow escape of steam.
Place molds on rack in cooker with 3
or 4 cups of water. Cover cooker,
leaving selective Pressure Regulator
Weight off. Steam for about 15
minutes. Replace selective Pressure
Regulator Weight on Vent Pipe and
cook one hour at 15 pounds pres-
sure. Release steam at once. Place
bread in the oven for a few minutes
to dry the outside.
16

17
White Fruit Cake
(9 Pound Cake)
1 lb. white Sultana raisins
2 lbs. whole candied cherries
2 lbs. broken candied pineapple
21⁄4lbs. shelled pecans
7 eggs, separated
1⁄2lb. butter or substitute
1 cup grape juice
11⁄4cups white sugar
2 tsp. nutmeg
1⁄2tsp. salt
41⁄2cups sifted flour
Cream butter and sugar; add egg
yolks (beaten separately), and beat
again. Add 31⁄2cups of flour, alternat-
ing with grape juice; mix well. Sift
the other cup of flour over the fruit
and nuts. Mix fruit and nuts into
dough. Lastly, fold in well beaten
whites of eggs.
Use No. 3 sanitary tin cans lined
with greased paper. Fill to desired
thickness—cake rises very little.
Cover cans and place on bottom of
cooker. Put about 3⁄4"of water in
bottom of cooker. Cover and steam
with selective Pressure Regulator
Weight off for about 30 minutes.
Place selective Pressure Regulator
Weight on Vent Pipe and cook for 35
minutes at 5 pounds pressure. Then
raise temperature to 10 pounds and
cook for 40 minutes. Release pressure
very slowly. Allow the cakes to stand
in cooker for one-half hour. Remove
from cooker and cool.
Dark Fruit Cake
1 lb. butter or substitute
1 lb. light brown sugar
9 eggs
4 cups flour
3⁄4tsp. cloves
3⁄4tsp. nutmeg
3⁄4tsp. mace
2 tsp. cinnamon
1 tsp. soda
1⁄4cup milk
1 lb. currants
3 lbs. raisins
1⁄2lb. almonds
1⁄2lb. citron
1⁄2lb. candied orange peel
Clean raisins and currants. Blanch
almonds and cut them. Heat in a
moderate oven until a delicate
brown. Cut orange and citron in
small pieces. Cream butter and sugar
until thoroughly blended. Add well
beaten egg yolks to butter and sugar
mixture, cream well. Add well-beaten
egg whites. Sift one-half the flour
over the fruit and mix until fruit is
well separated. Sift the remaining
flour, soda, spices and salt together
and add to cake batter, alternating
with the milk. Add the fruit and nuts
and mix thoroughly. Line cake pans
with waxed paper and fill with fruit
batter.
Cover the pans with several
thicknesses of waxed paper so the
tops of the cakes will be kept dry. It
is best to tie the paper in place so it
will not slip off. Place 21⁄2cups of
water in the bottom of the cooker.
Place pans on rack in cooker one
above the other. Cover and cook for
one hour and fifteen minutes, the
first 45 minutes at 10 pounds
pressure and the last 30 minutes at
15 pounds pressure. Release pressure
very slowly, allowing cooker to cool
before removing cover. Remove
cakes from cooker and remove
waxed paper from tops of pans. Place
in slow oven and bake for about
12 minutes to dry out the cake.
PRESSURE COOKING RECIPES

18
Foods are considered either acid or
low-acid, each of which requires a
different canning method. Acid
foods, which include most fruits,
tomatoes acidified with bottled lemon
juice or citric acid, pickles, relishes,
chutneys, jams, jellies and preserves,
may be safely processed using a hot
water bath. (Figs are a low-acid fruit,
but if acidified before canning, they
may be safely processed in a hot
water bath.) Low-acid foods such as
meats, poultry, seafood, milk and
vegetables must be processed in a
pressure canner.
OT WATER BAT FOR ACID
FOODS: FRUITS AND TOMATOES
To process fruits and tomatoes,
use the pressure canner as a hot
water bath. Place rack in bottom of
pot. Arrange sealed cans or jars on
rack. Add enough boiling water to
completely cover jars by 1-2 inches.
Put lid on pot, but leave the Selective
Pressure Regulator Weight off so all
the steam escapes through the Vent
Pipe and no pressure builds up in the
cooker.
The Models 910 and 915 can only
process pint jars using the hot water
bath method, as quart jars are too
tall.
Berries and grapes (hot pack) .......25 minutes
Rhubarb (hot pack) ......................20 minutes
All other fruits (hot pack) .............30 minutes
Time given above is for quart jars,
pint jars, No. 2 and No. 3 cans. Do
not pressure cook cranberries or
strawberries.
The USDA and the State xtension
Services do not recommended pro-
cessing fruits in a pressure cooker
under pressure, since the high
temperature has a tendency to break
down the delicate tissues of these
products. If you prefer to process
fruits under pressure, process at ten
pounds pressure for ten minutes.
Contact your county extension
agent for further information on
processing tomatoes in a boiling
water canner.
PRESSURE CANNING FOR LOW-
ACID FOODS: VEGETABLES,
MEAT, POULTRY AND SEAFOOD
Pressure canning is the only safe
method for canning meats, poultry,
seafood and vegetables other than
tomatoes.
Pour 11⁄2” of water in cooker. Place
sealed cans or closed jars on rack in
pressure cooker. Stagger the top layer
if there are two layers of cans or jars,
using a rack between layers. Be sure
cooker doesn’t boil dry when repeated
batches of food are processed.
Exhausting: Place lid on cooker,
place pressure cooker over heat
source on high heat and allow steam
to escape from the Vent Pipe for 7
minutes before placing the Selective
Pressure Regulator Weight on Vent
Pipe. Be sure to check the recipe if
you are canning food such as cereals,
macaronis, spaghetti and noodles,
which may specify medium heat at
this time. If your recipe calls for
cooking at 15 pounds, set Pressure
Regulator Weight over Vent Pipe at
CANNING INSTRUCTIONS
Two Types Of Food — Two Canning Methods
ACID FOODS.
Fruits, acidified tomatoes, pickles, relishes,
chutneys, jams, jellies and preserves are acid
foods — those foods with enough natural acid
or enough additional acid (lemon juice or
vinegar) to result in a pH of 4.6 or lower.
Acid foods may be safely canned using a hot
water bath method.
BOTULISM.
A deadly form of food poisoning caused by
toxins produced by the growth of botulinus
spores. For more on botulism and how to
prevent it, see page 20.
BUCKLING.
This term applies to cans in which one or both
ends have been permanently distorted by
excess pressure in the can. Slack filling,
sealing at too low a temperature, or too
sudden of a release of pressure after cooking
can all cause buckling.
OT-PACK MET OD.
Filling hot jars with hot precooked food before
processing.
OT WATER BAT .
The canning method used to process acid
foods. See page 18.
EADSPACE.
Headspace is the distance between the food in
the can and the cover of the can. Leave at
least 1⁄2"headspace to most canned foods.
Failure to leave headspace may cause bulging
of the cans due to over filling.
LOW-ACID FOODS.
Foods with little natural acid which have a pH
above 4.6. This includes meats, poultry,
seafood, milk, vegetables and some varieties
of tomatoes. Low-acid foods must be
processed in a pressure canner.
PRESSURE CANNING.
The canning method used to process low-acid
foods. See page 18.
RAW-PACK MET OD.
Filling hot jars with raw, unheated food prior
to processing.
SWELL.
Swell is the commercial term given to cans
whose ends have been distended or swelled by
the gas which has been generated by spoilage
of the food in the can. Any can with ends
swelled out should be thrown away as it is not
fit for use, unless the can was filled too full or
was not sealed while hot. See “Headspace.”
VACUUM.
Vacuum as it applies to cans refers to a lower
pressure within the container than on the
outside. This higher pressure on the outside
causes the ends of the cans to be held in a
concave position. Vacuum is obtained by
sealing the cans while they are hot. The
condensation of the vapor in the headspace
and the contraction of the gases and contents
of the can upon cooling produces a partial
vacuum in the can. Proper vacuum may be
obtained by thorough pre-heating or
exhausting just previous to closing. A can with
a vacuum—that is, with the ends properly
pulled in—is considered to contain good food.
If the products start to spoil, gas is generated
which releases the vacuum and causes the
ends of the can to bulge.
Canning Terms
Other manuals for 910
1
This manual suits for next models
5
Table of contents
Other All American Electric Pressure Cooker manuals
Popular Electric Pressure Cooker manuals by other brands

Cuisinart
Cuisinart CPC-800 Series Instruction/recipe booklet

Philips
Philips HD2105 user manual

Cuckoo
Cuckoo CRP-RT10 Fuzzy Series operating instructions

InstantPot
InstantPot Duo Plus Series user manual

BLUE STONE
BLUE STONE PCB-5763 user manual

Cook's essentials
Cook's essentials 99725 Instructions for proper use and care