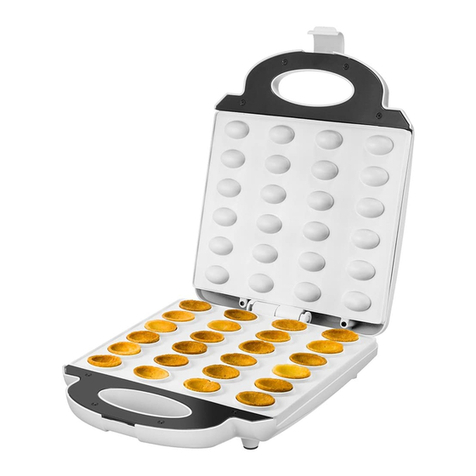
all-clad WD822D51 User manual

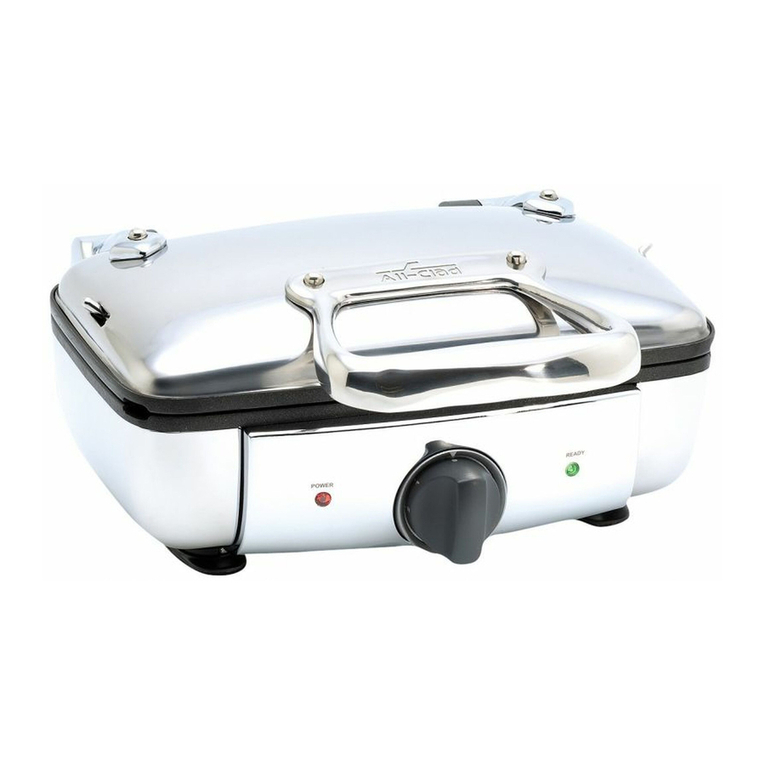
4 Slice Gourmet Wae Maker -
Owner’s Guide - Model No. WD822D51
Guide d’utilisation - Modèle No. WD822D51
Read and save these instructions - Lisez et conservez ces instructions
www.all-clad.com
EN
FR

2
TABLE OF CONTENTS
IMPORTANT SAFEGUARDS......................................................................................................................... p. 3
DISPOSING OF YOUR APPLIANCE ........................................................................................................... p. 5
CONGRATULATIONS ON YOUR PURCHASE....................................................................................... p. 5
DESCRIPTION.................................................................................................................................................... p. 13
BEFORE USE....................................................................................................................................................... p. 13
ASSEMBLY/DISASSEMBLY........................................................................................................................... p. 13
USING YOUR WAFFLE MAKER.................................................................................................................. p. 14
CLEANING & MAINTENANCE................................................................................................................... p. 15
TIPS FOR BETTER COOKING RESULTS................................................................................................. p. 16
LIMITED TWO YEAR WARRANTY........................................................................................................... p. 17

3
EN
IMPORTANT SAFEGUARDS
When using electrical appliances, basic safety precautions should always be followed including the following:
1. Read all instructions.
2. Do not touch hot surfaces. Use handles or knobs. Always use oven mitts.
3. To protect against electrical shock do not immerse cord, plugs, or this appliance in water or any other liquid.
4. Close supervision is necessary when any appliance is used by or near children.
5. Unplug from outlet when not in use and before cleaning. Allow to cool before adding or removing parts, and
before cleaning the appliance.
6. Do not operate any appliance with a damaged cord or plug or after the appliance malfunctions, or has been
damaged in any other manner. Call 1-800-ALL-CLAD (255-2523) for repair or return information.
7. e use of accessory attachments not recommended by the appliance manufacturer may cause injuries.
8. Do not use outdoors.
9. Do not let the cord hang over the edge of tables, counters, or touch hot surfaces.
10. Do not place on or near a hot gas or electric burner, or in a heated oven.
11. Extreme caution must be used when moving an appliance containing hot oil or other liquids.
12. To disconnect, turn the control to “OFF” position, then remove plug from wall outlet.
13. Do not use appliance for other than intended use.
FOR HOUSEHOLD USE ONLY
SAVE THESE INSTRUCTIONS

4
is appliance is for HOUSEHOLD USE ONLY.
ere are no user-serviceable parts inside. If servicing becomes necessary, within the warranty period, return your
wae maker to All-Clad. See warranty information for details; do not attempt to repair it yourself.
WARNING: To prevent personal injury or property damage caused by re, always unplug this and other
appliances when not in use.
CAUTION: To ensure continued protection against risk of electrical shock, connect to properly grounded outlets only.
Always follow recommended cooking times when using this electric wae maker.
NOTE: During the initial use of this appliance, some slight smoke and/or odor may be detected. is is normal
and will stop after a few uses.
ELECTRICAL REQUIREMENTS
e appliance employs a 3-conductor power supply cord with grounding conduct and a grounding type attachment
plug, which is intended to be grounded during use .
If the plug does not t, contact a qualied electrician. Do not attempt to modify the plug in any way.
• A short power-supply cord has been provided to reduce the risk entanglement in or tripping over a long cord.
• Extension cords are available and should be used with caution.
• If a longer detachable power-supply cord or extension cord is used,
- the marked electrical rating of the cord set or the extension cord should be at least as great as the electrical
rating of the appliance, and
- the cord should be arranged so that it will not drape over the countertop or tabletop where it can be pulled on
by children or tripped over unintentionally,
- the extension cord should be a grounding type 3 wire cord.

5
EN
Your appliance contains many materials which can be recycled.
Consult your local waste collection agency for information on how to properly dispose of your
appliance.
DISPOSING OF YOUR APPLIANCE
CONGRATULATIONS ON YOUR PURCHASE
All-Clad Metalcrafters created the original collection of professional cookware made with a patented metal bonding
process, which eliminates uneven heating, an accomplishment that lead to All-Clad becoming the product chosen
for the kitchens of more four-star restaurants than any other. Still the only complete line of cookware made by an
American company with materials produced in its own mill, All-Clad has revolutionized the art of cooking since its
introduction.
All-Clad’s professional cookware collections feature a variety of bonded metals and nishes from high grade
aluminum and stainless steel to copper. All-Clad combines professional design with high performance for all tastes
and cooking styles.
e All-Clad cooking experience now extends to a focused selection of small electrical appliances, each designed
without compromise to make a noticeable dierence in both use and performance. Cooking connoisseurs now have
a wonderful opportunity to complete their kitchen with electrics by All-Clad, the undisputed original.
All-Clad Metalcrafters has an ongoing policy of research and development and may modify its products without
prior notice.

6
TABLE DES MATIÈRES
PRÉCAUTIONS DE SÉCURITÉ IMPORTANTES................................................................................... p. 7
COMMENT DISPOSER DE SON APPAREIL........................................................................................... p. 9
NOUS VOUS FÉLICITONS DE VOTRE ACHAT .................................................................................... p. 10
DESCRIPTION.................................................................................................................................................... p. 19
AVANT L'UTILISATION................................................................................................................................. p. 19
ASSEMBLAGE / DÉMONTAGE................................................................................................................... p. 19
UTILISATION DE VOTRE GAUFRIER...................................................................................................... p. 20
NETTOYAGE ET ENTRETIEN.................................................................................................................... p. 21
CONSEILS POUR DE MEILLEURS RÉSULTATS DE CUISSON....................................................... p. 22
GARANTIE LIMITÉE DE DEUX ANS........................................................................................................ p. 23

7
FR
PRÉCAUTIONS DE SÉCURITÉ
IMPORTANTES
Lors de l’utilisation d’un appareil électrique, il est toujours impératif de respecter les précautions de sécurité
élémentaires, notamment les suivantes:
1. Lisez toutes les instructions.
2. Ne touchez pas les surfaces chaudes. Utilisez les poignées ou les boutons. Utilisez toujours des gants de cuisine.
3. An d’éviter tout risque d’électrocution, n'immergez jamais le câble d’alimentation, les ches ou cet appareil
dans l'eau ou tout autre liquide.
4. Une surveillance attentive est nécessaire lorsque l’appareil est utilisé par ou à proximité d’enfants.
5. Débranchez le câble d’alimentation lorsque l’appareil n’est pas utilisé et avant de procéder au nettoyage. Laisser
l’appareil refroidir avant d’ajouter ou de retirer des pièces et avant de le nettoyer.
6. Ne faites pas fonctionner un appareil dont le câble électrique ou la che d’alimentation est endommagé, après un
dysfonctionnement ou encore après qu’il ait été endommagé de quelque façon. Appelez le 1-800-ALL-CLAD
(255-2523) pour obtenir des informations sur la réparation ou le retour.
7. L’utilisation d’accessoires non recommandés par le fabricant de cet appareil peut provoquer des blessures.
8. Cet appareil n’est pas conçu pour être utilisé en plein air.
9. Ne pas laisser le câble d'alimentation pendre au-dessus du bord d'une table ou d'un plan de travail, ni toucher
des surfaces chaudes.
10. Ne placez pas l'appareil sur ou près d’un foyer électrique ou à gaz chaud ni dans un four chaud.
11. Le déplacement d’un appareil contenant de l’huile chaude ou autre liquide chaud doit être fait avec extrême
prudence.
12. Pour débrancher l’appareil, placer tous ses boutons de contrôle en position d’arrêt, puis débranchez la prise de
l'alimentation.
13. N'utilisez pas l'appareil à des ns autres que celles prévues.

8
POUR UN USAGE DOMESTIQUE
UNIQUEMENT
CONSERVEZ CES INSTRUCTIONS
Cet appareil est conçu pour un USAGE DOMESTIQUE UNIQUEMENT.
Il ne contient aucune pièce réparable par l'utilisateur. Si un entretien s'avère nécessaire, pendant la période de
garantie, renvoyez votre gaufrier à All-Clad. Voir les informations sur la garantie pour plus de détails ; n'essayez pas
de le réparer vous-même.
AVERTISSEMENT : Pour éviter des blessures ou des dommages matériels causés par un incendie, débranchez
toujours cet appareil et les autres appareils lorsqu'ils ne sont pas utilisés.
ATTENTION: Pour assurer le maintien de la protection contre tout risque d’électrocution, vous devez seulement
vous brancher à des prises de courant à contact de mise à la terre. Suivez toujours les temps de
cuisson recommandés lorsque vous utilisez ce gaufrier électrique.
REMARQUE :Il est possible de détecter une légère fumée ou une légère odeur pendant la première utilisation de cet
appareil. Ce phénomène est normal et cela s’arrêtera après quelques utilisations.

9
FR
EXIGENCES ÉLECTRIQUES
L'appareil utilise un câble d'alimentation à 3 conducteurs avec mise à la terre et une che de raccordement de type
mise à la terre, qui est destinée à être reliée à la terre pendant l'utilisation.
Si la che ne s'adapte pas, contactez un électricien qualié. Ne tentez pas de modier la che de quelque manière
que ce soit.
• Un câble d’alimentation électrique court est fourni an de réduire les risques associés à l’enchevêtrement ou au
trébuchement causé par un câble plus long.
• Des rallonges sont disponibles et doivent être utilisées avec prudence.
• En cas d’utilisation d’un câble d’alimentation électrique amovible plus long ou d’une rallonge,
- les caractéristiques électriques nominales du câble électrique ou de la rallonge doivent être équivalentes ou
supérieures à celles de l’appareil;
- Le câble électrique doit être disposé de manière à ne pas traîner sur un comptoir ou une table, où un enfant
pourrait le tirer ou y trébucher involontairement;
- la rallonge doit être un câble de terre de type 3.
Votre appareil contient plusieurs matériaux qui peuvent être recyclés.
Consultez votre centre local de collecte des déchets pour connaître la procédure appropriée an de
disposer de votre appareil.
COMMENT DISPOSER DE SON APPAREIL

10
All-Clad Metalcrafters a créé la collection originale d’ustensiles de cuisine fabriqués d’après un processus breveté de
laminage de métaux qui élimine toute diusion inégale de la chaleur, une réalisation qui a mené à l’adoption de la
marque par plus de cuisines de restaurants quatre étoiles que toute autre marque. All-Clad demeure la seule gamme
complète d’ustensiles de cuisine fabriquée par une entreprise américaine utilisant des matériaux produits dans sa
propre usine. Depuis qu’ils existent, les produits All-Clad ont révolutionné l’art culinaire.
Riche de ses cinq collections d’ustensiles de cuisson professionnels fabriquées à partir d’une variété de métaux
laminés et polis, allant de l’aluminium de qualité supérieure à l’acier inoxydable en passant par le cuivre, All-Clad
allie conception professionnelle et rendement élevé pour tous les goûts et styles de cuisson.
L’expérience de cuisson All-Clad se prête maintenant à un éventail ciblé de petits appareils électroménagers, chacun
étant conçu sans compromis pour faire une diérence non négligeable sur le plan de l’utilisation et du rendement.
Les connaisseurs culinaires ont dorénavant une occasion en or : ajouter à leur arsenal culinaire les appareils
électroménagers d’All-Clad, la marque originale incontestée.
All-Clad Metalcrafters a pour principe la recherche et le développement continus et peut ainsi modier ses produits
sans préavis.
NOUS VOUS FÉLICITONS DE VOTRE ACHAT

11
C
BG
H*
B
A
DF E

12
Fig. 1 Fig. 2 Fig. 3
Fig. 5 Fig. 6 Fig. 7
Fig. 4
Fig. 8
beep
Fig. 11 Fig. 12
Fig. 9 Fig. 10

13
EN
A Cool-touch handle
B Release plates buttons
C Removable wae plates
D Power indicator
E Ready indicator
F Shade selector
G Batter tray
H Storage lock*
(is knob is for storage ONLY)
DESCRIPTION
BEFORE USE
ASSEMBLY/DISASSEMBLY
• Remove all packaging and stickers from your wae maker and wipe the housing and plates with a damp cloth
to remove any dust or residue remaining from manufacturing.
• We recommend seasoning the non-stick plates with cooking spray or oil before use. For best results it is
suggested to repeat this process at the start of each use
1. Open the lid of the wae maker.
2. To remove wae plates
a.Be sure plates are completely cool.
b.Press the upper plate release button (located on the right side of the lid) with one hand, while removing the
plate with the other hand. (Fig. 1)
c.Repeat the process with the lower plates (release button located on the right bottom housing).
3. To replace wae plates a. Insert the wae plate tabs into the unit and press down. You will hear the plates click
into place. (Fig. 2)

14
USING YOUR WAFFLE MAKER
CAUTION: Do not immerse the appliance, cord or plug in water or any other liquid.
• Do not run the wae maker under water or any other liquid.
• Before using, remove all packaging, stickers or accessories both inside and outside of the appliance.
• Remove the excess batter tray from the styrofoam packaging.
• Always use the wae maker on a at, dry, heat resistant surface.
• Ensure that your hands are dry when using this appliance.
• Do not place the appliance on or near slippery or hot surfaces, or allow the cord to dangle above a heat source.
1. Make sure the plates are in place and the Shade Selector is turned to the OFF position. Plug in the wae maker
(Fig. 3)
2. Turn on the heater and begin preheating by selecting the desired setting with the Shade Selector Knob (Setting 1
will results in the lightest wae; setting 6 the darkest). Pre-heat the wae maker in the closed position. (Fig. 4)
a.e red ON indicator will light to indicate that the wae maker is on and heating.
NOTE: e Removable Plates have a non-stick cooking surface that may emit a slight odor during rst use.
is is normal and commonly occurs with non-stick coatings.
3. Baking time is determined by browning level. Choose a setting on the shade selector. We recommend using
Setting 3 for golden brown waes. When the wae maker has reached the selected temperature and is ready to
bake, the green READY indicator will light up accompanied by a beep. (Fig. 5)
a.Lift the lid and add batter. (Fig. 6) en close the lid again to cook. Do not lock the safety catches on the sides
of the wae maker when cooking. (Fig. 7)
NOTE: ere will be some steam during cooking. is is normal and expected.
4. When your waes are ready, the green READY indicator will light up accompanied by a beep again.
a.Carefully remove your wae and enjoy.
b.If making more than one wae, once your rst wae is removed – repeat the baking process by adding more
batter (step 3a).

15
EN
CLEANING & MAINTENANCE
1. When you are nished cooking, turn the Shade Selector to O and unplug the power cord. Allow the unit to
cool down completely before handling.
2. Press the plate release buttons to remove plates from the housing. Be sure that the plates have cooled completely
before handling. a. We recommend cleaning the plates after every use. e plate should be washed in warm soapy
water or in a dishwasher. (Fig. 9) Failing to do so may negatively impact the non-stick coating performance.
Never use an abrasive cleanser or harsh pad on the non-stick coating.
3. To clean exterior:
- Polish using stainless steel cleaners approved for household cooking appliances.
- Follow the instructions for use on the polish; then rinse the outside of the wae maker with a sponge.
NOTE: Do not clean this product with aerosol sprays or the like.
DO NOT USE HARSH DETERGENTS OR SCOURING PADS ON THE EXTERIOR
OF THE WAFFLE MAKER AS THIS MAY DAMAGE THE POLISHED FINISH.
CAUTION: To avoid any risk of injury or accident, check the cord and wae maker prior to each use.
Do not use the wae maker if the cord and/or the appliance itself are damaged or are not operating correctly.
• Use the locks to store the wae maker in a vertical position or when moving the wae maker, make sure remove
the drip tray before storage. (Fig.10)
5. At the back of the wae maker there is a batter tray. (Fig. 9) is tray catches any excess batter.
We recommend emptying this tray when the wae maker is cold. Use oven mitts if the tray must be emptied
while the appliance is hot and in use
6. To turn o your wae maker at any time, turn the selector knob to the OFF position.

16
TIPS FOR BETTER COOKING RESULTS
• Each time the wae maker is used, wipe a small amount of cooking oil onto the wae plates, then wipe with
a soft cloth.
• Pour the batter with a ladle into each wae plates.
• e amount of batter should not go past the separation line between the two cooking plates (9).
• Increase or reduce the wae color to suit your taste, using the 6-position browning indicator.
• e green light, accompanied by a beep, is an indicator that the wae maker is ready to use.
• e green light goes out and lights up again regularly during cooking process, to show that the selected
temperature is maintained. Depending on the type of batter used, cooking cycle times will vary.
• Some steam will be produced during cooking cycles, this is normal and allows for a fuller wae. During the
cooking cycle, the top of the wae maker will drift upward, allowing the wae batter to fully expand into the
plate cavities. Do not impede this movement. e beep will sound again once the cooking cycle is complete. is
will let you know the waes are ready. Never lock the wae maker when in use.
• Cooking time depends on the kind of batter used and the wae browness desired.
• Cooking time typically takes 3 to 5 minutes.

17
EN
LIMITED TWO YEAR WARRANTY
: www.all-clad.com / www.all-clad.ca
With a strong commitment to the environment, All-Clad electrical products are repairable during and after the warranty period.
Before returning any defective products to the point of purchase, please call All-Clad consumer service directly at the phone
number below for repair options.
Your help to sustain the environment is appreciated!
e Warranty
is electrical product or product with batteries is guaranteed by All-Clad for a period of 2 years against any manufacturing
defect in materials or workmanship, starting from the initial date of purchase.
e manufacturer’s warranty by All-Clad is an extra benet which does not aect consumer’s Statutory Rights.
e All-Clad warranty covers all costs related to restoring the proven defective product so that it conforms to its original
specications, through the repair or replacement of any defective part and the necessary labor. At All-Clad’s choice, a
replacement product may be provided instead of repairing a defective product. All-Clad’s sole obligation and your exclusive
resolution under this warranty are limited to such repair or replacement.
Conditions & Exclusions
e All-Clad warranty only applies within the United States and Canada, and is valid only on presentation of a proof of
purchase.
For warranty service please contact All-Clad Consumer Service using the appropriate toll free number or website listed below.
A consumer service representative will personally assist you with the evaluation, repair or replacement of your product at the
closest All-Clad service center.
All-Clad shall not be obliged to repair or replace any product which is not accompanied by a valid proof of purchase.
is warranty will not cover any damage which occurs as a result of misuse, negligence, failure to follow All-Clad instructions,
use on current or voltage other than as stamped on the product, or a modication or unauthorized repair of the product. It also
does not cover normal tear and wear, maintenance or replacement of consumable parts, and the following:
- using the wrong type of water or consumable
- scaling (any de-scaling must be carried out according to the instructions for use);
- ingress of water, dust or insects into the product;
- mechanical damages, overloading
- damages or bad results due to wrong voltage or frequency

18
- accidents including re, ood, lightning, etc
- professional or commercial use
- damage to any glass or porcelain ware in the product
is warranty does not apply to any product that has been tampered with, or to damages incurred through improper use and
care, faulty packaging by the owner or mishandling by any carrier.
e All-Clad manufacturer’s warranty applies only for products purchased and used in USA & Canada. Where a product is
purchased in one country and then used in another one:
a) e All-Clad guarantee does not apply in case of non conformity of the purchased product with the local standards,
such as voltage, frequency, power plugs, or other local technical specications.
b) e repair process for products purchased outside the country of use may require a longer time if the product is not
locally sold by All-Clad.
c) In cases where the product is not repairable in the new country, the All-Clad guarantee is limited to a replacement
by a similar product or an alternative product at similar cost, where possible.
Consumer Statutory Rights
is All-Clad manufacturer’s warranty does not aect the statutory rights a consumer may have or those rights that cannot
be excluded or limited, nor rights against the retailer from which the consumer purchased the product. is warranty gives a
consumer specic legal rights, and the consumer may also have other legal rights which vary from State to State or Country to
Country or Province to Province. e consumer may assert any such rights at his sole discretion.
Additional information
Accessories, Consumables and end-user replaceable parts can be purchased, if locally available, as described in All-Clad internet
site.
U.S.A.
GROUPE SEB USA
2121 Eden Road
Millville, NJ 08332 CANADA
GROUPE SEB CANADA
36 Newmill Gate Unit 2
Toronto, ON
M1V 0E2
1-800-418-3325
800-255-2523
: www.all-clad.com / www.all-clad.ca

19
FR
A Poignée isolée
B Boutons de déverrouillage des plaques
C Plaques à gaufres amovibles
D Indicateur lumineux d’alimentation
E Indicateur « prêt à l’emploi »
F Sélecteur de brunissement
G Plateau à pâte
H Loquet de rangement * (ce bouton sert
UNIQUEMENT au rangement)
DESCRIPTION
AVANT L'UTILISATION
ASSEMBLAGE / DÉMONTAGE
• Retirez tous les emballages et autocollants de votre gaufrier et essuyez le boîtier et les plaques avec un chion
humide pour éliminer toute poussière ou résidu de fabrication.
• Nous recommandons d'assaisonner les plaques antiadhésives avec de l'aérosol de cuisson ou de l'huile avant
l’utilisation. Pour de meilleurs résultats, il est suggéré de répéter ce processus au début de chaque utilisation
1. Ouvrez le couvercle du gaufrier.
2. Pour retirer les plaques à gaufres.
a.Assurez-vous que les plaques sont complètement froides.
b.Appuyez sur le bouton de déverrouillage de la plaque supérieure (situé sur le côté droit du couvercle) d'une
main, tout en retirant la plaque de l'autre main. (Schéma 1)
c.Répétez le processus avec les plaques inférieures (bouton de déverrouillage situé sur le boîtier inférieur droit).
3. Pour remettre en place les plaques à gaufres a. Insérez les languettes de la plaque à gaufre dans l'appareil et
appuyez vers le bas. Vous entendrez les plaques s’enclencher en position. (Schéma 2)

20
UTILISATION DE VOTRE GAUFRIER
ATTENTION: N’immergez jamaisl'appareil, son câble d’alimentation ou sa prise dans de l'eau ni dans aucun
autre liquide.
• Ne faites pas fonctionner le gaufrier sous l'eau ou tout autre liquide.
• Avant l'utilisation, retirez tout l'emballage, les autocollants et les divers accessoires à l'intérieur et à l'extérieur
de l'appareil.
• Retirez le bac à pâte en excès de son emballage en polystyrène .
• Utilisez toujours le gaufrier sur une surface plane, sèche et résistante à la chaleur.
• Assurez-vous que vos mains sont sèches lorsque vous utilisez cet appareil.
• Ne placez pas l'appareil sur ou près de surfaces glissantes ou chaudes, et ne laissez pas le câble pendre au-dessus
d'une source de chaleur.
1. Assurez-vous que les plaques sont en place et que le sélecteur de brunissement est réglé en position d’arrêt (OFF).
Branchez le gaufrier (Schéma 3).
2. Mettez le gaufrier en marche et commencez le préchauage en sélectionnant le réglage souhaité avec le bouton
de sélection de brunissement (le réglage 1 donnera le brunissement la plus claire ; le réglage 6 la plus foncée).
Préchauez le gaufrier en position fermée. (Schéma 4)
a.L’indicateur rouge s'allumera pour indiquer que le gaufrier est en marche et chaue.
REMARQUE : Les plaques amovibles ont une surface de cuisson antiadhésive qui peut émettre une légère
odeur lors de la première utilisation. Ceci est normal et se produit généralement avec des revêtements
antiadhésifs.
3. Le temps de cuisson est déterminé par le niveau de brunissement. Choisissez un réglage sur le sélecteur de
brunissement. Nous vous recommandons d'utiliser le réglage 3 pour obtenir des gaufres d’une couleur brun doré.
Lorsque le gaufrier a atteint la température sélectionnée et est prêt à cuire, l’indicateur vert PRÊT À L’EMPLOI
(READY) s'allume en émettant un bip sonore. (Schéma 5)
a.Soulevez le couvercle et ajoutez la pâte. (Schéma 6) Refermer ensuite le couvercle pour cuire. Ne verrouillez
Table of contents
Languages:
Other all-clad Waffle Maker manuals
