SpeedAlert 18 Quick Start Guide p. 2
Step 3: Install the charged batteries
Follow these steps to install the charged batteries.
CAUTION: Use only the SHORT (3/8"-length) thumb screws to fasten the battery covers. Do NOT use the
longer (3/4"-length) thumb screws supplied for the Your Speed faceplate, as they are too long and can
cause damage to your sign.
A. Disconnect the battery from the charger.
B. Place the SpeedAlert face down on a flat surface and remove the mounting bracket and battery cover.
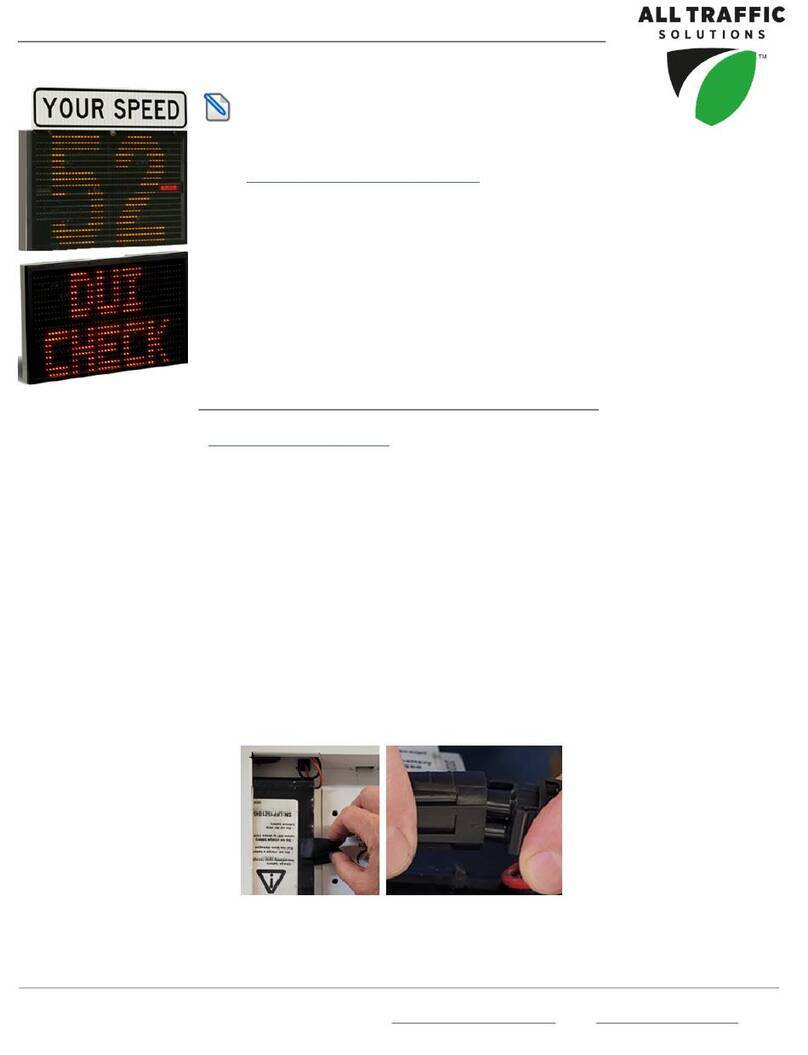
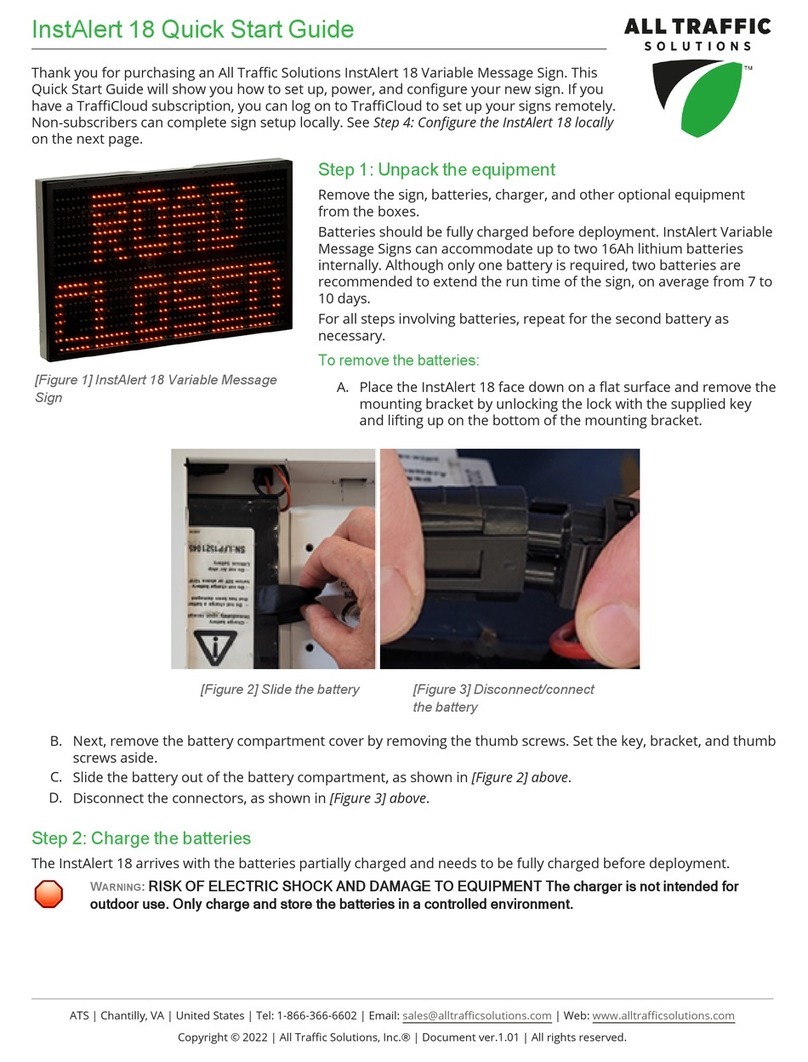
C. Connect the battery wiring harness to the connector inside the battery compartment, as shown in [Figure 3] on
the previous page.
D. Tuck the connector into the space in the top of the battery compartment.
E. Holding the connector in place, slide the battery into the compartment.
F. Replace the cover and fasten it down using the SHORT(3/8"-length) thumb screws.
Step 4: Configure the SpeedAlert 18 locally
If you have a TraffiCloud subscription, you should use this step only to power on your SpeedAlert, and instead
configure the sign online, setting the sign display options and assigning a Site. It's best to perform sign setup in
advance, so that your traffic data is captured in TraffiCloud immediately. See the Getting Started with TraffiCloud guide
for your sign.
If you don't have a TraffiCloud Web subscription or the TraffiCloud Mobile app for Android (over Bluetooth), you can
configure your sign using the Speed Limit and Display Mode buttons, and TraffiCloud Sign Manager for Windows,
connecting over the supplied USB A-to-mini B cable or over Bluetooth. The mini-B port is located above the buttons
inside the mounting channel for Shields, SpeedAlert 18s, and InstAlert 18s, and inside the back of the sign for the
SpeedAlert 24s and InstAlert 24s. For Bluetooth pairing, use code "ATS".
To configure the sign locally:
A. Turn the sign on by pressing the Power button on the back, inside the mounting channel.
The SpeedAlert will go through start-up and self-check sequences. Once the self-check is
complete, the sign is fully operational. A green LED on the top-left corner flashes every 10
seconds to indicate when the sign is powered on.
B. Set the speed limit by pressing the Speed Limit button until the desired value displays. The first
press displays the current speed limit.
C. Verify or set the display mode on the SpeedAlert. The default is Single Message Mode for
message-enabled signs.
D. To change the mode, press the Display Mode (or Display Settings) button until the desired
mode displays on the sign. For details about display modes, see the applicable figures and table
below for your sign.
NOTE: To reduce the risk of tampering, the buttons deactivate five minutes after you power on the sign.
To reactivate them, long press the Power button again.
SpeedAlert Display Modes
As mentioned, optionally you can use the sign's onboard buttons to configure a speed limit and other display
settings. Here are the available modes with the SpeedAlert:
ATS
|
Chantilly,
VA
|
United
States
|
Tel:
1-866-366-6602
|
Email:
[email protected] | Web: www.alltrafficsolutions.comCopyright © 2022 | All Traffic Solutions, Inc.® | Document ver.1.01 | All rights reserved.
