Allen Sports J1 User manual

1
For more information, visit Allen Care at www.allensportsusa.com
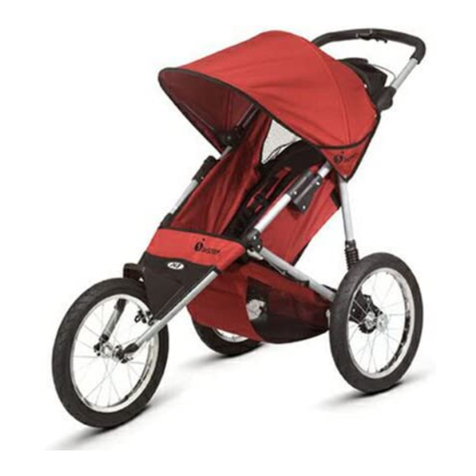
J1 JOGGER
USER MANUAL
PRODUCT REGISTRATION
Make sure to register your purchase at allensportsusa.com
to qualify for product warranty and to receive important product notications.

2
J1 JOGGER USER MANUAL
Please keep this User Manual for future reference.
PRIOR TO ASSEMBLY
Please read this Owner’s Manual completely before assembling or operating this product.
This product should be assembled by an adult.

3
For more information, visit Allen Care at www.allensportsusa.com
J1 JOGGER USER MANUAL
CONTENTS
1. Important Safety Information 4
2. Parts List 6
3. Key Features 6
4. Assembly Instructions 7
4.1 Frame Assembly 7
4.2 Rear Wheels 7
4.3 Front Wheel 8
4.4 Handbrake 8
4.5 Adjustable Handlebar 9
4.6 Parking Brake 9
4.7 Wrist Strap 9
4.8 Seat Belt 10
4.9 Reclining 10
4.10 Folding 10
5. Maintenance 11
6. Warranty 11
SECTION PAGE

4
IMPORTANT
Read and follow these instructions and safety rules before operating your jogger, for the safety of your child.
WARNING
• Do not use your jogger if any part is damaged or missing.
• Never leave child unattended.
• Avoid serious injury from falling or sliding out. Always use safety restraint harness (crotch strap, waist belt and shoulder
harness).
• Never hang items from handlebar, as it may result in tip over or loss of control.
• Do not skate with your jogger.
• Maximum load for seatback storage pockets is 4 lbs. Maximum weight for storage basket is 6 lbs.
• Do not use with children weighing more than 50 lbs/25 kg, or greater than 42 inches in height.
• It is recommended that a child be at least 6 months old before using for jogging. Check with your doctor, as child
development differs.
• The jogger may become unstable if any of the manufacturer’s recommended weight loads are exceeded.
• Take care to avoid injury to ngers when unfolding and folding frame. Keep child away from jogger when preparing the
jogger for use, making adjustments, or folding for transport or storage.
• Check that all folding elements are secure and operating correctly before each use.
• Inate tires to 30-50 PSI. Always use a hand or foot pump to inate tires.
CAUTION
• Follow all manufacturer’s instructions.
• Engage brakes whenever you park the jogger.
• Do not leave children unattended.
• Do not carry extra children or shopping bags on this jogger.
• Make sure children are clear of any moving parts when adjusting the jogger.
1. IMPORTANT SAFETY INFORMATION

5
For more information, visit Allen Care at www.allensportsusa.com
SAFETY GUIDELINES
Think Safety First! Enjoy your jogger, but remember to follow a few guidelines to make your experience a safer one.
• WRIST STRAP: Wear the wrist strap at all times when operating your jogger. This is a safety line that connects you to your
child.
• PARK BRAKE: This feature allows you to lock your jogger in place while loading and unloading. Even though the
brake is very reliable, do not depend on these brakes to secure and protect your child. DO NOT LEAVE YOUR CHILD
UNATTENDED!
• ALL TERRAIN: Your jogger is balanced and stable enough for general-purpose usage. It can be used at home on rough
gravel roads, grass and sand.
• IN-LINE SKATES: DO NOT USE YOUR JOGGER WITH IN-LINE OR OTHER TYPE OF SKATES. To do so will increase the
chance of falling and injuring your child dramatically.
• OWNERS’ MANUAL: The information in the Owners’ Manual is valuable. Retain for future reference.
• HELMETS: It is recommended to let your child wear a bicycle helmet. Your pediatrician can give you guidance in selecting
the right helmet for your child.
• NIGHT USE: Operating the jogger at night can be dangerous. Your jogger is not recommended for nighttime usage. If you
need to use it at night, please install light equipments and reective materials to improve the visibility of the jogger.
• ROUTINE CARE: To prevent deterioration of fabric and rubber components, do not store your jogger outdoors. The seat
can be hand washed in cold water. Allow fabric to air dry on frame. Check tires for proper pressure and make sure all
fasteners are tight. DO NOT MACHINE WASH OR DRY.
• WEIGHT LIMIT: Maximum user weight capacity of your jogger is 50 lbs/25 kgs, or 42 inches in height. DO NOT EXCEED
THIS LOAD LIMIT.
• SEAT BELT: Always make sure to fasten the seat belt during operation. This is a very important safety feature that should
always be used.
• BASKET: The basket is provided as a convenience for small necessities. Cargo items placed in basket or pouch may
affect the balance of the jogger. DO NOT OVERLOAD THE BASKET AND THE SEAT POUCH. Please keep in mind that
maximum weight for basket contents is 6 Lbs/3 Kgs.
ALWAYS PAY ATTENTION:
• Purses, shopping bags, parcels and accessory items may change the balance of the jogger and cause hazardous, unstable
conditions.
• Maximum weight to be carried in the basket is 6 lbs/ 3 kgs. Excessive weight may cause unstable, hazardous conditions.
• Be certain the jogger is completely latched before allowing the children to ride.
• A passenger who weighs more than 50 lbs/25 kgs or 42 inches in height will cause excessive wear and stress on the
jogger and may cause tipping.
• Do not use the jogger on stairways or escalators.
• Never allow your jogger to be played as a toy.
• Periodically, check your jogger for loose screws, worn parts, torn material or stitching.
• Repair or replace the worn parts as needed.
• If the jogger malfunctions or become damaged, discontinue using it.

6
2. PARTS LIST 3. KEY FEATURES
• (1) Front tire
• (2) Rear tires
• (1) Jogger strap
• Quick Assembly, take down and storage
• Lightweight aluminum jogger with durable Quick-Release
16 inch wheels
• Safely and comfortably transports 1 child (up to 50 lb
max payload). Minimum age: 6 months.
• Rear suspension smooths out the bumps in the road
• Raised rear axle for running comfort
• Five-point safety harness and a reclining seat
• Easy trigger folding and push button release rear wheels
Meets ASTM F1975 Norm for Cycle Trailers
Meets ASTM F833 Norm for Carriages and Joggers
Certied by Mechanicals and Hardgoods Lab. SGS Taiwan Ltd.
127, Wu Kung Road, Wuku Industrial Zone, Taipei County, Taiwan
TW-24803 – Taipei
Registration number: TAF1053
Please read all instructions and examine contents carefully before assembly.

7
For more information, visit Allen Care at www.allensportsusa.com
4. ASSEMBLY INSTRUCTIONS
4.1 FRAME ASSEMBLY
Open carton and remove contents. Position the jogger frame as shown, with foam grip and sun canopy on the top and rear
axle assembly on the ground (Fig. 1). Unfold the frame by lifting the handle, and allowing the rear axle to move down to the
ground (Fig. 2). When unfolded, the locking mechanism on each side of the frame (Fig. 3) will close with an audible click.
Take off the fabric from the tube (Fig. 4). Make sure the locking mechanisms are fully closed before continuing assembly.
4.2 REAR WHEELS
Lift the rear of the frame, then push
and hold the button in the wheel
center to allow you to insert the wheel
axle into the hole in the frame (Fig. 5).
Push the wheel all the way in to lock in
place. After completing this operation,
tug on the wheel to make certain it is
properly locked in place. To remove the
rear wheel, push and hold the button in
the center of the wheel (Fig. 6) and pull
the wheel out.
Figure 1
Figure 3
Figure 5
Figure 2
Figure 4
Figure 6

8
4.3 FRONT WHEEL
IMPORTANT: Seek qualied instruction on use of the Quick-Release lever.
The jogger is equipped with a Quick-Release front wheel. Wheel installation is quick and simple. Place the jogger so the
rear wheels and handlebar are touching the oor. The front axle has a at area on it (Fig. 7) that you must align with the
slots in the front fork. After aligning the front wheel in the fork slots, align the safety washers so the hook-shaped tip ts
in the hole in the fork end; and then slide the wheel all the way into the front fork. When you set the wheel in its position,
and the Quick-Release lever in the “Open” position, tighten the nger nut on the axle until it is nearly touching to the fork.
Move the lever into the “Closed” position (Fig. 8). You should feel signicant resistance when closing the lever. If you do not
feel enough resistance, open the lever and tighten the nger nut a bit more and close the lever again. Continue to do this
operation until the movement of the lever results in tension on the lever when closing, and the wheel is tight. When you
complete the wheel installation process, attempt to pull wheel out. If wheel fails to be stable, tighten the nger nut further
and repeat the test.
4.4 HANDBRAKE
The Jogger kit includes a hand-operated V-brake caliper for use while walking or jogging. To connect the brake, simply
squeeze the brake caliper together, while pulling the curved metal tube cable housing, and insert the cable ferrule into the
metal bracket on the opposing brake arm. This xes the brake caliper and allows your brake to function properly.
Figure 7
Figure 9 Figure 10
Figure 8
CAUTION: You cannot tighten the Quick-Release lever by merely twisting. You can only ensure it is locked by properly
tightening the nger nut and then ipping the Quick-Release lever from “Open” to “Closed”.
WARNING: Failure to properly install and adjust wheels with Quick-Release levers could allow wheel to come off during use.
This could lead to serious injury.
CAUTION: Test the hand brake before each use to make sure that it slows down the jogger. If brake fails to stop jogger
properly, visit your local bicycle deal for adjustment service.

9
For more information, visit Allen Care at www.allensportsusa.com
4.5 ADJUSTABLE HANDLEBAR
The handlebar of the jogger can be positioned easily. To set
the perfect position for you, press the buttons on each side
of the handle (Fig. 11) and raise or lower to the position as
desired.
4.6 PARKING BRAKE
The parking brake consists of a pedal that engages a slotted hub, which is afxed to the rear wheels (Fig. 12, Fig. 13). This
brake blocks the movement ability of the jogger completely. To apply, press the pedal with your foot until the pedal engages
with a slot on the hub. Always use both wheel brakes when parking jogger. To release the brake, lift the brake pedal with
your foot.
NOTE: Never leave child unattended.
4.7 WRIST STRAP
IMPORTANT: Every Allen Sports Jogger comes with a strong, nylon
wrist safety strap. Please make sure to attach this to the main handle
bars when installing your jogger. Wear the wrist strap at all times
when operating your stroller. This is a safety line that connects you
to your child.
Installation of the strap is simple and easy. Simply wrap the strap
over the handle bars and slip one end through the looped end to
securely link the strap to the jogger. The slide your wrist into the
looped end as shown here in Figure 14. If you slip or lose grip of the
handle bars, the wrist strap will ensure that you stay connected to
the jogger. The wrist strap is meant as a safety measure and is not
intended for use of pulling or dragging the jogger or for usage in
stopping or slowing the jogger.
Figure 11
Figure 13Figure 12
Figure 14

10
4.8 RECLINING
Your jogger includes a reclining seat to allow your child to sleep more comfortably. To recline, lift to release the red latch on
the rear of the seat, and allow the seat to recline back. To return to the upright position, lift seat back to close the red latch.
CAUTION: When fully reclined, the jogger may tip over more easily.
4.9 FOLDING
Your jogger can be easily folded for transport. First, set the seat to the upright position. Next, lift the plastic triggers on both
sides of the handle (Fig. 18) and push down the handle. Be careful not to pinch your ngers. For a more compact fold, remove
wheels as described above.
Figure 18
Figure 19
4.7 SEAT BELT
To Close & Adjust Waist Belt: Slide forked male portion of the buckle into the female portion until it snaps securely. Pull the
ends of the seat belt until snug around your child’s waist.
Figure 15 Figure 16 Figure 17
To Adjust Shoulder Harness: Slide buckle up or down to suit the shoulder height of your child. The shoulder straps should
be tted snugly around the child’s torso. They can be adjusted by pulling the loose end of the strapping through the plastic
buckle.
To Release: Press the red button in the center of the buckle with your nger, releasing both sides of the buckle.

11
For more information, visit Allen Care at www.allensportsusa.com
5. MAINTENANCE
6. WARRANTY
Before each ride, check the jogger for signs of wear or damage. Inate tires to correct pressure as stated on tire sidewall,
and check for wear and tear before each ride. Use of hand pump recommended to avoid over-ination. Check nuts and
bolts for tightness, and make sure Quick-Release pins for wheels and frame are secured. The jogger fabric can be cleaned
with mild soap and water, and allowed to air dry. The fabric is not machine washable.
R. A. ALLEN CO., INC. - 36 Maplewood Ave., Portsmouth, NH 03801, USA
Product designed in USA, Made in Ningbo, China
www.allensportsusa.com
Visit www.allensportsusa.com for full warranty details.
If your product requires warranty service, please do not return it to a retail store.
Please contact:
ALLEN SPORTS USA
CUSTOMERSERVICE@ALLENRACKS.COM
(800) 722-5536
Please note that all returns and exchanges are subject to the return policy
of the retailer where the product was originally purchased.
LEARN MORE
For more information, including instructional videos and online manuals,
visit ALLEN CARE at www.allensportsusa.com
Table of contents
