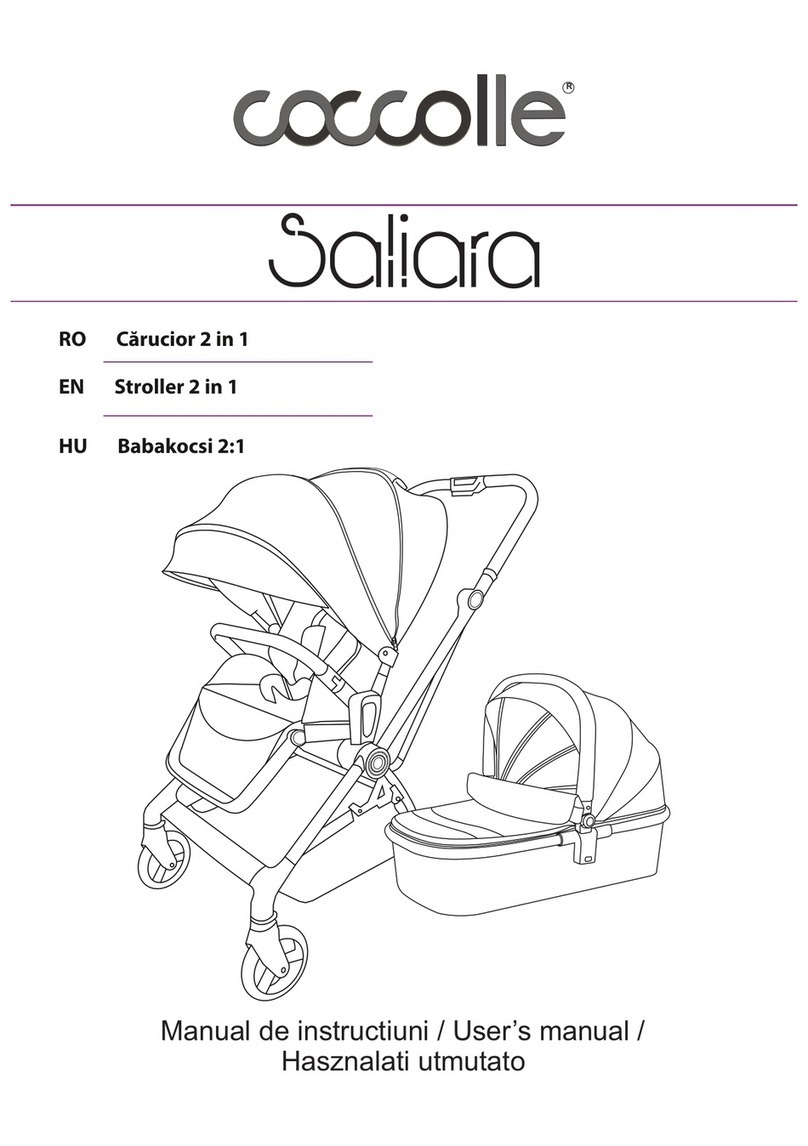
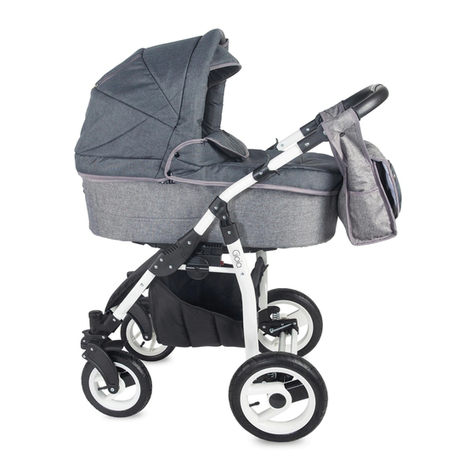
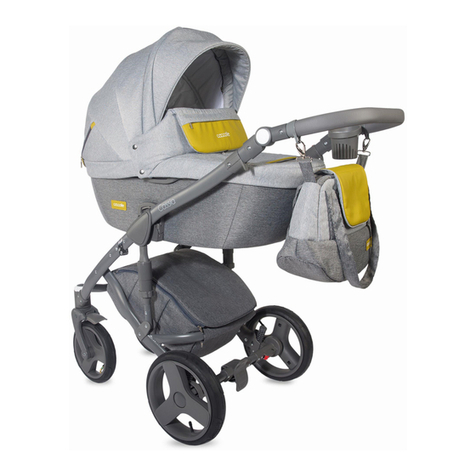
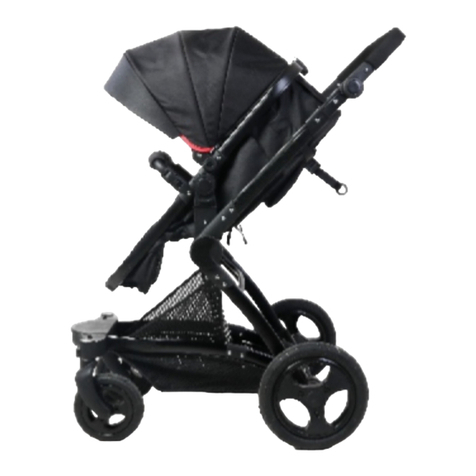
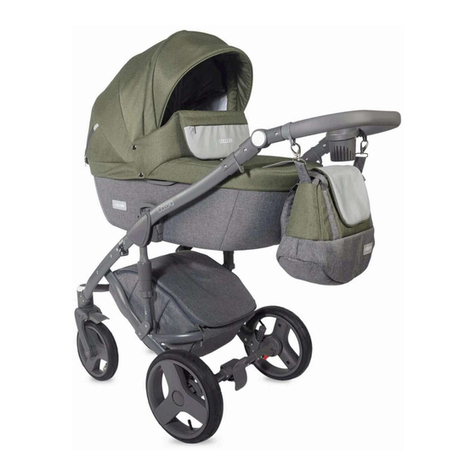
Coccolle Siyana User manual

RO Cărucior 3 in 1
EN Stroller 3 in 1
Manual de instructiuni / User’s manual /
Hasznalati utmutato
R
HU Babakocsi 3:1

A.
B.
C.
D.
E.
F.
G.
H.
I.
Carlig de pliere
Folding hook

Buton Buton
Buton
Buton
Buton Centura Centura
Buton
Button Button
Button Button
Button
Button Belt Belt

Buton
Frana
Buton
Button
Button
Brake

Buton
Buton
Buton
Buton Clema de
prindere
RO: imaginile din acest manual au scop ilustrativ. Produsul achizitionat
de dvs poate sa difere. / Functionarea in parametri normali a acestui
produs depinde de mentinerea acestuia in conditii de igiena propice.
EN: the images shown in this instructions manual have illustrative
purpose. The product purchased by you may look different. / The proper
functioning of this product is strictly dependent on its well maintenance.
HU: Az útmutatóban bemutatott képek szemléletes célt szolgálnak. Az Ön
által megvásárolt termék eltérő lehet. / A termék helyese müködéséhez
kötelezö hogy a tisztitási és karbantartási utasitást is betartsa.
Button
Button Button
Button
Safety hook

RO
A) copertina
Dupa cum este ilustrat in fig2, atasati fiecare roata pe axul corespunzator din
fata pana auziti sunetul click.
E) buton ajustare pozitie de inclinare
C) landou transformabil
D) centura de siguranta cu prindere in 5 puncte
F) cos de cumparaturi
G) roti spate cu frana
H )roti fata cu suspensii
I) roti pivotante cu functie de blocare
B) maner de impins ajustabil
Instructiuni de asamblare
Deplierea caruciorului
-Scoateti caruciorul din cutie dupa cum este ilustrat in fig1
-indepartati siguranta de pliere, prindeti manerul si ridicati de el pana se aude
sunetul click, dupa cum se vede in fig 1b si 1c
Instalarea rotilor din fata
Instalarea rotilor din spate
Dupa cum este ilustrat in fig3, inserati roata in axul din spate pana auziti sunetul
click,apoi asigurati-va ca roata este fixata corect.
Asa cum este ilustrat in fig4, inserati capetele barii de protectie in locasul aflat
pe unitate transformabila si apasati pana auziti sunetul click.
Instalarea landoului transformabil
Landoul este preasamblat. Introduceti-l in adaptor asa cum este ilustrat in fig 5a
si 5b.
Ajustarea sezutului
Instalarea barii de protectie
Pozitia sezutului poate fi reglata cu ajutorul butoanelor aflate pe cadru. Inchideti
catarama hamului din spate asa cum este ilustrat in fig 6a. Inchideti catarama
hamului in ambele parti ale landoului transformabil asa cum este ilustrat in fig
6b. Apasati butoanele laterale si ajustati landoul transformabil asa cum este
ilustrat in fig6c.
Sezut reversibil
Pentru a inversa pozitia unitatii transformabile scoateti-o de pe cadru prin
apasarea celor doua butoane laterale, schimbati directia si fixati-o inapoi in
conectori dupa cum este ilustrat in fig 7 a,b,c,d.
Ajustarea inaltimii manerului
Dupa cum este ilustrat in fig 9a,b,c,d,e, copertina poate fi deschisa sau inchisa
prin tragerea sau impingerea muchiei in fata sau in spate.
Tineti apasat simultan ambele butoane aflate pe marginea manerului pentru a
regla inaltimea manerului dupa cum este ilustrat in fig 8a si 8 b.
Copertina

RO
Rotile din spate – apasati butonul de pe roata cu o mana asa cum este ilustrat in
fig15, si indepartati-o folosind cealalta mana
Folositi piciorul pentru a ridica frana si a elibera sistemul de franare si apasati in
jos pentru a actiona mecanismul de franare dupa cum este ilustrat in fig 10b.
- pentru a deschide incuietoarea centurii tineti apasat pe butonul de pe
catarama si scoateti centurile laterale.
- dupa cum este ilustrat in fig 11i , centura de siguranta trebuie folosita
intotdeauna la copiii cu varstele cuprinse intre 6 si 36 de luni.
Centura de siguranta
Daca butonul de blocare pivot este ridicat atunci rotile din fata se vor roti. Daca
butonul de blocare pivot este actionat atunci rotile din fata vor fi blocate in
directia fata, asa cum este ilustrat in fig 10a.
-Centura se prinde in 5 puncte. Centurile laterale se insereaza in catarama, in
timp ce centurile de umeri se prind cu ajutorul unei cleme.
Rotile din fata pivotante
Instructiuni de pliere
- indepartati unitatea transformabila de pe cadru dupa cum este ilustrat in fig
12a
-cand copilul deja poate sta in sezut de unul singur, centura de siguratanta
poate fi instalata conform ilustratiilor din fig 11 f.g,h
-deschideti al doilea blocaj dupa cum este ilustrat in fig 12b
- dupa cum este ilustrat in fig 12 c, glisati butoanele laterale in directia sus si
apasati manerul in jos simultan
- actionati frana rotilor din spate si blocati functia pivotare a rotilor din fata
Dezasamblarea caruciorului
Bara de protectie – apasati butoanele laterale si scoateti bara asa cum este
ilustrat in fig13
Rotile din fata – apasati butonul de pe roata cu o mana asa cum este ilustrat in
fig 14, si scoateti roata folosind cealalta mana
ATENTIE
-centura de siguranta poate fi indepartata in perioada de la 0 la 6 luni astfel incat
sa puteti folosi unitatea transformabila in pozitie de landou pentru nou nascuti -
fig.11e.
- inainte de fiecare utilizare,verificati cu atentie caruciorul
- nu agatati si nu puneti o greutate mare pe produs in timpul manevrarii
caruciorului deoarece poate distorsiona centrul de greutate al produsului,
existand riscul de a se rasturna in timpul folosirii.
-inainte de utilizare asigurati-va ca toate dispozitivele de blocare sunt fixe
Folosirea franei de la rotile din spate
- dupa cum este ilustrat in fig 12d si 12 e puneti siguranta de pliere pentru a
pastra caruciorul in modul compact.
-caruciorul este proiectat pentru copiii cu varstele cuprinse intre 0 si 36 de luni
(0-6 luni folosind unitatea transformabile in pozitie de landou) iar capacitatea
maxina este de 15 kg (9 kg pentru pozitia de landou)
Cum sa indepartati:
- nu lasati copilul nesupravegheat in carucior

RO
-folositi produsul doar pe suprafete netede
-stergeti partile de metal si plastic ale caruciorului cu o carpa umeda, nu folositi
substante chimice dure sa curatati caruciorul
-curatati usor tesatura cu detergent neutru si apa rece. Lasati-o sa se usuce la
aer, cel mai recomandat detergent este cel lichid
- Deteriorările cauzate de nerespectarea condiţiilor de întreţinere de exemplu:
coroziune, modificarea culorii materialului textil sau a elementelor din plastic ca
urmare a expunerii îndelungate la soare, deteriorarea elementelor din plastic
sau a componetelor textile ca urmare a expunerii
- Deteriorările cauzate de reparaţii efectuate de către persoane neautorizate.
- Deteriorări şi murdăriri cauzate de ambalarea necorespunzătoare a produsului
pe timpul trimiterii
-pentru a curata tesatura, folositi o laveta moale si detergent neutru
3. Produsul trimis in service pentru reparatie trebuie sa fie expediat curat.
- produsul nu este potrivit a alerga cu el sa a face patinaj
-cand stationati caruciorul folositi intotdeauna frana
- Deteriorările apărute din vina utilizatorului.
instrucţiunile de utilizare, precum şi pe elementele produsului.
-intotdeauna verificati caruciorul sa nu aiba suruburi slabite, parti deteriorate sau
filamente stricate
-tineti produsul la o distanta considerabile de foc si de surse deschise de
caldura
- este interzis sa depozitati obiecte ce depasesc greutatea de 2 kg in cosul de
cumparaturi
Ingrijire si mentenanta
-nu folositi inalbitor, tamponati sau curatati uscat tesatura caruciorului
-in timpul asamblarii sau dezasamblarii, urmariti cu atentie pasii din manualul de
instructiuni
Conditii de pastrare a garantiei
1. Garanţia nu acoperă:
- Deteriorările apărute din cauza nerespectării recomandărilor, avertizărilor şi
restricţiilor incluse în
- Uzura normală a pieselor de schimb, cum ar fi: anvelope, camere de aer,
banda de rulare, materialele utilizate pe mânere, structura şi culoarea ţesăturilor
şi materialelor expuse la frecare, bucşele din roţi, axe, elementele imprimate.
îndelungate la soare sau la temperaturile ridicate, jocuri, zgomote cum ar fi
scârţâit/ piuit, deteriorările mecanismelor din cauza murdăriei.
- Devierea verticală a roţilor sub sarcină (aceasta este o caracteristică normală
pentru acest tip de construcţie).
acestuia prin serviciul de curierat.
2. Modul de reparaţie va fi stabilit de către producător/firma care realizează
rezolvarea solicitărilor privind garanția.
4. Garanţia pentru bunuri de consum vândute nu exclude şi nu suspendă
drepturile cumpărătorului rezultând din lipsa de conformitate a bunurilor de uz
îndelungat.

EN
Seat Reversal
G. Rear wheel with lock
H. Front wheels with suspension
Unfold the Baby Stroller
Install the Front Wheels
Install the Bumper Rail or Handrail
The position of the seat can be adjusted with the help of buttons present on the
stroller. Buckle the belt at the back, as shown in Fig. 6a Buckle the belt on both
sides of the carry cot as shown in Fig. 6b Press the side buttons and adjust the
carry cot as shown in Fig. 6c
The carry cot comes pre-assembled. Plug it on to the adapters as shown in Fig
5a and 5b.
As shown in Fig. 2, attach each wheel to the front wheel axle till a "click" sound
is heard.
As shown in Fig. 3, insert the rear wheels into the rear wheel axle till a "click"
sound is heard and ensure the rear wheels are locked and cannot be pulled out.
Install the Rear wheel
Press the buttons on both sides of the handle to adjust handle height as shown
in Fig. 8a and 8b.
- Unfold the folding hook, pull the handlebar and gradually push to open the
stroller until a "click" sound is heard as shown in Fig. 1 b and 1c
- Take the stroller out of the package as shown in Fig. 1 a
Seat Adjustment
I. Swivel wheels with locking function
As shown in Fig. 4, insert the rail into the body of unit and press down till
a"click"sound is heard.
Carry Cot Installation
Assembly Instructions:
To reverse the seat just disconnect the carry cot from the frame by pressing
down the two side buttons, change its direction and fix it onto the connectors
again as shown in Fig. 7a, 7b, 7c and 7d.
Handle Height Adjustment
A. Canopy
C. Reversible & removable carry cot
B. Adjustable handle
D. 5 Point safety harness
E. Reclining Positions
F. Storage basket

EN
- The safety harness can be removed while the baby is between the ages of 0 to
6 months and generally lies in the carry cot as shown in Fig 11e
As shown in Fig. 9a, 9b, 9c, 9d and 9e the canopy can be folded or unfolded by
pushing or pulling its front edge backward or forward.
Using the Rear Wheel Brakes
- Bumper Rail or Handrail - Press down the side buttons and remove the rail as
shown in Fig.13
- The belt comes in three parts. Simply insert the male parts on the shoulder and
side belts into the female part of the crotch belt and press slightly to lock as
shown in Fig. 11a,11 b,1 1 c & 11d
- Brake the rear wheels and stop the swiveling of the front wheels by drawing
the clip
- Remove the carrycot from the stroller as shown in Fig. 12a
- As shown in the Fig. 12 d and 12 e, put the folding hook in place to keep it
compact
- As shown in the Fig. 12c, slide rings and press down the handle at the same
time
How to Remove:
Folding Instructions
Front Swivel Wheel
If the fixed clip is raised, the front wheels will swivel. If the fixed clips are pushed
down, the front wheels can't swivel around the front pipe as shown in Fig. 10a.
Use your feet to lift the brake pole upward to release the brakes, and push it
downward to apply the brakes as shown in Fig. 10b.
Safety Harness
- To disengage the lock, press the button on the belt and then pull apart
- When the child learns to sit up, the safety harness can be installed as shown in
Fig 11f,11g,11 h
Canopy
Dismantling the Stroller :
- Unlock the second lock as shown in Fig.12b
- As shown in Fig 11i, the safety harness should always be used for children
aged between 6 to 36 months
- Front Wheels - Press the button on the wheels with one hand, as shown in
Fig.14, and remove the front wheels with the other hand
- Rear Wheels - Press the button on the wheels with one hand, as shown in
Fig.15, and remove the rear wheels with the other hand

EN
- Inspect the stroller properly every time before placing your baby in it
Warning
- Do not hang or place anything so heavy on the handle that the stroller
becomes prone to tipping over backwards
- Never leave your baby unattended in the stroller
- Before use make sure all the locking devices are inspected and secure
- The stroller is designed for babies between 0 to 36 months (0 to 6 months
while using as carry cot) and maximum carrying capacity is 15 kg (9 kg while
using as carry cot)
- Objects in the net basket should not weigh more than 2 kg
- The product is not suitable for running or skating
- Always use the brake when the stroller is in stationary mode
- Keep the product away from fire
- Always use the product on smooth and even surface
Maintenance
- For cleaning the fabric, remove the screw and take it out of the stroller
- Wipe the fabric lightly with natural soap and cold water. Let it air dry Babyhug
liquid laundry detergent is best recommended
- Do not bleach, press or dry clean the fabric of the stroller
Warranty conditions
- Keep checking the stroller for loose screws, damaged parts or broken threads
1. The warranty does not cover:
2. The repair method is determined by the manufacturer/warranty service
provider.
- Damage occurred for reasons attributable to the user.
- Wipe the metal and plastic parts of the stroller with a wet cloth. Do not use
harsh chemicals for cleaning
- While dismantling or assembling the stroller, follow the instructions on the user
manual carefully
- Damage occurred as a result of failure to use the product according to
recommendations, warnings and restrictions found in the user manual and on
product elements.
- Consumables subject to natural wear and tear during normal usage such as:
tyres, inner tubes, tread, materials used on handles, structure and colour of
fabrics and materials subject to friction, sleeves in wheels, axels, prints.
- Damage occurred due to repairs being carried out by unauthorised personnel.
- Damage and soiling occurred due to the product being incorrectly packaged for
shipping (courier online purchases).
4. The consumer goods warranty does not exclude or suspend the purchaser's
rights stemming from goods noncompliance with the agreement.
- Damage occurred as a result of failure to observe maintenance guidelines
such as: corrosion, changed upholstery or plastic elements colour as a result of
prolonged exposure to sunlight, damage to plastic elements of upholstery as a
result of prolonged exposure to sunlight or excessive temperatures, excessive
play, squeaking / creaking noises, damage to mechanism due to over-load.
- Single wheels being pushed into a vertical position as a result of loading (this
is normal).
3. The product subject to a complaint should be provided clean.

HU
Amint azt a 9a., B., C., D., E. Kép mutatja, a kupola kinyitható vagy
összecsukható a széle előre vagy hátra huzásával.
A beállításhoz tartsa egyszerre lenyomva a tolokaron oldalsó részén található
gombokat és hozza a tolokart a kivánt pozicióban (8 a.b képek).
A kupola használása:
Az átalakitható ülést lehet hordozni két pozicióban a vázon: a menetirányal
megegyezve vagy a menetirányal elentétesen. Ahoz hogy a kivánt pozicióban
tegye a mozeskosarat, nyomja meg egyidejűleg az oldalsó gombokat, majd
emelje a mozeskosarat, tegye a kivánt pozicióban és illessze be a vázon
található megfelelő résekben ( 7a.b.c.d képek).
A 4. kép szerint helyezze be az átalakitható ülés végeit a megfelelő résekben a
vázon és majd nyomja be ameddig a klik hang halható. Ezt az alkatrészet
könnyen lehet átalakitani mozeskosárbol sport ülésre. Ahoz hogy ezt megtegye
nyissa ki vagy csukja össze az öveket amelyek az ülés rész hátán találhatoak.
Átalakitható mozeskosára beállítása és használata:
A tolokar magassága beállítása:
Coccolle Siyana 3 az 1-ben multifunkcios babakocsi
D) 5 pontos biztonsági öv
E) hátra döntési pozició beállító gomb
A 2. képben látható módon ilessze be mind két kereket a megfelelő első
tengelyhez ameddig a klik hang halható.
A) kupola
A hátsó kerekek felszerelése
A 3. kép szerint helyezze be a kereket a hátsó tengelybe, ameddig a klik hang
halható, majd ellenőrizze hogy a kerék megfelelően van-e rögzítve.
C) átalakítható mozeskosár
Az első kerekek felszerelése
B) állítható tolókar
Használati utmutató
Alkatrész lista
I) bolygósitható első kerekek
Felszerelési lépések
G) hátsó kerekek fékkel
- Nyissa ki az összecsukási bíiztosító ézközt, fogja meg a tolokartól és emelje
fel, amíg a klik hang halható és az 1b és 1c kép szerint kinyilt a babakocsi.
F) vásárlókosár
A babakocsi kinyitása
- Vegye ki a babakocsit a csomogolásábol az 1. kép szerint
H) első kerek felfügesztéssi funkció beállitási pont

HU
- a 12d. és 12e. képen látható módon tegye be az összecsukási zárt a
babakocsi ahoz hogy az összecsukott babakocsi ne nyilhasson ki szállitás alatt.
Lábbal emelje a féket, ahoz hogy fékezetlen tudja tolni a babakocsit, majd
nyomja le a féket amikor szünete vesz a tolástol a 10b. kép szerint.
-A biztonsági öv 5 pontos rőgzitéssel müködik.
-amikor a gyermek már egyedül ülhet, a biztonsági övet is lehet a 11. kép f.g, h
képek szerint megfelelően rőgziteni.
A fék használása
- az övzár kinyitásához nyomja meg és tartsa lenyomva a központi gombot a
csaton és távolítsa el az oldalsó öveket.
- amint az a 11i. képen látható, a biztonsági övet mindig kell használni a 6 és 36
hónap közötti gyermekek számára.
Összecsukási utasítások:
- nyomja meg a hátsó kerekeken található féket és zárja le az első kerékek
bolygósitható funkcióját.
-a biztonsági öv 0 és 6 hónap közötti időszakban eltávolítható úgy, hogy az
átalakítható mozeskosarat mozeskosár formában lesz használva újszülöttek
számára -11e. kép.
Az első kerekek fölött egy gomb található. Ha ez a gomb felemelve van akkor a
kerekek bolygósithatoak. Viszont ha lenyomva van a gomb akkor az első
kerekek blokkolva vannak előre pozicióban (10a kép).
A biztonsági öv használása:
- távolítsa el az átalakitható ülést a vázrol a 12a. kép szerint.
Bolygósitható első kerekek:
- nyissa ki a második zárat a 12b. kép szerint
- a 12. c kép szerint csúsztassa az oldalsó gombokat felfelé és nyomja meg a
vázat lefele.
Lökhárító - nyomja meg az oldalsó gombokat és távolítsa el az alkatrészt a 13
kép szerint.
Hátsó kerekek - nyomja meg a kerék egyik gombját az egyik kezével a 15. kép
szerint, és a másik kezével távolítsa el a kereket.
Figyelmeztetések!
- Minden használat előtt ellenőrizze a babakocsi álapotát.
- Soha ne hagyja gyerekét felügyelet nélkül a babakocsiban.
- a babakocsi használata közben ne tegyen nagy súlyt a termékre mert az
egyensúly pontot elvesziti és balesetet okozhat (ha például a tolokarra akaszt
valami nehezet akkor a babakocsi hátra eshet).
-használat előtt ellenőrizze, hogy minden rőgiztö eszköz blokkolva legyen
Első kerekek - nyomja meg a kerék egyik gombját az egyik kezével a 14. kép
szerint, és a másik kezével távolítsa el a kereket.
Hogyan lehet eltávolítani:
A kocsi szétszerelése:

HU
- Illetéktelen személyek által végzett javításokból adódó sérülések.
-nedves törlövel törölje át a babakocsi fém- és műanyag alkatrészeit, ne
használjon maró anyagokat és vegyszerek a babakocsi tisztításához.
- Felhasználó hibájából keletkezett sérülések,
3. A reklamált terméket tiszta állapotban kell átadni javitásra.
Garancia feltételek
- tartsa a terméket jelentős távolságban a tűztől és a nyílt hőforrásoktól
2. A gyartó/szakszerviz javitó cég dönthet a javitási módszerben.
- a babakocsit 0 és 36 hónapos gyerekek számára lett tervezve és 15 kg
maximális súly teherbirása van. Mozeskosár formában csak 6 honapos korig és
9 kg súly eléréseig lehet használni.
- a termék nem alkalmas korcsolyázni
- enyhén tisztítsa meg a textil részeket semleges tisztítószerrel és hideg vízzel.
Száritsa levegön.
1. A garancia nem terjed ki az alábbiakra:
- Üzemeltetés során természetes módon elhasználódó alkatrészek, mint pl.:
gumik, tömlők, gumiprofilok, fogantyúkon használt anyagok, dörzsölésnek kitett
textil részeken és változtatások a műanyagok struktúrájában és színében,
perselyek a kerekekben, tengelyek, feliratok.
-felszerelés, összecsukás, kinyitás vagy szétszerelés közben gondosan
kövesse a kézikönyvben bemutatot lépéseket.
- a textil részek tisztításához használjon puha törlöt és semleges tisztítószert.
- ne használjon fehérítőt, ne vasalya és ne tisztítsa szárazon a babakocsi textil
alkatrészeit.
- A használati útmutatóban és a termék alkatrészein szereplő ajánlások,
figyelmeztetések és korlátozások be nem tartása következtében keletkezett
sérülések,
- a terméket csak sima felületeken használja
-ellenőrizze minding a babakocsi álapotat, hogy nincsenek-e laza csavarok,
sérült alkatrészek vagy törött szálak.
- tilos a 2 kg súlyt meghaladó tárgyakat a vásárlokosárban tárolni
Tisztitás és karbantartás
- A tulságos terhelés egy helytelen használás mint pl. a tolás csak egy részen
levö kerekeken, a huzás lépcsöken vagy mozgó lépcsöken stb.
-a babakocsi parkolásákor mindig használja a féket
- A termék futárpostával való szállításának idejére nem megfelelő
becsomagolásából adódó sérülések és szennyeződések.
4. Az értékesített fogyasztói cikkre nyújtott garancia nem zárja ki és nem
függeszti fel a vevő a szerződésnek nem megfelelő termékből adódó jogait.
- Karbantartási feltételek be nem tartásából adódó sérülések, pl.: korrózió, textil
és műanyag alkatrészek elszíneződése a napsütés miatt vagy magas
hőmérséklet miatt, holtjátékok, szokatlan hangok mint nyikorgás/csikorgás,
mechanizmusok sérülése a szennyeződések következtében.

Foto/ Photo A

Foto/Photo B
Foto/Photo C
Fig. 1-20. Ajustari/ Adjustments/ Beállítások


Fig.21-25. Selectarea locului in autovehicul si ajustarea scaunului/
Seat selection and adjustment/ Az autoules valasztasa es
hordozo bealitasa
Fig. 26-30. Instalarea in vehicul/ Installation in vehicle/
A biztonsági gyermekülés rögzítése a gépjárműb

Fig.31-35. Asigurarea copilului in scaun/ Securing the child/
A biztonsági gyermekülés rögzítése a gépjárműbe

Fig.36 Indepartarea si inlocuirea husei exterioare/ Removing
and replacing the cover/ Az üléshuzat eltávolítása
HU: Az útmutatóban bemutatott képek szemléletes célt szolgálnak. Az Ön
által megvásárolt termék eltérő lehet. / A termék helyese müködéséhez
kötelezö hogy a tisztitási és karbantartási utasitást is betartsa.
EN: the images shown in this instructions manual have illustrative
purpose. The product purchased by you may look different. / The proper
functioning of this product is strictly dependent on its well maintenance.
RO: imaginile din acest manual au scop ilustrativ. Produsul achizitionat
de dvs poate sa difere. / Functionarea in parametri normali a acestui
produs depinde de mentinerea acestuia in conditii de igiena propice.
Table of contents
Languages:
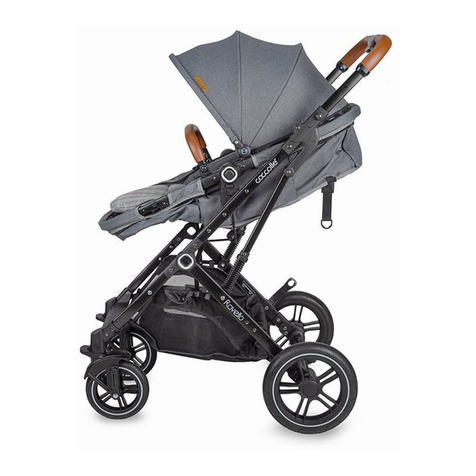
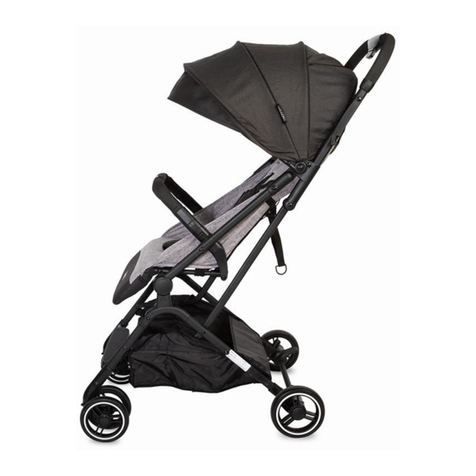
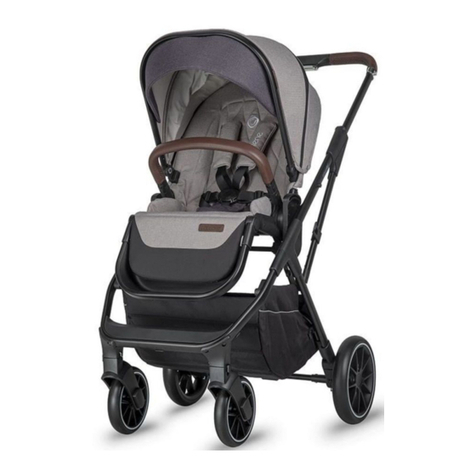
Other Coccolle Stroller manuals

Coccolle
Coccolle primo User manual

Coccolle
Coccolle Lissia User manual

Coccolle
Coccolle Saliara User manual

Coccolle
Coccolle gire plus User manual

Coccolle
Coccolle Amani User manual

Coccolle
Coccolle Arona User manual

Coccolle
Coccolle Oppa User manual

Coccolle
Coccolle Cassia User manual

Coccolle
Coccolle Gioia User manual

Coccolle
Coccolle Alla User manual

Coccolle
Coccolle Perla User manual

Coccolle
Coccolle Beyla User manual

Coccolle
Coccolle Selena User manual

Coccolle
Coccolle Monara User manual

Coccolle
Coccolle Juno User manual

Coccolle
Coccolle Vispo User manual

Coccolle
Coccolle Ravello User manual

Coccolle
Coccolle Silene User manual

Coccolle
Coccolle Oro User manual

Coccolle
Coccolle Lemira User manual