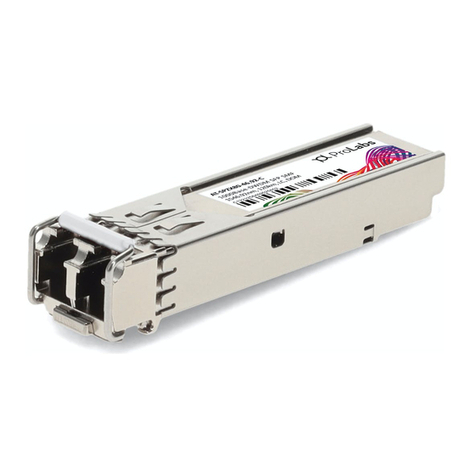
Allied Telesis AT-B15/SX User manual

AT-B15/SX
AT-B15/LX
AT-B17
Expansion
Modules
For the AT-8324SX Fast Ethernet
Switch
Quick Install Guide
PN 613-50113-00 Rev A

Copyright 2000 Allied Telesyn International, Corp.
960 Stewart Drive Suite B, Sunnyvale CA 9 086 USA
All rights reserved. No part of this publication may be reproduced without prior
written permission from Allied Telesyn International, Corp.
Ethernet is a registered trademark of Xerox Corporation. All other product names,
company names, logos or other designations mentioned herein are trademarks or
registered trademarks of their respective owners.
Allied Telesyn International, Corp. reserves the right to make changes in specifications
and other information contained in this document without prior written notice. The
information provided herein is subject to change without notice. In no event shall
Allied Telesyn International, Corp. be liable for any incidental, special, indirect, or
consequential damages whatsoever, including but not limited to lost profits, arising out
of or related to this manual or the information contained herein, even if Allied Telesyn
International Corp. has been advised of, known, or should have known, the possibility of
such damages.

iii
Electrical Safety and Emission Statement
Standards: This product meets the following standards.
RFI Emission EN55022 Class A (CISPR 22) ! 1
EN60555-2 (1995) Class A
EN60555-3
WARNING: In a domestic environment this product may cause radio interference in
which case the user may be required to take adequate measures. ! 2
Immunity IEC 1000- -2 ( kV CD, 8 kV AD) !3
IEC 1000- -3 (1995) (3 V/m)
IEC 1000- - (1995) (1.0 kV - (power line);
0.5 kV - (signal line))
IEC 1000- -6 (1995) (3 Vrms)
EN50082-1 (1992)
EN61000- -2 (1995)
EN61000- - (1995)
Important: Appendix A contains translated safety statements for installing this
equipment. When you see the !, go to Appendix A for the translated safety statement in
your language.
Wichtig: Anhang A enthält übersetzte Sicherheitshinweise für die Installation dieses
Geräts. Wenn Sie ! sehen, schlagen Sie in Anhang A den übersetzten
Sicherheitshinweis in Ihrer Sprache nach.
Vigtigt: Tillæg A indeholder oversatte sikkerhedsadvarsler, der vedrører installation af
dette udstyr. Når De ser symbolet !, skal De slå op i tillæg A og finde de oversatte
sikkerhedsadvarsler i Deres eget sprog.
Belangrijk: Appendix A bevat vertaalde veiligheidsopmerkingen voor het installeren van
deze apparatuur. Wanneer u de ! ziet, raadpleeg Appendix A voor vertaalde
veiligheidsinstructies in uw taal.
Important: L'annexe A contient les instructions de sécurité relatives à l'installation de cet
équipement. Lorsque vous voyez le symbole !, reportez-vous à l'annexe A pour consulter
la traduction de ces instructions dans votre langue.
Tärkeää: Liite A sisältää tämän laitteen asentamiseen liittyvät käännetyt turvaohjeet.
Kun näe !-symbolin, katso käännettyä turvaohjetta liitteestä A.
Importante: l’Appendice A contiene avvisi di sicurezza tradotti per l’installazione di
questa apparecchiatura. Il simbolo !, indica di consultare l’Appendice A per l’avviso di
sicurezza nella propria lingua.
U.S. Federal Communications Commission
RADIATED ENERGY
Note: This equipment has been tested and found to comply with the limits for a Class A
digital device pursuant to Part 15 of FCC Rules. These limits are designed to provide
reasonable protection against harmful interference when the equipment is operated in
a commercial environment. This equipment generates, uses, and can radiate radio
frequency energy and, if not installed and used in accordance with this instruction
manual, may cause harmful interference to radio communications. Operation of this
equipment in a residential area is likely to cause harmful interference in which case
the user will be required to correct the interference at his own expense.
Note: Modifications or changes not expressly approved of by the manufacturer or the
FCC, can void your right to operate this equipment.
Industry Canada
This Class A digital apparatus meets all requirements of the Canadian Interference-
Causing Equipment Regulations.
Cet appareil numérique de la classe A respecte toutes les exigences du Règlement sur
le matériel brouilleur du Canada.
iv
Viktig: Tillegg A inneholder oversatt sikkerhetsinformasjon for installering av dette
utstyret. Når du ser !, åpner du til Tillegg A for å finne den oversatte
sikkerhetsinformasjonen på ønsket språk.
Importante: O Anexo A contém advertências de segurança traduzidas para instalar este
equipamento. Quando vir o símbolo !, leia a advertência de segurança traduzida no seu
idioma no Anexo A.
Importante: El Apéndice A contiene mensajes de seguridad traducidos para la
instalación de este equipo. Cuando vea el símbolo !, vaya al Apéndice A para ver el
mensaje de seguridad traducido a su idioma.
bs! Bilaga A innehåller översatta säkerhetsmeddelanden avseende installationen av
denna utrustning. När du ser !, skall du gå till Bilaga A för att läsa det översatta
säkerhetsmeddelandet på ditt språk.

v
Electrical Safety and Emission Statement ..............................................iii
Table of Contents ........................................................................................... v
Welcome to Allied Telesyn ......................................................................... vii
Where to Find Web-based Guides....................................................................vii
Document Conventions..................................................................................... vii
Contacting Allied Telesyn ...............................................................................viii
Online Support .........................................................................................viii
For Technical Support and Services........................................................viii
Technical Support E-mail Addresses ......................................................viii
Returning Products............................................................................................ ix
FTP Server ......................................................................................................... ix
For Sales or Corporate Information................................................................... x
Tell Us What You Think..................................................................................... x
verview .......................................................................................................... 1
Installing the Expansion Module....................................................................... 2
Verifying the Package Contents ................................................................. 2
Reviewing Safety Guidelines ...................................................................... 3
Reviewing Connectivity Guidelines............................................................
Handling the Module................................................................................... 5
Installing the Module.................................................................................. 5
LEDs.................................................................................................................... 8
Troubleshooting .................................................................................................. 8
Warranty Registration ....................................................................................... 8
Technical Specifications ..................................................................................... 9
Appendix A
Translated Safety and Emission Information ....................................... 11
Appendix B
Technical Support Fax rder ................................................................... 23
Incident Summary............................................................................................ 23
Appendix C
AT-B15 and AT-B17 Quick Install Guide Feedback ............................. 25
Table of Contents


vii
This guide contains instructions on how to install an AT-B15/SX, AT-B15/LX,
or AT-B17 expansion module in an AT-832 SX Fast Ethernet Switch.
Where to Find Web-based Guides
The Allied Telesyn web site at www.alliedtelesyn.com provides you with an
easy way to access the most recent documentation and technical information
for all of our products. All web-based documents relating to this product and
other Allied Telesyn products can be downloaded from the web site in pdf
format.
Document Conventions
This guide uses several conventions that you should become familiar with first
before you begin to install the product.
Note
A note provides additional information.
Caution
A caution indicates that performing or omitting a specific action may
result in equipment damage or loss of data.
Warning
A warning indicates that performing or omitting a specific action
may result in bodily injury.
Welcome to Allied Telesyn

viii
Contacting Allied Telesyn
There are several ways to contact Allied Telesyn technical support: online,
telephone, fax and e-mail.
Online Support
You can request technical support online by filling out the Tech-Assistant
Form at www.alliedtelesyn.com/support.htm.
For Technical Support and Services
Technical Support E-mail Addresses
United States and Canada
TS1@alliedtelesyn.com
Latin America, Mexico, Puerto Rico, Caribbean, and Virgin Islands
latin_america@alliedtelesyn.com
United Kingdom, Sweden, Norway, Denmark, and Finland
support_europe@alliedtelesyn.com
Americas
United States, Canada, Mexico,
Central America, South America
Tel: 1 (800) 428-4835, option 4
Fax: 1 (503) 639-3176
Germany
Germany, Switzerland, Austria, Eastern
Europe
Tel: (+ 9) 0130/83-56-66
Fax: (+ 9) 30- 35-900-115
Asia
Singapore, Taiwan, Thailand, Malaysia,
Indonesia, Korea, Philippines, China,
India, Hong Kong
Tel: (+65) 381-5612
Fax: (+65) 383-3830
Italy
Italy, Spain, Portugal, Greece, Turkey,
Israel
Tel: (+39) 02- 160 7
Fax: (+39) 02- 19282
Australia
Tel: 1 (800) 000-880
Fax: (+61) 2-9 38- 966
Japan
Tel: (+81) 3-3 3-56 0
Fax: (+81) 3-3 3-2 3
France
France, Belgium, Luxembourg,
The Netherlands, Middle East, Africa
Tel: (+33) 0-1-60-92-15-25
Fax: (+33) 0-1-69-28-37- 9
United Kingdom
United Kingdom, Denmark, Norway,
Sweden, Finland
Tel: (+00 ) 1235- 2500
Fax: (+ ) 1-235- 2680

AT-B15 and AT-B17 Quick Install Guide
ix
Returning Products
Products for return or repair must first be assigned a Return Materials
Authorization (RMA) number. A product sent to Allied Telesyn without a
RMA number will be returned to the sender at the sender’s expense.
To obtain an RMA number, contact Allied Telesyn’s Technical Support at one
of the following locations:
FTP Server
If you know the name of a specific driver that you need for an Allied Telesyn
device, you can download the software by connecting directly to our FTP
server at ftp://gateway.centre.com.
At login, enter ‘anonymous’. Enter your e-mail address for the password as
requested by the server at login.
North America
2205 Ringwood Ave
San Jose, CA 95131
Tel: 1-800- 28- 835, option
Fax: 1-503-639-3716
European Customer Support Centre
10/11 Bridgemead Close
Westmead Industrial Estate
Swindon, Wiltshire SN5 7YT
England
Tel: + -1793-501 01
Fax: + -1793- 31099
Latin America, the Caribbean,
Virgin Islands
Tel: international code + 25- 81-3852
Fax: international code + 25- 83-9 58
Mexico and Puerto Rico
Tel: 1-800- 2 -5012, ext 3852 or
1-800- 2 - 28 , ext 3852
Mexico only: 95-800- 2 -5012, ext 3852
Fax: international code + 25- 89-9191

x
For Sales or Corporate Information
Tell Us What You Think
If you have any comments or suggestions on how we might improve this or
other Allied Telesyn documents, please fill out the “AT-B15 and AT-B17 Quick
Install Guide Feedback” on page 25 and return the form to us at the address
or fax number provided. You can also provide feedback online by filling out the
Feedback on Documentation form at www.alliedtelesyn.com/forms/
feedbackman.htm.
Allied Telesyn International, Corp.
19800 North Creek Parkway, Suite 200
Bothell, WA 98011
Tel: 1 ( 25) 87-8880
Fax: 1 ( 25) 89-9191
Allied Telesyn International, Corp.
960 Stewart Drive, Suite B
Sunnyvale, CA 9 086
Tel: 1 (800) 2 - 28 (USA and Canada)
Fax: 1 ( 08) 736-0100

1
Overview
The AT-B15/SX, AT-B15/LX, and AT-B17/SM are optional expansion modules
for the AT-832 SX Fast Ethernet Switch. These expansion modules can be
used to extend your network to remote sites, build a Fast Ethernet or Gigabit
Ethernet backbone, or connect additional nodes to the network, such as high-
speed servers.
Table 1 lists the basic specifications of the modules.
Caution
The expansion modules are designed for the AT-832 SX Fast Ethernet
Switch only. Do not install these modules in any other Allied Telesyn
device.
Table 1 Expansion Modules
Model Number and Type of Ports Maximum Distance1
1. The maximum distance can be less depending on the type of fiber optic cabling used with the port
and the duplex mode of the end node.
AT-B15/SX One 1000BASE-SX port 550 m (1805 ft)
AT-B15/LX One 1000BASE-LX port 5 km (3 mi)
AT-B17 Two 100BASE-FX ports 2 km (1.24 mi)

2
Figure 1 through Figure 3 illustrate the expansion modules.
Figure 1 AT-B15/SX Expansion Module
Figure 2 AT-B15/LX Expansion Module
Figure 3 AT-B17 Expansion Module
Installing the Expansion Module
The following sections contain the instructions on how to install an expansion
module in the switch.
Verifying the Package Contents
Check to be sure that your module package contains the following items. If
any of the items are missing or damaged, contact your Allied Telesyn
representative.
"One AT-B15/SX, AT-B15/LX, or AT-B17 Expansion Module
"Warranty Card
"This Quick Install Guide

AT-B15 and AT-B17 Quick Install Guide
3
Reviewing Safety Guidelines
Please review the following safety guidelines before you begin to install the
expansion module in the switch.
Warning
Class 1 laser product. !
Warning
Do not stare into the laser beam. !5
Warning
Electric Shock Hazard: To prevent electric shock, do not remove the
cover. There are no user-serviceable parts inside. The unit contains
hazardous voltages and should only be opened by a trained and
qualified technician. !6
Warning
Lightning Danger: Do not work on this equipment or cables during
periods of lightning activity. !7
Warning
Power cord is used as a disconnection device: To de-energize
equipment, disconnect the power cord. !8
Warning
Electrical-Type Class 1 Equipment: This equipment must be
earthed. The power plug must be connected to a properly wired earth
ground socket outlet. An improperly wired socket outlet could place
hazardous voltages on accessible metal parts. !9
Caution
Pluggable Equipment: The socket outlet should be installed near the
equipment and should be easily accessible. !10
Caution
Air vents: The air vents must not be blocked on the unit and must have
free access to the room ambient air for cooling. !11
Caution
perating Temperature: This product is designed for a maximum
ambient temperature of 50°C. !12
Caution
All Countries: Install this product in accordance with local and
National Electric Codes. !13

4
Reviewing Connectivity Guidelines
The AT-B15/SX has one 1000BASE-SX fiber optic port with an SC connector.
This module operates at 1Gbps and supports auto-negotiation for duplex mode
(half- or full-duplex) and flow control. Refer to Table 2 for the cabling
specifications for this module.
The AT-B15/LX has one 1000BASE-LX fiber optic port with an SC connector.
This module operates at 1Gbps and supports auto-negotiation for duplex mode
(half- or full-duplex) and flow control. Refer to Table 3 for the cabling
specifications for this module.
The AT-B17 expansion module has two 100BASE-FX ports with SC
connectors. For cabling specifications for this module, refer to the AT-8324SX
Fast Ethernet Switch Installation Guide.
Table 2 Cabling Specifications for the AT-B15/SX Expansion Module
Cable Fiber Bandwidth Minimum to Maximum
Cable Length
62.5/125 micron multi-
mode fiber
160 MHz/km 2-220 m (7-722 ft)
200MHz/km 2-275 m (7-902 ft)
50/125 micron multi-
mode fiber
400MHz/km 2-500 m (7-1641 ft)
500 MHz/km 2-550 m (7-1805 ft)
Table 3 Cabling Specifications for the AT-B15/LX Expansion Module
Cable Fiber Bandwidth Minimum to Maximum
Cable Length
62.5/125 micron multi-
mode fiber
500 MHz/km 2-550 m (7-1805 ft)
50/125 micron multi-
mode fiber
400MHz/km 2-550 m (7-1805 ft)
500 MHz/km 2-550 m (7-1805 ft)
9/125 micron single-
mode fiber
N/A 2-5 km (7-16,404 ft)

AT-B15 and AT-B17 Quick Install Guide
5
Handling the Module
Caution
The expansion module can easily be damaged by electrostatic discharge.
To prevent electrostatic damage, observe the following guidelines:
"Wear an anti-static wristband connected to a suitable earth ground
whenever handling the module.
"Do not remove the module from its packaging until you are ready to
install it.
"Do not touch any of the module’s pins, connectors or components.
"Hold the module only by its edges or front panel.
"Store or transport this module only in appropriate anti-static
packaging.
Installing the Module
To install the expansion module, perform the following procedure:
1. Power off the switch by disconnecting the AC power cord from the switch.
If a redundant power unit (RPU) is present, disconnect its DC cable
connection to the switch.
Caution
The switch must be powered off before installing or replacing any
module. Installing a module with the switch powered on can damage the
module.
2. Using a flathead screwdriver, remove the faceplate from either the lower
right (slot A) or the lower left (slot B) expansion slot, as shown in Figure .
Allied Telesyn recommends installing the module in the lower right
expansion slot (slot A) and reserving the lower left slot for the optional
AT-STACK1 Stacking Module.
Caution
Do not install the expansion module in the upper expansion slot (slot
MGMT). This slot is reserved for the optional AT-BMGMT Management
Module.

6
Figure 4 Removing a Faceplate
Note
Keep the original faceplate for future use. If you should remove the
module, replace the faceplate to prevent dust and debris from entering
the unit and to maintain proper air flow.
Caution
Be sure to wear an anti-static wristband while performing the next step.
The AT-STACK1 module can be damaged by electrostatic discharge.

AT-B15 and AT-B17 Quick Install Guide
7
3. Insert the new module into the switch. Holding the new module with the
text on the front panel upright, carefully slide the module into the switch
slot, ensuring that the edge connector is fully engaged. Once the new
module is installed, check to be sure the front panel of the module is flush
against the switch.
Figure 5 Installing the Expansion Module
. Using a flathead screwdriver, secure the new module to the switch by
tightening the attached screws.
5. Connect the fiber optic cable(s) to the port(s) on the newly installed
module.
6. Power on the switch by reconnecting the previously removed power sources
to the switch. The switch’s front-panel LEDs should indicate their status
of the new connection. Check the LED indicators for the fiber ports to
ensure that they are operating properly. Refer to the table of LEDs in this
guide for a description of the LED indications. If the module does not
respond, see "Troubleshooting" below.
More details concerning connection options and network applications can be
found in the AT-8324SX Fast Ethernet Switch Installation Guide, which is
available from the Allied Telesyn web site.

8
LEDs
The front panel of the switch has several LEDs that report the status of the
port(s) on the expansion module. Table defines the LEDs.
Troubleshooting
If you experience any problems with the module, check the following items
before contacting Allied Telesyn Technical Support:
"Ensure the switch with the module is powered up.
"Ensure that the device attached to the module is powered up and
operating correctly.
"Ensure that the module is properly seated in the slot.
"Verify that the module port is configured to match the communication
mode used by the attached device.
"Check the connectors on both ends of the cable to be sure they are
properly engaged. When attaching fiber cable to an SC-type port, be
sure the plug clicks into place to ensure that it is properly seated.
"If you are using fiber optic cable with an ST-type connector (in
conjunction with an SC-ST converter), try switching the TX and RX
connectors. Also, be sure the fiber terminators are clean. Dirty fiber
terminators on fiber optic cables will impair the quality of the light
transmitted through the cable.
Warranty Registration
When you are finished installing the module, register your product by
completing the enclosed warranty card and sending it in, or by visiting our
web site at www.alliedtelesyn.com/forms/warranty.htm and completing
the on-line registration form.
Table 4 Expansion Module LEDs
LED Condition Status
STATUS On A module is installed in the slot.
ACT Flashing Traffic is passing through the port.

AT-B15 and AT-B17 Quick Install Guide
9
Technical Specifications
Table 5 lists the technical specifications for the expansion modules.
Table 5 Technical Specifications
Ports
AT-B15/SX One 1000BASE-SX with SC connector
AT-B15/LX One 1000BASE-LX with SC connector
AT-B17 Two 100BASE-FX with SC connectors
Cable Type
AT-B15/SX 50/125 or 62.5/125 micron multimode fiber
AT-B15/LX 50/125 or 62.5/125 micron multimode fiber
AT-B17 50/125 or 62.5/125 micron multimode or 9/125
micron single-mode fiber
Switching Method Store-and-forward
Filtering/Forwarding Full line speed
Queue Buffer
AT-B15/SX 2 Mbytes
AT-B15/LX 2 Mbytes
AT-B17 128K bytes per port
Power Consumption
AT-B15/SX 2.4W maximum
AT-B15/LX 2.4W maximum
AT-B17 10.6W maximum
Temperature Operating: 32° to 122° F (0° to 50° C)
Storage: -4° to 158° F (-20° to 70° C)
Operating Humidity 5% to 95% (non-condensing)

10
Compliances
CE Mark
EN55022 (CISPR22) Class A
VCCI Class A
C-Tick
Standards
AT-B15/SX IEEE 802.3z, ISO/IEC 8802-3
AT-B15/LX IEEE 802.3z, ISO/IEC 8802-3
AT-B17 IEEE 802.3, IEEE 802.3u, ISO/IEC 8802-3
Certification
Emissions FCC Class A, VCCI Class A, CISPR Class A
Immunity IEC 1000-4-2/3/4/6
CE Mark
Table 5 Technical Specifications
This manual suits for next models
2
Table of contents
Other Allied Telesis Computer Hardware manuals

Allied Telesis
Allied Telesis AT-2814FX User manual

Allied Telesis
Allied Telesis AT-2500TX User manual

Allied Telesis
Allied Telesis AT-SPZX80 User manual

Allied Telesis
Allied Telesis AT-2874SX User manual

Allied Telesis
Allied Telesis AT-A15/SX User manual

Allied Telesis
Allied Telesis AT-AR020 PRI E1/T1 Application guide

Allied Telesis
Allied Telesis CAM User manual

Allied Telesis
Allied Telesis AT-A45/SC-SM15 User manual

Allied Telesis
Allied Telesis AT-2812FX User manual

Allied Telesis
Allied Telesis AT-CV5M0 Series User manual