Allmatic B.RO MINI 1CH User manual

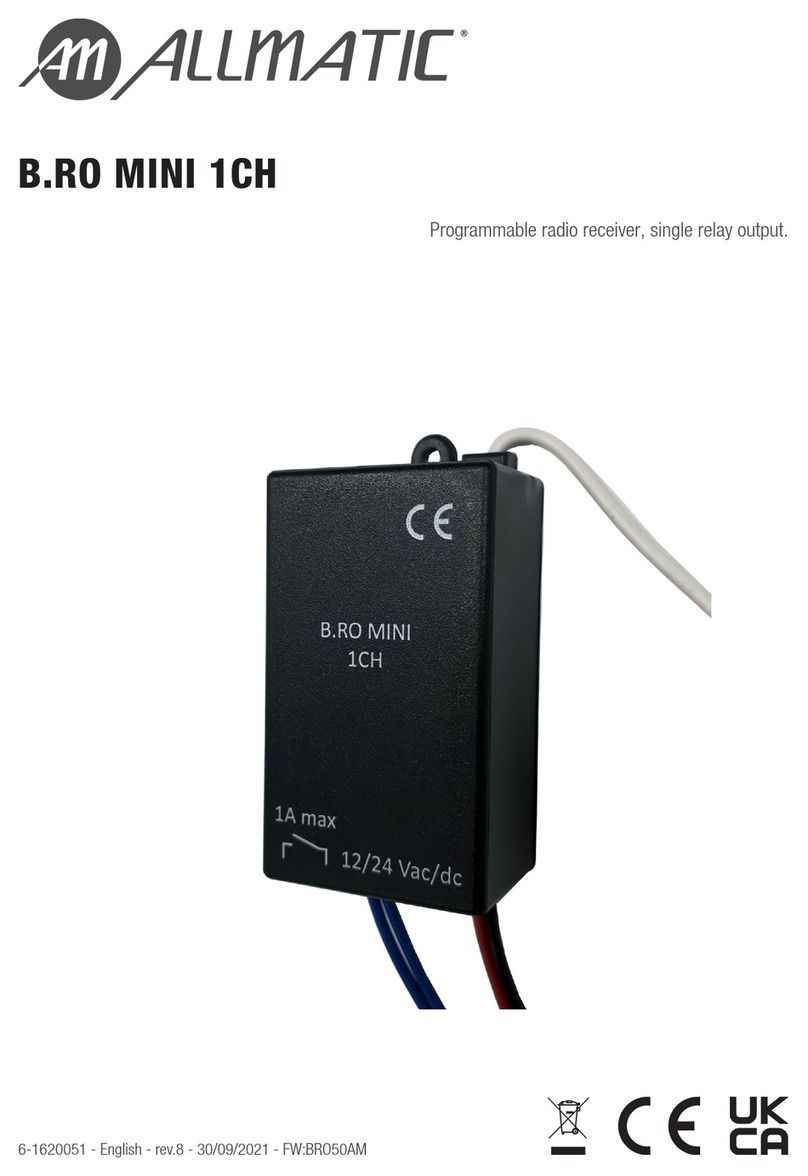
B.RO MINI 1CH
Ricevitore radio programmabile, a singola uscita relé.
6-1620051 - Italiano - rev.8 - 30/09/2021 - FW:BRO50AM

2- Italiano 6-1620051 - rev.8 - 30/09/2021
INDICE
1. AVVERTENZE GENERALI SULLA SICUREZZA 3
2. DESCRIZIONE E CARATTERISTICHE TECNICHE 3
3. PRIMA INSTALLAZIONE 4
4. APPRENDIMENTO DI UN TRASMETTITORE 4
5. PROGRAMMAZIONE USCITA RELÉ 5
6. APPRENDIMENTO DI UN NUOVO TRASMETTITORE TRAMITE UNO GIÀ APPRESO 6
7. CANCELLAZIONE DI UN SINGOLO TRASMETTITORE APPRESO 6
8. RESET TOTALE DEL DISPOSITIVO 7
9. SMALTIMENTO DEL PRODOTTO 7
10. GARANZIA 7

Italiano - 36-1620051 - rev.8 - 30/09/2021
1. AVVERTENZE GENERALI SULLA SICUREZZA
ATTENZIONE!
Prima di installare il prodotto è obbligatorio leggere il documento relativo alle AVVERTENZE DI SICUREZZA
GENERALI a corredo del prodotto. Documento 6-1620001. Il foglio integrativo è scaricabile anche dal sito
www.allmatic.com.
2. DESCRIZIONE E CARATTERISTICHE TECNICHE
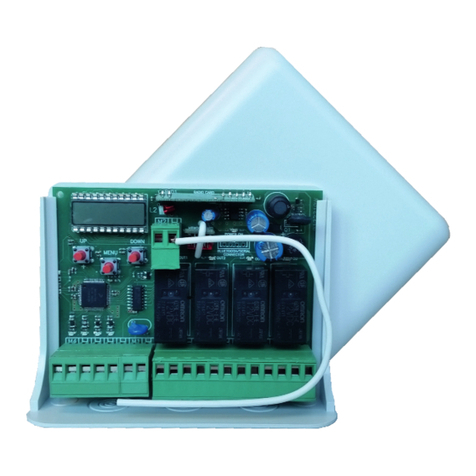
Il B.RO MINI 1CH è un ricevitore miniaturizzato Rolling Code programmabile a singola uscita relé a contatto libero da tensione, già
provvisto di cavi lunghi 30 cm. Nel B.RO MINI 1CH è possibilie configurare l'uscita relé in 3 dierenti modalità di utilizzo: modalità
"toggle", immediato e temporizzato.
COM
N.O.
12-24
Vac / Vdc
+ -
ATTENZIONE!
La portata massima è influenzata dal tipo di trasmettitore e antenna in uso. Inoltre la portata può variare sensibilmente
in presenza di parti metalliche, in presenza di schermature tra il dispositivo e il trasmettitore in uso o in presenza di altri
dispositivi che comunicano alla stessa frequenza radio.
ANTENNA
CARATTERISTICHE TECNICHE
Alimentazione 12-24 Vac/Vdc
Consumo 45mA dc - 85mA ac @ 12V
50mA dc - 100mA ac @ 24V
Contatto relé Normalmente Aperto 1A @ 30Vdc MAX
0,5A @ 42,4Vac MAX
Codifica radio Rolling Code Allmatic
Frequenza 433.92 MHz
Max trasmettitori memorizzabili 1000
Max portata (in campo libero) 250 m
Temperatura di utilizzo -10 ... +55 °C
LED DI SEGNALAZIONE
TASTO DI APPRENDIMENTO MODULO RADIO
USCITA RELÉ INGRESSO ALIMENTAZIONE

4- Italiano 6-1620051 - rev.8 - 30/09/2021
4. APPRENDIMENTO DI UN TRASMETTITORE
LEGENDA:
= LED Spento; R = LED Acceso Fisso; = LED Lampeggiante
Il B.RO MINI 1CH è compatibile con tutti i trasmettitori a Rolling Code Allmatic. Prima di apprendere un nuovo telecomando assicu-
rarsi che il tipo di codice trasmesso sia compatibile con quello del ricevitore in uso e portarsi in prossimità del ricevitore stesso.
Assicurarsi che il ricevitore sia alimentato e pronto per essere utilizzato (led spento).
Premere una volta il tasto di apprendimento, il led si accende. R
Premere il tasto del trasmettitore che si desidera memorizzare.
Il led eseguirà due lampeggi a conferma della corretta memorizzazione del telecomando. 2 x
Ripetere la procedura per ogni trasmettitore che si desidera memorizzare.
Attenzione: Dopo 10 secondi di inattività il dispositivo esce automaticamente dal menu di programmazione.
Attenzione: Il ricevitore memorizza un solo tasto per ogni trasmettitore. In caso di memorizzazione di un secondo
tasto, questo rimpiazzerà il tasto precedentemente memorizzato.
3. PRIMA INSTALLAZIONE
Una volta installato il dispositivo, prima di poterlo utilizzare è necessario alimentarlo ed attendere che il led esegua due lampeggi.
Alimentare il ricevitore, il led esegue due lampeggi. 2 x
Una volta spento il led, il ricevitore è pronto ad essere utilizzato.

Italiano - 56-1620051 - rev.8 - 30/09/2021
5. PROGRAMMAZIONE USCITA RELÉ
Il ricevitore dispone di tre modalità in cui è possibile programmare il funzionamento della uscita relé (Contatto Normalmente
Aperto).
1. Nella modalità di utilizzo TOGGLE, il relé cambia il suo stato ogni volta che viene premuto il tasto del trasmettitore.
2. Nella modalità di utilizzo IMMEDIATO l'uscita relé rimane chiusa finché si tiene premuto il tasto del trasmettitore.
3. Nella modalità di utilizzo TEMPORIZZATO, a partire dal momento in cui viene premuto il tasto del trasmettitore, l'uscita del
relé rimane chiusa per un tempo programmabile da 1 a 120 secondi.
MODALITÀ DI UTILIZZO TOGGLE
Assicurarsi che il ricevitore sia alimentato e pronto per essere utilizzato (led spento).
Mantenere premuto il tasto di apprendimento per almeno 2 secondi, ma meno di 10.
Quando si vede il led lampeggiare lentamente rilasciare il tasto. SLOW
Il led eseguirà 5 lampeggi per confermare la corretta programmazione. 5 x
MODALITÀ DI UTILIZZO IMMEDIATO (DEFAULT)
Assicurarsi che il ricevitore sia alimentato e pronto per essere utilizzato (led spento).
Mantenere premuto il tasto di apprendimento per almeno 10 secondi.
Quando si vede il led lampeggiare velocemente rilasciare il tasto. FAST
Mantenere premuto il tasto di apprendimento per 5 secondi.
Il led eseguirà 5 lampeggi per confermare la corretta programmazione. 5 x
MODALITÀ DI UTILIZZO TEMPORIZZATO
Assicurarsi che il ricevitore sia alimentato e pronto per essere utilizzato (led spento).
Mantenere premuto il tasto di apprendimento per almeno 10 secondi.
Quando si vede il led lampeggiare velocemente rilasciare il tasto. FAST
Premere il tasto di apprendimento un numero di volte pari ai secondi per cui si vuole programmare che
il contatto del relé rimanga chiuso (minimo 1, massimo 120).
Ad ogni pressione del tasto il led esegue un lampeggio.
Esempio: 10 pressioni del tasto = l'uscita rimane chiusa per 10 secondi.
Esempio
10 x
Mantenere premuto il tasto di apprendimento per 5 secondi.
Il led eseguirà 5 lampeggi per confermare la corretta programmazione. 5 x
LEGENDA:
= LED Spento; R = LED Acceso Fisso; = LED Lampeggiante

6- Italiano 6-1620051 - rev.8 - 30/09/2021
LEGENDA:
= LED Spento; R = LED Acceso Fisso; = LED Lampeggiante
7. CANCELLAZIONE DI UN SINGOLO TRASMETTITORE APPRESO
La possibilità di cancellare un singolo telecomando è legata al tipo di trasmettitore in uso. Nel caso il trasmettitore non sia compa-
tibile con questa procedura, per cancellare il trasmettitore è necessario eettuare il reset completo della memoria.
Portarsi in prossimità del ricevitore dal quale si vuole cancellare il trasmettitore.
Premere e mantenere premuto il tasto nascosto del trasmettitore da cancellare.
(Fare riferimento al manuale di istruzione del trasmettitore in uso)
Senza rilasciare il tasto nascosto, premere il primo tasto del trasmettitore.
Il led del ricevitore esegue 4 lampeggi per conferma della cancellazione del trasmettitore. 4 x
ATTENZIONE!
Questa operazione cancella il trasmettitore da tutte le automazioni attive nelle sue vicinanze, alle quali era preceden-
temente associato.
6. APPRENDIMENTO DI UN NUOVO TRASMETTITORE TRAMITE UNO GIÀ APPRESO
La possibilità di apprendere un nuovo telecomando utilizzandone uno già appreso è legata al tipo di trasmettitore in uso. Nel caso
il trasmettitore non sia compatibile con questa procedura, per apprendere un nuovo telecomando fare riferimento al capitolo 4 di
questo manuale.
Assicurarsi che il ricevitore sia alimentato e pronto per essere utilizzato (led spento).
Premere una volta il tasto nascosto di un trasmettitore già appreso.
(Fare riferimento al manuale di istruzione del trasmettitore in uso)
Questo corrisponde a premere il tasto di apprendimento sul ricevitore.
Il led sul ricevitore si accende. R
Premere il tasto del nuovo trasmettitore che si desidera memorizzare.
Il led eseguirà due lampeggi a conferma della corretta memorizzazione del telecomando. 2 x
Ripetere la procedura per ogni trasmettitore che si desidera memorizzare.
Attenzione: Dopo 10 secondi di inattività il dispositivo esce automaticamente dal menu di programmazione.
Attenzione: Il ricevitore memorizza un solo tasto per ogni trasmettitore. In caso di memorizzazione di un secondo
tasto, questo rimpiazzerà il tasto precedentemente memorizzato.

Italiano - 76-1620051 - rev.8 - 30/09/2021
9. SMALTIMENTO DEL PRODOTTO
8. RESET TOTALE DEL DISPOSITIVO
Questa procedura permette di cancellare completamente la memoria radio del ricevitore e di riportare il ricevitore al suo modo di
utilizzo di default (modalità di utilizzo IMMEDIATO).
Togliere alimentazione al ricevitore.
Premere e tenere premuto il tasto di apprendimento.
Accendere il ricevitore, il led si accenderà.
In questa fase è importante NON rilasciare il tasto di apprendimento. R
Quando il led si spegne è possibile rilasciare il tasto di apprendimento.
Il led eseguirà due lampeggi a conferma della corretta esecuzione della procedura. 2 x
10. GARANZIA
Questo prodotto è parte integrante dell’automazione, e dunque, deve essere smaltito insieme con essa. Come per le operazioni
d’installazione, anche al termine della vita di questo prodotto, le operazioni di smantellamento devono essere eseguite da personale
qualificato. Questo prodotto è costituito da vari tipi di materiali: alcuni possono essere riciclati, altri devono essere smaltiti. Infor-
matevi sui sistemi di riciclaggio o smaltimento previsti dai regolamenti vigenti sul vostro territorio, per questa categoria di prodotto.
ATTENZIONE! – Alcune parti del prodotto possono contenere sostanze inquinanti o pericolose che, se disperse
nell’ambiente, potrebbero provocare eetti dannosi sull’ambiente stesso e sulla salute umana. Come indicato dal
simbolo a lato, è vietato gettare questo prodotto nei rifiuti domestici. Eseguire quindi la “raccolta separata” per lo
smaltimento, secondo i metodi previsti dai regolamenti vigenti sul vostro territorio, oppure riconsegnare il prodotto al
venditore nel momento dell’acquisto di un nuovo prodotto equivalente.
ATTENZIONE! – I regolamenti vigenti a livello locale possono prevedere pesanti sanzioni in caso di smaltimento
abusivo di questo prodotto.
La garanzia del produttore ha validità a termini di legge dalla data stampigliata sul prodotto ed è limitata alla riparazione o sostitu-
zione gratuita dei pezzi riconosciuti dallo stesso come difettosi per mancanza di qualità essenziali nei materiali o per deficienza di
lavorazione. La garanzia non copre danni o difetti dovuti ad agenti esterni, deficienza di manutenzione, sovraccarico, usura naturale,
scelta del tipo inesatto, errore di montaggio, o altre cause non imputabili al produttore. I prodotti manomessi non saranno né ga-
rantiti né riparati. I dati riportati sono puramente indicativi. Nessuna responsabilità potrà essere addebitata per riduzioni di portata o
disfunzioni dovute ad interferenze ambientali. La responsabilità a carico del produttore per i danni derivati a chiunque da incidenti di
qualsiasi natura cagionati da nostri prodotti difettosi, sono soltanto quelle che derivano inderogabilmente dalla legge.
ATTENZIONE!
Eseguire la procedura di reset comporta la cancellazione di tutti i telecomandi precedente appresi nel ricevitore.

ALLMATIC S.r.l
32026 Borgo Valbelluna – Belluno – Italy
Via dell’Artigiano, n°1 – Z.A.
Tel. 0437 751175 – 751163 r.a. Fax 0437 751065

B.RO MINI 1CH
Programmable radio receiver, single relay output.
6-1620051 - English - rev.8 - 30/09/2021 - FW:BRO50AM

2- English 6-1620051 - rev.8 - 30/09/2021
INDEX
1. GENERAL SAFETY WARNINGS 3
2. DESCRIPTION AND TECHNICAL CHARACTERISTICS 3
3. FIRST INSTALLATION 4
4. LEARNING OF A TRANSMITTER 4
5. RELAY OUTPUT PROGRAMMING 5
6. LEARNING A NEW TRANSMITTER THROUGH A LEARNED ONE 6
7. CANCELLATION OF A LEARNED SINGLE TRANSMITTER 6
8. TOTAL RESET OF THE DEVICE 7
9. PRODUCT DISPOSAL 7
10. WARRANTY 7

English - 36-1620051 - rev.8 - 30/09/2021
1. GENERAL SAFETY WARNINGS
WARNING!
Before installing the product it is mandatory to read the document related to the GENERAL SAFETY WARNINGS
accompanying the product. Document 6-1620001. The additional sheet can also be downloaded from www.
allmatic.com.
2. DESCRIPTION AND TECHNICAL CHARACTERISTICS
The B.RO MINI 1CH is a miniaturized Rolling Code receiver programmable with single voltage-free contact relay output, already
equipped with 30 cm long cables. In the B.RO MINI 1CH it is possible to configure the relay output in 3 dierent modes of use:
"toggle" mode, immediate and timed.
COM
N.O.
12-24
Vac / Vdc
+ -
ATTENTION!
The maximum range is aected by the type of transmitter and antenna in use. In addition, the range can vary signifi-
cantly in the presence of metal parts, in the presence of shielding between the device and the transmitter in use or in
the presence of other devices that communicate at the same radio frequency.
ANTENNA
TECHNICAL CHARACTERISTICS
Power Supply 12-24 Vac/Vdc
Consumption 45mA dc - 85mA ac @ 12V
50mA dc - 100mA ac @ 24V
Contact relay Normally Open 1A @ 30Vdc MAX
0,5A @ 42,4Vac MAX
Radio coding Rolling Code Allmatic
Frequency 433.92 MHz
Max transmitters can be stored 1000
Max range (in open field) 250 m
Operating temperature -10 ... +55 °C
INDICATOR LED
LEARNING BUTTON RADIO MODULE
RELAY OUTPUT POWER SUPPLY

4- English 6-1620051 - rev.8 - 30/09/2021
4. LEARNING OF A TRANSMITTER
KEY:
= LED O; R = LED On Fixed; = flashing LED
The B.RO MINI 1CH is compatible with all Rolling Code Allmatic transmitters. Before learning a new remote control make sure that
the type of transmitted code is compatible with that of the receiver in use and move close to the receiver itself.
Make sure the receiver is powered and ready to use (LED o).
Once press the learning button, the LED lights up. R
Press the button of the transmitter you want to store.
The LED will flash two times to confirm the correct storage of the remote control. 2 x
Repeat the procedure for each transmitter you want to store.
Warning: After 10 seconds of inactivity the device automatically exits the programming menu.
Attention: The receiver stores only one button per transmitter. If a second key is stored, it will replace the previously
stored key.
3. FIRST INSTALLATION
Once the device is installed, before you can use it you need to power it and wait for the LED to flash two flashes.
Power the receiver, the LED performs two flashes. 2 x
Once the LED is turned o, the receiver is ready to be used.

English - 56-1620051 - rev.8 - 30/09/2021
5. RELAY OUTPUT PROGRAMMING
The receiver has three modes in which you can program the operation of the relay output (Normally Open Contact).
1. In TOGGLE mode, the relay changes its status each time the transmitter button is pressed.
2. In IMMEDIATE mode, the relay output remains closed until the transmitter button is pressed.
3. In TIMED mode, from the moment the transmitter button is pressed, the relay output remains closed for a programmable
time of 1 to 120 seconds.
TOGGLE MODE OF USE
Make sure the receiver is powered and ready to use (LED o).
Hold down the learning button for at least 2 seconds, but less than 10.
When you see the LED flash slowly release the button. SLOW
The led will run 5 flashes to confirm the correct programming. 5 x
IMMEDIATE USE MODE (DEFAULT)
Make sure the receiver is powered and ready to use (LED o).
Press and hold the learning button for at least 10 seconds.
When you see the LED flash quickly release the button. FAST
Press and hold the learning button for 5 seconds.
The led will run 5 flashes to confirm the correct programming. 5 x
TIMING MODE OF USE
Make sure the receiver is powered and ready to use (LED o).
Press and hold the learning button for at least 10 seconds.
When you see the LED flash quickly release the button. FAST
Press the learning button a number of times equal to the seconds for which you want to program that
the contact of the relay remains closed (minimum 1, maximum 120).
At each press of the button the led flashes.
Example: 10 press of key = the output remains closed for 10 seconds.
Example
10 x
Press and hold the learning button for 5 seconds.
The led will run 5 flashes to confirm the correct programming. 5 x
KEY:
= LED O; R = LED On Fixed; = flashing LED

6- English 6-1620051 - rev.8 - 30/09/2021
7. CANCELLATION OF A LEARNED SINGLE TRANSMITTER
The ability to delete a single remote control is linked to the type of transmitter in use. In case the transmitter is not compatible with
this procedure, to delete the transmitter it is necessary to perform a complete reset of the memory.
Get close to the receiver from which you want to delete the transmitter.
Press and hold the hidden button of the transmitter to be deleted.
(Please refer to your transmitter instruction manual)
Without releasing the hidden button, press the first button of the transmitter.
The LED of the receiver performs 4 flashes to confirm the cancellation of the transmitter. 4 x
WARNING!
This operation deletes the transmitter from all active automations in its vicinity, to which it was previously associated.
6. LEARNING A NEW TRANSMITTER THROUGH A LEARNED ONE
The ability to learn a new remote using one already learned is linked to the type of transmitter in use. If the transmitter is not
compatible with this procedure, please refer to Chapter 4 of this manual to learn a new remote control.
Make sure the receiver is powered and ready to use (LED o).
Once press the hidden button of an already learned transmitter.
(Please refer to your transmitter instruction manual)
This corresponds to pressing the learning button on the receiver.
The LED on the receiver lights up. R
Press the button of the new transmitter you want to store.
The LED will flash two times to confirm the correct storage of the remote control. 2 x
Repeat the procedure for each transmitter you want to store.
Warning: After 10 seconds of inactivity the device automatically exits the programming menu.
Attention: The receiver stores only one button per transmitter. If a second key is stored, it will replace the previously
stored key.
KEY:
= LED O; R = LED On Fixed; = flashing LED

English - 76-1620051 - rev.8 - 30/09/2021
9. PRODUCT DISPOSAL
8. TOTAL RESET OF THE DEVICE
This procedure allows to completely erase the radio memory of the receiver and to return the receiver to its default mode of use
(IMMEDIATE mode of use).
Power o the receiver.
Press and hold the learning button.
Turn on the receiver, the LED will turn on.
At this stage it is important not to release the learning button. R
When the LED turns o you can release the learning button.
The LED will flash two times to confirm the correct execution of the procedure. 2 x
10. WARRANTY
This product is an integral part of automation, and therefore must be disposed of together with it. As with installation operations, even
at the end of the life of this product, dismantling operations must be carried out by qualified personnel. This product consists of various
types of materials: some can be recycled, others must be disposed of. Find out about the recycling or disposal systems required by the
regulations in force in your territory for this category of product.
WARNING! - certain parts of the product may contain pollutants or dangerous substances which, if dispersed in the
environment, could have harmful eects on the environment and human health.
As indicated by the symbol on the side, it is forbidden to throw this product into household waste. Then perform the
“separate collection” for disposal, according to the methods provided by the regulations in force in your territory, or
return the product to the seller when buying a new equivalent product.
WARNING! - the regulations in force at local level may provide for heavy penalties in case of improper disposal of this
product.
The manufacturer’s warranty is valid from the date stamped on the product and is limited to the repair or replacement free of charge
of the parts recognized by the same as defective due to lack of essential quality in the materials or lack of processing. The warranty
does not cover damage or defects due to external agents, maintenance deficiency, overload, natural wear, choice of incorrect type,
assembly error, or other causes not attributable to the manufacturer. Tampered products will not be guaranteed or repaired. The data
given are purely indicative. No liability may be charged for reductions in scope or malfunctions due to environmental interference.
The liability of the manufacturer for damage caused to anyone by accidents of any nature caused by our defective products, are only
those that derive from the Italian law.
WARNING!
Performing the reset procedure results in the deletion of all previous remote controls learned in the receiver.

ALLMATIC S.r.l
32026 Borgo Valbelluna – Belluno – Italy
Via dell’Artigiano, n°1 – Z.A.
Tel. 0437 751175 – 751163 r.a. Fax 0437 751065

B.RO MINI 1CH
Récepteur radio programmable à sortie relais unique.
6-1620051 - Français - rev.8 - 30/09/2021 - FW:BRO50AM

2- Français 6-1620051 - rev.8 - 30/09/2021
INDEX
1. AVERTISSEMENTS GÉNÉRALES DE SECURITÉ 3
2. DESCRIPTION ET CARACTÉRISTIQUES TECHNIQUES 3
3. PREMIÈRE INSTALLATION 4
4. APPRENTISSAGE D’UN TRANSMETTEUR 4
5. PROGRAMMATION DE SORTIE RELAIS 5
6. APPRENTISSAGE D’UN NOUVEAU TRANSMETTEUR À L’AIDE DEJA APRISSE NOUVEAU TRANSMETTEUR 6
7. EFFACEMENT D’UN SEUL ÉMETTEUR APPRIS 6
8. RESET TOTAL DU DISPOSITIF 7
9. ÉLIMINATION DU PRODUIT 7
10. GARANTIE 7

Français - 36-1620051 - rev.8 - 30/09/2021
1. AVERTISSEMENTS GÉNÉRALES DE SECURITÉ
ATTENTION!
Avant d’installer le produit il est obligatoire de lire le dossier concernant LES AVERTISSEMENTS GÉNÉRALES
DE SECURITÉ fournies avec le produit. Dossier 6-1620001. Téléchargeable aussi à partir du site internet www.
allmatic.com.
2. DESCRIPTION ET CARACTÉRISTIQUES TECHNIQUES
Le B.RO MINI 1CH est un récepteur miniaturisé Rolling Code programmable à une seule sortie relais à contact libre de tension,
déjà pourvu de câbles longs de 30 cm. Dans le B.RO MINI 1CH il est possible de configurer la sortie relais en 3 modes diérents
d’utilisation: mode "toggle", immédiat et temporisé.
COM
N.O.
12-24
Vac / Vdc
+ -
ATTENTION !
La portée maximale est influencée par le type d’émetteur et d’antenne utilisés. En outre, la portée peut varier sensi-
blement en présence de pièces métalliques, en présence de blindage entre le dispositif et l’émetteur en service ou en
présence d’autres dispositifs communiquant à la même fréquence radio.
ANTENNE
CARACTÉRISTIQUES TECHNIQUES
Alimentation 12-24 Vac/Vdc
Utilisation 45mA dc - 85mA ac @ 12V
50mA dc - 100mA ac @ 24V
Contact relais Normalement Ouvert 1A @ 30Vdc MAX
0,5A @ 42,4Vac MAX
Codage radio Rolling Code Allmatic
Fréquence 433.92 MHz
Max transmetteurs mémorisables 1000
Portée maximale (champ libre) 250 m
Température de production -10 ... +55 °C
LED DE SIGNALISATION
TOUCHE D’APPRENTISSAGE MODULE RADIO
SORTIE RELAIS ENTRÉE ÉLECTRIQUE

4- Français 6-1620051 - rev.8 - 30/09/2021
4. APPRENTISSAGE D’UN TRANSMETTEUR
LÉGENDE:
= LED Éteint; R = LED Allumé Fixe; = LED Clignotant
Le B.RO MINI 1CH est compatible avec tous les transmetteurs à Rolling Code Allmatic. Avant d’apprendre une nouvelle télécom-
mande, assurez-vous que le type de code transmis est compatible avec celui du récepteur en cours d’utilisation et portez-vous à
proximité du récepteur lui-même.
Assurez-vous que le récepteur est alimenté et prêt à être utilisé (led éteint).
Une fois que vous appuyez sur le bouton d’apprentissage, la led s’allume. R
Appuyez sur le bouton de l’émetteur que vous souhaitez stocker.
La led eectuera deux clignotements pour confirmer le stockage correct de la télécommande. 2 x
Répétez la procédure pour chaque émetteur que vous souhaitez stocker.
Attention: Après 10 secondes d’inactivité, l’appareil quitte automatiquement le menu de programmation.
Attention: Le récepteur ne mémorise qu’une seule touche par émetteur. En cas de mémorisation d’une seconde
touche, celle-ci remplacera la touche précédemment mémorisée.
3. PREMIÈRE INSTALLATION
Une fois le dispositif installé, avant de pouvoir l’utiliser il est nécessaire de l’alimenter et d’attendre que le led eectue deux
clignotements.
Alimenter le récepteur, la LED eectue deux clignotements. 2 x
Une fois la LED éteinte, le récepteur est prêt à être utilisé.
Other manuals for B.RO MINI 1CH
2
Table of contents
Languages:
Other Allmatic Receiver manuals
