2MK3001RP April 2023 R1
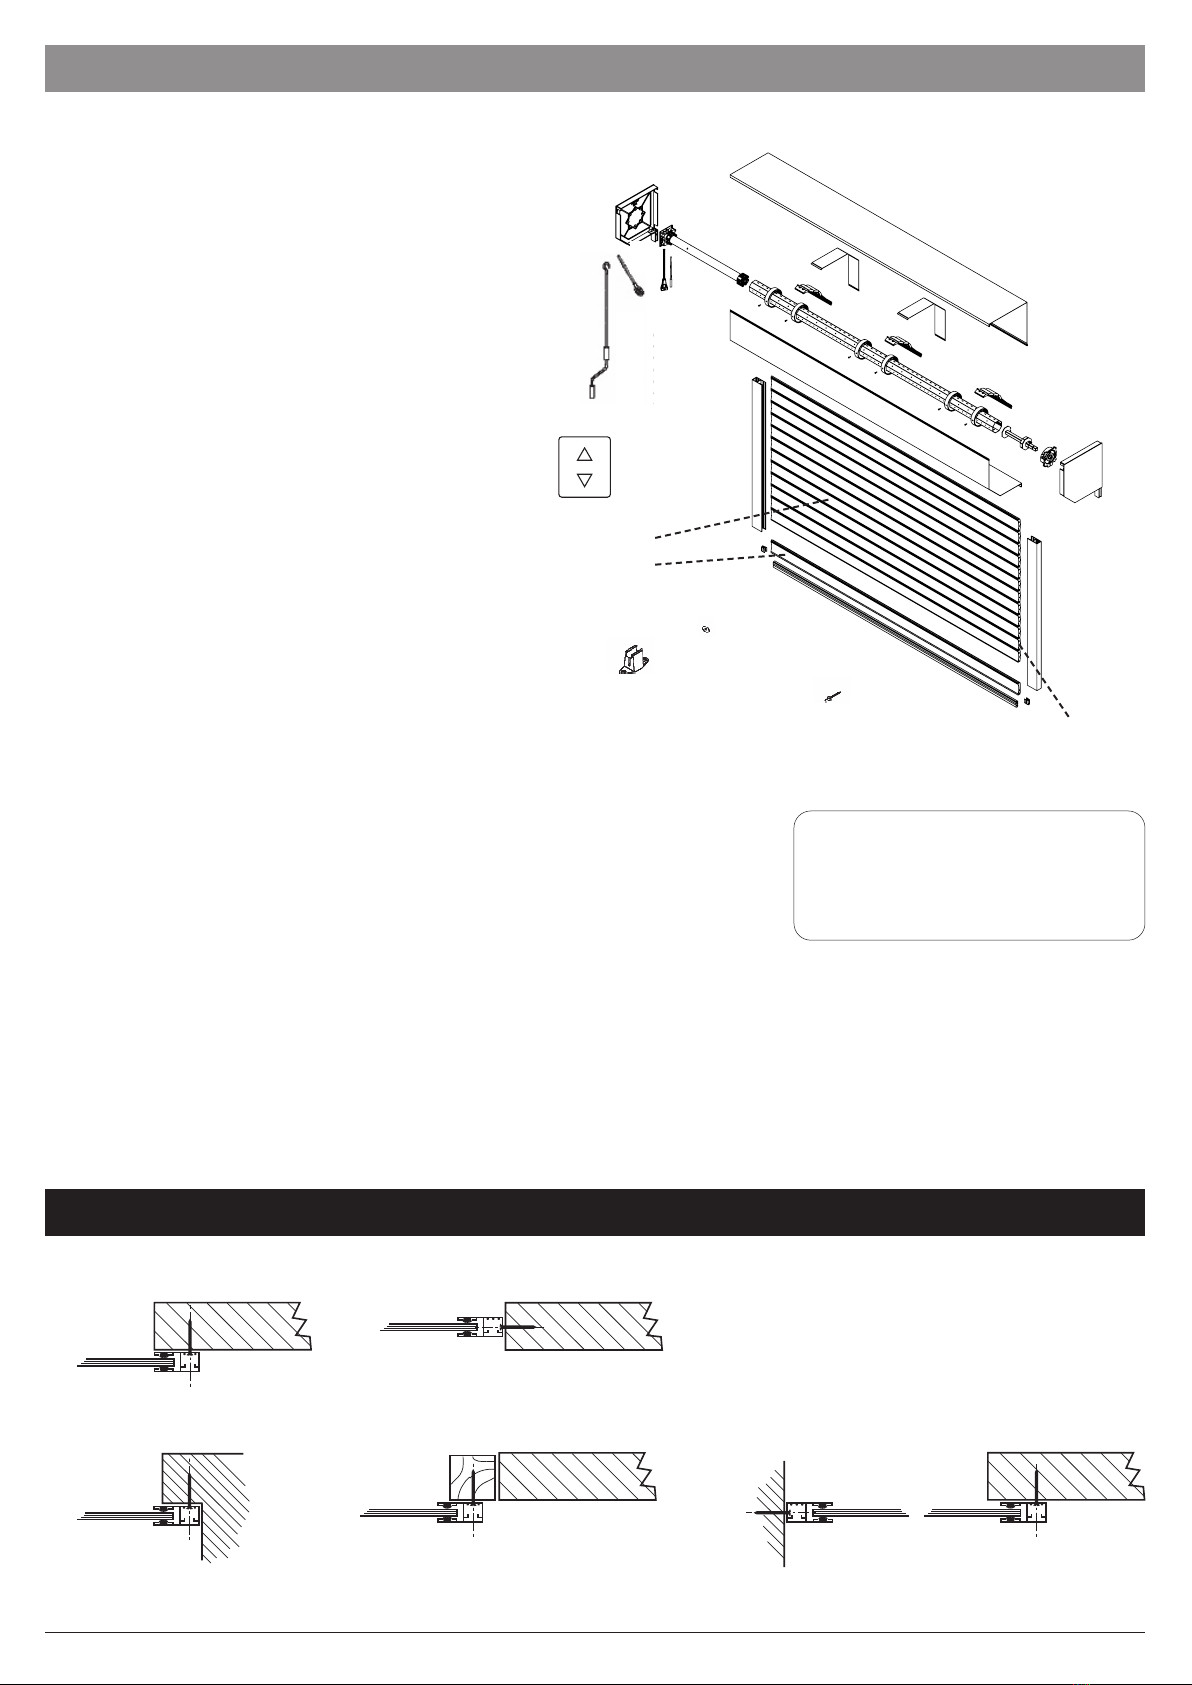
Check:
i. Delivery note
ii. Order sheet
iii. Door dimensions / colour
iv. Opening dimensions / clearances
v. Components
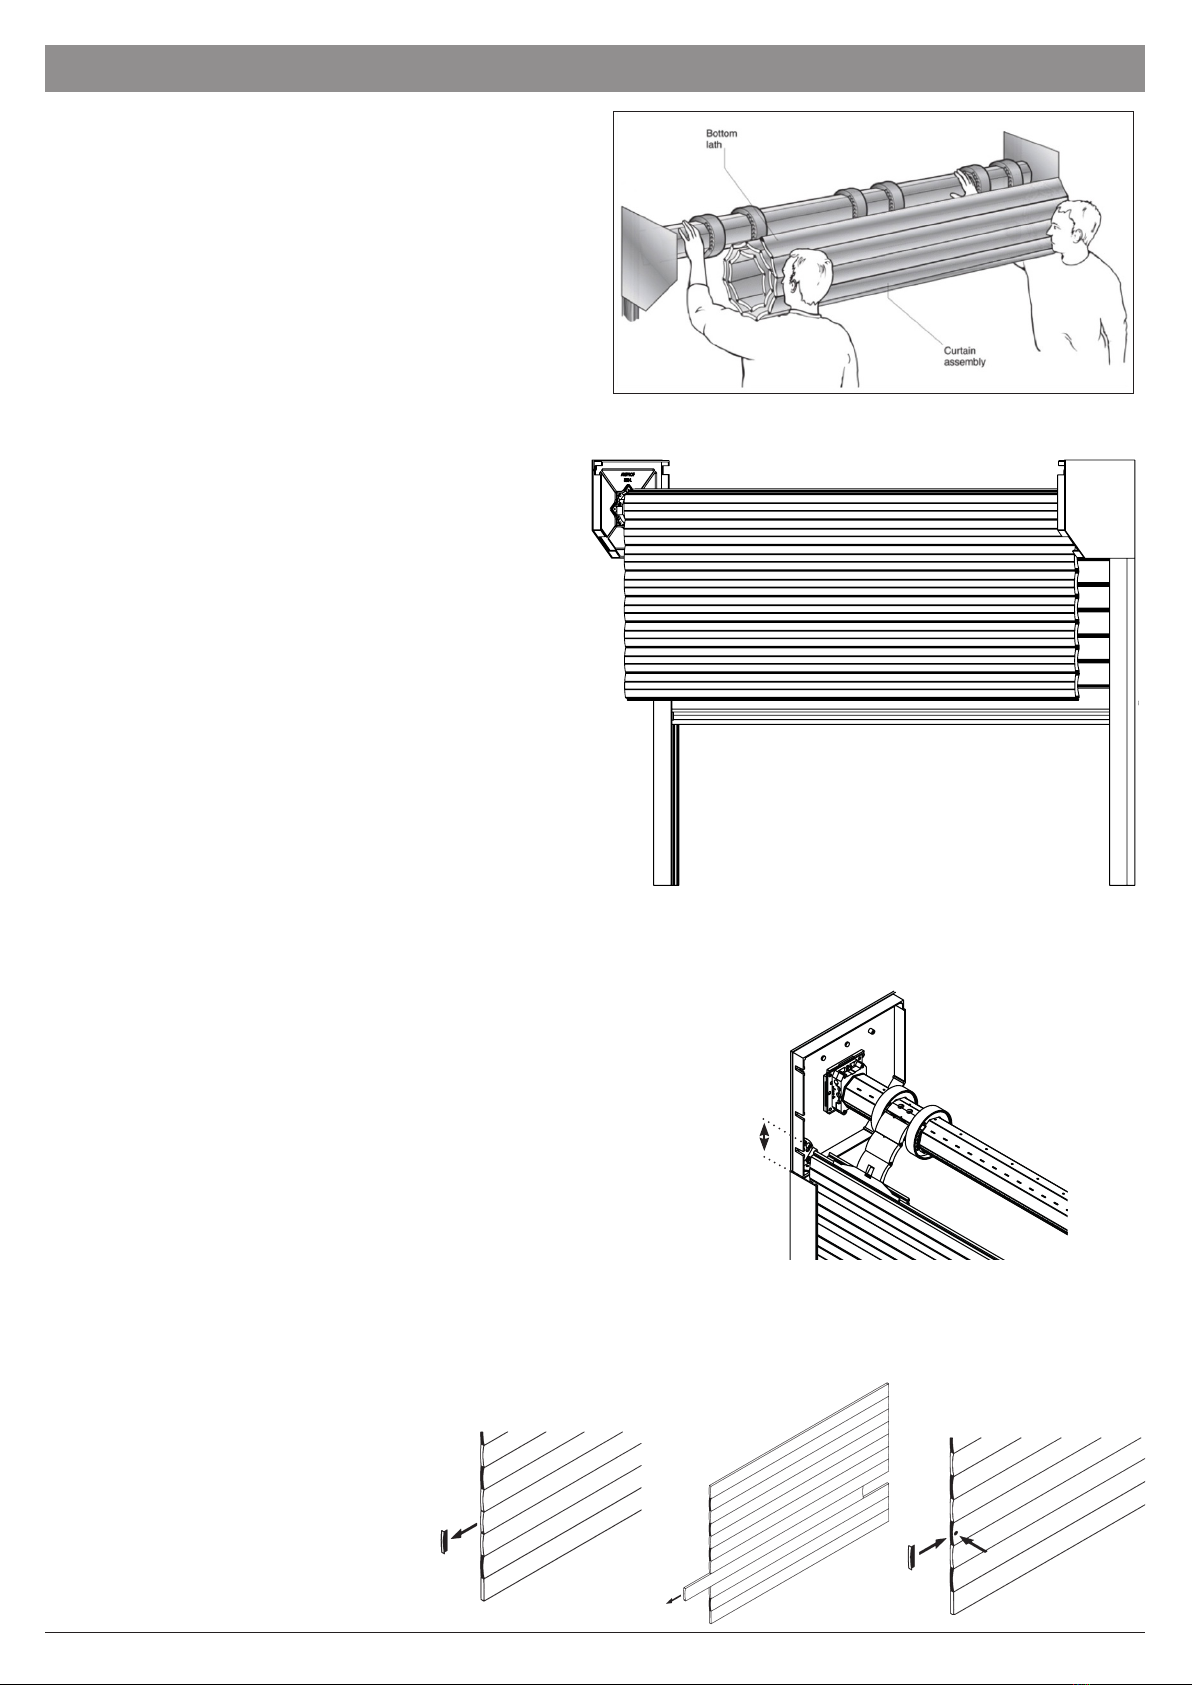
vi. Check for any damage to the guide rails
or the outside roll of the curtain
Do not proceed further with the
installation unless you are sure that
the door is the correct size, and all
components are present.
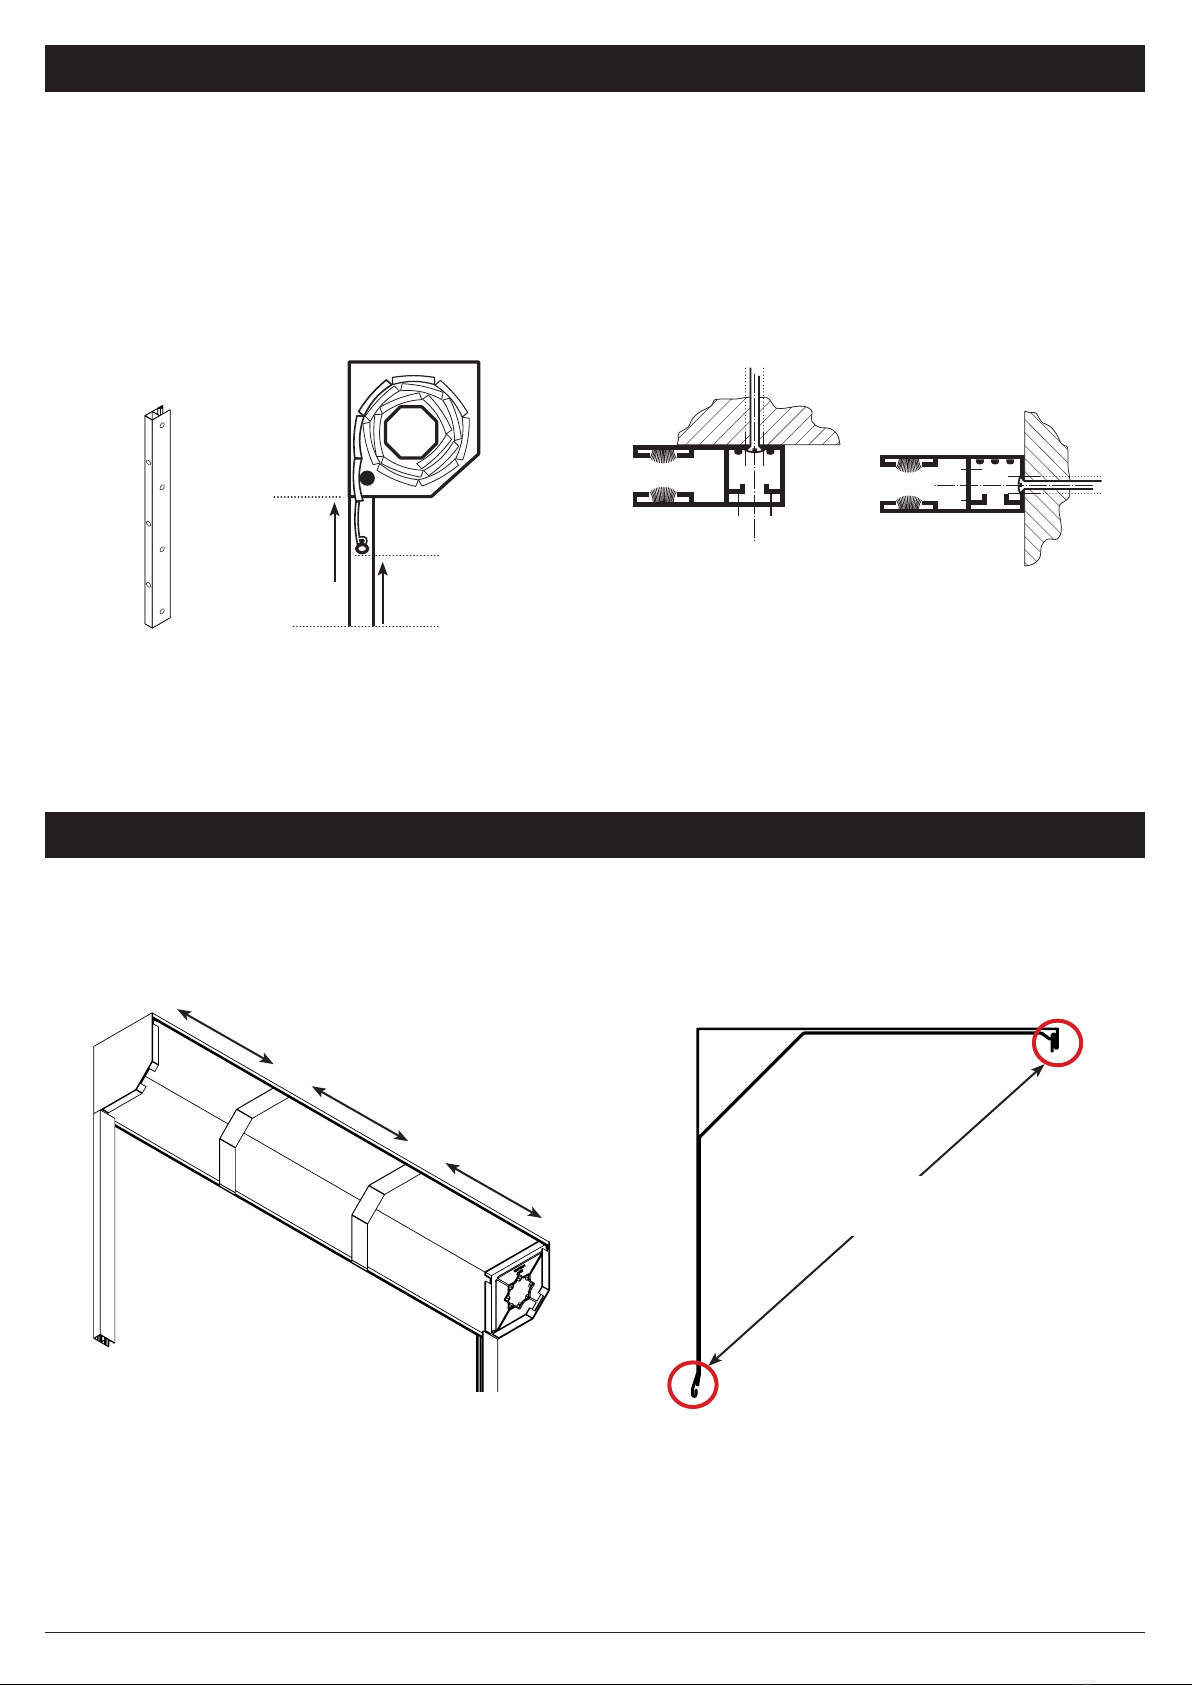
WIDTHS
Manufacturing Width = Over Guide Width
Drive Through Width = Over Guide Width less
150mm for 75mm guides
HEIGHTS
Manufacturing Height = Guide Height
Total Height = Guide Height + End Plate
Headroom/End Plate up to 2.5m Guide Height =
300mm
Drive Through Height = Guide Height less 100mm
Before removing the old door check that the door size and colour
correspond with that which was ordered.
Structural condition of opening.
i. Ensure the area around the opening is strong enough to
support the weight of the door.
ii. The surface where the door is to be fitted must be flush and
reasonably smooth. Small irregularities in the brickwork will be
acceptable.
iii. No obstacles in fitting footprint eg. no sharp objects, pipes,
cables, bumps etc. sticking out from the pillars, lintel or header
to twist the guides, distort the fascia or catch on the curtain.
iv. The lintel must not protrude backwards or forwards from the
brick piers. Should the lintel protrude backwards or forwards
from the brick piers this will require special instructions, please
consult your supplier.
v. The floor must be flat/level. If necessary install a sub-frame to
ensure secure, flush and level fixing (recommended minimum
70 X 70 PAR). The lintel must not protrude backwards or
forwards from the brick piers. Should the lintel protrude
backwards or forwards from the brick piers this will require
special instructions, please consult your installer.
Fitting Notes
vi. It is recommended that 2 people are available for fitting all
door sizes.
vii. The door must be fitted square and level, irrespective
of the shape of the opening; on no account should any
compensation be made to suit an irregular opening.
viii. Ensure all necessary tools are to hand before starting.
ix. The door package and its contents should be checked for
obvious damage before removal of the wrapping.
IF THERE IS ANY DAMAGE YOUR SUPPLIER SHOULD BE
CONTACTED IMMEDIATELY.
x. Ensure there is a suitable 13amp 3 pin switched socket
adjacent to where the Remote Control Box is to be fitted.
xi. Ensure all tools and door components are gathered together
inside the garage prior to starting the installation.
Recommended Tools for Assembly:
• 2 stepladders
• Spirit/laser level
• Tape measure
• Power drill
• 10mm A/F spanner
• Slot screwdriver
• Pozidrive screwdriver
• 3.5mm drill bit
• 7.0mm drill bit
• 11.0mm drill bit
• 3mm A/F Allen key
• 4mm A/F Allen key
• Hacksaw
• Suitable wall plugs (not supplied)
• Suitable fixings (not supplied)
Note: In case of power failure a manual override system is fitted as standard but this can only be operated from inside the garage. If
the garage has no service entrance door then an exterior release kit must be fitted to allow manual operation of the garage door from
outside.
01. PRE-INSTALLATION AND COMPONENT CHECK (CONTINUED)
PRE-INSTALLATION CHECK