manuals.online logo
Brands
  1. Home
  2. •
  3. Brands
  4. •
  5. Alphasmart
  6. •
  7. Keyboard
  8. •
  9. Alphasmart NEO2 SmartApplet User manual

Alphasmart NEO2 SmartApplet User manual

1
R42798
R0311.1008
SmartOption Mobile Lab
Setup for NEOs
S
MART
O
PTION
™
M
OBILE
L
AB
S
ETUP
FOR
NEO
S
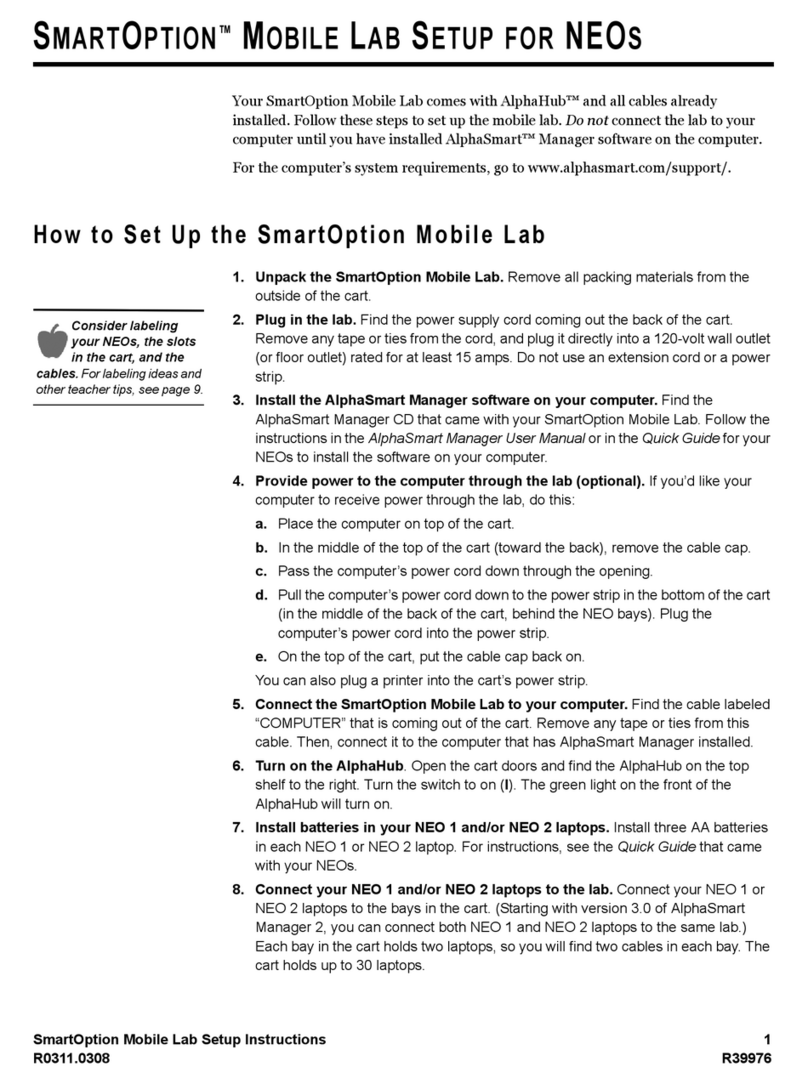
Your SmartOption Mobile Lab comes with AlphaHub™ and all cables already
installed. Follow these steps to set up the mobile lab. Do not connect the lab to your
computer until you have installed AlphaSmart™ Manager software on the computer.
For the computer’s system requirements, go to www.renlearn.com/requirements.
How to Set Up the SmartOption Mobile Lab
1. Unpack the SmartOption Mobile Lab. Remove all packing materials from the
outside of the cart.
2. Plug in the lab. Find the power supply cord coming out the back of the cart.
Remove any tape or ties from the cord, and plug it directly into a 120-volt outlet
rated for at least 15 amps. Do not use an extension cord or a power strip.
3. Install the AlphaSmart Manager software on your computer. Find the
AlphaSmart Manager CD that came with your SmartOption Mobile Lab. Follow the
instructions in the AlphaSmart Manager User Manual or in the Quick Guide for your
NEOs to install the software on your computer.
4. Provide power to the computer through the lab (optional). If you’d like your
computer to receive power through the lab, do this:
a. Place the computer on top of the cart.
b. In the middle of the top of the cart (toward the back), remove the cable cap.
c. Pass the computer’s power cord down through the opening.
d. Pull the computer’s power cord (Aon the next page) down to the power strip
Bin the bottom of the cart (in the middle of the back of the cart, behind the
NEO bays). Plug the computer’s power cord into the power strip.
e. On the top of the cart, put the cable cap back on.
You can also plug a printer into the cart’s power strip.
Consider labeling
your NEOs, the slots
in the cart, and the
cables. For labeling ideas and
other teacher tips, see
page 11.
SMARTOPTION™ MOBILE LAB SETUP FOR NEOS
How to Set Up the SmartOption Mobile Lab
2
R0311.1008
. . . . .
SmartOption Mobile Lab
Setup for NEOs
5. Connect the SmartOption Mobile Lab to your computer. Find the USB cable
labeled “COMPUTER” that is coming out of the cart. Remove any tape or ties from
this cable. Then, connect it to the computer that has AlphaSmart Manager
installed. The first time you connect the lab to your computer, make sure that you
are logged into the computer with administrator rights so that drivers are properly
loaded, and make sure AlphaSmart is not running.
6. Turn on the AlphaHub. Open the cart doors and find the AlphaHub on the top
shelf to the right C. Turn the switch to on (I). The green light on the front of the
AlphaHub will turn on.
7. Install batteries in your NEO 1 and/or NEO 2 laptops. Install three AA batteries
in each NEO 1 or NEO 2 laptop. For instructions, see the Quick Guide that came
with your NEOs.
8. Connect your NEO 1 and/or NEO 2 laptops to the lab. Connect your NEO 1 or
NEO 2 laptops to the bays in the cart, with the light on the right edge of the NEO
toward the door of the cart. (Starting with version 3.0 of AlphaSmart Manager 2,
you can connect both NEO 1 and NEO 2 laptops to the same lab.) Each bay in the
cart holds two laptops, so you will find two cables in each bay. The cart holds up to
30 laptops.
C
A
B
Benefits of having
the NEO lights face
out:
• You can see whether the
light comes on when each
NEO is connected. If the light
doesn’t come on, the
AlphaHub isn’t on, or the cart
is not plugged in.
• You can see the color of the
light for each NEO. Green
means it is plugged in properly
and has batteries installed or
charged. Amber or orange
means the NEO is recharging
(if it is rechargeable), or it
does not have batteries
installed.
SMARTOPTION™ MOBILE LAB SETUP FOR NEOS
AlphaHub Warranty
3
R0311.1008
. . . . .
SmartOption Mobile Lab
Setup for NEOs
AlphaHub Warranty
Renaissance Learning, Inc. warrants the AlphaHub to be free from defects in materials
and workmanship for a period of one year from the date of original purchase. The
AlphaHub is not covered by extended warranty. During this period, if a defect occurs,
Renaissance Learning, Inc., will, at its option, repair or replace the AlphaHub at no
charge to you, provided that it is returned during the warranty period to Renaissance
Learning, Inc., or one of its authorized resellers. This warranty does not apply if the
AlphaHub has been damaged by accident or abuse, modified without the written
permission of Renaissance Learning, or if identifying marks (including serial
numbers) or seals have been removed or defaced. There are no other warranties,
expressed or implied. Renaissance Learning, Inc., accepts no responsibility for
consequential damages, including, but not limited to, loss of profit or benefits.
Additional Software for NEO 2
NEO 2 SmartOption Mobile Labs also come with the software listed below. The
software is not used with NEO 1 laptops because those laptops do not have RF (radio
frequency) capability.
•AccelTest™ software: This software allows you to create your own quizzes, tests,
and assignments for any subject and score student responses quickly. Students can
complete some types of assignments using either Renaissance Responders or NEO 2
laptops. The scores are entered automatically in the AccelTest electronic gradebook.
•2Know!™ Toolbar: This simple program allows you to get real-time responses
from students. You can use the toolbar to ask multiple-choice, true/false, numeric-
response, pulse, or short-answer questions and quickly get responses. This can help
you immediately assess whether your students understand the concepts you’ve been
discussing.
To use this software, you must first connect the Renaissance Receiver. Then, you can
install the software on your computer and begin using NEO 2 with the software. The
following pages provide more information about installing the software.
Connecting Your Renaissance Receiver
To find out how to connect the Renaissance Receiver, refer to the NEO 2 Quick Guide
or the NEO 1 and NEO 2 User Manual.
SMARTOPTION™ MOBILE LAB SETUP FOR NEOS
Additional Software for NEO 2
4
R0311.1008
. . . . .
SmartOption Mobile Lab
Setup for NEOs
Installing AccelTest Software on Your Computer
Important Information about Using NEO 2 with AccelTest 3.x
In AccelTest, when you choose to score an assignment with a Renaissance Responder,
you are choosing to have students enter their answers using either the Responder or
NEO 2 for automatic scoring. When you choose “NEO 2 Only” in AccelTest version 3.2
or higher, only NEO 2 laptops may be used.
System Requirements for AccelTest Software
Visit www.renlearn.com/requirements and click 2Know! Classroom Response
System to make sure your computer meets at least the minimum hardware and
software requirements. If you have questions, email us at [email protected].
Rights Required to Use the Program
The following rights are required when you use AccelTest:
•Windows 2000, XP, and Vista Computers: AccelTest users need at least read
access to the AccelTest program folder, and they need full access to the Renaissance
Learning and Renaissance Wireless Server folders in Documents and Settings\All
Users\Application Data.
•Macintosh OS 10 Computers: AccelTest users need at least read access to the
AccelTest program folder. The Owner, Group, and Everyone must have Read and
Write permissions to the Renaissance Learning and Renaissance Wireless Server
folders in Library : Application Support.
Rights Required for Data Folders
These rights are needed for data folders on a network:
•For Windows NT Networks: Grant the Change permission to the data folder on
your network, including all files. If you want to assign specific rights to the folder,
include the Read, Write, and Delete permissions. If you will be using this data folder
on both Macintosh and Windows computers, set the Macintosh permissions first;
then, set the Windows permissions.
•Windows 2000 Server and Widows Server 2003 Networks: Grant the
Modify permission to the data folder on your network, including all files. If you want
to assign specific rights to the folder, make sure you include the Read, Write, and
Delete permissions.
•Novell Networks: Grant the following rights to the data folder on your network,
including all files: [RWCEMF] (read, write, create, erase, modify, and file scan).
•Unix/Linux Networks: Grant the following permissions to the data folder on
your network (including all files) for the owner, group, and others: Read, Write, and
Execute (drwxrwxrwx). If you have a group created for students and teachers, you
can grant the Read, Write, and Execute permissions to the owner and to that group
only (drwxrwx---).
SMARTOPTION™ MOBILE LAB SETUP FOR NEOS
Additional Software for NEO 2
5
R0311.1008
. . . . .
SmartOption Mobile Lab
Setup for NEOs
•AppleShare Networks: Grant the following privileges to the data folder on your
network server, including all files:
AppleShare 4.x: Check all nine boxes.
AppleShare IP 5.x and 6.x: Pencil and glasses (write and read).
•OS 10 Networks: Grant the following permissions to the data folder on your
network (including all files) for the Owner, Group, and Everyone: Read and Write. If
you have a group created for students and teachers, you can grant the Read and
Write permissions to the owner and to that particular group only.
These rights are needed for local data folders on Windows 2000, Windows XP,
Windows Vista, and OS 10 computers:
•Windows 2000 Professional, Windows XP, and Windows Vista
Computers: If you put your data folder on your computer, but not in the default
location, make sure you have full access to the data folder.
•OS 10 Computers: If you put your data folder on your computer, but not in the
default location, grant the Read and Write permissions for the Owner, Group, and
Everyone. If you have a group created for students and teachers, you can grant the
Read and Write permissions to the owner and to that particular group.
Windows: Installing AccelTest Software
Note: You must be logged in as an administrator user to install the software.
1. Insert the AccelTest CD into your computer.
2. If the AccelTest installation wizard starts automatically, go on to step 3.
If not, view the contents of the CD; then, double-click AccelTest.msi.
3. When the Welcome panel of the AccelTest installation wizard opens, click Next.
4. Click Install to begin the installation. The installation progress will be shown.
5. Click Finish in the AccelTest installation wizard. To continue, see “Starting and
Registering AccelTest and Choosing a Data Location” on page 6.
Macintosh: Installing AccelTest Software
1. Insert the AccelTest CD into your computer.
2. If the AccelTest window does not open automatically, double-click the AccelTest
CD icon on your desktop to view the contents of the CD.
3. Double-click AccelTest Installer.
4. If the program asks you to enter your password, enter the administrator password
for this computer; then, click OK. This shows that you have the permissions
required to install the software.
5. Read the information in the Welcome panel of the Installer; then, click Install.
6. If the computer must be restarted, a message will notify you. Click Restart to
restart the computer now or Continue to perform other tasks before restarting the
computer.
If a restart is not necessary, click Quit when the installation is complete.
To continue, see “Starting and Registering AccelTest and Choosing a Data
Location” on page 6.
SMARTOPTION™ MOBILE LAB SETUP FOR NEOS
Additional Software for NEO 2
6
R0311.1008
. . . . .
SmartOption Mobile Lab
Setup for NEOs
Starting and Registering AccelTest and Choosing a Data Location
1. Windows: Click StartProgramsAccelTestAccelTest.
Macintosh: Open the Applications folder on your computer. Then, open the
AccelTest folder. Double-click AccelTest in that folder.
2. When the Data Location Preference opens, click one of the options. Then, click
Next.
3. If you chose to select a data location that is somewhere else, a dialog box will
open. Find and open the folder that you want to use, or create a new folder in the
location you prefer. Keep this information in mind as you choose or create the data
folder:
•If you choose an existing AccelTest data folder, and someone else is also using
that folder, please note that only one person at a time can use the data folder
with AccelTest.
•On Macintosh computers, if you choose a network data folder, make sure you
connect to that network using an afp connection.
4. Then, click OK (Windows) or Choose (Macintosh).
5. Check the data location shown on the next panel. If it is correct, click Next. (If not,
click Back to choose a different location.)
6. If AccelTest hasn’t been registered before for this data location, enter the serial
number (Aon the next page), school name B, and teacher name C. The serial
number is on a label that is attached to the CD case. It is also on the one-page
instruction sheet you received with the software.
Click OK to continue.
Type the serial
number carefully. Be
careful not to confuse
“Z” and “2,” “I” and “1,” “S” and
“5,” or “O” and “0.”
SMARTOPTION™ MOBILE LAB SETUP FOR NEOS
Additional Software for NEO 2
7
R0311.1008
. . . . .
SmartOption Mobile Lab
Setup for NEOs
7. Click Done in the Summary for the Data Location Preference.
8. Enter admin (the default administrator
password). Then, click OK.
9. AccelTest will check for updates if a Web
connection is available. If any are found, you
can choose to download them. For more
information, see the AccelTest User Manual.
10. You will be asked if you would like
to set up your school year. When
you do this, you enter the school
year and term dates that will be
used for assignments and grades
in the Gradebook. Click one of the
options in this message. For more
information about setting up the school year, refer to the information about the
School Year preference in the AccelTest User Manual.
Read the AccelTest User Manual for More Information
The AccelTest User Manual tells you how to set up your school year and your classes
and students, create your assignments, and add assignments to the Gradebook so you
can start using AccelTest.
The AccelTest User Manual is installed with the AccelTest software. Here’s where you
can find it:
•Windows: Click StartProgramsAccelTestUser Manual.
•Macintosh: Open the Applications folder on your hard drive; then, open the
AccelTest folder and double-click the ATSoftwareManual.pdf file.
You may need Adobe Reader installed to view the manual; if you don’t have it, you can
download Adobe Reader at www.adobe.com.
A
B
C
SMARTOPTION™ MOBILE LAB SETUP FOR NEOS
Additional Software for NEO 2
8
R0311.1008
. . . . .
SmartOption Mobile Lab
Setup for NEOs
AccelTest Site License
Please read this License carefully before installing the enclosed software. By breaking
the seal on this package and using the enclosed software, your organization
(“Licensee”) agrees to be bound by the terms of this License. If your organization does
not agree to these terms, return the software and materials to Renaissance Learning,
Inc., (“RL”) for a refund.
1. Grant of License. RL grants Licensee a non-exclusive, non-transferable license
to use the enclosed software, which software may include embedded third-party
software licensed to RL (“Software”).
2. Restrictions. Licensee shall have the right to install and use the Software on any
and all stand-alone personal computers at a single “Site.” Site means a single
building or a single campus wherein the buildings are less than 150 feet apart.
Licensee shall not make the Software available in whole or in part in any other
networked or time-sharing environment. Licensee may make a backup or archival
copy of the Software but may not otherwise copy any portion of the Software or
translate, reverse-engineer, disassemble, or decompile it. In addition, Licensee
may install on home computer for use related to licensed site needs.
3. Ownership. All rights in the Software and RL Content are owned, licensed by,
and retained by RL. The Software and RL Content are protected under U.S. and
international copyright laws and the source code of the Software is a trade secret
of RL. Neither the Software nor the Licensee’s rights or obligations under this
License may be sublicensed, leased, rented, distributed, assigned, or transferred
in whole or in part to any third party. All RL Content provided with the Software
shall be used solely by and within the Licensee. RL Content shall not be given
away, posted, leased, sold, or licensed for use by any third party. RL Content shall
not be used in conjunction with software other than that provided or authorized
by RL. Licensee shall be prohibited from capturing or extracting RL Content by
any means, or using content for any purpose other than the designated
requirements of the product.
4. Term. This License is effective upon receipt by Licensee of the Software. Licensee
may terminate this License at any time by returning all copies of the Software to
RL. RL may terminate this License if the Licensee breaches any term of this
License. Upon termination, Licensee will return all copies of the Product, and any
portions there of, to RL or destroy the same and certify in writing to RL that it has
done so.
5. Limited Warranty. RL warrants that, for a period of 30 days from the delivery
(the “Warranty Period”), the Software will perform substantially in accordance
with any accompanying written materials. This Limited Warranty is void if the
failure of the Software results from accident, abuse or misapplication. If, during
the Warranty Period, a defect appears, Licensee may return the Software to RL for
replacement or refund at RL’s discretion. RL does not warrant the completeness
or accuracy of any information contained in the Software, or that the use of the
Software will meet Licensee’s needs or that its use will be uninterrupted or error
free. THE FOREGOING CONSTITUTES LICENSEE’S SOLE AND EXCLUSIVE
REMEDY FOR BREACH OF ANY WARRANTIES (EXPRESS OR IMPLIED)
MADE UNDER THIS LICENSE. EXCEPT FOR THE WARRANTIES SET FORTH
SMARTOPTION™ MOBILE LAB SETUP FOR NEOS
Additional Software for NEO 2
9
R0311.1008
. . . . .
SmartOption Mobile Lab
Setup for NEOs
ABOVE, THE PRODUCT IS LICENSED “AS IS,” AND RL DISCLAIMS ANY AND
ALL OTHER WARRANTIES, EXPRESS OR IMPLIED, INCLUDING WITHOUT
LIMITATION ANY IMPLIED WARRANTIES OF MERCHANTABILITY, FITNESS
FOR A PARTICULAR PURPOSE, TITLE AND NON-INFRINGEMENT. NO RL
DEALER, DISTRIBUTOR, AGENT OR EMPLOYEE IS AUTHORIZED TO MAKE
ANY MODIFICATION OR ADDITION TO THE FOREGOING WARRANTY.
6. Limitation of Liability. Licensee assumes responsibility for the selection of the
Software to achieve its intended results, the use and acquisition of other software
and/or equipment compatible with the Software, and the installation, use, and
results obtained from the Software. INAS MUCH AS THE PRICE PAID FOR THE
LICENSE RIGHTS GRANTED TO USE THE SOFTWARE MAY BE
DISPROPORTIONATE TO THE VALUE OF PRODUCTS TO BE USED WITH
THE SOFTWARE, AND TO LIMIT THE LIABILITY AGAINST RL TO AN
AMOUNT REASONABLY PROPORTIONATE TO THE VALUE OF THIS
TRANSACTION, LICENSEE AGREES THAT RL’S AND ITS LICENSOR’S
CUMULATIVE LIABILITY TO LICENSEE AND ALL OTHER PARTIES FOR ANY
LOSS OR DAMAGES RESULTING FROM ANY CLAIMS, DEMANDS, OR
ACTIONS ARISING OUT OF OR RELATING TO THIS LICENSE SHALL NOT
EXCEED THE FEE PAID BY LICENSEE FOR THE USE OF THE PRODUCT. RL
SHALL NOT BE LIABLE FOR: (A) ANY LOSS OF USE OF LICENSEE'S
COMPUTERS OR LOSS OR CORRUPTION OF DATA OR THE COSTS OF
SYSTEM OR DATA RECOVERY; (B) ANY THIRD PARTY CLAIMS; OR (C) FOR
ANY INDIRECT, SPECIAL, PUNITIVE, EXEMPLARY, INCIDENTAL, OR
CONSEQUENTIAL DAMAGES OR LOST PROFITS, WHETHER BASED ON
CONTRACT, NEGLIGENCE, STRICT LIABILITY, OR OTHERWISE, EVEN IF RL
HAS BEEN ADVISED OF THE POSSIBILITY OF SUCH DAMAGES.
7. Export Law Assurance. You may not use or otherwise export the Software
except as authorized by U.S. law. In particular, but without limitation, the
Software may not be exported (i) into (or to a national or resident of) any U.S.
embargoed country (ii) to anyone on the U.S. Treasury Department’s list of
Specially Designed Nationals or the U.S. Department of Commerce’s Table of
Denial Orders. By using the Software you represent and warrant that you are not
located in, under control of, or a national or resident of any such country, or on
any such list.
8. Governing Law. This License shall be governed by the laws of the State of
Wisconsin.
9. Complete Agreement. This License constitutes the entire agreement between
the parties with respect to the Software.
10/08
SMARTOPTION™ MOBILE LAB SETUP FOR NEOS
Additional Software for NEO 2
10
R0311.1008
. . . . .
SmartOption Mobile Lab
Setup for NEOs
Installing the 2Know! Toolbar Software
Windows: Installing the 2Know! Toolbar Software
1. In the back of the NEO 2 Resource Guide for Use with 2Know!, you’ll find the
2Know! Toolbar CD. Insert it into your computer and view the contents of the CD.
2. Double-click the 2Know!_Toolbar_2.0_Win.msi file on the CD.
3. In the installation wizard that opens, click Next > on the Welcome panel.
4. Note the installation location and click Next > on the next panel.
5. Click Install on the next panel.
6. If you want to start the 2Know! Toolbar right away, check the box on the final panel.
Click Finish to complete the installation.
7. A message may appear to tell you that you must restart your computer for the
configuration changes to take effect. Click Yes if you want to restart the computer
now or No to restart it later.
8. Connect the Renaissance Receiver to your computer and set the Receiver name
(see the NEO 2 and SmartApplets Quick Guide).
9. Make sure that neither AccelTest nor the Renaissance Responder program are
running. Then, start the 2Know! Toolbar by clicking StartPrograms2Know!
Toolbar2Know! Toolbar.
10. Read the license; then, check the I agree box and click OK to start the program.
Macintosh: Installing the 2Know! Toolbar Software
1. In the back of the NEO 2 Resource Guide for Use with 2Know!, you’ll find the
2Know! Toolbar CD. Insert it into your computer and view the contents of the CD.
2. Double-click 2Know! Toolbar Installer in the window that opens.
3. Enter the administrator user name and password for the computer and click OK.
(You must have rights that allow you to install the program.)
4. Click Install in the installation assistant. The program will be installed. (If the
computer must be restarted after installation, the program will notify you; click OK.)
5. When the installation is finished, click Restart if the computer must be restarted. If
not, click Quit.
6. Connect the Renaissance Receiver to your computer and set the Receiver name
(see the NEO 2 and SmartApplets Quick Guide).
7. Open the Applications folder on the computer’s hard drive. Then, open the 2Know!
Toolbar folder. Double-click 2Know! Toolbar.
8. Read the license; then, check the I agree box and click OK to start the program.
Getting Information about Using the 2Know! Toolbar
Once the 2Know! Toolbar program is open, click Options and choose Getting
Started. This will open a document titled Using the 2Know! Toolbar, which explains
how to use the program.
You can also
download the
2Know! Toolbar from
the Renaissance Learning
Web site at
www.renlearn.com.
SMARTOPTION™ MOBILE LAB SETUP FOR NEOS
Teacher Tips for Using the SmartOption Mobile Lab
11
R0311.1008
. . . . .
SmartOption Mobile Lab
Setup for NEOs
Teacher Tips for Using the SmartOption Mobile Lab
The tips below may help teachers use the SmartOption Mobile Lab with their classes.
Getting Started
• Label the cart shelves, slots, cables, and NEOs with numbers using an artist pen or a
white paint pen. This helps students find their NEOs and see where to connect them.
In some classrooms, putting the NEO number next to the light on the NEO is helpful
so students notice both the number and the green light when the cart is connected.
Within the cart, putting a white dot or cable number on the side of the cables that
faces out helps students see which direction the cord should go into the NEO.
• While labeling NEOs or carts, avoid using teacher names, room numbers, school
names, or similar information that may change.
• If you have more than one cart, number your carts and make the number easy to see
on the cart. You can also put the cart number on the back of your NEOs to help
identify them and keep them in the correct cart.
• Assign NEO numbers to students in a way that promotes orderly use. For example,
you can assign NEOs based on the class seating chart so that when students get their
NEOs, they can walk out of their row and return to their seats in order.
• If more than one teacher or class is sharing a SmartOption Mobile Lab, consider
doing the following:
• Enable file passwords and teach students to password-protect their files. To
find out how to set unique file passwords, see the NEO 1 and NEO 2 User
Manual.
• If you are using a central calendar like GroupWise,1place the cart as an object
in the calendar to make the cart easier to share, and require a lesson plan and
objectives and sample work to be attached for gathering data for grants or
funding requests.
• If you are not using an automated calendar, use a paper calendar for reserving
the cart. This helps you to gather data to support the purchase of more carts if
necessary.
• Keep a log on top of the cart so teachers can indicate if they have cleared open
work files. This helps prevent other teachers from sending new lessons that
overwrite open student work, causing those files to be lost.
• Have a parent night before you send NEOs home to explain the NEOs to parents and
to provide hands-on training.
• When students will be traveling with the NEOs, you can provide them with small
plastic collapsible file folders to keep the NEOs in labeled with the NEO number,
campus, and teacher name.
1. GroupWise is a registered trademark of Novell, Inc., in the United States and other countries.
SMARTOPTION™ MOBILE LAB SETUP FOR NEOS
Teacher Tips for Using the SmartOption Mobile Lab
12
R0311.1008
. . . . .
SmartOption Mobile Lab
Setup for NEOs
Classroom Management Tips
• Create a “startup” send list to help reset your NEOs at the beginning of the year. The
send list could set the master password you want, enable file passwords, and set your
KeyWords settings.
• Teach students to save files immediately upon beginning an
assignment by pressing ctrl-S. This helps prevent loss of student work if files
are cleared or overwritten.
• Teach students to put an automatic heading on every document they create.
• Use the pocket on the cart for gathering writing samples.
• Create “beam schemes” so you can send out documents quickly without disrupting
the class. Some teachers use row and pod schemes or assign student leaders who
accept files and send them out.
• Keep a notebook for recording problems students have encountered and how they
solved them. (Students can write this information in the notebook or type it into a
NEO, print it out, and put it in the book.) Have one NEO leader each week help
check connections, answer questions, and get the NEOs out.
• Photocopy the shortcut tips or needed symbols, enlarge the copy, and laminate it to
put on the wall.
• You can use one of the files on NEOs to record the progress of each of your reading
groups. While a reading group is meeting, have a “recorder” use a NEO to document
new vocabulary, unanswered questions, main events, quotes, etc.
Routine Maintenance Tips
• Clean files off your NEOs on a regular basis (such as weekly or at the end of each
grading period) to keep too many files from being stored on the NEOs and to remove
old files that are no longer needed.
• Delete all KeyWords students when you have finished all keyboarding instruction.
(Remember: keyboarding best practices recommend daily instruction until all 16
units are complete, followed by weekly or biweekly practice sessions.)
• Use the QuizManager program to delete all AlphaQuiz quizzes as needed.
Remember: each NEO can hold up to four quizzes.
• At the end of the school year, use AlphaSmart Manager to reset all devices. This
returns NEOs to their original factory default settings so they are ready to go for the
next school year.

Other manuals for NEO2 SmartApplet

6

This manual suits for next models

1

Other Alphasmart Keyboard manuals

Alphasmart NEO2 SmartApplet Firmware update

Alphasmart

Alphasmart NEO2 SmartApplet Firmware update

Alphasmart 3000 User manual

Alphasmart

Alphasmart 3000 User manual

Alphasmart NEO2 SmartApplet User manual

Alphasmart

Alphasmart NEO2 SmartApplet User manual

Alphasmart Manager for Dana Installation and operating instructions

Alphasmart

Alphasmart Manager for Dana Installation and operating instructions

Alphasmart 3000 User manual

Alphasmart

Alphasmart 3000 User manual

Alphasmart AS Pro User manual

Alphasmart

Alphasmart AS Pro User manual

Alphasmart NEO User manual

Alphasmart

Alphasmart NEO User manual

Alphasmart AS 2000 User manual

Alphasmart

Alphasmart AS 2000 User manual

Popular Keyboard manuals by other brands

Zagg Rugged Book Go instructions

Zagg

Zagg Rugged Book Go instructions

Manhattan 175708 reference guide

Manhattan

Manhattan 175708 reference guide

GeoVision GV-Keyboard user manual

GeoVision

GeoVision GV-Keyboard user manual

PCD Maltron RS10N1G-UK user manual

PCD Maltron

PCD Maltron RS10N1G-UK user manual

Logitech DINOVA EDGE INSTALLING AND FEATURES

Logitech

Logitech DINOVA EDGE INSTALLING AND FEATURES

Hal Communications MKB-1 instruction manual

Hal Communications

Hal Communications MKB-1 instruction manual

BTC 5135 user guide

BTC

BTC 5135 user guide

Logitech K800 Getting started

Logitech

Logitech K800 Getting started

Logitech K400 Plus Frequently asked questions

Logitech

Logitech K400 Plus Frequently asked questions

IOGear GKB632B quick start guide

IOGear

IOGear GKB632B quick start guide

M-Audio Axiom A.I.R. Mini 32 Service manual

M-Audio

M-Audio Axiom A.I.R. Mini 32 Service manual

Honeywell HD-JC-010 user manual

Honeywell

Honeywell HD-JC-010 user manual

WOXTER Stinger RX 2000 K user manual

WOXTER

WOXTER Stinger RX 2000 K user manual

SteelSeries APEX 5 user manual

SteelSeries

SteelSeries APEX 5 user manual

Crosley LK-716B manual

Crosley

Crosley LK-716B manual

IOGear GKB635 quick start guide

IOGear

IOGear GKB635 quick start guide

Macally BLSLIMKEYPROSG user manual

Macally

Macally BLSLIMKEYPROSG user manual

KROM KHAIDO QuickGuide Installation

KROM

KROM KHAIDO QuickGuide Installation

manuals.online logo
manuals.online logoBrands
  • About & Mission
  • Contact us
  • Privacy Policy
  • Terms and Conditions

Copyright 2025 Manuals.Online. All Rights Reserved.