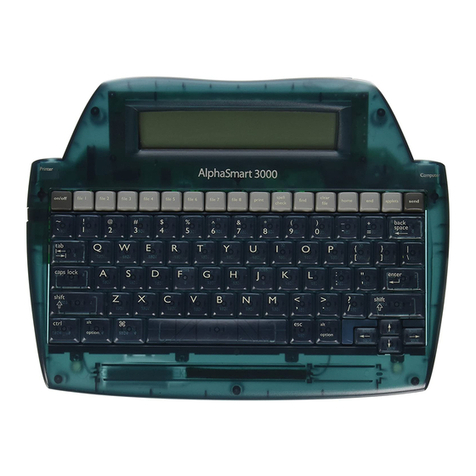
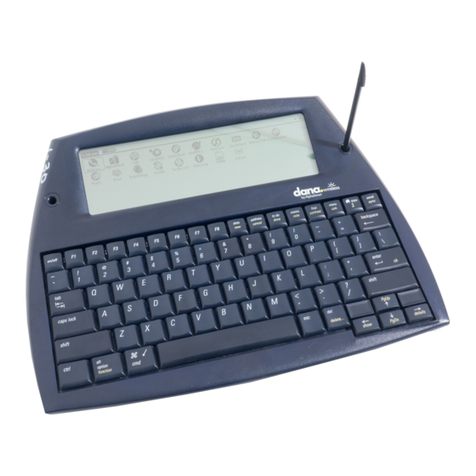
Alphasmart AS 2000 User manual

AlphaSmart Command List
Option-x-Clear File Permanently clear file
Option-x-ctrl-shift-Clear File Clear all eight files
x-Delete Delete from cursor to the end
of file.
x-F or Find Find Text
x-Find Keyboarding Timer
x-F1 Changes files when attached
to the PC (F1 for File 1, etc.)
Option-x-F1 Changes files when attached
to the Mac (F1 for File 1, etc.)
x-G Continue the Find Text search
while in the Find screen
Option-x-K Sticky Keys, Auto Repeat,
and Show Marks
Option-x-L Layout options: QWERTY,
Dvorak, right and left
x-P or Print Print command
Option-Print Printer selection menu
Option-x-P Change password
Option-x-ctrl-P Password enable/disable
Option-x-S Transfer speed menu
x-Spell Check Spell check a word
Option-x-Spell Check Disable/enable Spell Check
Option-x-R Recover file from last deletion
Option-x-ctrl-R Recover 40 lines of text
Option-x-ctrl-shift-R Recover entire file
Option-x-V System status, current file
number, version number, etc.
See also page 30 for a list of insertion commands for international
characters.
Three Year Limited Warranty
Intelligent Peripheral Devices, Inc. warrants the AlphaSmart
2000 keyboard and display to be free from defects in materi-
als and workmanship for a period of three years from the
date of original retail purchase. During this period, if a defect
should occur, Intelligent Peripheral Devices will, at its
option, repair or replace the AlphaSmart 2000 at no charge
to you, provided that it is returned during the warranty
period to Intelligent Peripheral Devices or one of its autho-
rized dealers. This warranty does not apply if the AlphaSmart
2000 has been damaged by accident or abuse, or modified
without the written permission of Intelligent Peripheral
Devices, or if the serial number has been removed or
defaced. There are no other warranties, express or implied.
Intelligent Peripheral Devices accepts no responsibility for
consequential damages, including but not limited to loss of
profit or benefits.
To return a unit, please see the Return Procedures section.
AlphaSmart 2000 Loaner Program & Technical Service
Please contact our Technical Service Center toll-free at
(888) 274-2720 for technical questions, or for more informa-
tion on getting an AlphaSmart 2000 loaner (including a lab.
pack of loaners). You may also contact us by e-mail at
Nothing in this manual may be reproduced in any manner, either wholly
or in part, for any purpose whatsoever without written permission from
Intelligent Peripheral Devices, Inc.
Copyright ©1999 Intelligent Peripheral Devices, Inc. All rights reserved.
Apple, the Apple logo, Apple IIGS, and Macintosh are registered trade-
marks of Apple Computer, Inc. Classic is a registered trademark licensed
to Apple Computer, Inc. Apple Desktop Bus, Performa, and PowerBook
are trademarks of Apple Computer, Inc. MacWrite is a registered trade-
mark of Claris Corporation. Microsoft is a registered trademark of
Microsoft Corporation. IBM is a registered trademark of International
Business Machines. HyperStudio is a trademark of Roger Wagner Pub-
lishing, Inc. Digital Chisel is a trademark of Pierian Spring Software.
Revised May 1999

■TABLE OF CONTENTS
Warranty . . . . . . . . . . . . . . . . . . . . . . . . . . . . . . . . . . . . .Inside Cover
System Requirements . . . . . . . . . . . . . . . . . . . . . . . . . . . . . . . . . . . .3
Quick Start . . . . . . . . . . . . . . . . . . . . . . . . . . . . . . . . . . . . . . . . . . . .3
Using the AlphaSmart • Transferring Text to a Computer • Auto Power Off
Safety, Care, and Maintenance . . . . . . . . . . . . . . . . . . . . . . . . . . . . .5
Caring for Batteries
Entering Text . . . . . . . . . . . . . . . . . . . . . . . . . . . . . . . . . . . . . . . . . .5
Text Formatting • Caps Lock Indicator
Working with Files . . . . . . . . . . . . . . . . . . . . . . . . . . . . . . . . . . . . . .7
File Capacity • Erasing Files • Clear All Files Command
Data Recovery . . . . . . . . . . . . . . . . . . . . . . . . . . . . . . . . . . . . . . . . .8
Spell Check . . . . . . . . . . . . . . . . . . . . . . . . . . . . . . . . . . . . . . . . . . .8
Disabling Spell Check
Installing the Mac Y Cable . . . . . . . . . . . . . . . . . . . . . . . . . . . . . . . .9
Concerns about ADB Live Connect/Disconnect
Sending Text to a Macintosh . . . . . . . . . . . . . . . . . . . . . . . . . . . . . .11
Installing the PC Y Cable . . . . . . . . . . . . . . . . . . . . . . . . . . . . . . . . .12
Sending Text to a PC . . . . . . . . . . . . . . . . . . . . . . . . . . . . . . . . . . . .14
Keyboard Command Differences • Transferring Text to a PC • Tips for
Connecting to PC-compatible Laptops
Transferring Text Using Infrared . . . . . . . . . . . . . . . . . . . . . . . . . . .16
AlphaBeam for Mac v1.0 • AlphaBeam for PC v1.0
Tips for Downloading to Spreadsheets, Databases, Multimedia,
E-mail, and Other Applications . . . . . . . . . . . . . . . . . . . . . . . . . . . .20
Downloading into Alternate Applications • Spreadsheets • Databases
Changing the Transfer Speed . . . . . . . . . . . . . . . . . . . . . . . . . . . . . .23
Send Speed for Mac • Send Speed for PC
AlphaSmart Find Feature . . . . . . . . . . . . . . . . . . . . . . . . . . . . . . . . .24
Keyboard Layouts . . . . . . . . . . . . . . . . . . . . . . . . . . . . . . . . . . . . . .25
Special Education Needs . . . . . . . . . . . . . . . . . . . . . . . . . . . . . . . . .27
Auto Repeat • Sticky Keys
AlphaSmart 2000
1

■SYSTEM REQUIREMENTS
The AlphaSmart 2000 works with any desktop or laptop com-
puter with an external keyboard port, whether IBM compati-
ble, Apple Macintosh, or Apple IIGS.
The AlphaSmart 2000 works with IBM compatible computers
including PC AT, PS/2, 286, 386, 486, and Pentium.1Alpha-
Smart 2000 is compatible with all versions of DOS, Windows
and OS/2.
The AlphaSmart 2000 works with any Apple®computer (or
Mac clone) equipped with an Apple Desktop Bus™ (ADB) port,
which includes the Apple IIGS®, all Macintosh®models, all
PowerBook™models, the Performa™, Centris™, and Quadra™
series, Mac clones, and all Power Macintosh models.2 Alpha-
Smart is compatible with all Apple system software
versions 6.0.x and later, including System 7.x and 8.x.
Note for Macintosh Users: For the sake of simplicity, the term
“Macintosh“ is used generically throughout this manual. The pro-
cedures are the same regardless of the particular Macintosh model
being used.
Note for PC Users: For the sake of simplicity, the term “PC“ is
used generically throughout this manual when referring to an
IBM-compatible DOS, Windows or OS/2 personal computer. The
procedures are the same regardless of the particular IBM compati-
ble model being used.
■QUICK START
For those of you who don’t like to read manuals, here’s a
quick guide to working with the AlphaSmart 2000 keyboard
and display.
Note: It is important to follow these steps completely in the order
they are given.
AlphaSmart 2000
3
1AlphaSmart is not compatible with the older XT model PCs and with
laptops without an external keyboard port.
2AlphaSmart does not work with older, non-ADB–based Macs, including
the Mac 128, Mac 512, Mac 512E, Mac Plus, and the PowerBook 190. It
is also incompatible with the Apple IIe and Apple IIc. It is compatible
with the Mac SE and all Macs produced after the Mac SE.
International Character Support . . . . . . . . . . . . . . . . . . . . . . . . . . .29
List of AlphaSmart International & Special Characters
Printing from Your AlphaSmart . . . . . . . . . . . . . . . . . . . . . . . . . . . .31
Keyboard Timer . . . . . . . . . . . . . . . . . . . . . . . . . . . . . . . . . . . . . . .32
Show Marks . . . . . . . . . . . . . . . . . . . . . . . . . . . . . . . . . . . . . . . . . .33
Status Screen . . . . . . . . . . . . . . . . . . . . . . . . . . . . . . . . . . . . . . . . .33
AlphaSmart Password Protection . . . . . . . . . . . . . . . . . . . . . . . . . . .34
Enabling the Password Option • Setting a Password • Changing a Password
Get Utility Software . . . . . . . . . . . . . . . . . . . . . . . . . . . . . . . . . . . .36
Get Utility for Mac v2.0 • Get Utility for PC v2.1
TurboTransfer Software . . . . . . . . . . . . . . . . . . . . . . . . . . . . . . . . . .46
Installation • Tips for Using TurboTransfer with Different Applications
• Compatible Applications • Troubleshooting Notes • TurboTransfer Times
Batteries and Power Requirements . . . . . . . . . . . . . . . . . . . . . . . . .49
Batteries • Battery Life—Using AA Alkaline Batteries • Rechargeable NiCAD
Battery Pack • Use of Other Rechargeable Batteries • Low Battery Indication
• Lithium Battery • Power • Radio and Television Interference
AlphaSmart Accessories . . . . . . . . . . . . . . . . . . . . . . . . . . . . . . . . .55
AC Adapter • Carrying Case • Mac Y Cable • PC Y Cable • NiCAD
Rechargeable Battery Pack • Parallel Printer Cable • Serial Printer Cable
• AlphaSmart Training Video • IR Module • Infrared Pods
Troubleshooting . . . . . . . . . . . . . . . . . . . . . . . . . . . . . . . . . . . . . . .56
Frequently Asked Questions . . . . . . . . . . . . . . . . . . . . . . . . . . . . . .59
Return Procedures & Restrictions and Money Back Guarantee . . . . .61
Safety Guidelines . . . . . . . . . . . . . . . . . . . . . . . . . . . . . . . . . . . . . .63
Work Environment • Positioning of the AlphaSmart 2000 • Furniture and Posture
• Hand and Arm Position and Motion • Lighting • Vision Care • Work Habits
• Health Habits and Exercise • Conclusion • For Further Information
AlphaSmart Command List . . . . . . . . . . . . . . . . . . .Inside Back Cover
2
AlphaSmart 2000

■SAFETY, CARE & MAINTENANCE
With proper care and maintenance, your AlphaSmart will
give you years of worry-free service.
• Your AlphaSmart will turn off automatically when it is idle
for more than three minutes.
• Always turn off your AlphaSmart before changing the
batteries or connecting to an AC adapter.
• Take care not to break the LCD screen. Don’t drop the
AlphaSmart or subject it to strong impact. Do not place an
AC adapter or other heavy object over the LCD screen.
• Keep your AlphaSmart away from extreme heat. Don’t
leave it on the dashboard or in the trunk of a car, or near
a heater.
• Don’t leave your AlphaSmart in a place that is extremely
dusty or damp.
• Do not use frayed or damaged cables.
• Never force a connector into a port if the connector and
port do not join easily.
• Clean the screen only with a soft dry cloth. Do not use
solvents.
Caring For Batteries
• To avoid battery leakage, change the batteries as soon as
they become weak.
• Do not drop, puncture, disassemble, mutilate or incinerate
the batteries.
• Recharge only rechargeable batteries, and then only as
directed in the manual.
• Do not leave batteries in hot locations.
• When storing the AlphaSmart for several months (like over
the summer), remove the AA batteries.
■ENTERING TEXT
When you first turn on your AlphaSmart, you will see the
start-up screen for a few seconds, which gives your Alpha-
Smart 2000 version number (for example, v3.x) and the
number of the file it is opening. Then the screen will display
AlphaSmart 2000
54
AlphaSmart 2000
Step One—Using the AlphaSmart
• Turn on the AlphaSmart by pressing the On/Off key and
start typing. Your text will appear in the window.
• Use the arrow keys to move your cursor in the text.
• Use the Delete key to erase.
Step Two—Transferring Text to a Computer
• Turn on the Macintosh or PC
• Start up any application that accepts text and open a new
file. You must have a file open in this application in order
to transfer files from the AlphaSmart.
• Mac: Connect your AlphaSmart to the Macintosh using a
Mac Y Cable.3
• PC: Connect your AlphaSmart to the PC using a PC Y
Cable.4
• IR: Launch AlphaBeam on your Mac or PC. Point the IR
lens of the AlphaSmart towards the IrDA transceiver or pod.5
• Press the Send key on the AlphaSmart. Make sure you are
in any application that accepts text input before pressing
the Send key. If you press Send while in the Finder, you
will rename the files on your desktop to the text that is in
your AlphaSmart.
• Your text will appear on the Macintosh or PC screen.
Step Three—Finishing the Process
• At the Macintosh or PC, save the new file.
• At the AlphaSmart, press the Clear File key to erase the text.
AlphaSmart supports eight different files. To go to file 1,
press the F1 key, F2 for file 2, and so on up to F8 for file 8.
Auto Power Off
The AlphaSmart will automatically power off after 3–4
minutes of non-use.
3See Installing the Mac Y Cable for more information.
4See Sending Text to a PC for more information.
5If your AlphaSmart is equipped with an IR module , you can send text
to a computer via infrared.

■WORKING WITH FILES
The first time that the AlphaSmart is turned on, it will dis-
play the message Opening file 1. On subsequent startups, it
will automatically open the last file used.
File Capacity
The AlphaSmart 2000 supports eight files, which are fixed in
length. File 1 is 16 pages long, files 2–5 are 8 pages each, files
6 and 7 are 6 pages each, and file 8 is 4 pages in length. This
provides a total storage capacity of 64 pages of single-spaced
text or 128,000 characters.
This file structure is intended to support multiple users or to
enable a single user to organize his or her work into chapters
or sections. To move between files, press the F1/file 1 key
to go to file 1, the F2/file 2 key to go to file 2 and so forth,
up to F8.
Erasing Files
Text entered into each file will remain there until you
explicitly erase it by pressing the Clear File key when the
AlphaSmart is not attached to a desktop computer. Note that
when you press the Clear File key, you are clearing only the
file in which you are currently working; other files will
remain unchanged.
Once the Clear File key is pressed and the file is deleted,
information may still be recovered using the Data Recovery
command described below. However, for confidential files
which you wish to erase without the ability to recover, you
may press Option-x-Clear File. This command writes 0
(zeros) to the entire file. Use this command with care.
Clear All Files Command
Press Option-x-control-shift-Clear File to erase all eight
files simultaneously. You will be asked if you are sure—press-
ing the Ykey at this point will clear files 1 through 8. How-
ever, this deletion is not permanent, and you can still
recover any of the files using the Data Recovery command
described below as long as you have not typed over the files.
AlphaSmart 2000
76
AlphaSmart 2000
the first page of your file. To enter text, simply begin typing
as you would on any other keyboard. Use the Delete key to
erase. As soon as you type each character it is automatically
saved. There is no Save command. The arrow keys allow you
to move your cursor through the text. Additionally, the fol-
lowing keyboard combinations will also move your cursor as
specified:
xomoves the cursor up 4 lines (one displayed page)
x,moves the cursor down 4 lines (one displayed page)
xlmoves the cursor to the end of the line
xkmoves the cursor to the beginning of the line
As with any word processing application, the text will auto-
matically wrap at the end of each line, so you should use the
Return key only to separate paragraphs.
Text Formatting
All text formatting, including margins, tab stops, font, size, and
other styling attributes, are done on the desktop computer after
the file has been transferred from the AlphaSmart. Only the
characters themselves (ASCII key codes) are transferred from
the AlphaSmart to the computer. However, the Tab key can be
used on the AlphaSmart to create columns or paragraph inden-
tations which will transfer to the Macintosh with the file.
When the tab key is used, it will appear as a right arrow on the
AlphaSmart screen when Show Marks is activated.
The AlphaSmart does not have cut, copy, or paste functions
included. These advanced editing features are more easily
performed when using a larger screen and mouse, and there-
fore should be performed once a file has been transferred to
the desktop computer.
When an AlphaSmart file is full, a message will be displayed
which reads:
File is full. Use another file or send data to your computer.
Caps Lock Indicator
When Caps Lock is active, the lower right character of the
screen will be solid black. Pressing the Caps Lock key toggles
the Caps Lock on and off.

If your intended word is not displayed, or the message “No
suggestions found” appears, then press the spacebar to skip
over that word and continue checking the other words in
the document.
If the word is spelled correctly, but isn’t in the AlphaSmart
dictionary, just press the spacebar to skip over the word and
leave it unchanged in your file.
To spell check a single word in a document, put the cursor
anywhere within the word you wish to check and press
x-Spell Check. That word alone will be checked and if it is
not in the dictionary, replacement suggestions for the word
will be offered.
Disabling Spell Check
To disable the spell check feature (for example, to give the
class a spelling test), press x-Option-Spell Check. You will
be prompted to enter the master password to disable spell
checking. To enable the spell check feature, once again press
x-Option-spell check and enter the master password.
Note: The master password can be obtained by calling our
technical support office (888) 274-2720.
There is no “user dictionary” as well as no way of adding
words to the existing dictionary.
■INSTALLING THE MAC Y CABLE
You may use any Apple Desktop Bus (ADB) cable to transfer
data from the AlphaSmart to the Macintosh—no special cable
is usually needed.6For convenience, however, we offer an
optional Y cable that makes connecting and disconnecting an
AlphaSmart even easier. We suggest installing the Y cable
between your keyboard and its ADB cable, as shown in Figure 1.
To install the Y cable, first disconnect your Macintosh key-
board from the computer (at the keyboard end). Insert the
trunk of the Y cable into the empty ADB port on the keyboard.
AlphaSmart 2000
9
■DATA RECOVERY
If you accidentally clear a file, it can still be recovered as
long as no text has been entered into that file yet. Open the
file you wish to recover by pressing one of the F1–F8 keys.
Press Option-x-R to activate the AlphaSmart Data Recovery
command.
The Data Recovery command restores the end-of-file marker to
the same position it was when the file was last cleared (by
pressing the Clear File key). So if you accidentally clear a file,
Option-x-R will restore it.
If, however, the Data Recovery command fails to recover the
data, try pressing Ctrl-Option-x-R. This is the Recover 40
Characters command. Each time you press this command it
will move the end-of-file marker back 40 characters. Press
this command repeatedly until you see all of your text, plus
some garbage. Then hold the delete key down until the
garbage characters are deleted.
You may also try pressing Shift-Ctrl-Option-x-R to recover
the entire file. Scroll down to the end of your text where the
garbage characters start and press x-Delete to erase from the
cursor to the end of the file.
Note: If the file was deleted using the Option-x-Clear File com-
mand, the data is not recoverable.
■SPELL CHECK
To spell check the current file, press the Spell Check key.
Your file will be checked from the top to the bottom. When
it finds a word not contained in its dictionary, the Alpha-
Smart will provide a list of alternate words that are spelled
similarly.
For example, if the word “runn” is checked, a list of sugges-
tions (run, runs, rune, rung, runt, ruin) will be displayed. If
one of the suggestions is the correct spelling, use the arrow
keys to select it and press Return to replace the incorrect
word with the correct one.
8
AlphaSmart 2000
6The Mac Y cable is required when connecting to a Macintosh with an
“Apple Design Keyboard,” model #M2980, since this keyboard has an
attached ADB cable and only one ADB connector.

Warning: DO NOT attach the AlphaSmart to both a PC and the
Mac at the same time. It won’t work and possible damage may
occur to the Mac or the PC.
Concerns about ADB Live Connect/Disconnect
The AlphaSmart keyboard is designed to be connected to and
disconnected from Macintosh ADB ports while the Mac is
running.
Some people may be concerned with this, since Apple
recommends not unplugging or attaching an ADB device
while the computer is running. This is recommended by
Apple because certain ADB devices change modes when they
are unplugged, causing confusion to the system when the
devices are reattached.7
However, the AlphaSmart has been designed so that it does
not change modes when unplugged. More importantly, it
does not confuse the Mac when unplugged and reconnected.
■SENDING TEXT TO A MACINTOSH
When you attach your AlphaSmart to a Macintosh, the
AlphaSmart changes modes and the screen displays the fol-
lowing message: Attached to Macintosh, emulating keyboard.
Press Send key to transfer file.
If you do not see this message, check your cable and make
sure it is attached properly to the Macintosh.
When the AlphaSmart is attached to a Macintosh, all of the
keys except the Send and On/Off keys behave as standard
Macintosh keyboard keys. Any characters that are typed will
appear on the Macintosh screen, and the Clear File key acts as
a Macintosh clear key. Although the Control, and Option
keys have no function when the AlphaSmart is used in stand-
alone mode, they function as normal Macintosh keys when
the AlphaSmart is plugged into a Macintosh.
AlphaSmart 2000
11
Plug the short leg of the Y cable into your original keyboard
cable. The remaining cable leg should be plugged into the
connector port on the right side of your AlphaSmart, which is
the Macintosh ADB port.
Figure 1. Installing the Mac Y Cable
To install the Y cable with a M2980 keyboard (which has a
permanently attached ADB cable), first unplug your mouse
from your keyboard. Insert the trunk of the Y cable into the
empty ADB port in the middle back of the keyboard. Plug
your mouse into the short leg of the Y cable (see Figure 2).
The remaining cable leg will be used to connect your Alpha-
Smart to the Macintosh when you want to transfer text.
Figure 2. Installing the Mac Y Cable
with Mac Keyboard model #M2980
AlphaSmart
Mac Keyboard model #M2980
"Y” Cable
Mouse
to Mac
AlphaSmart
Mac Keyboard
Mac "Y” Cable
Mouse
Mac ADB
Cable
10
AlphaSmart 2000
7As stated on page 290 of The Guide to Macintosh Family Hardware by Apple
Computer (published by Addison-Wesley): “Do not unplug and reattach an
ADB device while the computer is running—if you do, the device reverts
to its default address while the computer continues trying to reach the
device at the address assigned at startup time.”

3. Plug the cable end of the AlphaSmart PC Y Cable labeled
Computer’s Keyboard Port into the computer’s keyboard
port. Replug your computer keyboard cable into the PC
keyboard port on the PC Y Cable (see Figure 3).
Figure 3. Connecting the PC Y cable between a PC, a regular
keyboard and an AlphaSmart
4. With the PC Y Cable installed and your normal PC key-
board plugged in, turn on the computer, wait for complete
boot up and test your keyboard for operation. Open any
application that accepts text input and create a new docu-
ment or file.
5. Plug one end of your AlphaSmart Connector Cable into
the port labeled AlphaSmart on the Y cable and the other
end to the PC port on the AlphaSmart (on the left side).
6. Now, with your computer running and a file open in an
application, send your data to the PC. When the transfer
is complete, you may disconnect the AlphaSmart or you
may leave the AlphaSmart cable connected to the PC Y
Cable and use it whenever you want to transfer text.
Note: Always leave the PC Y Cable installed. If for any reason
you need to remove the PC Y Cable from the PC, do so when your
computer is turned off.
AlphaSmart
PC Keyboard
PC Y Cable
AlphaSmart
Connector Cable
PC Keyboard
Cable
AlphaSmart 2000
13
To change files when attached to the Macintosh, press
Option-x-F1 to go to file 1, Option-x-F2 to go to file 2,
and so on.
Pressing the Send key (at the extreme upper right of the key-
board) initiates the transfer of the current file from the Alpha-
Smart to the Macintosh. If you want to abort a file transfer,
just press any other key. You must have an application that
accepts text (such as a word processing or multimedia application)
already open on the Macinstosh, and have the cursor placed in the
file where you wish to insert the text before pressing the Send key.
Be sure to be within the application and not the Finder or Desktop
when you press the Send key, or you may rename your files to the
text in your AlphaSmart.
When the transfer is complete, disconnect the AlphaSmart.
(You may also leave the AlphaSmart connected to the Macin-
tosh for use as a normal keyboard.)
To finish the transfer process, save the word processing file on
the Macintosh. Once the text is saved on your Macintosh, you
can style, format, and spell check the file as you would any
other file in your word processing application.
To erase the transferred file from the AlphaSmart, press the
Clear File key on the AlphaSmart. The currently displayed
file will be deleted.
■INSTALLING THE PC Y CABLE
To install your AlphaSmart PC Y Cable:
1. Turn off the computer
2. Disconnect the keyboard from the computer keyboard
port and determine if it is a 5-pin or Mini-DIN 6-pin con-
nector. If you have a Mini-DIN 6-pin connector, use the
PC Y Cable and AlphaSmart Connector Cable alone. You
will not need the 2 adapters. If it is a 5-pin connector, you
need to connect one of the included “5-pin to Mini-DIN
6-pin” connectors to the tail of the PC Y Cable and the
other to the port that says PC Keyboard.
12
AlphaSmart 2000

Spell Check is the same as ScrLk
Shift-Spell Check is the same as NumLk
Find is the same as del
Shift-Find is the same as ins
x-Print is the same as F9
x-Spell Check is the same as F10
x-Find is the same as F11
x-Clear File is the same as F12
To change files when attached to the PC, only press the x
key and the Fxkey (F1 for file 1, F2 for file 2, etc). Do not
press the alt/option key. Pressing the alt key puts some word
processing programs into command mode and the file won’t
transfer correctly.
Tips for Connecting to PC-compatible Laptops
To get an AlphaSmart to download to a PC-compatible
laptop computer, you must connect the AlphaSmart the
exact same way you would attach an external keyboard to
your laptop. Unfortunately, each different PC compatible
laptop computer seems to have its own different, often non-
obvious, way to connect to an external keyboard.
For example, some IBM Thinkpad laptops have a Mini-DIN 6
port with a mouse and keyboard icon near it. One might log-
ically think that one could plug in a mouse or Mini-DIN 6
(PS/2 style) keyboard and expect it to work. Even though it
fits, it won’t work. To overcome this problem, you need a
special adapter cable that plugs in the port.
Another example is a particular Hitachi laptop model that
has a tiny switch that must be turned on in order to get an
external keyboard to work.
Some laptops (reported with some Compaq models), when
attached to the PC, require pressing the Enter key on the
AlphaSmart before pressing the Send key. Tech note: Pressing
the Enter key causes the laptop to switch from listening to the inter-
nal keyboard to listening to an external one, e.g. the AlphaSmart.
Since there are so many different types of laptops and differ-
ing ways that they each handle external keyboards, you must
in look in your laptop’s user manual for instructions on con-
necting an external keyboard. It is best if you can test it with
an external PC keyboard first before trying it with an Alpha-
Smart. If an external keyboard can type into your laptop,
AlphaSmart 2000
15
■SENDING TEXT TO A PC
When your AlphaSmart is attached to a PC, it changes modes
and the screen displays the following message: Attached to PC,
emulating keyboard. Press Send key to transfer file. If you do not
see this message, check your cable and make sure it is
attached properly to the PC.
Transferring Text to a PC
1. Pressing the Send key (at the extreme upper right of the
keyboard) initiates the transfer of the current file from the
AlphaSmart to the PC. If you want to abort a file transfer,
just press any other key. You must have a file open in an
application that accepts text and your cursor placed where you
want the text inserted in the file before sending text to a PC.
2. When the transfer is complete, disconnect the Alpha-
Smart. (You may also leave the AlphaSmart connected to
the PC for use as a normal keyboard.)
3. To finish the transfer process, save the word processing file
on the PC. Once the text is saved on your PC, you can style
and format the file as you would with any other file in your
word processing application.
4. To erase the transferred file from the AlphaSmart, press the
Clear File key on the AlphaSmart. The currently displayed
file will be deleted.
Note: If you only get the first one or two characters transferred
when sending from the AlphaSmart, be sure your normal PC key-
board is not connected. Disconnect your keyboard and try sending
the text again.
Keyboard Command Differences
When the AlphaSmart is attached to a PC, all of the keys
except the Send key behave as standard PC keyboard keys.
Any characters that are typed will appear on the PC screen.
Although the Escape, Enter, Control, and Alt keys have no
function when the AlphaSmart is used in standalone mode,
they function as normal PC keys when the AlphaSmart is
plugged into a PC.
When the AlphaSmart is attached to a PC:
Print is the same as PrtScrn
Shift-Print is the same as Pause
14
AlphaSmart 2000
AlphaSmart 2000
17
then the AlphaSmart should also be able to connect, type,
and send information to your laptop.
■TRANSFERRING TEXT USING
INFRARED
If your AlphaSmart 2000 has a built-in IR module, then you
can send text via infrared to a Mac, PC or printer. Since the
AlphaSmart uses the industry standard for infrared (IrDA), it
will transfer text to any computer or printer with a built-in
IrDA transceiver
It’s easy to use. Point the AlphaSmart towards the computer’s
IR transceiver and hit the Send key. Text will be transferred
to the document or file that is open on the computer. To
print, hit the Print key on the AlphaSmart while pointing it
towards the printer’s IR transceiver or IR module. The
AlphaSmart can be up to three feet (1 meter) away to transfer
text to and from a computer.
There is a new version of the Get Utility which allows text to
be sent from a Mac or PC to an AlphaSmart via infrared.
Note: If the computer or printer does not have a built-in IrDA
transceiver, you need to purchase an IrDA wireless pod for Mac or
PC from IPD, Inc. For a list of companies that make the printer
pods, please see our web site www.alphasmart.com.
AlphaBeam for Mac v1.0
AlphaBeam for Mac v1.0 is a software program that allows
the user to send text to a Mac, that is equipped with a built-
in IrDA transceiver or a wireless pod, from an AlphaSmart
2000 equipped with the optional IR module. The program
can insert the text from the AlphaSmart into any Mac pro-
gram that allows text input.
You can download the most current version of AlphaBeam
(at no cost) from the Support Section of our home page at
http://www.alphasmart.com.
Some of the Macs that are equipped with a built-in IrDA trans-
ceiver are iMacs, Powerbook 3400C, Powerbook G3, etc.
16
AlphaSmart 2000
Note: If the Mac does not have a built-in IrDA transceiver, you
need to purchase an IR wireless pod for Mac from IPD, Inc.
Installation Instructions
If the computer has a built-in IrDA transceiver, then go
directly to Step 3.
1. Plug the IR wireless pod for Mac into a serial port (Modem
or Printer) on the Mac.
2. Be sure and note which serial port the wireless pod for
Mac is plugged into.
3. Insert the disk into drive, and start the Installer by double
clicking on it.
4. The Installer will place the program in the folder that you
select.
5. Once the installation is finished, double click on the pro-
gram.
6. The Preferences window will be displayed the first time
that you select the program.
7. In the Preferences dialog click on the Receive text using
IrDA Wireless checkbox and then select the correct port
(modem, printer or built-in IrDA) that you plugged the IR
wireless pod for Mac into. The frequency at which to look
for IR AlphaSmarts can be adjusted, but the default selec-
tion of 3 seconds is adequate. Select OK and then the pro-
gram will look for IR AlphaSmarts. These settings will be
saved so that the next time you start the program you will
not need to go into the Preferences.
Figure 4. IrDA Preferences for AlphaBeam
Sending text from an AlphaSmart to a Mac
1. Open the program that you want to transfer the Alpha-
Smart file into.

2. Turn on the AlphaSmart and open the file you want to
transfer to the Mac.
3. Point the AlphaSmart at the IR wireless pod for Mac and
press the Send key on the AlphaSmart. The screen on the
AlphaSmart should display the message “Connecting to IR
Get Utility. Press esc to exit. Sending File x”.
4. No text will show up in the program window until the file
transfer is complete then the entire text will be pasted
into the active program.
Figure 5. AlphaBeam for Mac
To send another AlphaSmart file to the Mac, it is not neces-
sary to quit AlphaBeam and rerun it, just return to Step 3.
Tips on using AlphaBeam
For Macs that have a built-in IrDA transceiver, make sure
that the Infrared Control Panel has been set to IrDA.
The text from the AlphaSmart will be pasted in the active
program or application on the computer. If AlphaBeam is
the front most program then the text from the AlphaSmart
will be placed in the Clipboard. In order to see the text, you
must open another program and do a Paste which will place
the Clipboard contents into your program.
You can arrange your windows so that when AlphaBeam is
in the background (not the active program) you can watch
the progress indicator show how the transfer is progressing.
AlphaBeam™ for PC v1.0
AlphaBeam™ for PC v1.0 is a software program that allows
the user to send text to a PC, that is equipped with a built-
in IrDA transceiver or a wireless pod, from an AlphaSmart
AlphaSmart 2000
1918
AlphaSmart 2000
2000 equipped with the optional IR module. Your PC must
be running Windows 95 or Windows 98. The program trans-
fers the contents of the open file on the AlphaSmart into the
Windows Clipboard and to the user’s word processor if it is
running.
This version of the program does not support DOS, Windows
3.1 or Windows NT.
Installing AlphaBeam for PC
1. Plug IR wireless pod for PC into a COM port on the PC. A
COM port is either a 9 pin or 25 pin male DB connector.
Be sure and note which COM port the wireless pod for PC
is plugged into. (ie. COM1 COM2 etc.)
2. Insert CD or floppy disk into drive.
3. Select Run, from the Windows File menu or the Start
Menu in Windows 95.
4. In the command line box enter: a:\SETUP where “a” is
the drive letter of the floppy drive.
5. During the setup you will be asked which COM port the
IR wireless pod for PC is plugged into. You will also be
asked to set up a simulated COM port. The program
selects a valid COM port and all you have to do is press
the Next button.
Sending text from an AlphaSmart to a PC
1. Run AlphaBeam for PC (double click on its icon). At this
point AlphaBeam will begin scanning for IR enabled
AlphaSmarts.
2. Point the AlphaSmart at the IrDA wireless pod for PC and
press the Send button.
3. The AlphaSmart will display the message “Connecting
to computer (wireless mode). Press esc to exit. Sending
File x.”
4. After a few seconds, AlphaBeam will show that an Alpha-
Smart has been found (Figure 6).
5. At this point the AlphaSmart will begin sending its file to
the PC. After the send is completed, AlphaBeam will put

AlphaSmart 2000
21
the contents of the file onto the Clipboard and issue a
paste command. If a word processor is open and is the top
window, the contents of the file will be pasted into it.
Figure 6. AlphaBeam for PC
6. After the send the AlphaSmart will be disconnected from
the PC. You may then resend the same file by pressing the
Send key again or you may open up a new file and send
it, or bring up another AlphaSmart and send its file.
■TIPS FOR DOWNLOADING TO
SPREADSHEETS, DATABASES,
MULTIMEDIA, E-MAIL AND OTHER
APPLICATIONS
Because AlphaSmart simply retypes the data from your files,
you may transfer the text in your AlphaSmart to any applica-
tion that you can type into—not just word processing appli-
cations.
Downloading into Applications
When in another application, simply put the cursor where
you want the text to go and press Send. This can be in a
HyperStudio text field, or when using the text tool of a page
layout program, or when using an e-mail program. Wherever
you would normally type in the information, you can easily
download information from your AlphaSmart by placing your
cursor in the new application and pressing Send.
Spreadsheets
If you are using TurboTransfer Software or Infrared, you can
transfer text to a spreadsheet. For some spreadsheets, you
need to do a special trick to get things to work the way you
want. If you want to download the following data that’s
already typed in your AlphaSmart (separated by tabs) into a
spreadsheet program:
20
AlphaSmart 2000
98l46l78k
75l89l100
If you put the cursor in the upper left cell of a new spread-
sheet file and press Send on your AlphaSmart, this is what
your spreadsheet may look like:
The reason for this is that the Return causes most spread-
sheets to drop straight down a row, instead of going back to
the left-most column of the spreadsheet.
An easy trick to fix this is to send your text to a word proces-
sor application first, then copy it and paste it into your
spreadsheet. The paste command will fix the problem and
your spreadsheet will look like this:
Note: If you are using TurboTransfer or Infrared Transfer, there is
no need to use the spreadsheet trick above. Both transfer methods
will paste your text into the spreadsheet correctly.
Databases
The steps below work for transferring text to an AppleWorks
(formerly ClarisWorks) database document on a Macintosh.
Database programs differ substantially, so transferring to
other databases may require experimentation
1. Create your database in AppleWorks if you haven’t already
done so, and set up your fields.
2. Create a tab-delimited record on the AlphaSmart by enter-
ing the data in the tab order of the database, entering a
return at the end of each record. The tabs separate the
fields and the return indicates the end of the previous
ABC
1984678
2 75 89 100
ABCDE
1984678
2 75 89 100

the original AlphaSmart file and then retransmit the data to
the word processing file.
■CHANGING THE TRANSFER SPEED
The AlphaSmart can send text faster than some older comput-
ers can accept it. If you notice missing characters or jumbled
text, then you need to slow down the transfer speed. Even on
newer, faster computers, some programs like Microsoft Word,
KidWorks™
, and Student Writing Center are slow to accept text
and you must slow down the AlphaSmart to transfer text into
these programs.
The AlphaSmart file transfer speed menu is accessed by the
keyboard command Option-x-S (this command works in
stand-alone mode only, not when the AlphaSmart is
attached to a computer). The speed command affects both
the Mac sending speed and the PC sending speed.
The AlphaSmart has four file transfer speeds:
1. Very Slow is the slowest speed setting and is compatible
with all machines and applications. It is recommended
especially when you are using KidWorks or Student Writ-
ing Center. If you still lose data sending to KidWorks 2,
turn Sound Effects off by deselecting “Sound Effects”
under the KidWorks 2 Options menu.
2. Slow, which is compatible with all machines and most
applications. It is recommended especially if you are using a
Mac Classic, an Apple IIGS or a PC AT (286).
3. Faster (the default speed), which is a little faster and is recom-
mended for the Mac LC or for 386- and 486-based PCs.
4. Fastest is the fastest speed setting. However, some word
processing programs may experience a loss of data when
files are transferred using this mode, so you may wish to
experiment to see which speed works best for you.
Note: The keyboard control panel in your Macintosh system may
also need to be adjusted to a faster setting.
AlphaSmart 2000
2322
AlphaSmart 2000
record and the beginning of the next one. Enter as many
records as you want in a single AlphaSmart file—you do
not need to save each record into a separate file.
3. Open the database on the Macintosh in AppleWorks.
4. Open a new empty word processing file.
5. Connect the AlphaSmart to the Mac keyboard cable.
6. Download the data file from the AlphaSmart to the empty
AppleWorks word processing document by pressing the
Send key on the AlphaSmart.
7. Select all the downloaded text by choosing Select All from
the Mac Edit menu. (x-A).
8. Copy the data to the clipboard by choosing Copy from
the Edit menu (x-C).
9. Make the database the active AppleWorks document either
by choosing the database file in the View menu or by
clicking once in the database window (Do not click on an
individual field in the document to make it the active
field or all the data will be put into the one field).
10. Paste the data from the clipboard by selecting Paste from
the Edit menu or by pressing x-P. The data will be trans-
ferred to the database, beginning with the second record if
there was already a record in the database (a newly-
created database will have an empty record as the first
record).
11. Delete the empty record if needed. Save and close the
database. Reopen to verify that the data is there and trans-
mitted correctly. When you wish, you may discard the
data in the unnamed text file. Subsequent transmission of
new data will be appended to the end of the database and
will not create a new blank record.
If the database contains calculated fields, you may simply
skip the field by entering a tab. When the data is pasted it
will make the calculations automatically in the database.
If you find errors in the way the data appears in the database
after it has been transferred, you can make the corrections in

■KEYBOARD LAYOUTS
To change the keyboard layout, press Option-x-L (this com-
mand works in stand-alone mode only, not when the Alpha-
Smart is attached to a computer). You will see four choices:
• Pressing 1chooses QWERTY—the standard default
layout of most keyboards and typewriters (see Figure 7).
• Pressing 2sets the keyboard to Dvorak. Dvorak is a scientif-
ically-designed key layout which requires much less finger
reaching and stretching for the most commonly used keys,
and results in faster and easier typing (see Figure 8).
AlphaSmart 2000
25
If you are using a Mac, you can significantly speed up the trans-
fer of data (approximately 6 times faster) by using TurboTransfer
software (see details under TurboTransfer software).
Send speed for Mac
• 1.25 pages per minute (set at speed 4, sending to Apple-
Works on a Power Mac).
• With TurboTransfer, 8 pages per minute.
Send speed for PC
• 3 pages per minute (set at speed 4, sending to Windows
Write, on a 486).
■ALPHASMART FIND FEATURE
To access the AlphaSmart Find feature, press the Find key or
x-F. You will see a screen that says:
Find:_________
Press Return to search in file 1,
option-Return to search in all files,
CMD-G to Find again, Esc to exit.
At the cursor, you may enter up to 16 characters. The search
is not case sensitive, so if you are looking for “CAT” and
type in “cat”, the search will find cat, CAT, Cat, or caT. It
will also find partial words or characters embedded in other
words. For example, if you searched for “cat”, it will also
show you “catalog.”
If you press Return after entering your search text, it will
search in the current file only. If you press Option-Return, it
will search in all eight files. However, if password protection is
activated, the Option-Return command cannot be used and
you can only search in the current file. When a string is found
in a different file than the one currently displayed, it will open
that file and put a cursor at the end of the string it found.
After the text is found once, you may continue the search
by pressing x-G. The next occurrence will be displayed or
the message String NOT found will be displayed. (x-G does
not bring up the Find dialog screen—unless you haven’t ever
entered search text.)
24
AlphaSmart 2000
!
1@
2#
3$
4%
5^
6&
7*
8(
9)
0
—
–
+
=
delete
~
`
on/off F1
file 1 F2
file 2 F3
file 3 F4
file 4 F5
file 5 F6
file 6 F7
file 7 F8
file 8 print spell
check F11 clear
file home end enter send
tab
QW
E
R
T
Y
UI
O
P
{
[}
]
|
\
caps lock AS
D
FG
H
JK
L
:
;
"
'
return
shift Z
X
C
V
B
N
M
<
,>
.?
/
shift
ctrl alt
option
alt
option xesc
Figure 8. Dvorak keyboard layout.
!
1@
2#
3$
4%
5^
6&
7*
8(
9)
0—
–+
=delete
~
`
on/off F1
file 1 F2
file 2 F3
file 3 F4
file 4 F5
file 5 F6
file 6 F7
file 7 F8
file 8 print spell
check F11 clear
file home end enter send
tab QWERTYUIOP{
[}
]|
\
caps lock ASDFGHJKL:
;"
'return
shift ZXCVBNM<
,>
.?
/shift
ctrl alt
option
alt
option xesc
Figure 7. QWERTY keyboard layout.

• Choosing 3sets the keyboard layout for right-hand only,
and selecting 4sets the keyboard for left-hand only. Right
and left one-handed layouts enable faster typing for
people with disabilities (see Figures 9 and 10).
When the AlphaSmart is turned on, a message is displayed
stating the current layout option—if other than the default
QWERTY layout.
Note: When key layout changes, all command keystrokes use the
default QWERTY location for the key. For example, if the layout
is currently set to Dvorak, you still press Option-x-L, where Lis
the QWERTY location of L, not the Dvorak location. (Note: this
command works in stand-alone mode only, not when the Alpha-
Smart is attached to a computer.)
AlphaSmart 2000
2726
AlphaSmart 2000
Also, international characters use the QWERTY location for the
letters and their accents. For example, to generate an éyou press
Option-e, using the QWERTY location for e, regardless of the
current keypad setting.
Note: AlphaSmart keys are removable and may be popped off and
repositioned to match the new layout you choose.
KEYTIME®has effective training materials for learning to
type on the standard, Dvorak, right-handed, left-handed,
and single-digit keyboards. In addition, KEYTIME®has clear
stickers to relabel keyboards and key-cap pullers to rearrange
keys for alternative keyboard users. Contact KEYTIME®, Inc.
at (206) 522-TYPE for more information and prices.
■SPECIAL EDUCATION NEEDS
AutoRepeat/Key Repeat Control
With Key Repeat Control enabled, only one character prints
per keystroke. For example, if you hold down the letter “a”
key for an extended period of time, you would expect to see
the letter continually repeat itself on your screen (“aaaaaaa”).
However, with Key Repeat Control enabled, you would
obtain just one “a”, regardless of how long the key was held.
The AutoRepeat function can be disabled or enabled by
pressing Option-x-K to get to the AutoRepeat/Sticky Keys
control screen, and then pressing 1 (this command works in
stand-alone mode only, not when the AlphaSmart is
attached to a computer).
Sticky Keys
To enable the Sticky Key function, press Option-x-K and
then 2to either enable or disable Sticky Keys(this command
works in stand-alone mode only, not when the AlphaSmart
is attached to a computer).
With Sticky Keys enabled, you can type combination key-
strokes without actually pressing the keys simultaneously.
For example, you could press Option-x-S individually in
order (instead of as a group) to get to the AlphaSmart Trans-
fer Speed menu.
!
1
@
2
#
3
$
4
%
5
^
6
&
7
*
8
(
9
)
0
—
–
+
=
delete
~
`
on/off F1
file 1 F2
file 2 F3
file 3 F4
file 4 F5
file 5 F6
file 6 F7
file 7 F8
file 8 print spell
check F11 clear
file home end enter send
tab Q
W
E
R
T
YU
I
O
P
{
[}
]
|
\
caps lock A
S
D
F
G
H
J
K
L
:
;
"
'
return
shift
Z
X
C
V
B
N
M
<
,
>
.
?
/
shift
ctrl alt
option
alt
option xesc
Figure 10. Left one-handed keyboard layout.
!
1@
2#
3
$
4%
5^
6
&
7*
8(
9
)
0
—
–
+
=
delete
~
`
on/off F1
file 1 F2
file 2 F3
file 3 F4
file 4 F5
file 5 F6
file 6 F7
file 7 F8
file 8 print spell
check F11 clear
file home end enter send
tab
Q
W
E
R
T
Y
U
I
O
P{
[}
]
|
\
caps lock A
S
D
F
G
H
J
K
L
:
;
"
'
return
shift ZX
C
V
B
N
M
<
,
>
.
?
/
shift
ctrl alt
option
alt
option xesc
Figure 9. Right one-handed keyboard layout.

Figure 12 shows just the control and shift keys down.
Figure 12. Example shows the control and shift modify indicators
in the lower right corner of the screen
■INTERNATIONAL CHARACTER SUPPORT
See the chart on the following page for international charac-
ter key equivalences. International characters can be sent to
Macintosh or Windows machines. They work with all Macin-
tosh applications. If sent to a machine running Windows,
international characters are sent using the codes defined in
the Character Map Accessory.
International characters work directly with the following
Windows applications:
• Write • Paintbrush
• Notepad • Microsoft Works for Windows
International characters do not directly transfer correctly to
the following Window applications:
• Word Perfect 5.2, 6.0
To transfer international characters to these applications,
1. Transfer your file to Windows Write or Notepad (or
another application that does accept international
characters directly),
2. Select your text, then Copy the text (so that it is in the
Windows clipboard),
3. Open a file in one of the above applications, and
4. Paste the text into your document.
My Summer Vacation
--by Joey Student
This summer I went to stay with my grandparents in
the country. SC
Sticky Keys affect the four modifier keys: shift, option, com-
mand (x), and control. When Sticky keys are enabled, press-
ing a modifier key effectively keeps that key “pressed down”
for the next normal key press.
The current state of the shift, option, command, control,
and caps lock keys are shown in the lower right of the
AlphaSmart screen. The last five characters in the lower right
corner of the display show which keys are “down” and
which keys are “up.”
• The right-most character is the caps lock indicator, and is
solid black if the caps lock key has been pressed. Caps lock
is not affected by Sticky key settings.
• The second character from the bottom right corner is the
command (x) key indicator. If the command key is down, a
Cwill be displayed here.
• The third character from the bottom right corner of the
screen is the option key indicator. If the option key is down,
an Owill be displayed.
• The fourth character from the lower right corner of the
screen is the control key indicator. If the control key is
down, a Cwill be displayed here.
• The fifth character from the lower right corner of the
screen is the shift key indicator. If the shift key is down, an
“S” will be displayed here.
Figure 11 shows an example of what the screen would look
like if all the modifier keys (shift, control, option, command,
and caps lock) were in the “down” position.
Figure 11. Example shows modify indicators in the lower right
corner of the screen
SCOC
My Summer Vacation
--by Joey Student
This summer I went to stay with my grandparents in
the country.
28
AlphaSmart 2000 AlphaSmart 2000
29

Note: The reason that the international characters don’t
directly transfer into these applications is that these applications
don’t support the Microsoft international character set. Fortu-
nately, by copying and pasting through the clipboard, the clip-
board performs the appropriate translations.
All non-international characters transfer correctly to all
Windows and DOS applications.
■PRINTING FROM YOUR ALPHASMART
The AlphaSmart 2000 can print directly to a large number of
printers by using a specially designed serial or parallel printer
cable. Printers currently supported by the AlphaSmart 2000 are:
• Apple ImageWriters
• Hewlett-Packard DeskJets and DeskWriters
• Apple StyleWriter I, II, and 1200
• Parallel printers (requires AlphaSmart Parallel
Printer Cable)
To print from an AlphaSmart 2000 to a printer:
1. Press Option-Print to access the printer setup menu. Use
the arrow keys to select either ImageWriter, HP DeskJet or
Writer, Stylewriter, or Parallel. Press Return to leave the
menu.
2. Connect the special AlphaSmart-to-Printer cable from the
AlphaSmart PC port to the printer serial or parallel port.
This cable is specially made and is not available from com-
puter stores (it has some electronic components built
directly into the cable).
3. Make sure the printer is turned on and, for the ImageWriter
II, make sure the Select LED is green (printer is selected to
print).
4. Press x-P or Print on the AlphaSmart to print the current
file. The printer should start to print.
The AlphaSmart will remember your selected printer, so you
only have to do Step 1 once, or whenever you change printers.
AlphaSmart 2000
3130
AlphaSmart 2000
option-A = á
option-E = é
option-I = í
option-O = ó
option-U = ú
option-shift-A = Á
option-shift-E = É
option-shift-O = Ó
option-shift-U = Ú
ctrl-A = à
ctrl-E = è
ctrl-I = ì
ctrl-O = ò
ctrl-U = ù
ctrl-shift-A = À
ctrl-shift-E = È
ctrl-shift-O = Ò
ctrl-shift-U = Ù
ctrl-option-A = â
ctrl-option-E = ê
ctrl-option-I = î
ctrl-option-O = ô
ctrl-option-U = û
ctrl-option-shift-E = Ê
ctrl-option-shift-O = Ô
ctrl-option-shift-U = Û
option-x-A = ä
option-x-E = ë
option-x-I = ï
option-x-O = ö
option-x-U = ü
option-x-shift-A = Ä
option-x-shift-E = Ë
option-x-shift-O = Ö
option-x-shift-U = Ü
option-? = ¿
option-! = ¡
ctrl-2=å
shift-ctrl-2=Å
option-0 = º
option-shift-1 = 1
/2
option-2 = ™
option-3 = £
option-4 = ¢
option-6 = ¨(double dot)
option-shift-7 = ¤
option-8 = •
option-9 = ª
option-” = æ
option-shift-” = Æ
ctrl-option-x-A=ã
shift-ctrl-option-x-A=Ã
option-B = ß
option-C = ç
option-shift-C = Ç
option-D = °(degree symbol)
option-G = ©
option-N = ñ
option-shift-N = Ñ
option-M = µ
ctrl-option-x-O=õ
shift-ctrl-option-x-O=Õ
option-P = ¶
option-R = ®
option-S = §
option-Q = œ
option-shift-Q = Œ
option-Y = ¥
ctrl-/ = ø
ctrl-shift-/ = Ø
AlphaSmart International and Special Characters
The following characters are not supported: Â,Î,Ï,Ì,Í

4. To start the timer again press Return.
5. To exit the Keyboarding Timer, hit esc.
When typing in the Keyboarding Timer, the delete key is
disabled.
The text typed in the Keyboarding Timer is appended to the
end of the current file so that the text can be reviewed for
accuracy, if desired.
If you don’t wish to keep the text, simply press Clear File
after you exit the Keyboarding Timer. You may also wish to
change to an unused file, or press Clear File before starting
the Keyboarding Timer.
■SHOW MARKS
The Show Marks function can be disabled or enabled by
pressing Option-x-K, and then pressing 3(this command
works in stand-alone mode only, not when the AlphaSmart
is attached to a computer).
When Show Marks is enabled, tabs show up as “l” and
returns show up as “Œ”. When Show Marks is disabled, tabs
and returns show up as spaces on the AlphaSmart screen.
Regardless of the Show Marks setting, tabs and returns are
transferred to the computer as tabs and returns.
■STATUS SCREEN
Press Option-x-V to get to the system status screen (this
command works in stand-alone mode only, not when the
AlphaSmart is attached to a computer). This screen tells you
the AlphaSmart version number, what the current file
number is, AutoRepeat and StickyKeys status, Password Pro-
tection, and which keypad layout option is currently in use.
AlphaSmart 2000
33
Note: Font, print quality, line spacing, and margins are fixed and
not changeable by the user. The line spacing is set for double
spacing for easy manual editing.
The AlphaSmart 2000 supports draft printing to most older
direct connect printers. If your printer is already connected
to a computer or a network, most users find it easier and
faster to leave the printer connected to the computer or net-
work, and download the text to the computer for printing.
Direct draft printing from the AlphaSmart works best when
tabs are not used in the text. For most consistent direct
printing, use spaces for separation instead of tabs.
Printers with DIP switch settings. If the AlphaSmart fails to
print and your printer has DIP switches for different option
settings, consult your printer user manual and set the DIP
switches to the following settings:
• 9600 baud
• 1 stop bit
• no parity
• hardware handshake (DTR)
• LF on CR (line feed on carriage return)
■KEYBOARDING TIMER
To access the Keyboarding Timer:
1. Press x-Find (this command works in stand-alone mode
only, not when the AlphaSmart is attached to a computer).
A message will be displayed that says:
TYPING TIMER, BEGIN TYPING TO START TIMER.
2. Start typing. The elapsed time will be shown as you type.
Press CTRL to stop.
3. When CTRL is pressed the screen will give the elapsed
time and the words per minute (wpm).
32
AlphaSmart 2000

If eight different students are to share an AlphaSmart,
instruct each student to set their own private password for
their own file. Tell them to use “smart” as the old password.
Changing a Password
1. Turn the AlphaSmart on and make sure it is NOT con-
nected to a computer. Open file x (you might need to
enter the password if password protection is on).
2. Press Option-x-P to show the Change Password Dialog
screen. If pressed in file 4, you will see:
Change password for file 4
Old password: _____
New password: _____
Press esc key to exit.
3. First type the old password, which is “smart” if this is the
first time. (If you have forgotten the old password, the
master password may be entered by the teacher). As you
type the old password, Xs will appear for each character. If
you type the password incorrectly, the message Invalid
password, please try again will appear, and you
can try again. When you correctly type the old password,
your screen will say:
Change password for file 4
Old password: XXXXX
New password: _______
Press esc key to exit.
4. The cursor will now be in the third row, waiting for you to
type in the new password. Any letters or numbers can be
used for the password. Unlike the old password, each char-
acter of the new password will be displayed as it is typed.
If you don’t want anyone to see your password, be sure to type
your password in a private location.
Change password for file 4
Old password: XXXXX
New password: abcde
Press esc key to exit.
AlphaSmart 2000
35
■ALPHASMART PASSWORD PROTECTION
When multiple people share one AlphaSmart, it is sometimes
useful to password protect each file to keep the contents
private and protected from accidental loss.
AlphaSmart 2000s are shipped with password protection
disabled. To enable AlphaSmart’s password protection fea-
ture for the first time, you will need to contact IPD to
obtain the master password encoded into each AlphaSmart.
To obtain the master password, call toll-free 1-888-274-
2720. You may also fax your request (including your fax
number) to (408)252-9409.
Enabling the Password Option
Follow these steps to enable passwords on your AlphaSmart.
1. Turn the AlphaSmart on and make sure it is NOT con-
nected to a computer.
2. Press the Control-Option-x-P keys simultaneously to
show the Password Enable/Disable screen. The Alpha-
Smart will display the message:
Password protection is OFF.
Type master password to turn on:_____
3. Type in the five-letter master password you obtained from
IPD to turn password protection on (to turn it off, follow
the same steps). As you type the old password, the pass-
word will appear as Xs on your screen. When the password
has been entered correctly, the AlphaSmart will display:
Password protection is ON.
Type master password to turn off:_____
4. Passwords are now enabled. Press the esc key to exit the
password screen.
Setting an Individual Password
Each of the eight files can have their own unique password.
When the password feature is enabled, each individual file
password is initially set to “smart”.
34
AlphaSmart 2000

Figure 13. Get Utility Installer icon
2. The Installer will place the program in the folder that you
select.
3. Once the installation is finished, double click on the pro-
gram icon.
4. The Preferences window will be displayed the first time
that you select the program.
Figure 14. Preferences window
Important Notes:
1. If you are using the iMac, Powerbook or a Mac with an
internal IrDA transceiver select IrDA connection via the
built-in IrDA transceiver.
2. If you are not using wireless infrared transfer press
Cancel.
Installation Instructions for Get Utility for Mac
Using IR Transfers
If your computer has a built-in IrDA transceiver, then go to
Step 3 of the instructions.
1. Plug IR wireless pod for Mac into a serial port (Modem or
Printer) on the Mac.
2. Be sure and note which serial port the wireless pod for
Mac is plugged into.
AlphaSmart 2000
37
As soon as you type the 5th letter of the new password, you
will see the message Your password has been changed for a
second, and then you will return to the file which you were
editing. (Passwords are all lowercase; pressing shift or caps
lock has no effect.)
When password protection is enabled, anytime you change
files you will be asked for that file’s password before being
allowed to edit that file. All individual file passwords can be
overridden by typing the master password.
If, when turning on the AlphaSmart, you are prompted for
the password for a file that isn’t yours, simply press the
appropriate file number to get your own file and enter the
password.
Note: This password system was designed to protect against acci-
dental or casual mischievous data loss and to provide a minimum
level of data privacy. It is NOT designed to prevent concerted
malicious efforts at data destruction. All security systems have
ways of being “broken” if you try hard enough. As the old saying
goes, “Locks are to keep honest people honest.”
■GET UTILITY SOFTWARE
Get Utility for Mac v2.0
The Get Utility for Mac v2.0 is a software utility program
that allows the user to send text between a Mac and an
AlphaSmart, AlphaSmart Pro, or AlphaSmart 2000.
You can send text to an AlphaSmart from your Mac either by
using an ADB “Y” cable, or by wireless infrared transfer if
your AlphaSmart is equipped with an IR module. You can
download the upgrades (at no cost) from the Support Section
of our home page at http://www.alphasmart.com.
Note: For the sake of simplicity, the term “IR” is used to represent
infrared transfer.
Installation Instructions for Get Utility for Mac
Using Cable Transfers
1. Insert the CD or floppy disk into the drive, and start the
Installer by double clicking on Get Utility Installer.
36
AlphaSmart 2000
Other manuals for AS 2000
1
This manual suits for next models
1
Table of contents
Other Alphasmart Keyboard manuals

Alphasmart
Alphasmart AS Pro User manual

Alphasmart
Alphasmart NEO User manual

Alphasmart
Alphasmart 3000 User manual

Alphasmart
Alphasmart NEO2 SmartApplet Firmware update

Alphasmart
Alphasmart NEO2 SmartApplet User manual

Alphasmart
Alphasmart NEO2 SmartApplet User manual

Alphasmart
Alphasmart Manager for Dana Installation and operating instructions

Alphasmart
Alphasmart 3000 User manual