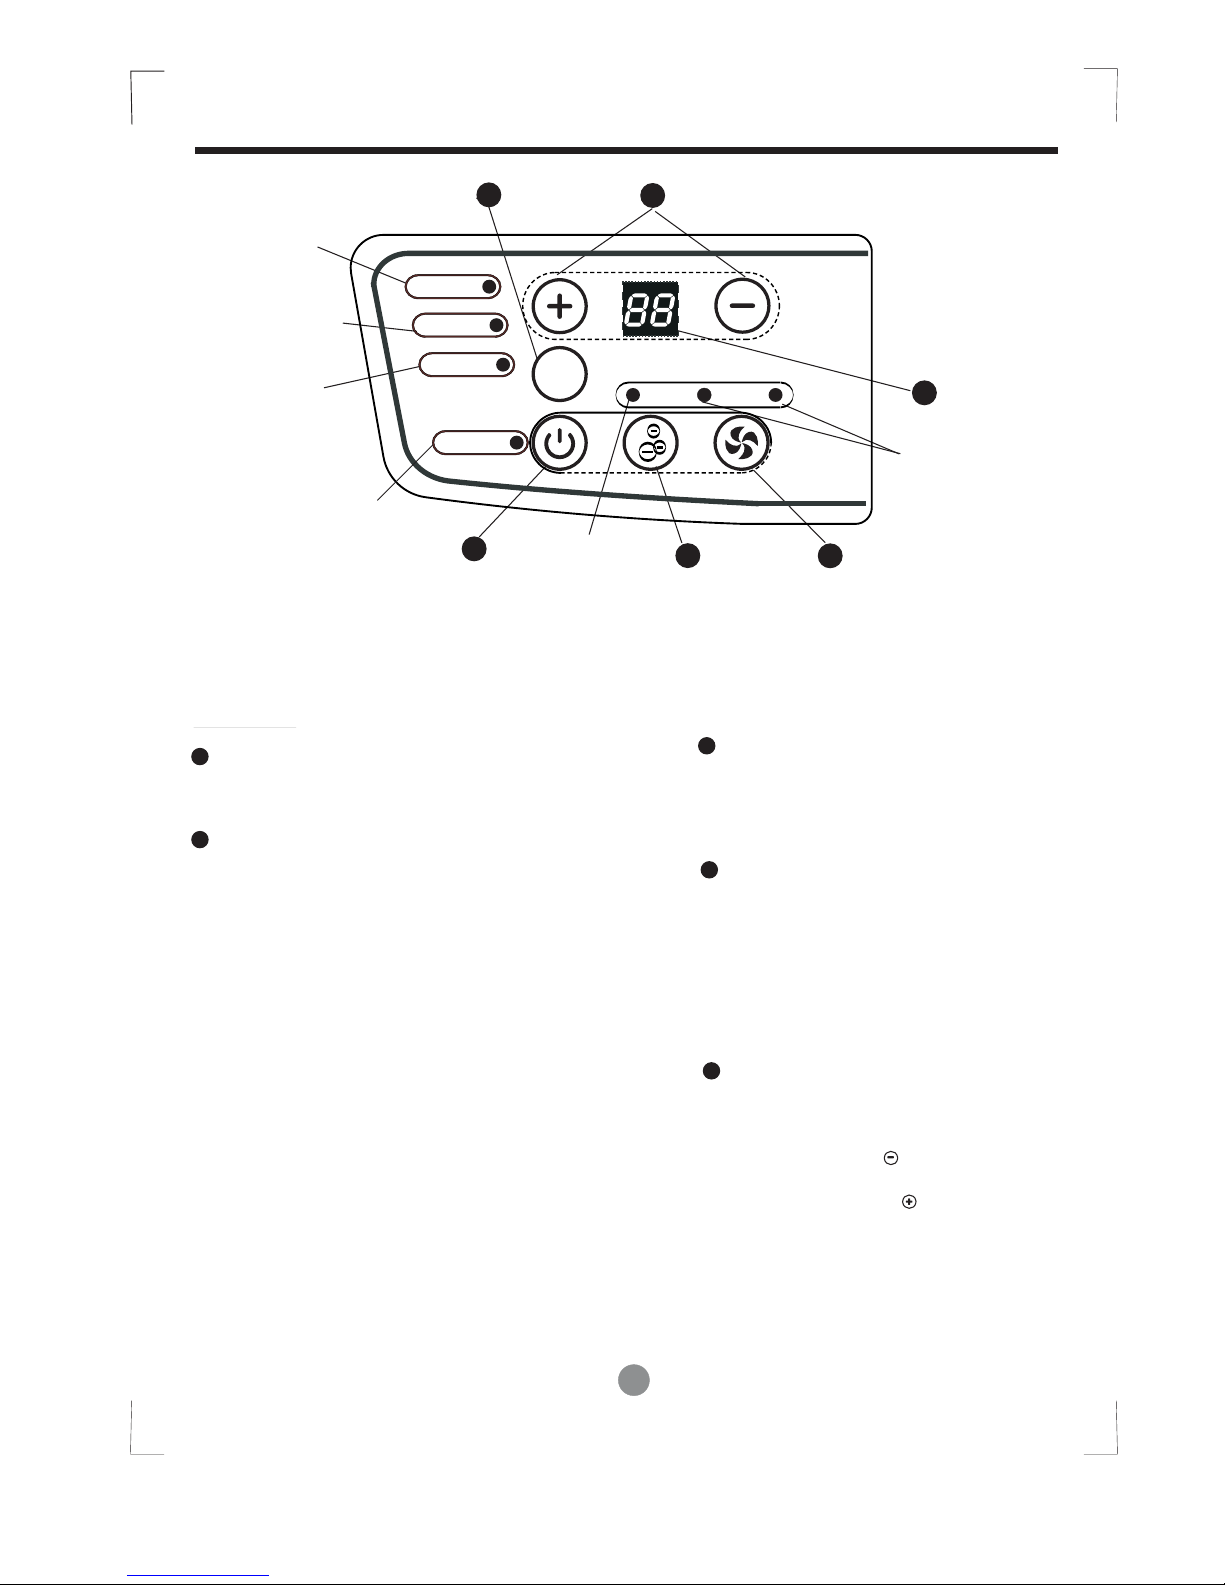
3
Do not cover the intake or
exhaust openings with
cloths or towels.
A lack of air flow can lead
to overheating and fire.
Do not clean unit when
power is on as it may cause
fire and electric shock, it may
cause an injury.
When the unit is to be
cleaned, switch off, and turn
off the circuit breaker.
Do not use in areas
where chemicals are
handled.
This will cause the unit
deterioration due to
chemicals and solvents
dissolved in the air.
Care should be taken when
using the unit in a room with
the following persons:
Infants, children, elderly people,
and people not senstive to
humidity.
You may be injured if you
fall or if the unit falls over.
Water may spill inside the
unit, causing insulation
failure and electrical
shock or fire.
!
!
!
It may cause failure of
appliance or accident.
There is danger of fire or
electric shock.
Do not place heavy object on the
power cord and take care so that
the cord is not compressed.
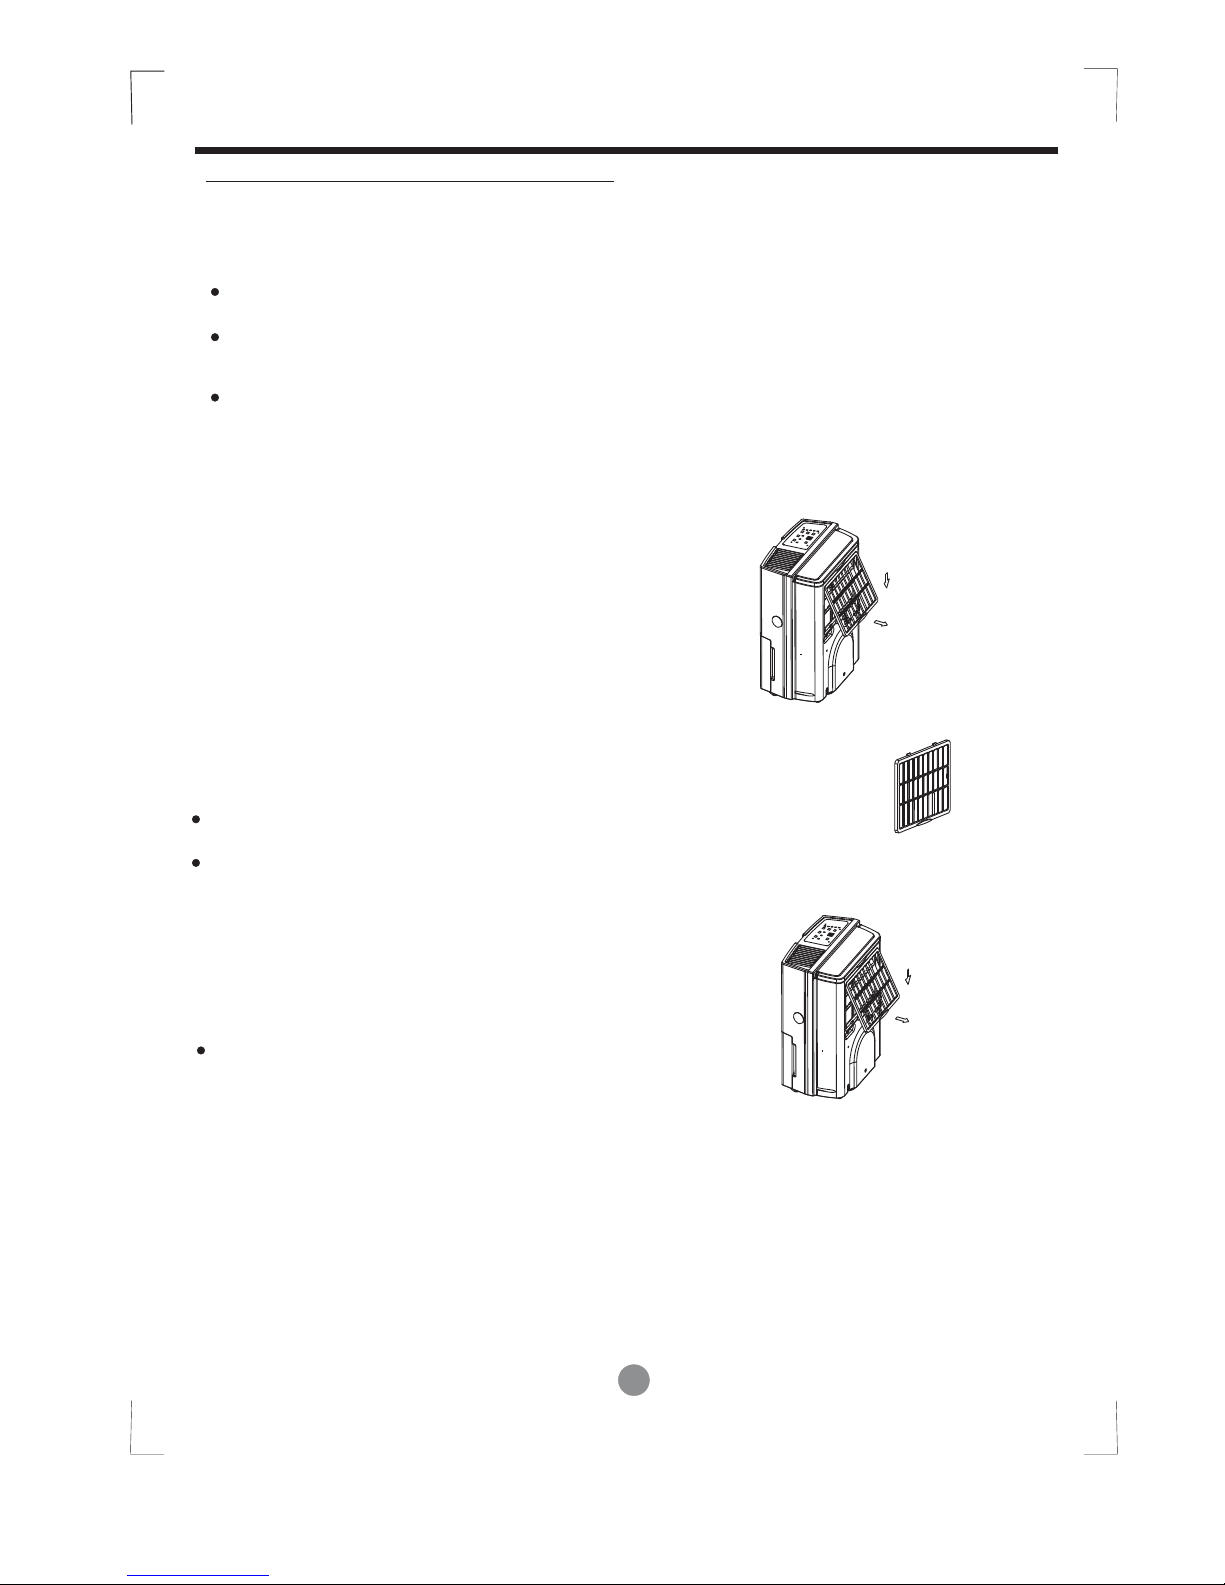
Operation without filters
may cause failure.
Always insert the filters
securely. Clean filter
once every two weeks.
CAUTION
Do not climb up on
or sit on the unit.
If water enters the unit, turn
the unit off and disconnect the
power , contact a qualified
service technician.
!
Do not place flower
vases or other water
container on top of
the unit.
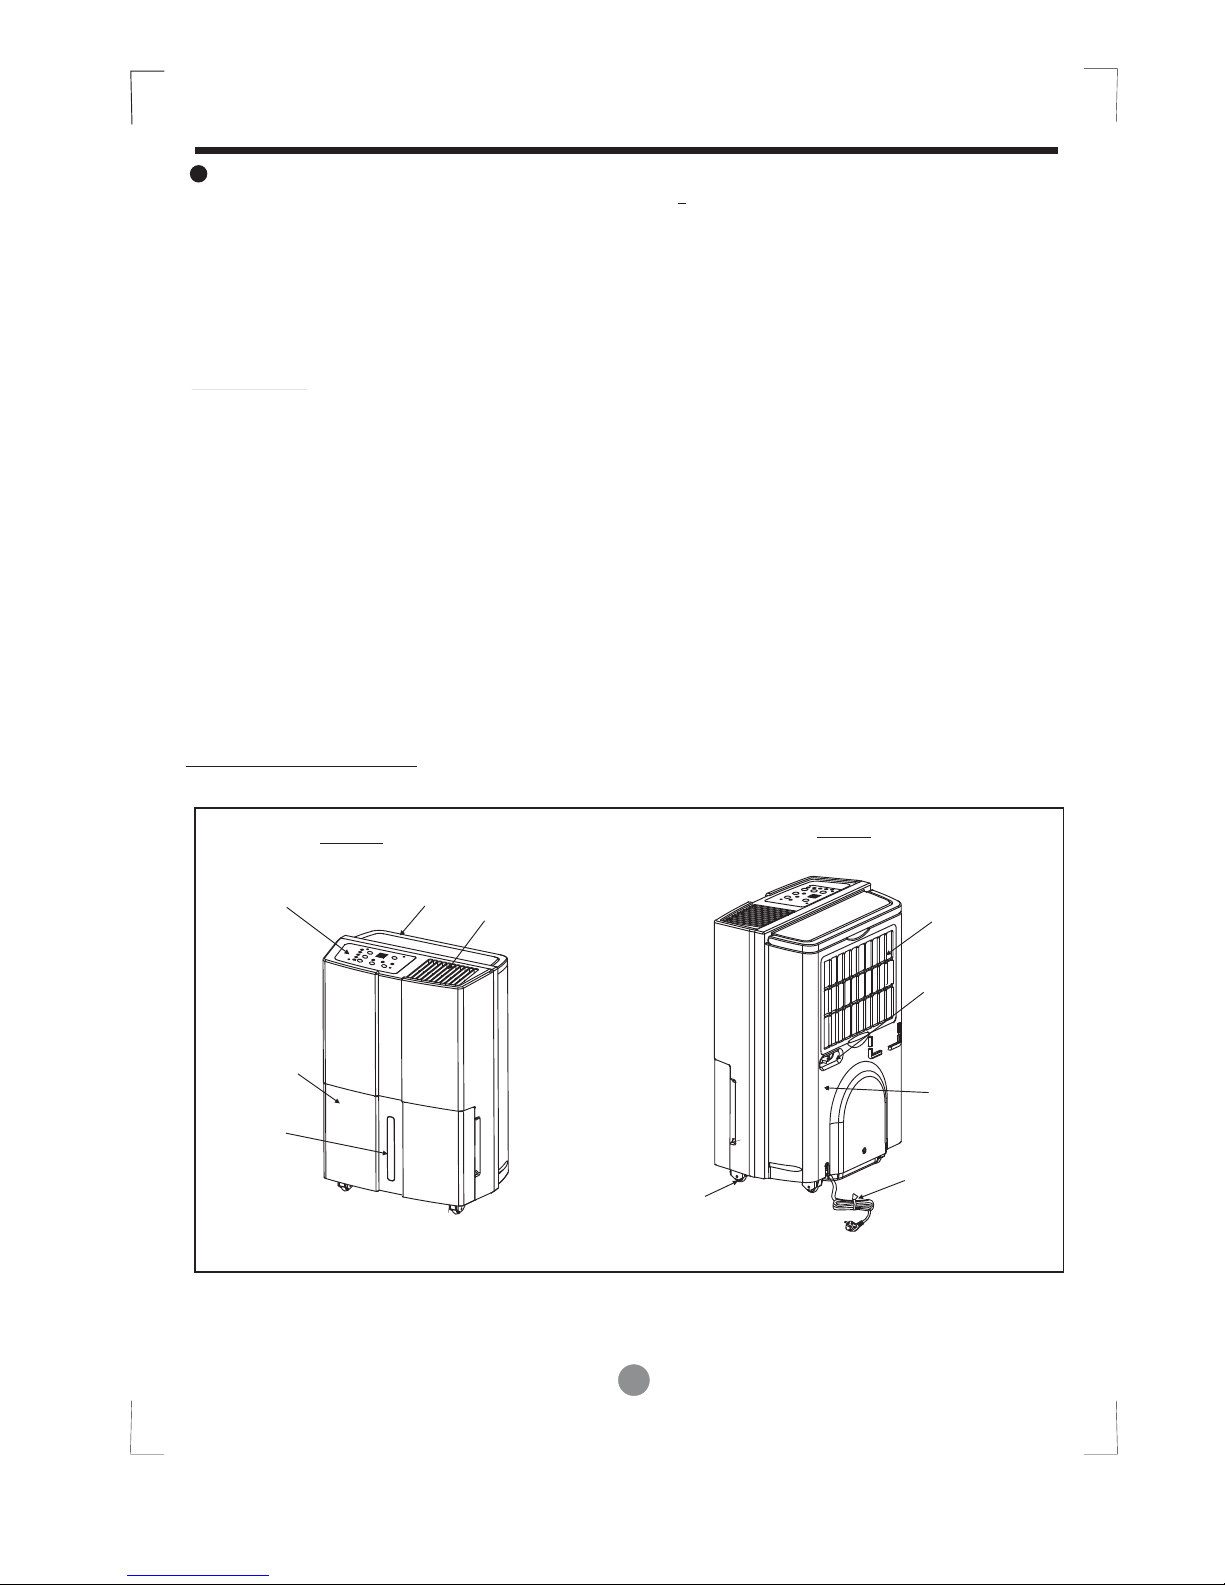
SAFETY PRECAUTIONS
The manufactures nameplate is located on the rear panel of
the unit and contains electrical and other technical data
specific to this unit.
Be sure the air conditioner is properly grounded. To minimize
shock and fire hazards, proper grounding is important.
Your air conditioner must be used in a properly grounded wall
receptacle. If the wall receptacle you intend to use is not
adequately grounded or protected by a time delay fuse or
circuit breaker, have a qualified electrician install the proper
receptacle.
Ensure the receptacle is accessible after the unit installation.
However, if it is necessary to use an extension cord, use
an approved air conditioner extension cord only (available
at most local hardware stores).
To avoid the possibility of personal injury, always disconnect
the power supply to the unit, before installing and/or servicing.
Do not use extension cords or an adapter plugs with this
unit.
Electrical Information
Do not, under any
circumstances, cut,
remove, or bypass
the grounding prong.
This unit is grounded through the
power cord plug when plugged
into a matching wall outlet.The
plug supplied is different
depending on model you
purchased.
or
or