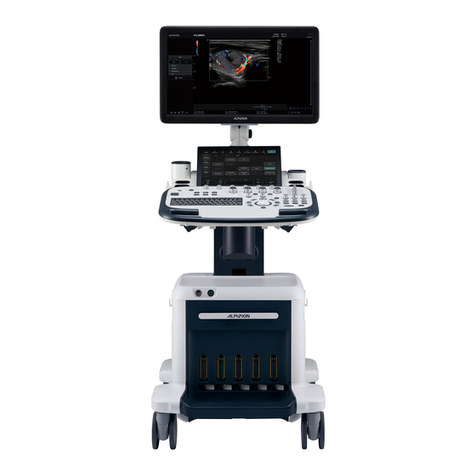
Alpinion Medical Systems E CUBE 8 User manual

QUICK GUIDE
70002734 Rev. 0 (ENG)

Copyright and License
Reproducon, adaptaon, or translaon without prior wrien permission is prohibited, except
as allowed under the copyright laws.
The informaon contained herein is subject to change without noce.
The only warranes for ALPINION products and services are set forth in the express warranty
statements accompanying such products and services. Nothing herein should be construed as
constung an addional warranty. ALPINION shall not be liable for technical or editorial errors
or omissions contained here in.
Prepared by:
ALPINION MEDICAL SYSTEMS Co., LTD.
1FL and 6FL, Verdi Tower,
72, Digital-ro 26-gil, Guro-gu, Seoul, Republic of Korea
1316~1320 room, ACE HIGH-END Tower 1st,
5, Digital-ro 26-gil, Guro-gu, Seoul, Republic of Korea
T: +82 2 3282 0907 F: +82 2 851 5591 www.alpinion.com
Copyright © 2017 ALPINION MEDICAL SYSTEMS Co., LTD, All rights reserved.
Revision Log
The following is a list of major changes and addions that have been made to this quick guide
since it was rst released.
Rev Date Descripon
Rev. 0 Sep 25, 2017 Quick guide rst released

Table of Contents
1. System Basics.....................................................................................1-1
Introducon ...........................................................................................................1-2
Documentaon..................................................................................................................... 1-2
System Feature ..................................................................................................................... 1-2
Console Overview ..................................................................................................1-5
System_Front View .............................................................................................................. 1-5
System_Rear View ................................................................................................................ 1-6
System_Side View................................................................................................................. 1-7
Monitor ................................................................................................................................ 1-8
Control Panel ........................................................................................................................ 1-9
QWERTY Keyboard.............................................................................................................. 1-12
Touch Screen ...................................................................................................................... 1-13
Image Display ..................................................................................................................... 1-14
System Start-Up ...................................................................................................1-15
Power On............................................................................................................................ 1-15
Power O............................................................................................................................ 1-15
Transducer ...........................................................................................................1-16
Connecng the Transducer.................................................................................................1-16
Disconnecng the Transducer ............................................................................................ 1-16
Acvang the Transducer................................................................................................... 1-17
Deacvang the Transducer............................................................................................... 1-17
2. Geng Started...................................................................................2-1
Beginning an Exam .................................................................................................2-2
Paent Registraon Display.................................................................................................. 2-2
Starng a New Paent.......................................................................................................... 2-3
Quick ID ................................................................................................................................ 2-4
Searching for an Exisng Paent .......................................................................................... 2-4
Starng a New Exam on an Exisng Paent .........................................................................2-5
Retrieving Paent Informaon via Worklist..........................................................................2-5
Ending a Study ...................................................................................................................... 2-6

Opmizing the Image .............................................................................................2-7
2D Mode Controls................................................................................................................. 2-7
M Mode Controls................................................................................................................ 2-14
CF Mode Controls...............................................................................................................2-16
PD Mode Controls .............................................................................................................. 2-19
PWD Mode Controls........................................................................................................... 2-20
CWD Mode Controls...........................................................................................................2-23
3D and 4D Modes Operaon Controls................................................................................ 2-24
Other Controls .................................................................................................................... 2-26
Managing Image and Paent Data........................................................................2-29
Clipboard ............................................................................................................................ 2-29
E-View................................................................................................................................. 2-30
Measurement and Report ....................................................................................2-34
Basic Measurement Operaons ......................................................................................... 2-34
Measurement Result Window............................................................................................2-34
Basic Measurements .......................................................................................................... 2-35
Report................................................................................................................................. 2-50
3. Aer the Exam is Over........................................................................3-1
System Preset.........................................................................................................3-2
System Preset Display...........................................................................................................3-2
General Workow................................................................................................................. 3-2
System Preset Menus ........................................................................................................... 3-3
Connecvity.......................................................................................................................... 3-4
Backup/Restore ................................................................................................................... 3-5
System Care and Maintenance ...............................................................................3-7
Daily Maintenance................................................................................................................ 3-7
Weekly Maintenance............................................................................................................ 3-7
Monthly Maintenance ..........................................................................................................3-8
Transducer Care and Maintenance..........................................................................3-9
Cleaning and Disinfecng Transducers ............................................................................... 3-10
Cable Handling.................................................................................................................... 3-12
Planned Maintenance......................................................................................................... 3-12

4. Safety.................................................................................................4-1
Safety Summary .....................................................................................................4-2
Safety Noce ........................................................................................................................ 4-2
Equipment Safety Informaon ............................................................................................. 4-3
Paent Safety Informaon.................................................................................................... 4-4
Electrical Safety Informaon ................................................................................................ 4-5
Transducer Safety Informaon ............................................................................................. 4-6
Regulatory Informaon ..........................................................................................4-7
System Symbols and Labels ..................................................................................4-10


1
Introducon.............................................................................................1-2
Console Overview....................................................................................1-5
System Start-Up.....................................................................................1-15
Transducer.............................................................................................1-16
This chapter introduces the followings:
System Basics

1-2 System Basics
Introducon
Documentaon
The E-CUBE 8 Quick Guide (TRANSLATED) provides basic informaon needed by the user to
operate the system safely.
For more informaon, see the E-CUBE 8 User Manual.
System Feature
Table 1-1 System feature
Physical Dimensions
•Height: 1115/1430 mm
•Width: 532 mm
•Depth: 787 mm
•Weight: 55 kg (not including opons)
Clinical Applicaons
•Abdomen
•OB
•GYN
•Cardiology
•Small Parts
•MSK
•Vascular
•Urology
•EM
•TCD
•Breast
•Appendix
Available Imaging Modes
•2D mode
•Harmonic mode (HAR)
•M mode
•Color M mode
•Anatomical M mode (AMM)
•Color Flow Doppler (CF) mode
•Power Doppler (PD) mode
•Direconal PD mode
•Pulsed Wave Doppler (PWD) mode
•Connuous Wave Doppler (CWD) mode
•High PRF Doppler mode
•Tissue Doppler Imaging (TDI) mode
•3D/4D mode

Introducon 1-3
Image Processing Technology
•Xpeed™
•Full SRI™
•Spaal Compounding Image (SCI)
•Panoramic
•Live HQ™
•Needle Vision™/Needle Vision™ Plus
•ECG
•Elastography
•Filter Method Tissue Harmonic Image (FTHI)
•Pulse Inversion Tissue Harmonic Image (PTHI)
•Raw Data Processing
•Post Processing
Operable Transducers
•Pencil Doppler Transducer
•Linear Array Transducer
•Sector Phased Array Transducer
•Convex Array Transducer
•Endocavity Transducer
•Volume Convex Transducer
Measurement Package
Including reports for:
•Abdomen
•OB
•GYN
•Cardiology
•Vascular
•Urology
•Pediatrics
•Small Parts
•Breast
•MSK
•EM
Available Measurements
•Distance
•Ellipse
•Trace
•Spline
•Velocity
•Time
•Slope
•Acceleraon
•Auto Calculaon
•Semi-Auto Calculaon
•Auto IMT
•Auto NT

1-4 System Basics
Connecvity
•Vericaon
•DICOM storage
•DICOM print
•DICOM storage commitment
•DICOM media
•DICOM worklist
•DICOM MPPS
•DICOM Structured Report (OB-GYN)
•DICOM Structured Report (Echocardiography)
•DICOM Structured Report (Vascular)
•DICOM Structured Report (Breast)
•Cube View™
•Network Storage
•Wireless LAN (Opon)
User Interface
•English
•German
•French
•Spanish
•Italian
•Russian
•Portuguese
•Chinese

Console Overview 1-5
Console Overview
System_Front View
There are the main components of your system:
Figure 1-1 E-CUBE 8 System (Front view)
No. Component No. Component
1Monitor (21.5-inch wide display) 6Control panel
2LED lamp 7Handle
3Gel warmer 8Transducer cable holder
4Transducer holder 9CW port
5Transducer holder
CAUTION
For compablity reasons, use only ALPINION MEDICAL SYSTEMS approved transducers,
peripherals or accessories.

1-6 System Basics
System_Rear View
Figure 1-2 E-CUBE 8 System (Rear view)
No. Component No. Component
1I/O panel 3AC inlet
2System on/o switch 4ECG port
NOTE
When connecng an external monitor to your system, use the monitor with 1366 x 768 or
higher resoluon.

Console Overview 1-7
System_Side View
Figure 1-3 E-CUBE 8 System (Side view)
No. Component No. Component
1Monitor arm 3Caster lock
2Transducer port 4Caster

1-8 System Basics
Monitor
Contrast, brightness, and dim brightness
To adjust the contrast,
1
Press the Mode/Select ( ) buon on the monitor once.
2
To increase the contrast, press the Up ( ) buon. Press the Down ( ) buon to decrease
the contrast. Repeat step 2 unl desired value reached.
NOTE
Current contrast value is shown on the display.
To adjust the brightness of the monitor,
1
Press the Mode/Select ( ) buon on the monitor twice.
2
To increase the brightness, press the Up ( ) buon. Press the Down ( ) buon to
decrease the brightness. Repeat step 2 unl the desired value is reached.
NOTE
Current brightness value is shown on the display.
To adjust the brightness of the touch screen,
1
Push up Brightness dial to increase the brightness.
2
To decrease the brightness, push down Brightness dial.
To adjust the dim brightness,
1
Press the Mode/Select ( ) buon on the monitor three mes.
2
To increase the dim brightness, press the Up ( ) buon. Press the Down ( ) buon to
decrease the dim brightness. Repeat step 2 unl the desired value is reached.
NOTE
Current dim brightness value is shown on the display.

Console Overview 1-9
Control Panel
The control panel can be used for controlling the system.
9
2
16
3
8
7
1
45
6
10
11
15
12
13
14
17 18
Figure 1-4 Control panel layout
No Controls Descripon
1TGC slides Use these controls to adjust TGC values on images.
2So keys
Use these controls to select or adjust the funcons in the so
menu at the boom of the touch screen.
•Press to select the corresponding so menu.
•Rotate to adjust the funcon of the corresponding so menu.
3Power on/o Use this control to turn on and o the system.
4U1, U2, U3 Use these controls to access user-dened funcons.
5Imaging modes Use these controls to acvate M, PW, CF, or 2D mode.
6
CW Use this control to acvate Connuous Wave (CW) Doppler mode.
This control is oponal.
PD Use this control to acvate Power Doppler mode.
3D4D Use these controls to acvate 3D and 4D modes.

1-10 System Basics
No Controls Descripon
7
Paent Use this control to display the Paent Registraon screen. You
can enter paent data.
Transducer Use this control to select the desired transducer, applicaon, and
preset.
Report Use this control to create a report based on the exam result and
edit it.
E-view Use this control to acvate image management with end of study
opons.
End Exam Use this control to end the current study.
8QWERTY keyboard Use this control to type numeric values and texts.
9Select Use this control to select the desired funcon from the context
menu on the screen.
10 Angle
Use this control to change an angle.
•In 2D or Color mode, rotate to adjust the angle steer.
•In CW or PW mode, rotate to adjust the Doppler angle correct.
•In Body paern mode, rotate to adjust the transducer angle.
•In Arrow mode, rotate to adjust the arrow angle.
•In CW or PW mode, press to adjust the auto angle.
11
Clear Use this control to delete the arrow, comment, and measurement.
Exit Use this control to exit current screen (mode) and return to the
previous screen (mode).
12
Depth Use this control to adjust the scanning depth of an image.
Focus Use this control to focus on the area of interest..
Zoom
Use this control to turn Zoom mode on.
•Rotate to acvate Read zoom.
•Press to acvate Write zoom in Read zoom mode.
13 Image layout keys Use these controls to view an image in dual or quad screen.
14
Xpeed Use this control to automacally opmize image parameters on
the live screen.
P2, P3 Use this control to print out images.

Console Overview 1-11
No Controls Descripon
15
Set/Cur
Use this control to show the cursor on the screen and set the
current funcon. You can select a menu on the screen using this
cursor.
Body Paern Use this control to display the body paern images.
Text Use this control to annotate images.
Update Use this control to update a 2D image in real me based on the
specied me or freeze a 2D image.
Measure Use this control to perform measurement.
Priority
Use this control to adjust the priority of Trackball.
•In 2D mode, press to select the priority between the width and
lt funcons.
•In Duplex or Triplex mode, press to select the priority between
ROIs of the acvated imaging modes.
16 Trackball Use this control to scroll through menus or opons on the screen
by moving the cursor.
17 Freeze Use this control to start and stop scanning.
18 P1 Use this control to print out images.

1-12 System Basics
QWERTY Keyboard
The QWERTY keyboard is available which you can enter text or perform special funcons.
Figure 1-5 QWERTY keyboard
Special keys
No Controls Descripon
1Quick ID Access the Quick ID screen.
2Paent Browse Access the E-View menu.
3Image Preset Access the Image Preset menu.
4System Preset Access the System Preset menu.
5DICOM Spool Access the DICOM Spooler menu.
6F7 Create your own user preset.
7DVR Access the DVR menu.
8Help Access the electronic manual.
9Eject Eject a media (CD, DVD, or USB).
10 Hide Hide the current menu screen.
11 Clear All Clear your input or cancel your selecon.
12 Biopsy Show the biopsy guideline.
13 Flip the image 180 degrees le/right.
14 Inial Restore the default sengs of the current funcon.

Console Overview 1-13
No Controls Descripon
15 End Exam End the current study.
16 Show the arrow pointer on the screen.
Touch Screen
Your ultrasound system has the touch screen that enables you to easily access menus or adjust
opons on the current monitor display. With the touch screen, you can also enter text instead
of using the QEWRTY keyboard. Simply touch the menu or opon you want.
Figure 1-6 Touch screen

1-14 System Basics
Image Display
The image display consists of an ultrasound image, applicaon informaon, paent
informaon, and indicators.
16
11
10
5
6
9
8
7
15
14
13
3 41 2
12
Figure 1-7 Image display
1
Hospital logo & name 10 Transducer orientaon marker
Current date & me 11 Image area
2Paent ID, Paent name 12 Image parameter
3Operator ID, Transducer name 13 Clipboard indicator
4Mechanical index, Thermal index 14 Image clipboard
5Zoom reference window
15
Symbol lock, Caps lock, USB connecon,
Network connecon, Wireless network
connecon, User dened key, Data
backup status, Cube View connecon,
Baery status icon
6Labeled measurement menu
7Gray/Color scale bar
8Focal zone marker
16
Clipboard icons: Recycle bin, Single &
Dual layout format, Scroll Up/Down/
Home/End
9Depth scale marker
Table of contents
Other Alpinion Medical Systems Medical Equipment manuals
Popular Medical Equipment manuals by other brands

OSD Audio
OSD Audio Fitrus A user guide

Valeda
Valeda Light Delivery System user manual

SSCOR
SSCOR S-SCORT III 74000 Operating Instructions & Maintenance Manual

Respironics
Respironics System One Heated Humidifier user manual

Xit-International
Xit-International PainXit Instruction booklet

AssiStep
AssiStep Stair Assistant user manual