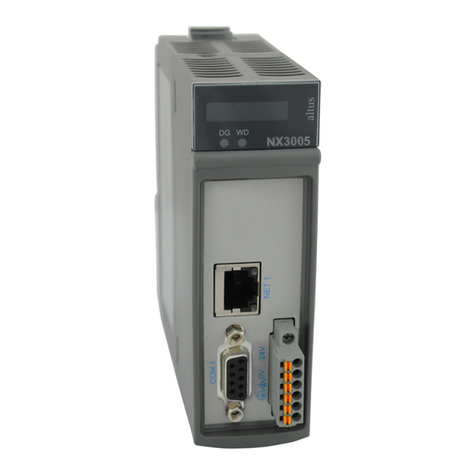
ALTUS Nexto Series User manual

User Manual
Nexto Serie CPU
NX3004
MU214616 Rev. B
May 27, 2022

General Supply Conditions
No part of this document may be copied or reproduced in any form without the prior written consent of Altus Sistemas de
Automação S.A. who reserves the right to carry out alterations without prior advice.
According to current legislation in Brazil, the Consumer Defense Code, we are giving the following information to clients
who use our products, regarding personal safety and premises.
The industrial automation equipment, manufactured by Altus, is strong and reliable due to the stringent quality control
it is subjected to. However, any electronic industrial control equipment (programmable controllers, numerical commands,
etc.) can damage machines or processes controlled by them when there are defective components and/or when a programming
or installation error occurs. This can even put human lives at risk. The user should consider the possible consequences of
the defects and should provide additional external installations for safety reasons. This concern is higher when in initial
commissioning and testing.
The equipment manufactured by Altus does not directly expose the environment to hazards, since they do not issue any kind
of pollutant during their use. However, concerning the disposal of equipment, it is important to point out that built-in electronics
may contain materials which are harmful to nature when improperly discarded. Therefore, it is recommended that whenever
discarding this type of product, it should be forwarded to recycling plants, which guarantee proper waste management.
It is essential to read and understand the product documentation, such as manuals and technical characteristics before its
installation or use. The examples and figures presented in this document are solely for illustrative purposes. Due to possible
upgrades and improvements that the products may present, Altus assumes no responsibility for the use of these examples and
figures in real applications. They should only be used to assist user trainings and improve experience with the products and
their features.
Altus warrants its equipment as described in General Conditions of Supply, attached to the commercial proposals.
Altus guarantees that their equipment works in accordance with the clear instructions contained in their manuals and/or
technical characteristics, not guaranteeing the success of any particular type of application of the equipment.
Altus does not acknowledge any other guarantee, directly or implied, mainly when end customers are dealing with third-
party suppliers. The requests for additional information about the supply, equipment features and/or any other Altus services
must be made in writing form. Altus is not responsible for supplying information about its equipment without formal request.
These products can use EtherCAT® technology (www.ethercat.org).
COPYRIGHTS
Nexto, MasterTool, Grano and WebPLC are the registered trademarks of Altus Sistemas de Automação S.A.
Windows, Windows NT and Windows Vista are registered trademarks of Microsoft Corporation.
OPEN SOURCE SOFTWARE NOTICE
To obtain the source code under GPL, LGPL, MPL and other open source licenses, that is contained in this product, please
contact [email protected]. In addition to the source code, all referred license terms, warranty disclaimers and copyright
notices may be disclosed under request.
I

CONTENTS
Contents
1. Introduction ..................................................... 1
1.1. Nexto Series ............................................... 1
1.2. Innovative Features ........................................... 2
1.3. Documents Related to this Manual ................................... 3
1.4. Visual Inspection ............................................. 4
1.5. Technical Support ............................................ 5
1.6. Warning Messages Used in this Manual ................................. 5
2. Technical Description ................................................ 6
2.1. Panels and Connections ......................................... 6
2.2. General Features ............................................. 7
2.2.1. Common General Features ................................... 7
2.2.2. Memory ............................................. 8
2.2.3. Protocols ............................................. 10
2.2.4. Serial Interfaces ......................................... 11
2.2.4.1. COM 1 ........................................ 11
2.2.5. Ethernet Interfaces ........................................ 12
2.2.5.1. NET 1 ......................................... 12
2.2.6. Power Supply .......................................... 12
2.2.7. Environmental Characteristics .................................. 13
2.3. Compatibility with Other Products ................................... 13
2.4. Performance ............................................... 13
2.4.1. Application Times ........................................ 14
2.4.2. Time for Instructions Execution ................................. 14
2.4.3. Initialization Times ....................................... 14
2.4.4. Interval Time .......................................... 14
2.5. Physical Dimensions ........................................... 15
2.6. Purchase Data .............................................. 16
2.6.1. Integrant Items .......................................... 16
2.6.2. Product Code .......................................... 16
2.7. Related Products ............................................. 16
3. Installation ..................................................... 18
3.1. Mechanical Installation ......................................... 18
3.2. Electrical Installation .......................................... 18
3.3. Ethernet Network Connection ...................................... 19
3.3.1. IP Address ............................................ 19
3.3.2. Gratuitous ARP ......................................... 19
3.3.3. Network Cable Installation ................................... 19
3.4. Serial Network Connection RS-485/422 ................................ 20
II

CONTENTS
3.4.1. RS-485 Communication without termination .......................... 21
3.4.2. RS-485 Communication with Internal Termination ....................... 22
3.4.3. RS-485 Communication with External Termination ...................... 23
3.4.4. RS-422 Communication without Termination ......................... 23
3.4.5. RS-422 Communication with Internal Termination ....................... 24
3.4.6. RS-422 Communication with External Termination ...................... 25
3.4.7. RS-422 Network Example .................................... 26
3.5. Architecture Installation ......................................... 26
3.5.1. Module Installation on the Main Backplane Rack ....................... 26
3.6. Programmer Installation ......................................... 26
4. Initial Programming ................................................. 27
4.1. Memory Organization and Access .................................... 27
4.2. Project Profiles .............................................. 29
4.2.1. Single .............................................. 29
4.2.2. Basic ............................................... 30
4.2.3. Normal .............................................. 30
4.2.4. Expert .............................................. 30
4.2.5. Custom .............................................. 31
4.2.6. Machine Profile ......................................... 31
4.2.7. General Table .......................................... 32
4.2.8. Maximum Number of Tasks ................................... 33
4.3. CPU Configuration ........................................... 33
4.4. Libraries ................................................. 35
4.5. Inserting a Protocol Instance ....................................... 35
4.5.1. MODBUS RTU ......................................... 35
4.5.2. MODBUS Ethernet ....................................... 36
4.6. Finding the Device ............................................ 38
4.7. Login ................................................... 40
4.8. Run Mode ................................................ 42
4.9. Stop Mode ................................................ 43
4.10. Writing and Forcing Variables ...................................... 44
4.11. Logout .................................................. 44
4.12. Project Upload .............................................. 45
4.13. CPU Operating States .......................................... 46
4.13.1. Run ............................................... 46
4.13.2. Stop ............................................... 46
4.13.3. Breakpoint ............................................ 46
4.13.4. Exception ............................................ 47
4.13.5. Reset Warm ........................................... 47
4.13.6. Reset Cold ............................................ 47
4.13.7. Reset Origin ........................................... 47
4.14. Programs (POUs) and Global Variable Lists (GVLs) .......................... 47
4.14.1. MainPrg Program ........................................ 47
4.14.2. StartPrg Program ........................................ 48
4.14.3. UserPrg Program ........................................ 48
4.14.4. GVL System_Diagnostics .................................... 48
4.14.5. GVL Disables .......................................... 49
4.14.6. GVL IOQualities ........................................ 50
III

CONTENTS
4.14.7. GVL Module_Diagnostics .................................... 51
4.14.8. GVL ReqDiagnostics ...................................... 51
4.14.9. Prepare_Start Function ..................................... 53
4.14.10. Prepare_Stop Function ..................................... 53
4.14.11. Start_Done Function ....................................... 53
4.14.12. Stop_Done Function ....................................... 53
5. Configuration .................................................... 54
5.1. CPU Configuration ........................................... 54
5.1.1. General Parameters ....................................... 54
5.1.1.1. Hot Swap ....................................... 56
5.1.1.1.1. Hot Swap Disabled, for Declared Modules Only ............... 56
5.1.1.1.2. Hot Swap Disabled .............................. 57
5.1.1.1.3. Hot Swap Disabled, without Startup Consistency .............. 57
5.1.1.1.4. Hot Swap Enabled, with Startup Consistency for Declared Modules Only . 57
5.1.1.1.5. Hot Swap Enabled with Startup Consistency ................. 57
5.1.1.1.6. Hot Swap Enabled without Startup Consistency ............... 57
5.1.1.1.7. How to do the Hot Swap ........................... 58
5.1.1.2. Retain and Persistent Memory Areas ......................... 60
5.1.1.3. TCP Configurations .................................. 61
5.1.1.4. Project Parameters .................................. 63
5.1.2. External Event Configuration .................................. 63
5.1.3. Time Synchronization ...................................... 64
5.1.3.1. SNTP ......................................... 66
5.1.3.2. Daylight Saving Time (DST) ............................. 66
5.2. Serial Interfaces Configuration ..................................... 66
5.2.1. COM 1 .............................................. 66
5.2.1.1. Advanced Configurations ............................... 67
5.3. Ethernet Interfaces Configuration .................................... 68
5.3.1. Local Ethernet Interfaces .................................... 68
5.3.1.1. NET 1 ......................................... 68
5.3.2. Reserved TCP Ports ....................................... 68
5.4. Protocols Configuration ......................................... 69
5.4.1. Protocol Behavior x CPU State ................................. 71
5.4.2. MODBUS RTU Master ..................................... 72
5.4.2.1. MODBUS Master Protocol Configuration by Symbolic Mapping .......... 72
5.4.2.1.1. MODBUS Master Protocol General Parameters – Symbolic Mapping Con-
figuration ................................... 72
5.4.2.1.2. Devices Configuration – Symbolic Mapping configuration ......... 75
5.4.2.1.3. Mappings Configuration – Symbolic Mapping Settings ........... 76
5.4.2.1.4. Requests Configuration – Symbolic Mapping Settings ............ 77
5.4.2.2. MODBUS Master Protocol Configuration for Direct Representation (%Q) ..... 82
5.4.2.2.1. General Parameters of MODBUS Master Protocol - setting by Direct Rep-
resentation (%Q) ............................... 82
5.4.2.2.2. Devices Configuration – Configuration for Direct Representation (%Q) . . . 83
5.4.2.2.3. Mappings Configuration – Configuration for Direct Representation (%Q) . . 84
5.4.3. MODBUS RTU Slave ...................................... 86
5.4.3.1. MODBUS Slave Protocol Configuration via Symbolic Mapping .......... 86
5.4.3.1.1. MODBUS Slave Protocol General Parameters – Configuration via Sym-
bolic Mapping ................................. 87
IV

CONTENTS
5.4.3.1.2. Configuration of the Relations – Symbolic Mapping Setting ......... 91
5.4.3.2. MODBUS Slave Protocol Configuration via Direct Representation (%Q) ...... 92
5.4.3.2.1. General Parameters of MODBUS Slave Protocol – Configuration via Di-
rect Representation (%Q) ........................... 92
5.4.3.2.2. Mappings Configuration – Configuration via Direct Representation (%Q) . 93
5.4.4. MODBUS Ethernet ....................................... 95
5.4.5. MODBUS Ethernet Client .................................... 96
5.4.5.1. MODBUS Ethernet Client Configuration via Symbolic Mapping .......... 96
5.4.5.1.1. MODBUS Client Protocol General Parameters – Configuration via Sym-
bolic Mapping ................................. 97
5.4.5.1.2. Device Configuration – Configuration via Symbolic Mapping ........ 99
5.4.5.1.3. Mappings Configuration – Configuration via Symbolic Mapping ......100
5.4.5.1.4. Requests Configuration – Configuration via Symbolic Mapping .......102
5.4.5.2. MODBUS Ethernet Client configuration via Direct Representation (%Q) ......106
5.4.5.2.1. General parameters of MODBUS Protocol Client - configuration for Direct
Representation (%Q) .............................106
5.4.5.2.2. Device Configuration – Configuration via Direct Representation (%Q) . . . 107
5.4.5.2.3. Mapping Configuration – Configuration via Direct Representation (%Q) . . 108
5.4.5.3. MODBUS Client Relation Start in Acyclic Form ..................111
5.4.6. MODBUS Ethernet Server ...................................111
5.4.6.1. MODBUS Server Ethernet Protocol Configuration for Symbolic Mapping . . . . . 111
5.4.6.1.1. MODBUS Server Protocol General Parameters – Configuration via Sym-
bolic Mapping .................................111
5.4.6.1.2. MODBUS Server Diagnostics – Configuration via Symbolic Mapping . . . 113
5.4.6.1.3. Mapping Configuration – Configuration via Symbolic Mapping .......115
5.4.6.2. MODBUS Server Ethernet Protocol Configuration via Direct Representation (%Q) 116
5.4.6.2.1. General Parameters of MODBUS Server Protocol – Configuration via Di-
rect Representation (%Q) ...........................116
5.4.6.2.2. Mapping Configuration – Configuration via Direct Representation (%Q) . . 117
5.4.7. OPC DA Server .........................................119
5.4.7.1. Creating a Project for OPC DA Communication ...................121
5.4.7.2. Configuring a PLC on the OPC DA Server ......................124
5.4.7.2.1. Importing a Project Configuration ......................126
5.4.7.3. OPC DA Communication Quality and Status Variables ...............126
5.4.7.4. OPC DA Server Communication Limits .......................127
5.4.7.5. Accessing data Through an OPC DA Client .....................128
5.4.8. OPC UA Server .........................................130
5.4.8.1. Creating a Project for OPC UA Communication ...................131
5.4.8.2. Types of Supported Variables .............................132
5.4.8.3. Limit Connected Clients on the OPC UA Server ...................133
5.4.8.4. Limit of Communication Variables on the OPC UA Server .............133
5.4.8.5. Encryption Settings ..................................133
5.4.8.6. Main Communication Parameters Adjusted in an OPC UA Client ..........134
5.4.8.6.1. Endpoint URL .................................134
5.4.8.6.2. Publishing Interval (ms) e Sampling Interval (ms) ..............135
5.4.8.6.3. Lifetime Count e Keep-Alive Count .....................135
5.4.8.6.4. Queue Size e Discard Oldest .........................135
5.4.8.6.5. Filter Type e Deadband Type .........................135
5.4.8.6.6. PublishingEnabled, MaxNotificationsPerPublish e Priority .........136
V

CONTENTS
5.4.8.7. Accessing Data Through an OPC UA Client .....................136
5.4.9. EtherNet/IP ...........................................138
5.4.9.1. EtherNet/IP Interface .................................138
5.4.9.2. EtherNet/IP Scanner Configuration ..........................140
5.4.9.2.1. General ....................................140
5.4.9.2.2. Connections ..................................141
5.4.9.2.3. Assemblies ..................................143
5.4.9.2.4. EtherNet/IP I/O Mapping ...........................144
5.4.9.3. EtherNet/IP Adapter Configuration ..........................144
5.4.9.3.1. Module Types .................................144
5.4.9.3.2. EtherNet/IP Module I/O Mapping ......................145
5.5. Communication Performance ......................................145
5.5.1. MODBUS Server ........................................145
5.5.1.1. CPU’s Local Interfaces ................................145
5.5.2. OPC DA Server .........................................146
5.5.3. OPC UA Server .........................................147
5.6. System Performance ...........................................147
5.6.1. I/O Scan Time ..........................................148
5.7. RTC Clock ................................................148
5.7.1. Function Blocks for RTC Reading and Writing .........................149
5.7.1.1. Function Blocks for RTC Reading ..........................149
5.7.1.1.1. GetDateAndTime ...............................149
5.7.1.1.2. GetTimeZone .................................150
5.7.1.1.3. GetDayOfWeek ................................151
5.7.1.2. Function Blocks and Functions of RTC Writing and Configuration .........152
5.7.1.2.1. SetDateAndTime ...............................152
5.7.1.2.2. SetTimeZone .................................153
5.7.2. RTC Data Structures .......................................154
5.7.2.1. EXTENDED_DATE_AND_TIME ..........................154
5.7.2.2. DAYS_OF_WEEK ..................................155
5.7.2.3. RTC_STATUS .....................................155
5.7.2.4. TIMEZONESETTINGS ...............................155
5.8. User Files Memory ...........................................156
5.9. CPU’s Informative and Configuration Menu ..............................158
5.10. Function Blocks and Functions .....................................160
5.10.1. Special Function Blocks for Serial Interfaces ..........................160
5.10.1.1. SERIAL_CFG .....................................164
5.10.1.2. SERIAL_GET_CFG .................................166
5.10.1.3. SERIAL_GET_CTRL ................................167
5.10.1.4. SERIAL_GET_RX_QUEUE_STATUS .......................169
5.10.1.5. SERIAL_PURGE_RX_QUEUE ...........................170
5.10.1.6. SERIAL_RX .....................................172
5.10.1.7. SERIAL_RX_EXTENDED ..............................174
5.10.1.8. SERIAL_SET_CTRL .................................176
5.10.1.9. SERIAL_TX .....................................178
5.10.2. Inputs and Outputs Update ...................................180
5.10.2.1. REFRESH_INPUT ..................................180
5.10.2.2. REFRESH_OUTPUT .................................181
VI

CONTENTS
5.10.3. PID Function Block .......................................182
5.10.4. Timer Retain ...........................................183
5.10.4.1. TOF_RET .......................................183
5.10.4.2. TON_RET .......................................184
5.10.4.3. TP_RET ........................................185
5.11. SNMP ..................................................187
5.11.1. Introduction ...........................................187
5.11.2. SNMP in Nexto CPUs ......................................187
5.11.3. Private MIB ...........................................188
5.11.4. Configuration SNMP ......................................188
5.11.5. User and SNMP Communities .................................190
5.12. User Management and Access Rights ..................................190
6. Maintenance .....................................................191
6.1. Module Diagnostics ...........................................191
6.1.1. One Touch Diag .........................................191
6.1.2. Diagnostics via LED .......................................193
6.1.2.1. DG (Diagnostic) ....................................193
6.1.2.2. WD (Watchdog) ....................................193
6.1.2.3. RJ45 Connector LEDs ................................194
6.1.3. Diagnostics via WEB ......................................194
6.1.4. Diagnostic Explorer .......................................196
6.1.5. Diagnostics via Variables ....................................197
6.1.5.1. Summarized Diagnostics ...............................197
6.1.5.2. Detailed Diagnostics .................................200
6.1.6. Diagnostics via Function Blocks ................................207
6.1.6.1. GetTaskInfo ......................................207
6.2. Graphic Display .............................................209
6.3. System Log ...............................................211
6.4. Not Loading the Application at Startup .................................211
6.5. Common Problems ...........................................211
6.6. Troubleshooting .............................................212
6.7. Preventive Maintenance .........................................212
VII

1. INTRODUCTION
1. Introduction
Nexto Series programmable controllers are the ultimate solution for industrial automation and system control. With high
embedded technology, the products of the family are able to control, in a distributed and redundant way, complex industrial
systems, machines, high performance production lines and the most advanced processes of Industry 4.0. Modern and high-
speed, the Nexto series uses cutting-edge technology to provide reliability and connectivity, helping to increase the productivity
of different businesses.
Compact, robust and with high availability, the series products have excellent processing performance and rack expansion
possibilities. Its architecture allows easy integration with supervision, control and field networks, in addition to CPU and power
supply redundancy. The family’s equipment also offers advanced diagnostics and hot swapping, minimizing or eliminating
maintenance downtime and ensuring a continuous production process.
Figure 1: NX3004
1.1. Nexto Series
Nexto Series is a powerful and complete series of Programmable Controllers (PLC) with exclusive and innovative charac-
teristics. Due to its flexibility, functional design, advanced diagnostic resources and modular architecture, the Nexto PLC can
be used to control systems in small, medium and large scale applications.
Nexto Series architecture has a great variety of input and output modules. These modules combined with a powerful 32
bits processor and a high speed bus based on Ethernet, fit to several application kinds as high speed control for small machines,
complex distributed processes, redundant applications and systems with a great number of I/O as building automation. Further-
more, Nexto Series has modules for motion control, communication modules encompassing the most popular field networks
among other features.
Nexto Series uses an advanced technology in its bus, which is based on a high speed Ethernet interface, allowing input and
output information and data to be shared between several controllers inside the same system. The system can be easily divided
and distributed throughout the whole field, allowing the use of bus expansion with the same performance of a local module,
turning possible the use of every module in the local frame or in the expansion frames with no restrictions. For interconnection
between frames expansions a simple standard Ethernet cable is used.
1

1. INTRODUCTION
Figure 2: Nexto Series – Overview
1.2. Innovative Features
Nexto Series brings to the user many innovations regarding utilization, supervision and system maintenance. These features
were developed focusing a new concept in industrial automation.
Battery Free Operation: Nexto Series does not require any kind of battery for memory maintenance
and real time clock operation. This feature is extremely important because it reduces the system
maintenance needs and allows the use in remote locations where maintenance can be difficult to be
performed. Besides, this feature is environmentally friendly.
Easy Plug System: Nexto Series has an exclusive method to plug and unplug I/O terminal blocks.
The terminal blocks can be easily removed with a single movement and with no special tools. In order
to plug the terminal block back to the module, the frontal cover assists the installation procedure,
fitting the terminal block to the module.
Multiple Block Storage: Several kinds of memories are available to the user in Nexto Series CPUs,
offering the best option for any user needs. These memories are divided in volatile memories and
non-volatile memories. For volatile memories, Nexto Series CPUs offer addressable input (%I),
addressable output (%Q), addressable memory (%M), data memory and redundant data memory.
For applications that require non-volatile functionality, Nexto Series CPUs bring retain addressable
memory (%Q), retain data memory, persistent addressable memory (%Q), persistent data memory,
program memory, source code memory, CPU file system (doc, PDF, data) and memory card interface.
2

1. INTRODUCTION
One Touch Diag: One Touch Diag is an exclusive feature that Nexto Series brings to PLCs. With this
new concept, the user can check diagnostic information of any module present in the system directly
on CPU’s graphic display with one single press in the diagnostic switch of the respective module.
OTD is a powerful diagnostic tool that can be used offline (without supervisor or programmer), re-
ducing maintenance and commissioning times.
OFD – On Board Full Documentation: Nexto Series CPUs are capable of storing the complete project documentation in
its own memory. This feature can be very convenient for backup purposes and maintenance, since the complete information is
stored in a single and reliable place.
ETD – Electronic Tag on Display: Another exclusive feature that Nexto Series brings to PLCs is the Electronic Tag on
Display. This new functionality brings the process of checking the tag names of any I/O pin or module used in the system
directly to the CPU’s graphic display. Along with this information, the user can check the description, as well. This feature is
extremely useful during maintenance and troubleshooting procedures.
DHW – Double Hardware Width: Nexto Series modules were designed to save space in user cabinets or machines.
For this reason, Nexto Series delivers two different module widths: Double Width (two backplane rack slots are required)
and Single Width (only one backplane rack slot is required). This concept allows the use of compact I/O modules with a
high-density of I/O points along with complex modules, like CPUs, fieldbus masters and power supply modules.
High-speed CPU: All Nexto Series CPUs were designed to provide an outstanding performance to the user, allowing the
coverage of a large range of applications requirements.
iF Product Design Award 2012: Nexto Series was the winner of iF Product Design Award 2012
in industry + skilled trades group. This award is recognized internationally as a seal of quality and
excellence, considered the Oscars of the design in Europe.
1.3. Documents Related to this Manual
In order to obtain additional information regarding the Nexto Series, other documents (manuals and technical features)
besides this one, may be accessed. These documents are available in its last version on the site http://www.altus.com.br/site_
en/.
Each product has a document designed by Technical Features (CE), where the product features are described. Furthermore,
the product may have Utilization Manuals (the manuals codes are listed in the CE).
For instance, the NX2020 module has the information for utilization features and purchasing on its CE. On another hand,
the NX5001 has, besides the CE, a User Manual (MU).
It is advised the following documents as additional information source:
Code Description Language
CE114000 Nexto Series – Technical Characteristics English
CT114000 Série Nexto – Características Técnicas Portuguese
CS114000 Serie Nexto – Características Técnicas Spanish
CE114103 NX3004 Technical Characteristics English
CT114103 Características Técnicas NX3004 Portuguese
CS114103 Especificaciones y Configuraciones NX3004 Spanish
CE114700 Nexto Series Backplane Racks Technical Characteristic English
CT114700 Características Técnicas dos Bastidores da Série Nexto Portuguese
CS114700 Características Técnicas de los Bastidores de la Serie
Nexto Spanish
CE114810 Nexto Series Accessories for Backplane Rack Technical
Characteristics English
CT114810 Características Técnicas Acessórios para Bastidor Série
Nexto Portuguese
CS114810 Características Técnicas del Cierres Laterales para el
Bastidor Spanish
CE114902 Nexto Series PROFIBUS-DP Master Technical Charac-
teristics English
3

1. INTRODUCTION
Code Description Language
CT114902 Características Técnicas do Mestre PROFIBUS-DP da
Série Nexto Portuguese
CS114902 Características Técnicas del Módulo Profibus-DP Mae-
stro Spanish
CE114908 NX5110 and NX5210 PROFIBUS-DP Heads Technical
Characteristics English
CT114908 Características Técnicas Interfaces Cabeça
PROFIBUSDP NX5110 e NX5210 Portuguese
CS114908 Especificaciones y Configuraciones PROFIBUS-DP In-
terfaz Cabezas NX5110 y NX5210 Spanish
MU214600 Nexto Series User Manual English
MU214000 Manual de Utilização Série Nexto Portuguese
MU214616 NX3004 CPU User Manual English
MU214104 Manual de Utilização UCP NX3004 Portuguese
MU299609 MasterTool IEC XE User Manual English
MU299048 Manual de Utilização MasterTool IEC XE Portuguese
MP399609 MasterTool IEC XE Programming Manual English
MP399048 Manual de Programação MasterTool IEC XE Portuguese
MU214601 NX5001 PROFIBUS DP Master User Manual English
MU214001 Manual de Utilização Mestre PROFIBUS-DP NX5001 Portuguese
MU214608 Nexto PROFIBUS-DP Head Utilization Manual English
MU214108 Manual de Utilização da Cabeça PROFIBUS-DP Nexto Portuguese
MU214603 Nexto Series HART Manual English
MU214610 Advanced Control Functions User Manual English
NAP151 Utilização do Tunneller OPC Portuguese
NAP152 Extensão da potência de saída para até 20 W Portuguese
NAP165 Comunicação OPC UA com Controladores ALTUS Portuguese
NAP165_ing OPC UA Communication with ALTUS Controllers English
Table 1: Related Documents
1.4. Visual Inspection
Before resuming the installation process, it is advised to carefully visually inspect the equipment, verifying the existence
of transport damage. Verify if all parts requested are in perfect shape. In case of damages, inform the transport company or
Altus distributor closest to you.
CAUTION:
Before taking the modules off the case, it is important to discharge any possible static energy
accumulated in the body. For that, touch (with bare hands) on any metallic grounded surface
before handling the modules. Such procedure guaranties that the module static energy limits
are not exceeded.
It’s important to register each received equipment serial number, as well as software revisions, in case they exist. This
information is necessary, in case the Altus Technical Support is contacted.
4

1. INTRODUCTION
1.5. Technical Support
For Altus Technical Support contact in São Leopoldo, RS, call +55 51 3589-9500. For further information regarding the
Altus Technical Support existent on other places, see https://www.altus.com.br/en/ or send an email to [email protected].
If the equipment is already installed, you must have the following information at the moment of support requesting:
The model from the used equipments and the installed system configuration
The product serial number
The equipment revision and the executive software version, written on the tag fixed on the product’s side
CPU operation mode information, acquired through MasterTool IEC XE
The application software content, acquired through MasterTool IEC XE
Used programmer version
1.6. Warning Messages Used in this Manual
In this manual, the warning messages will be presented in the following formats and meanings:
DANGER:
Reports potential hazard that, if not detected, may be harmful to people, materials, environ-
ment and production.
CAUTION:
Reports configuration, application or installation details that must be taken into considera-
tion to avoid any instance that may cause system failure and consequent impact.
ATTENTION:
Identifies configuration, application and installation details aimed at achieving maximum
operational performance of the system.
5

2. TECHNICAL DESCRIPTION
2. Technical Description
This chapter presents all technical features from Nexto Series CPU NX3004.
2.1. Panels and Connections
The following figure shows the CPU front panel.
Figure 3: NX3004
As it can be seen on the figure, on the front panel upper part is placed the graphic display used to show the whole system
status and diagnostics, including the specific diagnostics of each module. The graphic display also offers an easy-to-use menu
which brings to the user a quick mode for parameters reading or defining, such as: inner temperature (reading only) and local
time (reading only).
Just below the graphic display, there are 2 LEDs used to indicate alarm diagnostics and watchdog circuit. The table below
shows the LEDs description. For further information regarding the LEDs status and meaning, see Diagnostics via LED section.
LED Description
DG Diagnostics LED
WD Watchdog LED
Table 2: LEDs Description
Nexto Series CPUs has two switches available to the user. The table below shows the description of these switches. For
further information regarding the diagnostics switch, see sections One Touch Diag.
Keys Description
Diagnostics
Switch
Switch placed on the module upper part. Used for diagnostics visualization
on the graphic display or for navigation through the informative menu and
CPU configuration.
Table 3: Keys Description
On the frontal panel the connection interfaces of Nexto Series CPUs are available. The table below presents a brief
description of these interfaces.
6

2. TECHNICAL DESCRIPTION
Interfaces Description
NET 1
RJ45 communication connector 10/100Base-TX stan-
dard. Allows the point to point or network communi-
cation. For further utilization information, see Ethernet
Interfaces Configuration section.
COM 1
DB9 female connector for RS-232 communication stan-
dard. Allows the point to point or network. For further
utilization information, see Serial Interfaces Configura-
tion section.
Power Supply
Connection by terminal on pin V1 to 24 Vdc and pin N1
to 0 Vdc. It powers the CPU, counters, fast outputs and
the rack, providing a power of up to 10 W for the lat-
ter. The pins V2 and N2, respectively 24 Vdc and 0 Vdc,
powers the normal outputs and inputs.
Table 4: Connection Interfaces
2.2. General Features
2.2.1. Common General Features
NX3004
Backplane rack occupation 2 sequential slots
Power supply integrated Yes
Ethernet TCP/IP local interface 1
Serial Interface 1
CAN Interface No
USB Port Host No
Memory Card Interface No
Real time clock (RTC) Yes
Resolution of 1 ms and maximum variance of 2 s per day.
Watchdog Yes
Status and diagnostic Indication
Graphic display
LEDs
Web pages
CPU internal memory
Programming languages
Structured Text (ST)
Ladder Diagram (LD)
Sequential Function Chart (SFC)
Function Block Diagram (FBD)
Continuous Function Chart (CFC)
Tasks
Cyclic (periodic)
Triggered by event (software interruption)
Triggered by external event (hardware interruption)
Continuous(freewheeling)
Triggered by status (software interruption)
Online changes Yes
Maximum number of tasks 16
Maximum number of expansion bus 1
Bus expansion redundancy support Yes
7

2. TECHNICAL DESCRIPTION
NX3004
Maximum number of I/O modules on the bus 32
Maximum number of additional Ethernet
TCP/IP interface modules 0
Ethernet TCP/IP interface redundancy sup-
port No
Maximum number of PROFIBUS-DP network
(using master modules PROFIBUS-DP) 1
PROFIBUS-DP network redundancy support No
Redundancy support (half-clusters) No
Hot Swap support Yes
Event oriented data reporting (SOE) No
Protocol -
Maximum Event Queue Size -
Web pages development (available through the
HTTP protocol) No
One Touch Diag (OTD) Yes
Electronic Tag on Display (ETD) Yes
Standards
IEC 61131-3 Yes
DNV-GL Type Approval – DNVGL-CG-
0339 (TAA000013D) Yes
IEC 61131-2 Yes
CE – 2014/35/EU (LVD) and
2014/30/EU (EMC)
Yes
RoHS – 2011/65/EU
Yes
UL Listed – UL61010-1 (file
E473496)
Yes
EAC – CU TR 004/2011 (LVD)
and CU TR 020/2011 (EMC)
Yes
Table 5: Common Features
Notes:
Real Time Clock (RTC): The retention time, time that the real time clock will continue to update the date and time after
a CPU power down, is 15 days for operation at 25 ◦C. At the maximum product temperature, the retention time is reduced to
10 days.
Maximum number of I/O modules on bus: The maximum number of I/O modules refers to the sum of all modules on
the local bus and expansions.
2.2.2. Memory
8

2. TECHNICAL DESCRIPTION
NX3004
Addressable input variables memory (%I) 32 Kbytes
Addressable output variables memory (%Q) 32 Kbytes
Direct representation variable memory (%M) 16 Kbytes
Symbolic variable memory 2 Mbytes
Maximum amount of memory configurable as
retentive or persistent 7.5 Kbytes
Full Redundant Data Memory -
Direct representation input variable mem-
ory (%I) -
Direct representation output variable mem-
ory (%Q) -
Direct representation variable memory
(%M) -
Symbolic variable memory -
Program memory 3 Mbytes
Source code memory (backup) 32 Mbytes
User files memory 16 Mbytes
Table 6: Memory
Notes:
Addressable input variables memory (%I): Area where the addressable input variables are stored. Addressable variables
means that the variables can be accessed directly using the desired address. For instance: %IB0, %IW100. Addressable input
variables can be used for mapping digital or analog input points. As reference, 8 digital inputs can be represented per byte and
one analog input point can be represented per two bytes.
Total addressable output variables memory (%Q): Area where the addressable output variables are stored. Address-
able variables means that the variables can be accessed directly using the desired address. For instance: %QB0, %QW100.
Addressable output variables can be used for mapping digital or analog output points. As reference, 8 digital outputs can be
represented per byte and one analog output point can be represented per two bytes. The addressable output variables can be
configured as retain, persistent or redundant variables, but the total size is not modified due to configuration.
Addressable variables memory (%M): Area where the addressable marker variables are stored. Addressable variables
means that the variables can be accessed directly using the desired address. For instance: %MB0, %MW100.
Symbolic variables memory: Area where the symbolic variables are allocated. Symbolic variables are IEC variables
created in POUs and GVLs during application development, which are not addressed directly in memory. Symbolic variables
can be defined as retentive or persistent, in which case the memory areas of retentive symbolic variables or memory of persistent
symbolic variables respectively will be used. The PLC system allocates variables in this area, so the space available for the
allocation of variables created by the user is lower than that reported in the table. The occupation of the system variables
depends on the characteristics of the project (number of modules, drivers, etc...), so it is recommended to observe the space
available in the compilation messages of the MasterTool IEC XE tool.
Persistent and Retain symbolic variables memory: Area where are allocated the retentive symbolic variables. The
retentive data keep its respective values even after a CPU’s cycle of power down and power up. The persistent data keep its
respective values even after the download of a new application in the CPU.
ATTENTION:
The declaration and use of symbolic persistent variables should be performed exclusively
through the Persistent Vars object, which may be included in the project through the tree
view in Application -> Add Object -> Persistent Variables. It should not be used to VAR PER-
SISTENT expression in the declaration of field variables of POUs.
The full list of when the symbolic persistent variables keep their values and when the value is lost can be found in the table
below. Besides the persistent area size declared in the table above, are reserved these 44 bytes to store information about the
persistent variables (not available for use).
The table below shows the behavior of retentive and persistent variables for different situations in which “-“ means the
value is lost and “X” means the value is kept.
9

2. TECHNICAL DESCRIPTION
Command VAR VAR RETAIN VAR PERSISTENT
Reset warm / Power on/off cycle - X X
Reset cold - - X
Reset origin - - -
Remove CPU or Power Supply from
the rack while energized ---
Download - - X
Online change X X X
Reboot PLC - X X
Clean All - - X
Reset Process (IEC 60870-5-104) - X X
Table 7: Post-command Variable Behavior
In the case of Clean All command, if the application has been modified so that persistent variables have been removed,
inserted into the top of the list or otherwise have had its modified type, the value of these variables is lost (when prompted by
the tool MasterTool to download). Thus it is recommended that changes to the persistent variables GVL only include adding
new variables on the list.
Program memory: Program memory is the maximum size that can be used to store the user application. This area is
shared with source code memory, being the total area the sum of “program memory” and “source code memory”.
Source code memory (backup): This memory area is used as project backup. If the user wants to import the project,
MasterTool IEC XE will get the information required in this area. Care must be taken to ensure that the project saved as a
backup is up to date to avoid the loss of critical information. This area is shared with source code memory, being the total area
the sum of “program memory” and “source code memory”.
User files memory: This memory area offers another way for the user to store files such as doc, pdf, images, and other
files. This function allows data recording as in a memory card. For further information check User Files Memory.
2.2.3. Protocols
NX3004 Interface
Open Protocol Yes COM1
MODBUS RTU Master Yes COM1
MODBUS RTU Slave Yes COM1
MODBUS TCP Client Yes NET1
MODBUS TCP Server Yes NET1
MODBUS RTU via TCP
Client Yes NET1
MODBUS RTU via TCP
Server Yes NET1
CANopen Master No -
CANopen Slave No -
CAN low level No -
SAE J-1939 No -
OPC DA Server Yes NET1
OPC UA Server Yes NET1
EtherCAT Master No -
SNMP Agent Yes NET1
DNP3 Server (Event-oriented
data) No -
IEC 60870-5-104 Server No -
EtherNet/IP Scanner Yes NET1
10

2. TECHNICAL DESCRIPTION
NX3004 Interface
EtherNet/IP Adapter Yes NET1
MQTT Client Yes NET1
SNTP Client (for clock syn-
chronism) Yes NET1
PROFINET Controller Yes NET1
PROFINET Device No -
Table 8: Protocols
Note:
PROFINET Controller: Enabled for use on a simple (not ring) network with up to 8 devices. For larger applications,
consult technical support.
2.2.4. Serial Interfaces
2.2.4.1. COM 1
COM 1
Connector Shielded female DB9
Physical interface RS-422 or RS-485 (depending on the selected cable)
Communication direction RS-422: full duplex
RS-485: half duplex
RS-422 maximum
transceivers 11 (1 transmitter and 10 receivers)
RS-485 maximum
transceivers 32
Termination Yes (optional via cable selection)
Baud rate 200, 300, 600, 1200, 1800, 2400, 4800, 9600, 19200, 38400,
57600, 115200 bps
Isolation
Logic to Serial Port 1000 Vac / 1 minute
Serial Port to protection
earth 1000 Vac / 1 minute
Table 9: COM 1 Serial Interface Features
Notes:
Physical Interface: Depending on configuration of the used cable, it is possible to choose the kind of physical interface:
RS-422 or RS-485. The list of cables can be found at Related Products section.
RS-422 Maximum Transceivers: It is the maximum number of RS-422 transceivers that can be used on a same bus.
RS-485 Maximum Transceivers: It is the maximum number of RS-485 transceivers that can be used on a same bus.
11

2. TECHNICAL DESCRIPTION
2.2.5. Ethernet Interfaces
2.2.5.1. NET 1
NET 1
Connector Shielded female RJ45
Auto crossover Yes
Maximum cable length 100 m
Cable type UTP or ScTP, category 5
Baud rate 10/100 Mbps
Physical layer 10/100 BASE-TX (Full Duplex)
Data link layer LLC (Logical Link Control)
Network layer IP (Internet Protocol)
Transport layer TCP (Transmission Control Protocol)
UDP (User Datagram Protocol)
Diagnostic LEDs - green (speed), yellow (link/activity)
Isolation
Ethernet interface to Se-
rial Port 1500 Vac / 1 minute
Table 10: Ethernet NET 1 Interface Features
2.2.6. Power Supply
Power Supply
Nominal input voltage 24 Vdc
Maximum output power 15 W
Maximum output current 3 A
Input voltage 19.2 to 30 Vdc
Maximum input current (in-
rush) 30 A
Maximum input current 1.4 A
Maximum input voltage inter-
rupt time 10 ms @ 24 Vdc
Isolation
Input to logic 1000 Vac / 1 minute
Input to protective earth 1500 Vac / 1 minute
Input to functional earth 1000 Vac / 1 minute
Cross section 0.5 mm2
Polarity inversion protection Yes
Internal auto recovery fuse Yes
Output short-circuit protec-
tion Yes
Overcurrent protection Yes
Table 11: Power Supply Features
12
Other manuals for Nexto Series
4
This manual suits for next models
2
Table of contents
Other ALTUS Computer Hardware manuals
Popular Computer Hardware manuals by other brands

Linksys
Linksys PCM200 - EtherFast 10/100 32-Bit Integrated CardBus PC... Quick installation

Victron energy
Victron energy VE.Direct to Bluetooth Smart dongle quick start guide

GIGAIPC
GIGAIPC QBiP-6412A user manual

HighPoint
HighPoint SSD7104 Quick installation guide

Portwell
Portwell ROBO-598 user guide

Ashly
Ashly 24.24M Technical notes & specifications