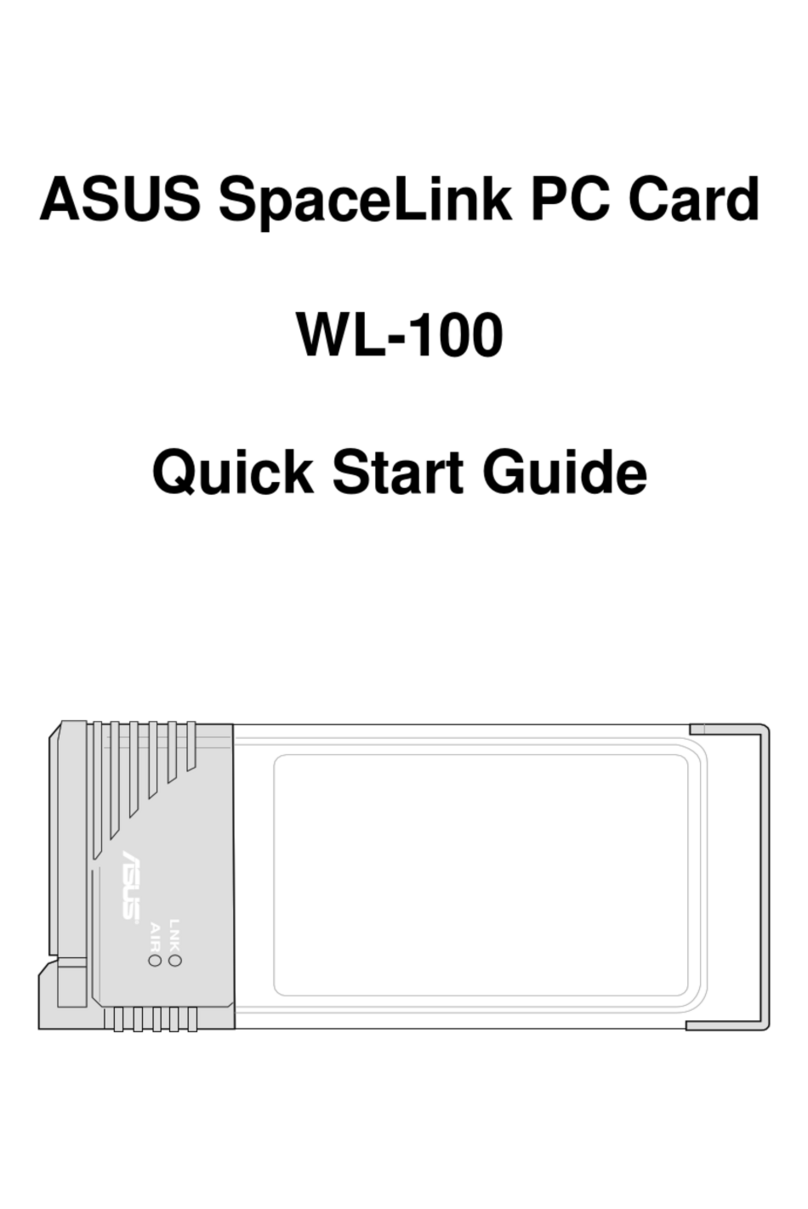
Eicon Technology DIVAMobile V90 User manual

DIVAMobileV.90
PC Card
User’s Guide

Second Edition (February 1999) 206-263-02
DIVA is a trademark of Eicon Technology Corporation.
IBM and PC AT are registered trademarks of International Business Machines Corporation.
Adobe and Acrobat are trademarks of Adobe Systems Incorporated.
CompuServe is a registered trademark of CompuServe Incorporated.
PCMCIA is a registered trademark of Personal Computer Memory Card International
Association.
Microsoft, Windows, and Windows NT are registered trademarks of Microsoft Corporation.
BVRP Software, the BVRP logo, and PhoneTools are trademarks of BVRP Software S.A.
All other trademarks are registered by their respective companies.
Changes areperiodically made tothe information herein; these changes will beincorporated
into new editions of the publication. Eicon Technology may make improvements and/or
changes in the products and/or programs described in this publication at any time.
If you wish to make comments about your Eicon Technology DIVA Mobile card or the
corresponding software, address them by E-mail to:
diva@eicon.com
If you wish to make comments about this publication, address them by E-mail to:
techpu[email protected]
To contact Eicon Customer Support, refer to the ‘Customer Services’ section in this manual.
Eicon Technology may use or distribute whatever information you supply in any way it
believes appropriate without incurring any obligations to you.
Copyright©1999 Eicon Technology Corporation. All rights reserved, including those to
reproduce this publication or parts thereof in any form without permission in writing from
Eicon Technology Corporation.
DIVA Mobile V.90 PC Card
Model Number: 800-332

EICON TECHNOLOGY CORPORATION SINGLE USER LICENSE AGREEMENT
FOR USE OF SOFTWARE
This is a legal agreement between you, the end user, and Eicon Technology Corporation.
You should carefully read thefollowing terms and conditions before installing this software.
Installing thesoftware indicates your acceptance of these terms and conditions. You assume
responsibility for the selection of the program to achieve your intended results, and for the
installation, use, and results obtained from the program.
Copyright
The software to be installed and documentation are owned by Eicon Technology
Corporation (‘Eicon’) andits suppliers andareprotectedbycopyright lawsandinternational
treaty provisions. Therefore, you must treat the software like any other copyrighted material
except as expressly permitted in this License Agreement.
License
Under the terms and conditions of this License Agreement:
• The software may be used only in conjunction with a legally acquired Eicon Technology
DIVA Mobile card;
• You may make as many copies of the Eicon Technology software components and
documentation as you wish for your own personal use;
• You may not redistribute the Eicon Technology software components or documentation
without prior written permission from Eicon Technology;
• You may use the additional application software provided by Eicon’s suppliers with the
DIVA Mobile card with which they were originally sold. You may not copy or redistribute
these applications without prior written permission from the associated supplier;
• You may transfer the software, documentation, and license to another party if the other
party agrees to accept the terms and conditions of this Agreement. If you transfer the
software and documentation, you must at the same time either transfer all copies, whether
in printed or machine readable form, to the same party or destroy any copies not transferred
to that party;
• You may not rent or lease the software. You may not reverse engineer, decompile or
disassemble the software. You may not use, copy, modify, or transfer the software and
documentation, or any copy, in whole or in part, except as expressly provided for in this
License Agreement;
• If you transfer possession of any copy of the software or documentation to another party
in any way other than that which is expressly permitted in this License Agreement, your
license is automatically terminated.
Term
The license is effective until terminated. You may terminate it at anytime by destroying the
software Program and documentation together with all copies, modifications and merged
portions in any form. It will also terminate upon conditions set forth elsewhere in this
Agreement or if you fail to comply with any term or condition of this Agreement.
You agree upon such termination to destroy the Program and documentation together with
all copies thereof, modifications and merged portions in any form.
U.S. Government Restricted Rights
The Program and documentation are provided with RESTRICTED RIGHTS. Use,
duplication, or disclosure by the Government is subject to restrictions as set forth in
subparagraph (c)(1)(ii) of The Rights in Technical Data and Computer Software clause at
DFARS 252.227-7013 or in subparagraphs (c)(1) and (2) of the Commercial Computer
Software -- Restricted Rights at 48 CFR 52.227-19, as applicable.
Contractor/Manufacturer is: Eicon Technology Corporation
9800 Cavendish Blvd., Montreal, Quebec, H4M 2V9.

Limited Warranty (Software)
The only warranty Eicon makes is that the medium on which the Program is recorded will
be replaced without charge if Eicon, in good faith, determines that it was defective in
materials or workmanship and if returned to your supplier with a copy of your receipt within
ninety (90) days from the date you purchased it. Eicon offers no warranty for your
reproduction of the Program. This Limited Warranty is void if failure of the Program has
resulted from accident, misuse, abuse or misapplication.
Eicon's entire liability and your exclusive remedy shall be repair or replacement of the
Program that does not meet the above Limited Warranty. Any replacement Program will be
warranted for the remainder of the original warranty period.
Limited Warranty (Hardware)
Eicon Technology Corporation warrants to the original purchaser of this Eicon Technology
Hardware Product that it is to be in good working order for a period of five (5) years from
the date of purchase from Eicon Technology or an authorized Eicon Technology dealer.
Should this Product, in Eicon Technology’s opinion, fail to be in good working order at any
time during this five year warranty period, Eicon Technology will, at its option, repair or
replace this Product at no additional charge except as set forth below. Repair parts and
replacement Products will be furnished on an exchange basis and will be either
reconditioned or new. All replaced parts and Products become property of Eicon
Technology. This Limited Warranty doesnot include serviceto repairdamageto theProduct
resulting from accident, disaster, misuse, abuse, or non-authorized alterations,
modifications, and/or repairs.
Products requiring Limited Warranty service during the warranty period should be delivered
to Eicon Technology with proof of purchase. If the delivery is by mail, you agree to insure
the Product or assume the risk of loss or damage intransit. You alsoagree toprepayshipping
charges to Eicon Technology and to use the original shipping container or equivalent.
No Other Warranties (Hardware and Software)
EICON DISCLAIMS ALL OTHER WARRANTIES, EITHER EXPRESS OR IMPLIED,
INCLUDING BUT NOT LIMITED TO IMPLIED WARRANTIES OF
MERCHANTABILITY, FITNESS FOR A PARTICULAR PURPOSE, LATENT
DEFECTS AND NON-INFRINGEMENT, WITH RESPECT TO THE HARDWARE,
PROGRAM, AND THE ACCOMPANYING DOCUMENTATION. THIS LIMITED
WARRANTY GIVES YOU SPECIFIC LEGAL RIGHTS. YOU MAY HAVE OTHERS,
WHICH MAY VARY FROM PROVINCE TO PROVINCE OR FROM STATE TO STATE.
No Liability For Consequential Damages
IN NO EVENT SHALL EICON OR ITS SUPPLIERS BELIABLE FOR ANYDAMAGES
WHATSOEVER (INCLUDING, WITHOUT LIMITATION, DAMAGES FOR LOSS OF
BUSINESS PROFITS, BUSINESS INTERRUPTION, LOSS OF BUSINESS
INFORMATION OR OTHER PECUNIARY LOSS AND INDIRECT, SPECIAL,
CONSEQUENTIAL,INCIDENTAL,ECONOMICOR PUNITIVEDAMAGES ARISING
OUT OF THE USE OF OR INABILITY TO USETHIS PRODUCT, EVEN IF EICON OR
ITS SUPPLIERS HAVE BEEN ADVISED OF THE POSSIBILITY OF SUCH
DAMAGES). BECAUSESOME JURISDICTIONSDO NOTALLOWTHE EXCLUSION
OR LIMITATION OF LIABILITY FOR CONSEQUENTIAL OR INCIDENTAL
DAMAGES, THE PRECEDING LIMITATION MAY NOT APPLY TO YOU IF YOU
LIVE IN ONE OF THOSE JURISDICTIONS.
Third-Party Software
In addition to the above-mentioned restrictions on liability, Eicon emphasizes that it shall be
responsible for absolutely no liability for any damagecaused by or malfunction of software
licensed from third parties. Third-party software is provided to you on a strictly AS IS basis.
Eicon makes absolutely no representations and provides no warranties whatsoever for
third-party software and explicitly does not warrant that third-party software is Year 2000
compliant.

Contents
Introduction....................................................................................7
Online documentation.......................................................................... 8
Bonus software .................................................................................... 9
How to proceed with the installation................................................... 9
Requirements...............................................................................10
Before installing DIVA Mobile under Windows 95 .......................... 12
Installing the DIVA Mobile PC Card............................................13
Installing the Software ................................................................14
Installing DIVA for Windows 95 & 98.............................................. 14
Installing DIVA Mobile for Windows NT......................................... 20
Connecting to the ISDN and to the Analogue Networks..........28
Connecting to the Internet or to Another Remote Network ....32
Under Windows 95/98....................................................................... 32
Under Windows NT........................................................................... 37
Sending and Receiving Faxes....................................................41
Selecting a modem............................................................................. 41
Sending faxes..................................................................................... 41
Receiving faxes.................................................................................. 42
Travelling to a New Location ......................................................43
Specifying your location.................................................................... 43
Changing your switch type, ISDN numbers, and SPIDs................... 44
Updating your Dial-Up Networking configuration ........................... 45
Connecting to the ISDN and to the analogue networks..................... 46
Diagnosing Problems..................................................................47
Appendix A: AT Commands & Result Codes............................48
AT commands ................................................................................... 48
Error Correction Commands ............................................................. 53
Caller ID Commands......................................................................... 54
S-Register Summary.......................................................................... 54
Result Codes...................................................................................... 56
Customer Services......................................................................59


Introduction ◆7
Introduction
This User’s Guide describes how to install and use your DIVA Mobile V.90 PC
Card. DIVA Mobile is an integrated ISDN and analogue modem card for
Windows 95, Windows 98, and Windows NT 4.0. With DIVA Mobile, you can
connect to your corporate LAN, the Internet, or other remote networks at up to
128 kbps over ISDN or up to 56 kbps* over PSTN (public-switched telephone
network) analogue lines. This makes DIVA Mobile a versatile solution if you
prefer fast ISDN connections, but sometimes need analogue remote access from
locations where an ISDN connection is not available. DIVA Mobile also provides
faxing capabilities at up to 14.4 kbps. Applications for DIVA Mobile are shown
below.
ISDN applications
You can connect to ISDN devices or to analogue devices over ISDN.
Analogue applications
You can connect to analogue devices over PSTN.
Important: DIVA Mobile was tested and found to comply with the Elec-
tromagnetic compatibility, Safety and Network connection regulations
within the European Union, North America, and other major territories.
Before you start, read the regulatory information in the online
DIVA Mobile V.90 PC Card Reference Guide.
Analogue
over ISDN
ISDN
LAN
LAN
Fax
Internet
Internet
Your
notebook
Your
notebook
Internet
Fax
LAN
Analogue
V.90

8◆Introduction
Online documentation
The DIVA Mobile Software Suite CD-ROM includes a comprehensive reference
guide in Adobe™ Acrobat™ portable document format (PDF). The reference
guide includes troubleshooting tips, regulatory information, and more.
To install Acrobat Reader 3.02:
1. Insert the DIVA Mobile Software Suite CD-ROM into your CD-ROM drive.
2. Click ‘Start > Run’.
3. In the ‘Run’ dialog box, type:
D:\DOC\READER\WIN9X_NT\ENGLISH\AR302.EXE
(where Dis your CD-ROM drive letter).
Click ‘OK’.
To view the reference guide:
1. Insert the DIVA Mobile Software Suite CD-ROM into your CD-ROM drive.
2. Click ‘Start > Run’.
3. In the ‘Run’ dialog box, type:
D:\DOC\CLIENT\REFGUIDE\ENGLISH\REF_EN.PDF
(where Dis your CD-ROM drive letter).
Click ‘OK’.
*For analogue connections, DIVA Mobile V.90 can download (receive) data at 56 kbps
(theoretical value). However, the actual speed depends on network and line quality. In
addition, in North America, regulations limit the download speed to 53 kbps.
DIVA Mobile can upload (send) data at up to 33.6 kbps.
Important: To properly view and print the reference guide, you must
use Acrobat Reader version 3.02 or later. You can install Acrobat
Reader version 3.02 from the DIVA Mobile Software Suite CD-ROM, as
described below.

Introduction ◆9
Bonus software
For your convenience, the following bonus software applications are included on
the DIVA Mobile Software Suite CD-ROM:
Eicon Technology does not provide support for these bonus software applications.
Note: Install DIVA Mobile and the corresponding software before installing the
bonus software applications.
To install the bonus software:
1. Insert the DIVA Mobile Software Suite CD-ROM into your CD-ROM drive.
2. Click ‘Start > Run’.
3. In the ‘Run’ dialog box, type the appropriate path (replace Dwith your
CD-ROM drive letter):
Click ‘OK’.
4. Follow the on-screen instructions to complete the installation.
How to proceed with the installation
1. Make sure you have all the items you need, as listed on page 10.
2. If you are running under Windows 95, install the Dial-Up Networking 1.3
update, as described on page 12.
3. If you downloaded software from the Eicon Technology web site, extract the
corresponding files. For ‘DIVA Mobile for Windows NT’, do not change the
directory structure of the extracted files.
4. Install the hardware, as described on page 13.
5. Install the software, as described on page 14.
6. Connect to the ISDN and/or to the analogue network(s), as described on
page 28.
Software Description
Internet Explorer Microsoft’s Internet Explorer is a powerful, yet easy to use, web
browser. The supplied version includes Outlook Express, for email;
and Netmeeting, for collaborating with others on the Internet. For
instructions on how to connect to the Internet, see page 32.
PhoneTools BVRP Software’s PhoneTools is an integrated communications
package that provides fax, voice mail, terminal emulation, and data
file transfer capabilities. For instructions on how to use PhoneTools
for sending and receiving faxes, see page 41.
To install: Type:
Internet Explorer D:\BONUS\WIN9X_NT\IE4\IESETUP.EXE
PhoneTools D:\BONUS\WIN9X_NT\BVRP\ENGLISH\SETUP.EXE

10 ◆Requirements
Requirements
Make sure you have the items you need to install and use DIVA Mobile:
Item Description
✔Notebook PC Your notebook PC must have:
• a free PCMCIA Type II or Type III slot
• an installed operating system: Windows 95/98 or Windows NT
4.0 (Service Pack 3)
• an 80486 or Pentium processor
• at least 4 MBytes of free hard-disk space
• at least 16 MBytes of RAM under Windows 95/98, or at least
24 MBytes of RAM under Windows NT 4.0
•aCD-ROMdrive
✔DIVA Mobile
package This includes:
• DIVA Mobile card and DIVA Mobile Software Suite CD-ROM
• an ISDN dongle (with an S/T- or U-interface)
• an ISDN cable and an analogue cable
•European packages: Teleadapters needed for connecting to the
analogue (PSTN) phone lines in various countries. (In Spain, a
teleadapter is not required.)
✔CD-ROM or
diskettes for your
operating system
During the software installation, you might be prompted to provide
the CD-ROM or diskettes for your operating system.
✔For ISDN
connections:
ISDN Basic Rate
Interface (BRI)
Line
• Your line is installed by your local telephone company.
•North America and Japan only. If the included dongle has an
S/T-interface, you need a separate network terminating device
(NT1) to connect your ISDN line. You can obtain a separate NT1
from Eicon Technology or from another supplier.

Requirements ◆11
✔For ISDN
connections:
Information
about your ISDN
line
Your ISDN service provider has to supply the following
information.
• ISDN switch type. This usually depends on your geographic loca-
tion. Common switch types include Euro-ISDN DSS1 (used
throughout Europe, commonly referred to as ‘ETSI standard’),
NI-1 (used in North America), and 5ESS (used in North
America).
• ISDN phone numbers
•North America only. Service Profile Identifiers (SPIDs)
✔Internet and
Remote Access
(ISDN or
analogue)
If you want to connect to the Internet, get an Internet account with
an Internet Service provider (ISP).
For ISDN Internet connections, make sure your ISP supports ISDN
connections. For analogue Internet connections, make sure your
ISP supports either the V.90 or the K56flex standard.
Your ISP or network administrator has to supply the following:
• user name and password
• dial-up number. Note that most ISPs have different dial-up
numbers for ISDN and analogue access.
• protocol properties. For Internet Access, such properties include:
host name, domain name, domain name server address, IP
address, and gateway address (some properties might not be
required).
Item Description

12 ◆Requirements
Before installing DIVA Mobile under Windows 95
Before you insert DIVA Mobile into your notebook, install the Dial-Up
Networking 1.3 update from the DIVA Mobile Software Suite CD-ROM.
If you do not have the DIVA Mobile Software Suite CD-ROM, you can search for
this update on Microsoft’s web site at http://www.microsoft.com.
Version conflicts
During the installation, the ‘Version Conflict’ dialog box might appear. If this
happens, click ‘Yes’ to keep the newer file on your computer.
To install the Dial-Up Networking 1.3 Update:
1. Insert the DIVA Mobile Software Suite CD-ROM into your CD-ROM drive.
2. Click ‘Start > Run’.
3. In the ‘Run’ dialog box, type:
D:\UPDATES\WIN_95\ENGLISH\MSDUN13.EXE
(where Dis your CD-ROM drive letter).
Click ‘OK’.
4. Follow the on-screen instructions. Keep the following points in mind:
• If the TCP/IP protocol is not installed on your computer, the setup program
will prompt you to install it. If this happens, click ‘OK’ in the displayed
message box to begin installing TCP/IP.
• You might be prompted to provide your Windows 95 CD-ROM or diskettes.
• Reboot your computer whenever you are prompted to do so.
• You might be prompted to enter a Computer name and Workgroup to iden-
tify your system on the network. If you plan to connect to a network, enter a
valid computer name and workgroup (provided by your network adminis-
trator); otherwise, enter any computer name and workgroup.
Important: The DIVA Mobile installation instructions (for Windows 95)
assume that the Dial-Up Networking 1.3 update is installed.
If you are using Windows 98, do not install this update.

Installing the DIVA Mobile PC Card ◆13
Installing the DIVA Mobile PC Card
To install the DIVA Mobile PC card:
1. Under Windows 95 only: If you have not done so already, install the Dial-Up
Networking 1.3 update, as described on page 12.
2. Close all applications on your notebook.
3. In general:
• Under Windows 95/98, you can leave your notebook on.
• Under Windows NT, shut down your notebook now; otherwise,
DIVA Mobile will not be detected.
4. As shown in the illustration:
• Plug the ISDN dongle into DIVA Mobile’s ISDN socket (the larger socket).
Note that your ISDN dongle might look different from the one shown (it
might be square in shape).
• Then, plug the analogue modem cable into DIVA Mobile’s analogue socket
(the smaller socket).
5. Insert the card into your notebook’s PC Card slot (type II or type III), with the
‘DIVA Mobile’ label facing upwards. An arrow (▼) on the label indicates
which end should be inserted.
Warning: Install the DIVA Mobile PC card in your computer (as
described below) before connecting to the ISDN or to the analogue
network.
What’s Next? You now have to install the software for your operating system.
Continue with ‘Installing the Software’ on the next page.
Analogue
modem
cable
ISDN dongle
(shown with
S/T-interface)

14 ◆Installing the Software
Installing the Software
Installing software downloaded from the Eicon Technology web site
Replace the paths in the installation instructions (shown in COURIER type)
accordingly, as these paths refer to installation from the DIVA Mobile Software
Suite CD-ROM.
Version conflicts
During the installation, the ‘Version Conflict’ dialog box might appear. If this
happens, click ‘Yes’ to keep the newer file on your computer.
Installing the software
Installing DIVA for Windows 95 & 98
To install the drivers under
Windows 95:
1. If your notebook is not on, turn it on. Windows 95 detects the new hardware.
2. This step depends on the dialog shown on your screen (Case 1 or Case 2).
Case 1: If the ‘New Hardware Found’ dialog box appears, do the following:
Operating system: Go to:
Windows 95 or Windows 98 ‘Installing DIVA for Windows 95 & 98’ below.
Windows NT 4.0 ‘Installing DIVA Mobile for Windows NT’ on page 20.
Click ‘Driver from disk
provided by hardware
manufacturer’.
Click ‘OK’.
The ‘Install from Disk’
dialog box appears.

Installing the Software ◆15
Case 2: If the ‘Update Device Driver Wizard’ appears, click ‘Next’.
In the displayed screen, do the following:
3. Insert the DIVA Mobile Software Suite CD-ROM into your CD-ROM drive.
In the displayed dialog box, type:
D:\MOBILE\WIN_9X\ENGLISH
(where Dis your CD-ROM drive letter).
Click ‘OK’.
Case 2 only:If the ‘Update Device Driver Wizard’ is displayed, click ‘Finish’.
4. If you are prompted for the ‘Setup’ disk: Click ‘OK’. In the ‘Copying files’
dialog box, type the same path as in the previous step, then click ‘OK’.
The setup program copies files to your notebook.
5. If the ‘Location Information’ dialog box appears: Fill out all the options in
the ‘Location Information’ dialog box, then click ‘OK’.
The setup program copies files to your notebook.
6. When the DIVA for Windows 95 & 98 wizard appears, follow the instructions
under ‘To configure your settings’ on page 17.
Click ‘Other Locations’.
The ‘Select Other Location’
dialog box appears.

16 ◆Installing the Software
To install the drivers under Windows 98:
1. If your notebook is not on, turn it on. Windows 98 detects the new hardware.
2. In the ‘Add New Hardware Wizard’, click ‘Next’.
3. In the displayed screen, do the following.
Click ‘Next’.
4. In the displayed screen, click ‘Have Disk’.
5. Insert the DIVA Mobile Software Suite CD-ROM into your CD-ROM drive.
In the ‘Install From Disk’ dialog box, type:
D:\MOBILE\WIN_9X\ENGLISH
(where Dis your CD-ROM drive letter).
Click ‘OK’.
6. In the ‘Add New Hardware Wizard’, select ‘EICON DIVA Mobile ISDN -
V.90 combo card’.
Click ‘Next’.
7. To begin installing the drivers, click ‘Next’.
The setup program copies files to your notebook.
8. In the ‘Add New Hardware Wizard’, click ‘Finish’.
9. When the DIVA for Windows 95 & 98 wizard appears, follow the instructions
under ‘To configure your settings’ on page 17.
Click ‘Display a list
ofallthedriversina
specific location,
so you can select
the driver you
want’.

Installing the Software ◆17
To configure your settings
Step 1: Specify your settings in the DIVA for Windows 95 & 98 wizard
1. In the DIVA for Windows 95 & 98 wizard, do the following:
2. Choose the type of installation you want to perform.
• The ‘Express setup’ option lets you quickly configure your DIVA Mobile
using the minimum number of parameters. The express setup is suitable for
most applications.
• The ‘Custom setup’ option presents all configurable parameters. This
option is recommended only for advanced users.
Click ‘Next’.
3. Select the ‘Switch Type’ specified by your ISDN service provider (some
ISDN service providers refer to the switch type as ‘ISDN D-channel
protocol’).
In general:
• In Europe, select ‘DSS1 (EuroISDN)’ (commonly referred to as ETSI
standard).
• In North America, select ‘North America Auto-detect’.
Click ‘Next’.
4. Enter the ISDN phone numbers (excluding the area code) specified by your
ISDN service provider. Enter each number directly, without spaces or
hyphens.
Note: If you do not plan to receive calls (that is, if you plan to make outgoing
calls only), then you do not have to enter ISDN phone numbers.
:
Click ‘Start’.

18 ◆Installing the Software
5. North America only: Enter the corresponding SPIDs (Service Profile Identi-
fiers) specified by your ISDN service provider. Enter each number directly,
without spaces or hyphens. Depending on your switch type, you have to enter
either one or two SPIDs for your ISDN line.
6. Click ‘Next’.
7. If you selected the ‘Custom setup’ option: You can configure additional
settings, which are described in the table below. In most cases, the default
settings are sufficient. For descriptions of specific parameters, see the DIVA
for Windows 95 & 98 online help.
8. Finally, a screen summarizing the configuration is displayed. If you kept all
the default values, the following items are installed:
• Eicon channel 0 and Eicon channel 1 modems (one modem for each
B-channel)
• Eicon ISDN V.120 modem
• Eicon ISDN CAPI 2.0
9. Click ‘Finish’.
The setup program copies files to your notebook.
Item Description
Rate Adaption Select the modems that correspond to the required connection
speed. When connecting to or calling from certain locations in
North America, some switches do not support 64 kbps connec-
tions, and you must limit the speed to 56 kbps.
If you are not sure which connection speed is required, click
‘Install 56- and 64- kBit/s modems’.
Eicon ISDN
RNA modem Install this virtual modem if you need to use asynchronous PPP
applications.
Eicon ISDN
X.75 modem Install this virtual modem if you need to connect to mailboxes that
require an X.75 modem (such as some ISDN bulletin board
systems in Europe).
Eicon ISDN
V.120 modem Install this virtual modem if you need to connect to CompuServe
over ISDN, or to ISDN mailboxes that require a V.120 modem.
Eicon ISDN
BTX modem Install this virtual modem if you need to use banking applications
— such as Microsoft Money and Amaris — in Germany.
Eicon ISDN
port Install a virtual COM port if you need to use Windows 3.x-based
applications, such as CompuServe. The application accesses the
COM port through AT commands. For descriptions of ISDN-spe-
cific AT commands, see the DIVA for Windows 95 & 98 online
help.
Eicon ISDN
CAPI 2.0 Install CAPI 2.0 if you need to use applications that are based on
the Common ISDN application programming interface.

Installing the Software ◆19
10. If you are prompted for the ‘Software’ disk: Click ‘OK’. Make sure the DIVA
Mobile Software Suite CD-ROM is in your CD-ROM drive.
In the ‘Copying files’ dialog box, type:
D:\MOBILE\WIN_9X\ENGLISH
(where Dis your CD-ROM drive letter).
Click ‘OK’.
11. If you are prompted for the ‘Protocol driver’ disk: Click ‘OK’. Make sure the
DIVA Mobile Software Suite CD-ROM is in your CD-ROM drive.
In the ‘Copying files’ dialog box, type:
D:\MOBILE\WIN_9X\ENGLISH
(where Dis your CD-ROM drive letter).
Click ‘OK’.
12. If you are prompted for your Windows 95/98 CD-ROM or a specific
Windows 95/98 diskette: Insert your Windows 95/98 CD-ROM or the appro-
priate diskette into a suitable drive. Click ‘OK’. If the ‘Copying files’ dialog
box appears, enter the path to the CD-ROM or diskette, then click ‘OK’.
13. When prompted, reboot your computer to complete the installation.
Step 2: Specify your location
1. Start the Country Selector: click ‘Start > Programs > DIVA > Country
Selector for the analog modem’.
2. In the ‘Country Selector’ dialog box, do the following:
Click ‘OK’.
What’s Next? The hardware and software for DIVA Mobile is installed and
configured. You can now connect to the ISDN and/or to the analogue network(s),
as described on page 28.
Select the country where you
are located.
The Country Selector lists all
the countries where DIVA
Mobile is certified for use.

20 ◆Installing the Software
Installing DIVA Mobile for Windows NT
Before you install DIVA Mobile for Windows NT, make sure that Windows NT
Networking and the protocols specified by your Internet Service Provider (ISP) or
by your network administrator are installed on your notebook.
Note: A protocol is a ‘language’ computers can use to communicate. Computers
that need to communicate with each other must use the same protocol.
In general:
• If you will be connecting to a Windows NT RAS server, you need one or more
of the following protocols: NetBEUI, TCP/IP, or IPX. You must use protocols
that are supported by the RAS server.
• If you will be connecting to an ISP or to a TCP/IP router, you need the TCP/IP
protocol.
To determine if Windows NT Networking is installed:
1. Click ‘Start > Settings > Control Panel’.
2. Double-click the ‘Network’ icon:
• If the ‘Network’ dialog box appears, then Windows NT Networking is
installed. Continue with installing and configuring the protocols on page 21.
• If the following message box appears, then you must install Windows NT
Networking before proceeding. Make sure you have your Windows NT
CD-ROM or diskettes available.
For more information, see your Windows NT documentation. During the
Windows NT Networking setup, you are prompted to select an adapter; if
you do not have a network interface card, select the MS Loopback adapter.
Click ‘Yes’ to install
Windows NT Networking.
Table of contents
