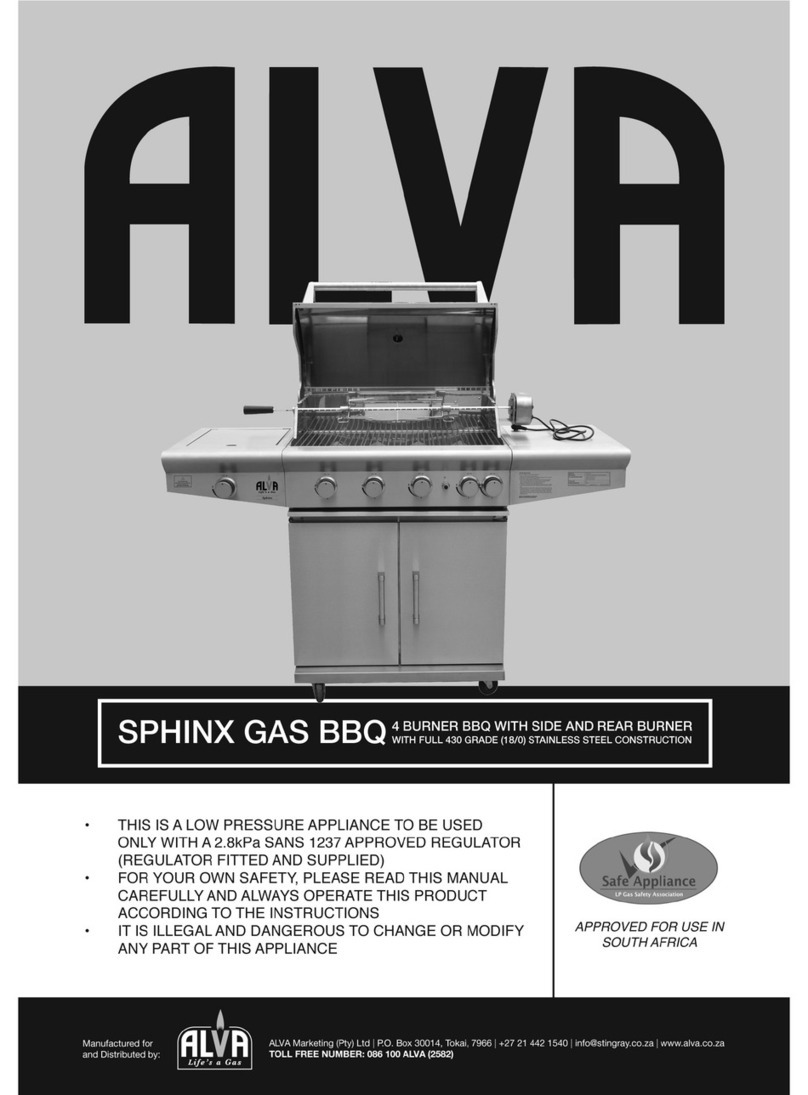
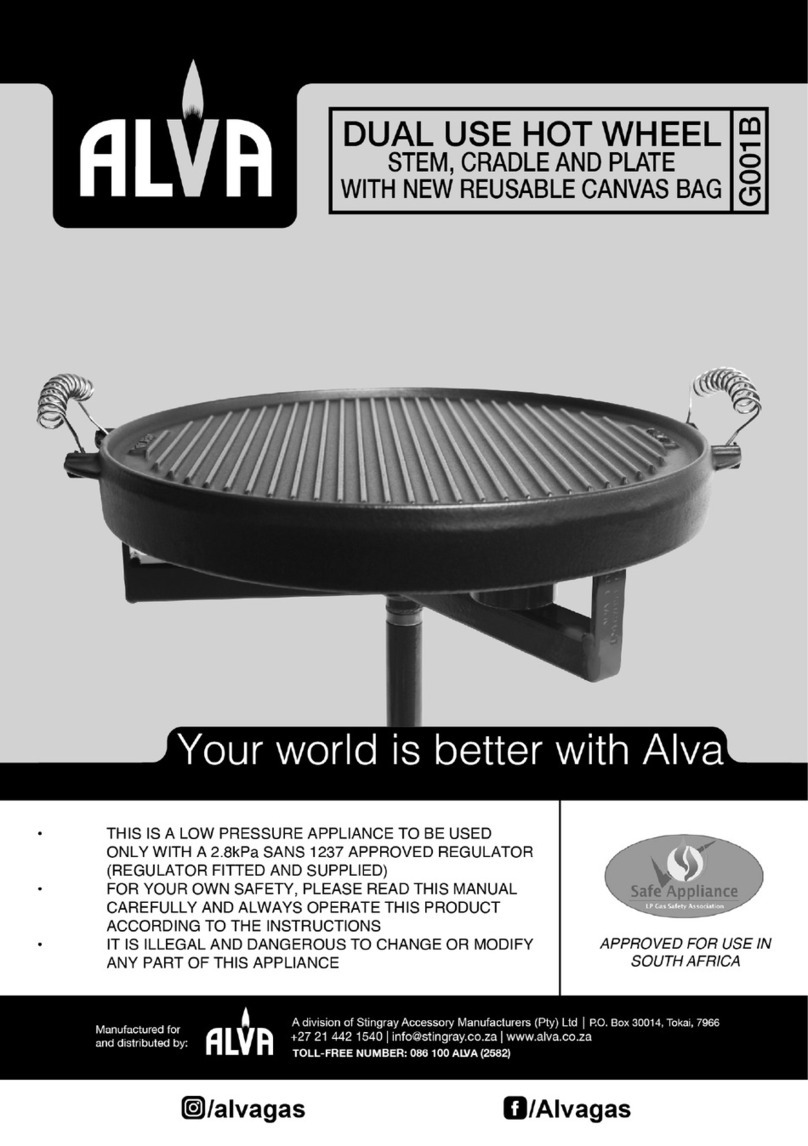
Alva EAGLE User manual

1
ALVA QUALITY BARBECUES
SAFETY, ASSEMBLY AND USER INSTRUCTION
MANUAL FOR ALL ALVA BARBECUE MODELS
RECIPES - LAST 4 PAGES
** Appearances of barbecues may differ slightly from the drawings above depending on model
FOR OUTDOOR USE ONLY. PLEASE READ INSTRUCTIONS CAREFULLY
BEFOREASSEMBLING. RETAIN THIS MANUAL FOR FUTURE REFERENCE
WARNING!!!
HAZARDOUS FIRE OR
EXPLOSION MAY
RESULT IF
INSTRUCTIONS ARE
IGNORED.
It is the consumer’s
responsibility to see
that the barbecue is
properly assembled,
installed and taken
care of. Failure to
follow instructions in
this manual could
result in bodily injury
and/or property
damage
FOR YOUR SAFETY
IF YOU SMELL GAS:
TURN OFF GAS SUPPLY AT BOTTLE
EXTINGUISH ALL NAKED FLAMES;
DO NOT OPERATE ANY ELECTRICAL
APPLIANCES
VENTILATE THE AREA
CHECK FOR LEAKS AS DETAILED IN
THIS MANUAL
IF ODOUR PERSISTS, CONTACT
YOUR DEALER OR GAS SUPPLIER
IMMEDIATELY
PRECAUTIONS
LEAK TEST ALL CONNECTIONS
AFTER EACH TANK REFILL
NEVER CHECK FOR LEAKS WITH A
MATCH OR OPEN FLAME
DO NOT STORE OR USE GASOLINE
OR OTHER FLAMMABLE VAPOURS
AND LIQUIDS IN THE VICINITY OF
THIS OR ANY OTHER APPLIANCE
AN LP GAS CYLINDER NOT
CONNECTED FOR USE MUST NOT BE
STORED IN THE VICINITY OF THIS OR
ANY OTHER APPLIANCE
MODEL NAME: EAGLE
MODEL NO: G537

2
INDEX
WARNINGS
(1) IMPORTANT INFORMATION
(2) INSTRUCTIONS FOR ASSEMBLY OF THE BARBECUE
(3) INSTALLATION
1.1 SELECTING LOCATION
1.2 PRECAUTIONS
1.3 CONNECTION REGULATOR AND HOSE
1.4 FIXING THE REGULATOR TO THE GAS CYLINDER
1.5 LEAK TESTING
(4) OPERATION
1.1 WARNING
1.2 LIGHTING THE BARBECUE
1.3 LID ROASTING – WARNING
1.4 FLASH BACK (FLAME IN BURNER TUBE/NECK)
1.5 END OF COOKING OPERATION
(5) CARE AND MAINTENANCE
1.1 CARE OF BURNERS
1.2 CAST IRON GRILL AND SOLID PLATE
1.3 DRIP/FAT TRAY
(6) STORAGE
1.1 CHECK FIXINGS (FITTINGS)
1.2 STORING YOUR BBQ
(7) HELPFUL HINTS FOR USING YOUR BBQ
(8) BUILD IN OPTION OR NATURAL GAS CONVERSION
(9) TECHNICAL SPECIFICATIONS
(10) WARRANTY
(11) RECIPES
DISTRIBUTED BY:
ALVA MARKETING (PTY) LTD
5 BEACH ROAD WOODSTOCK
CAPE TOWN
7925
TEL: 086 100 ALVA (2582)
E-MAIL: [email protected]
WEBSITE: www.alva.co.za

3
WARNINGS
This barbecue is only to be used outdoors
Read the instructions carefully before using the appliance
Note: Accessible parts may be very hot – keep young children away
SAFETY TIPS
Please observe the following points before using the barbecue:
Ensure barbecue is placed on a level surface
Do not move the appliance while in use
Never leave lit barbecue unattended
Turn off the gas supply at the gas cylinder after use
Do not tamper with any parts sealed by manufacturer or agent.Any modification of this appliance
is dangerous and will nullify any warranty.
The use of protective gloves is recommended when cooking or handling any parts of the Barbecue
while it is hot or in use
In the event of a gas leak, shut off gas supply immediately and extinguish any flames Contact
your local dealer.
1. IMPORTANT INFORMATION
Please read these instructions carefully before assembly and use!
Retain these instructions for future reference
For outdoors use only – do not use indoors
For use with LPG bottled gas only. A regulator of 2,8 kPa must be used
Do not use within 1m of any flammable structure, fabric, or surface
LP gas cylinders must not be stored or used in the horizontal position. A leak would be very
serious and liquid could enter the gas line
When igniting barbecue, open the lid before lighting
Do not move the barbecue while alight
This barbecue must not be left unattended when lit
The lid handle can become very hot. Grip only the centre of the handle. Use of a cooking glove
is advised
Use caution when opening the lid, as hot steam inside is released upon opening
Parts of this barbecue become very hot – care must be taken when children, elderly people, and
animals are present
Always turn off the gas bottle when the barbecue is not in use
Never cover a barbecue until it has completely cooled
Leak test annually, and whenever the gas bottle is removed or replaced.
Do not store flammable materials near this barbecue
Do not use aerosols near this barbecue
Failure to follow the instructions in this manual could result in serious injury or damage to
property
If you have any queries regarding these instructions, contact your local dealer
2. ASSEMBLY INSTRUCTIONS – SEE SEPARATE MANUAL ATTACHED
Tools are needed for assembly:
Flathead Screwdriver
Phillips Screwdriver
Metric Spanners or Shifting Spanner
Before Assembly:
Read all instructions thoroughly before proceeding
Find a large clean area in which to assemble your barbecue
Please refer to the parts list and assembly diagrams.
Assembly of the barbecue involves many large components; it is advisable to have two
people assembling the unit

4
3. INSTALLATION
3.1 Selecting a Location
This barbecue is for outdoor use only and should be placed in a well-ventilated area.
This appliance consumes oxygen and it is dangerous for the health and safety of the
occupants to use this appliance in areas not properly ventilated.
Take care to ensure that it is not placed under any combustible surface.
The sides of the barbecue should not be closer than 1 metre to any combustible surface.
Keep this barbecue away from any flammable materials.
3.2 Precautions
Do not obstruct any ventilation openings in the barbecue body. Position the gas cylinder on
the cylinder hanger.
The cylinder must not be placed on the ground whilst the barbecue is in use.
Should you need to change the gas cylinder, ensure that the cylinder valve is closed, the
barbecue is switched off and there are no sources of ignition (cigarettes, open flames,
sparks, etc) nearby before proceeding.
Inspect the gas hose to ensure it is free of any twisting or tension. The hose should hang
freely with no bends, folds, or kinks that could obstruct the free flow of gas. Apart from
the connection point, no part of the hose should touch any hot barbecue parts.
Always inspect the hose for cuts, cracks, or excessive wear before use. If the hose is
damaged, it must be replaced with hose suitable for use with LPG and which meets the
national standards for the country of use (South Africa: SANS 1156-2 or BS3212). The
length of the hose shall not exceed 1,5m.
3.3 Connecting the gas hose to the barbecue
Connect the gas hose to the gas manifold inlet on the left hand side of the barbecue. Do
not overtighten. Do not use any sealing tape or liquid on the connection
3.4 Fixing the regulator to the gas bottle
Ensure that all the barbecue control knobs are in the OFF position. Connect the regulator to
the gas bottle according to your regulator and cylinder dealer’s instruction. Always check
that the bullnose seal on the regulator is in place and in good condition before connecting
the regulator to the cylinder. Perform this check every time a cylinder is connected or
changed. Always make sure that the thread is fully engaged and properly tightened.
Please note that the thread on the regulator is a LEFT HAND thread and must be turned in
an ANTI-CLOCKWISE direction to tighten it when facing the cylinder valve.
3.5 Leak testing (to be performed in a well ventilated area)
Confirm that the control knob is in the OFF position. Open the gas control valve on the
cylinder. Check for leaks on all gas system joints, including all valve connections, hose
connections, and regulator connections by brushing a solution of half/half water and soap
solution over all joints and connections.
NEVER USE AN OPEN FLAME TO TEST FOR LEAKS AT ANY TIME. If bubbles form over any
of the joints, then there is a leak. Turn off the gas supply and re-tighten all joints. Repeat test.
If bubbles form again, do not use the BBQ. Please contact your local dealer for assistance.
Leak test annually and whenever the gas cylinder is removed or replaced.
4. OPERATION
4.1 Warning : Before proceeding make certain that you understand the IMPORTANT
INFORMATION section of this manual
4.2 Always light the burners in sequence from the right hand side to avoid an
accident and always turn the burners off in reverse sequence.WARNING-Open lid
before igniting barbecue.

5
Integrated Ignition:
1. Open the gas control valve at the cylinder.
2. From the OFF position, push in and turn rightmost control knob anti-clockwise. You will
hear a “click” noise, which will ignite the powerful pilot flame. Keep depressed until main
burner is lit. Release and turn control knob anti-clockwise for the desired setting.
3. If the burner fails to ignite, turn to the OFF position and wait 2 minutes. Then begin again
from step 2. If the burner still fails to ignite after several attempts, try the manual ignition
procedure below.
4. After successfully lighting the first burner, ensure the previous burner is lit BEFORE
opening the control valve on the next burner. Light the remaining burners as needed.
NEVER LIGHT BURNERS OUT OF SEQUENCE.
5. After use, first turn off the gas control valve at the cylinder and then turn ALL control knobs
to the OFF position.
Manual Ignition:
1. Open the gas control valve at the cylinder.
2. Remove grid and/or solid plate. The burners will be visible. First strike the match and hold
approximately 40 mm away from the RIGHT HAND burner, then push and turn the rightmost
control knob anti-clockwise to the HIGH position.
3. If the burner fails to ignite after 5 seconds, turn to OFF position and wait 2 minutes. Then
begin again from Step 2. If the burner still fails to light after several attempts, call your
local dealer for service.
4. After successfully lighting the first burner, turn next control knob to the ON position. The
gas will ignite from the lit burner on the right. Follow the same procedure for each successive
burner. Ensure the previous burner is lit BEFORE opening the control valve on the next
burner. Light the remaining burners from right to left.
5. After use, first turn off the gas control valve at the cylinder and then turn ALL control
knobs to the OFF position.
NOTE: Depending on the attitude this BBQ may require
the venturi to be adjusted on the burner. See Fig A.
Loosen securing screw. Turn air cup to increase air
intake until maximum flame required. Fig A
4.3 Roasting Lid Cooking !! VERY IMPORTANT !!
Barbecues equipped with a roasting lid give the option of cooking with lid closed to form
an ‘oven’ for roasting food, such as joint of meat, whole chickens, etc. When the lid is
closed, a large amount of heat is trapped inside the barbecue. Thus, it is important to make
sure that the burner is turned to the low position to prevent burning of the food and damaging
the barbecue. Avoid lifting the lid unnecessarily as heat will be lost every time when the
lid is opened. DO NOT ALLOW YOUR BARBECUE TO OVERHEAT.
4.4 FLASH BACK (FIRE IN BURNER TUBE)
In the event of a flash back occurring in the burner tube (i.e. when the flame burns inside
the tube instead of outside):
Immediately turn off the gas supply at the gas cylinder
Turn the BBQ itself off at the switch controls
Disconnect the regulator and wait for BBQ to cool down (+ 30 minutes)
Once cooled, check burner tube for blockages and follow cleaning procedures as
described under “Maintenance”
If on relighting, the problem reoccurs, get the unit checked by an authorised service
dealer.

6
4.5 End of Cooking Operation
After each cooking session, turn the barbecue burners to the HIGH position and burn for 5
minutes. This procedure will burn off cooking residue, thus making cleaning easier. The lid
must be off or open during this procedure.
Turning off your Barbecues
When you have finished using your barbecue, turn off the gas at the cylinder, and then
ensure that all the control valves are turned to the OFF position in sequence starting from the
right hand and moving to the left hand side of the unit.
Wait until the barbecue is sufficiently cool before closing it’s lid.
5. MAINTENANCE AND CARE
Maintenance
Clean your barbecue periodically between uses and especially after extended periods of storage.
NEVER douse the barbecue with water when it’s surfaces are hot
5.1 Care of Burners (see Fig B)
Ensure that there are no signs of blockage (e.g. debris, insects,
etc.) in either the burner portholes, the primary air inlet, or
the neck of stainless steel burners. Use compressed air or
pipe cleaner wire to clear obstructions. A soft Scouring
pad (3MScotchbrite) can be used to remove burned on
or scouring pad.Place burner upright in sun to dry properly
before fitting back into BBQ. WE RECOMMEND THAT THIS
SHOULD BE DONE AFTER EVERY COOKING SESSION IN
COASTAL AREAS. Taking care of your barbecue will prolong
its lifespan.
5.2 Cast Iron Grill and Solid Plate
The grills and solid plates of some upmarket units are covered with a non-corrosive vitreous
(baked enamel) finish and can be cleaned with hot water and soap with a green 3M scouring
pad or soft brush. Clean, dry and place back in position on barbecue.
Raw or non-coated grids and solid plates can be cleaned with hot water and soap and a
copper/brass bristled brush (never use a steel brush) or a green 3M scouring pad. Dry
thoroughly after washing, then lightly coat the cast iron plates and grids with cooking oil and
brush in – this will assist in the prevention of corrosion and rust.
5.3 Drip Tray
You can either cover the drip tray with a thin layer of sand and clean periodically, or you can
cover the drip tray with aluminium foil – this makes cleaning easier.
6. STORAGE
6.1 Fixings
Annual checking and tightening of metal fixings is recommended
6.2 Storage
Store your barbecue in a cool dry place. After having cleaned burners and coated with oil,
cover them with aluminium foil in order to prevent insects and other debris collecting in burner
holes. THE GAS CYLINDER SHOULD BE DISCONNECTED AND STORED OUTDOORS OR IN A
WELL VENTILATED AREA.
When using the barbecue after extended periods of storage, please take note once again of
the care, maintenance and safety instructions.
Fig B
drippings on the burner. Do not use any steel based brush

7
7. HELPFUL HINTS FOR USING YOUR BARBECUEAND PREPARATION PRIOR TO USE
(a) Seasoning the cooking surface (non vitreoused enamelled coated grids and solid
plates - first time only)
Use a pastry or soft paint brush to apply a light coating of cooking or vegetable oil to the
barbecue grid and plate. Then light the barbecue (as per lighting instructions) and turn all
burners to the LOW position, letting the grill and plate ‘cure’ for approximately 30 minutes. The
grill and plate are now cured and ready for cooking.
(b) Preheating
Burners should be burned at the high position for 3-5 minutes after lighting in order to preheat
the cooking grill or plate. This process should be carried out before every cooking session.
(c) Preparation of Cooking Surfaces
In order to prevent food from sticking to the hot cast iron plate or grill, apply a light coat of
cooking or vegetable oil with a brush before each barbecue session
(d) Flare-up Control
Flare-ups occur when meat is barbecuing on the grill side and the juices fall on the hot
vaporiser/flame tamer plate and vaporise. The smoke from some flare-up helps to give
the meat its barbecue flavour, but excessive flare-up will result in the meat becoming
burned and bitter. To control excessive flare-up, it is advisable to trim excessive fat from
meat and poultry before grilling; to control it further, the burners can be turned to the low
setting. Finally, extinguish excessive flare-ups by applying a small amount of baking
soda directly onto the vaporiser / flame tamer plate. Always protect your hands when
handling anything near the barbecue cooking surface
8. NATURAL GAS CONVERSION OR BUILD-IN OPTION
WARNING! THESE INSTRUCTIONS ARE FOR THE USE OF THE INSTALLER ONLY
WARNING! CONVERSION TO NATURAL GAS CAN ONLY BE PERFORMED BYA LICENSED GAS
INSTALLER
WARNING! IT IS ILLEGAL FORACONSUMER TO ATTEMPT TO CONVERT TO NATURAL GAS BY
THEMSELVES
This barbecue can be converted for natural gas use by replacing the injectors and removing the
hose assembly and replacing with an approved natural gas regulator.
The barbecue must be removed from the trolley (if applicable) and installed in a non-combustible
brick, concrete or similar frame.
Installation of the barbecue to the brick or concrete frame must be done to allow the air supply to
the burners to be unimpeded from below the barbecue. This can be achieved by placing the
barbecues out frame on at least one-brick height above any non-combustible base.
It is also recommended that the barbecue must not be built into a brick or concrete enclosure
covering more than one brick in height up around the sides and rear of the barbecue.
The barbecue must also be firmly bolted to the brickwork, or similar, with masonry anchor bolts
through the sides of the frame at the base (using the lower 4 holes normally used for attachment
of the body to the trolley).
The natural gas supply may then be connected to the barbecue by an authorised person.Any installation
of the barbecue must be performed to SANS 10087 part 1 and 2 in addition to any local gas regulations.
Please note that only authorised persons can convert this barbecue to a different gas type from that
supplied.

8
EXAMPLE – follow these clearances for all models
Description Distance
Distance from Non-combustible Surface to Bottom of Barbecue 800mm
Internal Width of Brickwork Base 745mm
Maximum Height of Brickwork Surrounding Barbecue Sides and Back 80mm
Gap Between Sides of Barbecue and Surrounding Brickwork 5mm
9. TECHNICAL DATA:
Model No: G537
Gas Type: LPG
Design Consumption at Max: 1,480 gr/hr
Heat Output: 15.9 KW
No. of Burners: 4
Operating Pressure: 2.8 kPa
TO BE OPERATED WITH A SANS 1237 APPROVED 2.8kPa REGULATOR, WITH A MINIMUM
DELIVERY CAPACITY OF 1.5kg/hr. REGULATOR SUPPLIED.
See technical data on product underneath side table
10. WARRANTY
This barbecue is warranted to the original purchaser to be free of defects in workmanship
and materials for a period of 12 months from the date of purchase.
The retailer, distributor, or manufacturer will not be liable for incidental or consequential
damage, or loss as a result of the installation and / or operation of this product.
The warranty will be voided against any and all claims if the unit has:
(a) Not been assembled and operated in accordance with the instructions provided
(b) Been used for commercial purposes
(c) Been abused, misused, or left exposed to the elements
(d) Been damaged as a result of fat fire
820
810
745
800
80

9
SOME GREAT RECIPE IDEAS!!
NEVERFAIL BARBECUE SAUCE
2 Tbsp Butter or Margarine 1 Clove Garlic, finely chopped
¼ Cup Finely chopped onion 1 Cup Tomato Sauce
½ tsp Ground Ginger ¼ Cup Lemon Juice
1 tsp Prepared Mustard 1 Tbsp Worcestershire Sauce
¼ Cup Brown Sugar, firmly packed ¼ tsp Hot Pepper Sauce
Method:
Cook onion and garlic in margarine until tender. Add remaining ingredients and bring to the boil.
Simmer uncovered 15-20 minutes. Refrigerate leftovers after using.
MARINATED CHICKEN - Use the Grill side of your barbecue
Ingredients:
¼ cup Dijon Mustard ½ tsp Dried Tarragon
2 Tbs Fresh Lemon Juice ¼ tsp Freshly ground Black Pepper
1 ½ tsp Worcestershire Sauce 4 Boneless, skinless Chicken Breast
halves
Method:
Combine ingredients, mixing well. Marinade chicken for several hours. Grill, uncovered, over
medium heat for 10-15 minutes. Chicken is done when juices run clear
BARBECUED HONEY STEAK - Use either Grill or Steak plate on your barbecue
Ingredients:
2 kg Beef sirloin steak 2 Garlic cloves - crushed
2 Tbs Red Pepper - crushed 1 large Onion
1 tsp Black Pepper 1 Cup Honey
Method:
Combine all ingredients and marinade steak for 7-8 hours. Remove meat from marinade and grill
over very high heat to desired doneness. Heat leftover marinade to a boil and pour over grilled
steak to serve.
GRILLED TROUT - Use either Grill or Steak plate on your barbecue
Ingredients:
¼ cup Lemon or lime juice 4 Trout (+ 750 gr each)
2 Tbs Melted butter 1 Clove Garlic, finely chopped
2 Tbs Vegetable oil 1 Cup Tomato Sauce
2 Tbs Chopped Parsley ¼ Cup Lemon Juice
1 Tbs Hot Sauce 1 tsp Prepared Mustard
½ tsp Salt
Method:
Combine lemon juice, margarine, oil, parsley, hot sauce, ginger and salt. Mix well. Pierce skin of
fish in several places. Roll fish in juice mixture to coat inside and out. Cover. Refrigerate 30
minutes to 1 hour, turning occasionally. Remove fish from marinade. Place fish on grill; brush with
marinade while grilling. Cook over high heat for 5 minutes. Turn, brush with marinade, cook 5
minutes longer. Fish is done when it flakes easily with fork.

10
GRILLED VEGGIES - Use either Grill or Steak plate on your barbecue
Ingredients:
¾ Cup Olive Oil
¼ Cup Red Wine vinegar
1 tsp Fresh Rosemary
1 tsp Fresh Thyme leaves
1 tsp Fresh Basil, chopped
1 tsp Fresh Oregano, chopped
1 Tbs Minced Garlic
½ tsp Salt
½ tsp Ground Black Pepper
1kgAssorted Vegetables, chopped or whole according to taste
Method:
Combine all ingredients in a small bowl. Marinade vegetables with sauce and cover. Refrigerate
for 2 hours. Grill vegetables over medium heat until tender, brushing them with marinade while
they cook. Cooking times will vary according to the vegetables chosen.
GRILLED BOEREWORS / SAUSAGE - Use Grill side
Brush boerewors / sausage lightly with olive oil. Also brush the grill lightly with oil.
Preheat grill section using 2 burner for 3 minutes on high.
Turn down to low. Put boerewors / sausage on grill. Grill on one side with lid open for + 5
minutes. Turn over and leave for another 5 minutes. Turn off and serve.
GRILLED RUMP STEAK - Use either Grill or Steak plate on your barbecue
Brush rump steak with olive oil. Leave out of refrigerator for 3-4 hours to reach room
temperature. Brush Grill or plate lightly with oil. Preheat Barbecue on high with lid open for 3-
5 minutes.
Place steak on plate/grill
+ 3 minutes on one side will be rare
(20mm thick cut)
Turn over and leave for another 3 minutes - your steak is now medium rare
Add seasoning of choice. Turn barbecue off and leave for + 1-2 minutes with closed lid – Steak is
now well done.
SWEETCORN FRITTERS - UseSteakPlate
1 Tin Creamed Sweetcorn
1Egg
1Cup Milk
1-1/2 Cup Self Raising Flour
1 Tbs Oil
1/2 cup Grated Cheese
Mix together the flour, egg, milk, sweetcorn, and cheese.
Heat the oil on the steak plate side of your BBQ. Gently pour spoons full of the mixture onto the
heated surface and fry till done, turning once.

11
SAVOURY PANCAKES - Use Steak plate on your barbecue
500ml Milk
3 Eggs
225 gr Flour
40 gr Melted Butter
Pinch Salt
Mix to a smooth batter.
Pour a little peanut or vegetable oil on the steak plate. Heat on medium for 3-4 minutes. Cook small
vegetables – broccoli florets for example – on the steak plate and pour the pancake mix over
them.
RIB EYE STEAKS WITH GRILLED VEGETABLES & OLIVE BUTTER - Use either Grill or Steak
plate on your barbecue
Ingredients:
4 Rib eye steaks
An assortment of vegetable of your choice
For the Olive Butter:
250 gr Butter
10 Black Olives
5 Cloves Garlic, crushed
2 tsp Fresh Basil
10 Sundried Tomatoes
10 gr Ground Paprika
Salt & Pepper to taste
Method:
Bring the butter to room temperature before making the olive butter. Chop the olives and tomatoes
finely and mix them and all the other olive butter ingredients into the butter. Roll into a sausage in
aluminium foil and allow to become firm in the fridge, or place in the freezer for a short time.
Season the meat with herbs of your choice and grill for 5 minutes at a high temperature. Remove
from the grill and leave in a warm dish to rest..
Meanwhile grill the vegetables. Carrots, cauliflower, Fennel, Broccoli, Artichokes, corn on the cob,
asparagus and celery are all good. Hard vegetables should preferably be parboiled first in water
or stock. Brush the vegetables with meat marinade (See Never Fail Barbecue Sauce recipe) and
herb oil before grilling. Season with more barbecue herbs and cook for around 5 minutes over a
lower heat.
Dot the meat with two or three slices of the butter and serve with the vegetables.
PRAWNS A LA ALVA - Use Steak plate on your barbecue
5 King or Tiger Prawns 6 Garlic Cloves, crushed
100 ml Olive Oil 1 Tbs Fresh Sage, chopped
100 ml Basil oil 20 gr Salt
20 drops Tabasco Sauce
Marinade the unpeeled prawns for a few hours in advance in the rest of the ingredients. Grill
prawns unpeeled until they turn pink and the tails curl.

12
DESSERT – ANYONE
CINNAMON APPLES
4Medium Tart Apples, cored
4 tsp Brown Sugar
4 tsp Cinnamon
Vanilla Ice Cream or Custard - optional
Method:
Mix the sugar and Cinnamon together.
Place each apple in the centre of a piece of heavy duty foil (30cm square). Spoon 1 teaspoon of
the sugar and cinnamon mix into the centre of each apple. Fold foil around the apple and seal
tightly.
Grill, covered, over medium-hot heat for 30 minutes or until apples are tender. Carefully transfer
apples and syrup to bowls. Serve warm with ice cream or custard if desired.
SUMMER MEDLEY
3medium Ripe peaches, halved & pitted
1Cup Fresh Blueberries
2 Tbs Brown Sugar
2 Tbs Butter or Margarine
1 Tbs Lemon Juice
Place each peach half, cut side up, on a double thickness of heavy duty foil (30 cm square).
Sprinkle with about 2 Tbs Blueberries, 1 teaspoon brown sugar, 1 teaspoon butter, and ½
teaspoon lemon juice. Fold foil around the peaches and seal tightly. Grill, covered, over medium-
low heat for 18-20 minutes or until the peaches are tender.
MEXICAN SMORES
½ Cup Creamy Peanut Butter
4 Flour tortillas (20 cms)
1 cup Miniature Marshmallows
½ Cup Miniature semi-sweet Chocolate Chips
Vanilla Ice Cream
Method:
Spread 2 tablespoons of peanut butter on each tortilla. Sprinkle ¼ cup marshmallows and 2
tablespoons chocolate chips on half of each tortilla. Roll up, beginning with the topping side. Wrap
each tortilla in heavy duty foil and seal tightly. Grill, covered over low heat for 5-10 minutes or until
heated through. Unwrap tortillas and place on dessert plates. Serve with Ice Cream
This manual suits for next models
1
Table of contents
Other Alva Grill manuals
Popular Grill manuals by other brands

Smoke hollow
Smoke hollow D4015SS Assembly, care & use manual

George Foreman
George Foreman SUBMERSIBLE GRES060BZ use and care manual

GBG
GBG PCGRILLSS quick start guide

Broil King
Broil King PORTA CHEF 320 CART Assembly manual & parts list

Weber
Weber JUMBO JOE PREMIUM Assembly guide

Master Forge
Master Forge BG179A manual