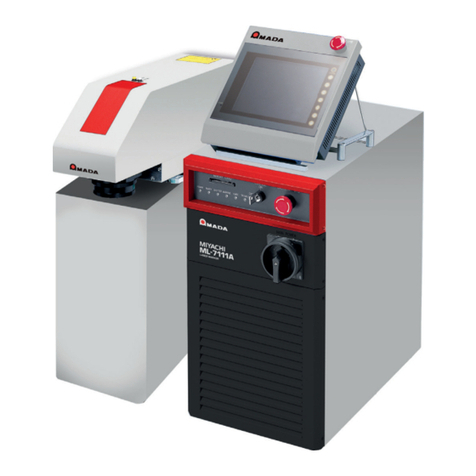
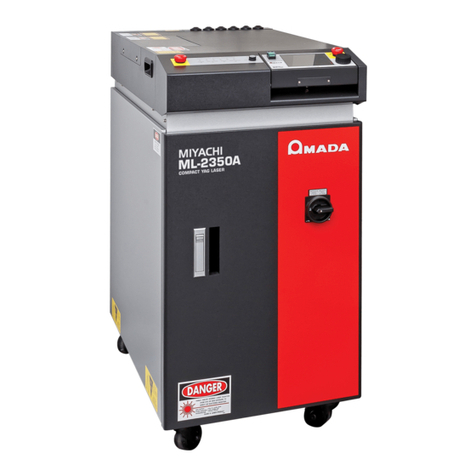
Amada ML-2650B User manual

AA06M0666E-34
OPERATION MANUAL
YAG LASER WELDER
ML-2650B/2651B

2ML-2650B/2651B
How to Use This Document
ATTENTION
In this manual, ML-2650B denotes ML-2650B, ML-2650B-CDRH, and
ML-2651B denotes ML-2651B, ML-2651B-CDRH.
Thank you for purchasing our YAG Laser Welder ML-2650B/2651B.
This operation manual explains its method of operation and precautions for use.
Before using, read this operation manual carefully; after reading, save it in a proper
place for your future reference.
This document is composed of the 4 parts of "Introduction Part", "Installation and
Preparation Part", "Operating Part", and "Maintenance Part", and "Appendixes."
We recommend inexperienced users to read through the whole contents starting from
"Introduction Part."
This document allows the user to understand the whole equipment image, basic
conguration, and how to use the laser.
Experienced users can refer to the desired page from the table of contents.
Organization of This Document and Its Contents
Introduction Part: Explains the outline and functions of the laser. Regarding the YAG
Laser, this part explains the basic configuration and functional
outline of this product including options so that the user can know
the conguration of the laser and equipment composition, and also
the name and function of each component section.
Installation and
Preparation Part:
Explains the installation of the laser and preparatory operations
such as connections of its respective sections.
Operating Part: Explains how to operate the laser. First, this part explains how to
perform each setting and how to operate the laser. Three types
of control (Control by the laser controller, control by external input/
output signals, and control by external communication control) are
explained in the operating method for laser welding.
Maintenance Part: Explains how to perform maintenance and how to handle trouble.
Appendixes: For reference materials, specications, dimensional outline drawing,
available output, timing chart, and list of terminology are available.
In the output schedule data entry table, the user can enter
registered laser output schedule data for use.

3
ML-2650B/2651B
Contents
How to Use This Document ..............................................2
For Use in Safety ......................................................7
Safety Precautions ..............................................7
Precautions for Handling ...............................................10
Laser Safety Supervisor .........................................10
Routine Handling ..............................................10
For Transportation .............................................11
For Disposal ..................................................15
Sticking Warning/Danger Labels .........................................16
Introduction Part 19
Chapter 1 Overview of the YAG Laser Welder ......................21
1. YAG Laser ........................................................21
2. Mechanism of the YAG Laser..........................................22
3. Functions of the ML-2650B/2651B......................................23
4. Product Composition ................................................24
Packaging ....................................................24
Checking the Packaged Products..................................24
Options ......................................................27
Chapter 2 Name and Functions of Each Section ....................29
1. Name and Function of Each Section on the Front Side ......................29
Front Cover Section ............................................29
Inside of the Front Side..........................................30
2. Name and Function of Each Section on the Top Side .......................32
Top Cover Section .............................................32
Laser Controller (MLE-122A) .....................................33
Laser Oscillator Section .........................................34
3. Name and Function of Each Section on the Lateral Side and Rear Side.........36
Installation and Preparation Part 37
Chapter 1 Installation ..........................................39
1. Installation Place ...................................................39
Space Required for Installation....................................39
Environment Suitable for Installation and Precautions ..................40
2. Fixing the Laser Welder ..............................................42
3. Cooling Water......................................................44
Required Quantity of Primary Cooling Water .........................45
Water Quality Standard for Primary Cooling Water ....................45
Chapter 2 Connections and Preparations of Each Section............47
1. Connecting the Power Supply .........................................47
2. Connecting the Hose for Primary Cooling Water ...........................48
3. Preparing the Secondary Cooling Water .................................49
4. Connecting the Optical Fiber ..........................................50

4ML-2650B/2651B
5. Removing the Laser Controller.........................................53
6. Connecting the External Communication Conversion Adapter (Option) .........54
Operating Part 55
Chapter 1 Control Method, and Start and Stop .....................57
1. Control Method.....................................................57
Switching the Control Method.....................................57
2. Start and Stop .....................................................58
How to Start the Laser ..........................................58
How to Stop the Laser ..........................................58
Chapter 2 Various Settings......................................59
1. Setting Welding Schedules. . . . . . . . . . . . . . . . . . . . . . . . . . . . . . . . . . . . . . . . . . . .59
Welding Schedule Setting Screen .................................59
Setting Laser Light Output Schedules (SCHEDULE Screen).............76
Setting the Output Conditions for Seam Welding (SEAM Screen) .........81
Setting the Output Status (STATUS Screen) .........................84
Checking the State of External Input/Output Signals (EXT.I/O MONITOR Screen) .89
Setting the Output Status Check Screen (MONITOR Screen) ............90
Protecting Set Values (PASSWORD Screen) .........................93
Switching theAccuracy of the Measured Laser Energy Value (J) (MEMORY SWITCH Screen) .97
Switching the Pulse Width Setting Range (MEMORY SWITCH Screen) ...100
2. Setting the Laser Light Delivery .......................................103
Laser Light Sharing............................................103
Operating Branch Shutters on the STATUS Screen ...................106
Controlling Branch Shutters Independently .........................107
3. Changing theAcceptance Time for Laser Start Signal/Schedule Signal (MEMORY SWITCH Screen) . 110
4. Setting the Function of the Output Unit with Fiber Sensor (Option) ............113
Chapter 3 Laser Welding by Laser Controller (PANEL CONTROL) ....115
1. Operation Flow ....................................................115
2. Laser Controller Functions ...........................................116
3. Operating Procedure ...............................................117
Chapter 4 Laser Welding by External Input/ Output Signals (EXTERNAL CONTROL) . 125
1. Operation Flow ....................................................125
2. Preparations for Operations ..........................................126
3. Connector Functions ...............................................127
Pin Arrangement and Functions ..................................127
Example Connections of External Input Signals......................135
Example Connection of External Output Signals .....................137
4. Programming .....................................................138
Chapter 5 Laser Welding by External Communication Control (RS-485 CONTROL) . 143
1. Operation Flow ....................................................143
2. Preparations for Operations ..........................................144
3. Initial Settings .....................................................145
Setting Communication Schedules................................145
Setting Equipment No. .........................................147


5
ML-2650B/2651B
4. Commands .......................................................149
Setting Data .................................................151
Reading Data ................................................152
Setting the Control Method, SCHEDULE No., Branch Shutter, etc. .......159
Setting the Mirror of the Timesharing Unit ..........................160
Reading the Control Method, SCHEDULE No., Branch Shutter, etc. ......161
Reading the Timesharing Unit Status ..............................162
Starting a Laser Light Output ....................................162
Stopping a Laser Light Output ...................................163
Stopping an Error Signal Output..................................163
Resetting the Total Number of Outputs.............................163
Resetting the Appropriate Number of Outputs .......................164
Reading Error No. at Occurrence of Trouble ........................164
Chapter 6 Printing Set Values and Measured Values................167
1. Printing Set Values .................................................167
2. Printing Measured Values. . . . . . . . . . . . . . . . . . . . . . . . . . . . . . . . . . . . . . . . . . . .169
3. Printing Set Values for Seam Welding ..................................170
Maintenance Part 171
Chapter 1 How to Perform Maintenance ..........................173
NOTE .............................................................173
1. Maintenance Parts and Standard Intervals of Inspection/Replacement.........173
2. Maintenance of the Cooler Unit Section.................................176
Cleaning the Solenoid Valve Strainer ..............................176
Draining Water from the Primary Cooling Water......................177
Draining Water form the Secondary Cooling Water Tank ...............179
Changing the Ion-Exchange Resin and Replacing the Ion-Exchanger.....180
Changing the Water Filter and Secondary Cooling Water ..............183
Water Drain When the Laser Welder Is Not Used Over One Month or
the Room Temperature at the Installation Place Goes Down Below 0ºC ...184
3. Maintenance of Laser Oscillator Section ................................187
Replacing the Flashlamp .......................................187
Making an Incident Beam Adjustment of the Optical Fiber ..............191
Cleaning the Optical Fiber ......................................191
Cleaning the Optical Parts ......................................192
4. Maintenance of the Power Supply Section...............................193
Replacing the Lithium Battery for Backup...........................193
Cleaning the Air Filter ..........................................194
Chapter 2 Inspection and Measure To Be Taken at Occurrence of an Error . 195
1. Error Display and How to Take a Measure...............................195
Operation for Closing Interlock ...................................200
2. Troubles not Displaying Fault Code ....................................200
Appendixes 201
Specications .......................................................203

6ML-2650B/2651B
Dimensional Outline Drawings ..........................................205
Available Output .....................................................206
Timing Chart ........................................................208
Explanation of Terminology ............................................214
Output Schedule Data Entry Table .......................................219
Index .......................................................225

For Use in Safety
7
ML-2650B/2651B
For Use in Safety
Safety Precautions
Before using, read "Safety Precautions" carefully to understand the correct
method of use.
These precautions are shown for safe use of our products and for prevention of
damage or injury to operators or others. Be sure to read each of them, since all of
them are important for safety.
A meaning of a gure sign
Denotes operations and practices that may imminently result in
serious injury or loss of life if not correctly followed.
Denotes operations and practices that may result in serious injury or
loss of life if not correctly followed.
Denotes operations and practices that may result in personal injury
or damage to the equipment if not correctly followed.
Denote "prohibition."
They are warnings about actions out of the scope of the warranty of
the product.
Denote actions which operators must take.
Denotes that the content gives notice of DANGER, WARNING or
CAUTION to the operator.
Do not touch the inside of the Laser unnecessarily.
Since source voltage of 3-phase 220 V/380 V AC is applied to the Laser,
high voltages are applied to its inside. Do not touch the inside of the Laser
unnecessarily with the power turned ON.
Never disassemble, repair or modify the Laser.
These actions can cause electric shock and re. Do not do anything other
than the maintenance described in the operation manual.
Do not look at or touch the beam.
Both direct laser beams and scattered laser beams are highly dangerous.
If the beam enters the eye directly, it can cause blindness.
Never burn, destroy, cut, crush or chemically decompose the Laser.
This product incorporates parts containing gallium arsenide (GaAs).
DANGER
WARNING
CAUTION
DANGER

8ML-2650B/2651B
For Use in Safety
Wear protective glasses.
Be sure to wear protective glasses having an optical density of at least
7 while using the Laser. Even if you wear them, you may lose your sight
if the laser beam enters your eyes directly through protective glasses.
Protective glasses attenuates the laser beam, but does not block it.
Do not expose your skin to the laser beam.
Your skin may be severely burnt.
Do not touch any processed workpiece during and just after processing
nished.
The processed workpieces are very hot.
Use only specied cables.
Use of a cable of insucient capacity or loose connection can cause
electric shock re.
Do not damage the power cable or connecting cables.
Do not tread on, twist or tense any cable. The power cable and connecting
cables may be broken, and that can cause electric shock and re. If any
part needs to be repaired, consult us or your distributor.
Stop the operation if any trouble occurs.
Continuous operation after occurrence of a trouble such as burning smell,
abnormal sound, abnormal heat, smoke, etc. can cause electric shock and
re. If such a trouble occurs, immediately consult us or your distributor.
Ground the Laser.
If the Laser is not grounded, you may get an electric shock when there is
trouble or electricity leaks.
Use a stopper.
The laser beam is dangerous to human bodies. Prevent emission through
the air by using a stopper (a heat-resistant, laser beam-absorbing,
-scattering material).
Persons with pacemakers must stay clear of the Laser.
Those who use a pacemaker must not approach the Laser or walk around
the welding shop while the Laser is in operation, without being permitted
by his/her medical doctor. The Laser generates a magnetic eld and has
eects on the operation of the pacemaker while it is turned ON.
WARNING

For Use in Safety
9
ML-2650B/2651B
Do not splash water on the Laser.
Water splashed over the electric parts, can cause electric shock and short circuits.
Use proper tools (wire strippers, pressure wire connectors, etc.) for
termination of the connecting cables.
Do not cut the wire conductor. A re or electric shock will occur.
Install the Laser on a rm and level surface.
If the Laser falls or drops, injury may result.
Do not place a water container on the Laser.
If water spills, insulation of the Laser will deteriorate, and that can cause
electric leaks and re.
Keep combustible matter away from the Laser.
Surface ash and expulsion can ignite combustible matter. If it is impossible
to remove all combustible matter, cover it with non-combustible material.
Do not apply the laser beam to combustible materials.
To avoid risk of re never apply the laser beam to ammable or
combustible materials.
Do not cover the Laser with a blanket, cloth, etc.
Do not cover the Laser with a blanket, cloth, etc. while you are using it.
The cover may be overheated and burn.
Do not use this Laser for purposes other than metal processing.
Use of the Laser in a manner other than specied can cause electric shock
and re.
Protective gear must be worn.
Put on protective gear such as protective gloves, long-sleeve jacket, leather
apron, etc. Surface ash and expulsion can burn the skin if they touch the skin.
Keep a re extinguisher nearby.
Keep a re extinguisher in the processing shop in case of re.
Maintain and inspect the Laser periodically.
Maintain and inspect the Laser periodically, and repair any damage before
starting operation.
CAUTION

10 ML-2650B/2651B
Precautions for Handling
Laser Safety Supervisor
⇒Appoint a safety supervisor for all laser work.
The appointed safety supervisor must have sucient knowledge and experience
regarding both lasers and laser work.
⇒The supervisor must control the keyswitch of the Laser, and must be responsible
for instructing operators in safety aspects of the Laser as well as directing the
laser work.
⇒Establish and control a laser operation area.
The responsible person must isolate the laser operation area from other areas
and control it by fences and display signs indicating that the area is o-limits to
unauthorized personnel.
Routine Handling
⇒Perform inspection periodically referring to the Maintenance Part, Chapter 1 "1.
Maintenance Parts and Standard Intervals of Inspection/Replacement" on page 173.
⇒If the outside of the Laser is stained, wipe it with a dry cloth or a moistened cloth.
If it is badly stained, use neutral detergent or alcohol to clean it. Do not use paint
thinner, benzine, etc. which can discolor or deform the parts.
⇒Do not put screws, coins, etc. in the Laser, since they can cause a malfunction.
⇒Operate the switches and buttons carefully by hand. If they are operated roughly
or with the tip of a screwdriver, a pen, etc. they may be broken.
⇒Operate the switches and buttons one at a time. If two or more of them are
operated at a time, the Laser may have trouble or may be broken.
⇒The outer panels and the covers are electrically connected to the main unit by
connecting cables. When the panels, covers and connecting cables are removed
and installed again, make sure that all these components are put back into place
correctly. Also, make sure that the cables do not block the optical path of the
oscillator or get caught between the outer panel and the frame.
⇒To prevent damage, do not bend the optical ber beyond its minimum bending
radius or apply any forms of shock to it. For the ber’s minimum bending radius,
see the table below.
Minimum bending radius of the optical ber
Core Diameter Minimum Bending Radius
φ 0.3, 0.4 mm 100 mm
φ 0.6 mm 150 mm
φ 0.8 mm 200 mm
φ 1.0 mm 250 mm
⇒When a supervisor or operator enters the area where the laser is used, protective
measures not to exceed the MPE* level must be taken.
* MPE: The maximum level of permissible exposure of the eyes or skin to laser beams. Abbreviation of
Maximum Permissible Exposure.
* For other information on managing laser equipment or the MPE level, refer to the
following standards.
CDRH Standards Part 1040 Sec. 1040.10 “Radiation safety standards for laser
equipment”

Precautions for Handling
11
ML-2650B/2651B
For Transportation
When transporting the laser, observe the following precautions to avoid
hazards.
⇒Package the Laser when transporting it.
⇒The worker must wear a helmet, safety shoes and gloves for safety. (Leather
gloves are recommended.)
⇒When transporting the Laser, use a lift truck, crane, belt, etc., of at least 600 kg
allowable load.
⇒Retract the level adjuster fully when transporting the Laser.
Precautions for using a fork lift
The following gure shows fork inserting positions.
⇒As shown at right, adjust the distance between the forks; distance between the
outer sides of the forks must be at least 850 mm, but the fork must not hit the
level adjuster.
⇒When transporting, belt the Laser to x and keep it horizontal.
Figures below show example forking; insert the forks fully till the points appear from
under the Laser.
DO DON'T
850 mm or more
Adjuster Adjuster
ForkFork
Fork
Fork

12 ML-2650B/2651B
Precautions for Handling
Precautions for using a crane
⇒When lifting the Laser, belt it between the caster and level adjuster observing a
“BELT HERE” label.
⇒Use two belts together.
⇒During transportation, keep the Laser horizontal.
⇒Make sure that the adjuster is not belted.
⇒For transportation using a crane, insert a buer material such as blanket, sponge,
and rubber material between the laser welder and the belt, and to have the belts
press the Laser evenly.
⇒Have the distance (Figure B on page 13) between the top corner of the Laser
and the crane hook is at least 1.5 times the Laser width including the cushion.
When the belt is not long enough as shown, insert a board (plywood, angle plate,
etc.) on the Laser not to hurt the top surface of the Laser.
BELT
HERE
CAUTION
BELT BETWEEN CASTERS
AND ADJUSTERS AS SHOWN.
注意
荷上げベルトは、左図のよ
うにキャスターとアジャス
ターの間に通して下さい。
Set the belt
in this range.
Adjuster
broken !
Adjuster
Main unit
Belt
DO
DON'T

Precautions for Handling
13
ML-2650B/2651B
Precautions for transportation
⇒Fix it rmly using belts, cushions, etc., to prevent a fall, damage due to vibration.
⇒Retract the level adjuster fully when freighting the Laser.
⇒Insert a broad and thick cushion between the front door and wall to provide
enough clearance between the wall and the upper front panel of the Laser.
⇒Insert pillows such as timber between the bottom of the Laser and floor to
balance the Laser. For positioning the pillows, refer to that for the forks of lift
truck.
Belt
Cushion
Board
A
B
Pillows
Cushion
Floor
Wall

14 ML-2650B/2651B
Precautions for Handling
⇒Set the belt for fixing the laser welder within the effective range of belt setting
shown in the following gure. If the belt is set from the lower part of the front
side, the front door may be out of position or deformed. Avoid setting the belt in
this way.
⇒Put the laser welder in close contact with the two surfaces of oor and wall and
x it securely with a belt. Be sure to use cushion between the Laser and belt not
to hurt the Laser.
⇒When it is expected that the Laser may bounce during transportation, belt the
Laser longitudinally.
Wall
Wall
DON'T
Belting range
Belt
Belting range
Example belting (Top view)
Top of
equipment
Cushion Belt
* The wall in the above Figures may be
replaced with a plank or rod as far as it can
support the Laser.

Precautions for Handling
15
ML-2650B/2651B
For Disposal
This product incorporates parts containing gallium arsenide (GaAs). At the time of
disposal, separate it from general industrial waste or domestic waste and carry out
the disposal in accordance with applicable laws and regulations.

16 ML-2650B/2651B
Sticking Warning/Danger Labels
Warning/danger labels are struck on the laser. Read the precautions provided on
each label for correct use. The numbers correspond to the label gure numbers on
the next page.
CHIBA 278-0016 JAPAN
95-3 FUTATSUKA NODA-CITY
MODEL No.
P-00161-002
CLASS Ⅳ LASER PRODUCT
SERIAL No. LABEL
Hz
1
ms
Hz
INPUT POWER VOLTS
MAX. RMS AMPS
MAX. AVERAGE POWER
MAX. PULSE ENERGY
PULSE DURATION
WAVELENGTH
PULSE REPETITION RATE
MFG:MONTH , YEAR
,
VAC
Phase 50/60Hz
A
W
J
-
-
1.064
μm
AMADA WELD TECH CO.,LTD.
MANUFACTURED BY:
P-00084-001
注 意 CAUTION
継手からホースを外す場合や、電磁弁のフィルタを掃除する際は、
水が飛び散らないようご注意ください。
水が通風孔などから装置内部に入ると、故障の原因となります。
WHEN DISCONNECTING HOSE FROM JOINT OR
CLEANING SOLENOID VALVE FILTER, TAKE CARE
NOT TO SPLASH WATER. IF WATER ENTERS
THE EQUIPMENT THROUGH VENTS, IT MAY CAUSE TROUBLE.
BELT
HERE
注 意
荷上げベルトは、左図のように
キャスターとアジャスターの間に
通して下さい。
CAUTION
BELT BETWEEN CASTERS
AND ADJUSTERS AS SHOWN.
P-00027-001
BELT
HERE
注 意
荷上げベルトは、左図のように
キャスターとアジャスターの間に
通して下さい。
CAUTION
BELT BETWEEN CASTERS
AND ADJUSTERS AS SHOWN.
P-00027-001
P-00374-001
HIGH VOLTAGE
EXPOSED TO ELECTRICAL SHOCK HAZARD
IF INTERLOCK IS DEFEATED PERSONNEL MAY BE
DISCONNECT POWER AND WAIT 5MIN.
BEFORE SERVICING
感電するおそれがあります。
高圧危険
また、電源切替後5分以内は
セーフティインタロックを解除すると
内部に絶対に触れないでください。
P-00374-001
HIGH VOLTAGE
EXPOSED TO ELECTRICAL SHOCK HAZARD
IF INTERLOCK IS DEFEATED PERSONNEL MAY BE
DISCONNECT POWER AND WAIT 5MIN.
BEFORE SERVICING
感電するおそれがあります。
高圧危険
また、電源切替後5分以内は
セーフティインタロックを解除すると
内部に絶対に触れないでください。
P-00374-001
HIGH VOLTAGE
EXPOSED TO ELECTRICAL SHOCK HAZARD
IF INTERLOCK IS DEFEATED PERSONNEL MAY BE
DISCONNECT POWER AND WAIT 5MIN.
BEFORE SERVICING
感電するおそれがあります。
高圧危険
また、電源切替後5分以内は
セーフティインタロックを解除すると
内部に絶対に触れないでください。
危険 - 可視及び/又は不可視レーザ光
DANGER - VISIBLE AND/OR INVISIBLE LASER RADIATION
危険
DANGER
VISIBLE AND/OR INVISIBLE LASER RADIATION WHEN
OPEN AND INTERLOCKS DEFEATED AVOID EYE OR SKIN
EXPOSURE TO DIRECT OR SCATTERED RADIATION
LB1164753
最大出力 / MAX
媒 質 / MEDIUM
パルス幅 / PULSE WIDTH
波 長 / WAVE LENGTH
クラス4レーザ製品 CLASS 4 LASER PRODUCT
JIS C6802:2014
パルス波 / PULSE
Nd:YAG
1.064μm
連続波 / CW
0.650μm
半導体レーザ / LD
IEC60825-1:2014
VISIBLE AND/OR INVISIBLE LASER RADIATION
MAX OUTPUT
PULSE DURATION
WAVELENGTH(S)
AVOID EYE OR SKIN EXPOSURE TO
DIRECT OR SCATTERED RADIATION
CLASS Ⅳ LASER PRODUCT
P-1221
危 険
DANGER
ここを開き、そしてインタ
ロックを解除するとクラス4の
レーザ放射が出る。ビーム
や散乱光の目又は皮膚
への被ばくを避けること
P-00474-001
危 険
DANGER
ここを開き、そしてインタ
ロックを解除するとクラス4の
レーザ放射が出る。ビーム
や散乱光の目又は皮膚
への被ばくを避けること
P-00474-001
P-00374-001
HIGH VOLTAGE
EXPOSED TO ELECTRICAL SHOCK HAZARD
IF INTERLOCK IS DEFEATED PERSONNEL MAY BE
DISCONNECT POWER AND WAIT 5MIN.
BEFORE SERVICING
感電するおそれがあります。
高圧危険
また、電源切替後5分以内は
セーフティインタロックを解除すると
内部に絶対に触れないでください。
P-00374-001
HIGH VOLTAGE
EXPOSED TO ELECTRICAL SHOCK HAZARD
IF INTERLOCK IS DEFEATED PERSONNEL MAY BE
DISCONNECT POWER AND WAIT 5MIN.
BEFORE SERVICING
感電するおそれがあります。
高圧危険
また、電源切替後5分以内は
セーフティインタロックを解除すると
内部に絶対に触れないでください。
AVOID EXPOSURE-LASER
被ばくを回避のこと - この
P-00377-001
FROM THIS APERTURE
RADIATION IS EMITTED
開口からレーザ放射が出る。
CLASS 4 LASER RADIATION
WHEN OPEN AND INTERLOCKS
DEFEATED AVOID EYE OR
SKIN EXPOSURE TO DIRECT
OR SCATTERED RADIATION.
CLASS 4 LASER RADIATION
WHEN OPEN AND INTERLOCKS
DEFEATED AVOID EYE OR
SKIN EXPOSURE TO DIRECT
OR SCATTERED RADIATION.
CLASS 4 LASER RADIATION
WHEN OPEN AND INTERLOCKS
DEFEATED AVOID EYE OR
SKIN EXPOSURE TO DIRECT
OR SCATTERED RADIATION.
ビームや散乱光の目又は皮膚の被ばくをさけること
AVOID EYE OR SKIN EXPOSURE TO DIRECT OR SCATTERED RADIATION
ここを開き、そしてインタロックを解除すると
クラス4のレーザ放射が出る。
(2)
(4)
(3) (5)
(2)
(7)
(6)
(8)
(7)
(2)(2)
(2) (1) (3) (3) (2)
Top view
Rear viewRight side viewFront view

Sticking Warning/Danger Labels
17
ML-2650B/2651B
VISIBLE AND/OR INVISIBLE LASER RADIATION
MAX OUTPUT
PULSE DURATION
WAVELENGTH(S)
AVOID EYE OR SKIN EXPOSURE TO
DIRECT OR SCATTERED RADIATION
CLASS Ⅳ LASER PRODUCT
P-1221
P-00374-001
HIGH VOLTAGE
EXPOSED TO ELECTRICAL SHOCK HAZARD
IF INTERLOCK IS DEFEATED PERSONNEL MAY BE
DISCONNECT POWER AND WAIT 5MIN.
BEFORE SERVICING
感電するおそれがあります。
高圧危険
また、電源切替後5分以内は
セーフティインタロックを解除すると
内部に絶対に触れないでください。
危 険
DANGER
ここを開き、そしてインタ
ロックを解除するとクラス4の
レーザ放射が出る。ビーム
や散乱光の目又は皮膚
への被ばくを避けること
P-00474-001
CLASS 4 LASER RADIATION
WHEN OPEN AND INTERLOCKS
DEFEATED AVOID EYE OR
SKIN EXPOSURE TO DIRECT
OR SCATTERED RADIATION.
危険 - 可視及び/又は不可視レーザ光
DANGER - VISIBLE AND/OR INVISIBLE LASER RADIATION
危険
DANGER
VISIBLE AND/OR INVISIBLE LASER RADIATION WHEN
OPEN AND INTERLOCKS DEFEATED AVOID EYE OR SKIN
EXPOSURE TO DIRECT OR SCATTERED RADIATION
LB1164753
最大出力 / MAX
媒 質 / MEDIUM
パルス幅 / PULSE WIDTH
波 長 / WAVE LENGTH
クラス4レーザ製品 CLASS 4 LASER PRODUCT
JIS C6802:2014
パルス波 / PULSE
Nd:YAG
1.064μm
連続波 / CW
0.650μm
半導体レーザ / LD
IEC60825-1:2014
ビームや散乱光の目又は皮膚の被ばくをさけること
AVOID EYE OR SKIN EXPOSURE TO DIRECT OR SCATTERED RADIATION
ここを開き、そしてインタロックを解除すると
クラス4のレーザ放射が出る。
AVOID EXPOSURE-LASER
被ばくを回避のこと - この
P-00377-001
FROM THIS APERTURE
RADIATION IS EMITTED
開口からレーザ放射が出る。
CHIBA 278-0016 JAPAN
95-3 FUTATSUKA NODA-CITY
MODEL No.
P-00161-002
CLASS Ⅳ LASER PRODUCT
SERIAL No. LABEL
Hz
1
ms
Hz
INPUT POWER VOLTS
MAX. RMS AMPS
MAX. AVERAGE POWER
MAX. PULSE ENERGY
PULSE DURATION
WAVELENGTH
PULSE REPETITION RATE
MFG:MONTH , YEAR
,
VAC
Phase 50/60Hz
A
W
J
-
-
1.064
μm
AMADA WELD TECH CO.,LTD.
MANUFACTURED BY:
キャスターとアジャスターの間に
AND ADJUSTERS AS SHOWN.
BELT BETWEEN CASTERS
P-00027-001
荷上げベルトは、左図のように
通して下さい。
CAUTION
注 意
BELT
HERE
P-00084-001
継手からホースを外す場合や、電磁弁のフィルタを掃除する際は、
水が飛び散らないようご注意ください。
水が通風孔などから装置内部に入ると、故障の原因となります。
注 意 CAUTION
THE EQUIPMENT THROUGH VENTS, IT MAY CAUSE TROUBLE.
CLEANING SOLENOID VALVE FILTER, TAKE CARE
WHEN DISCONNECTING HOSE FROM JOINT OR
NOT TO SPLASH WATER. IF WATER ENTERS
(1)
(2)
(3)
(4)
(5)
(6)
(7)
(8)
(Also stuck on the reverse side)

18 ML-2650B/2651B
Sticking Warning/Danger Labels
EXPOSURE TO VISIBLE AND/OR INVISIBLE LASER RADIATION
MAY OCCUR WHEN THE INTERLOCK SWITCH IS DEFEATED.
A LIGHTED LED INDICATES INTERLOCK SWITCH IS DEFEATED.
DIRECT OR SCATTERED RADIATION.
AVOID EYE OR SKIN EXPOSURE TO
P-1213
HIGH VOLTAGE
DISCONNECT POWER AND WAIT 5MIN.
BEFORE SERVICING
P-1044
DANGER
P-1264
LASER RADIATION
HAZARD WHEN THE
COVER IS REMOVED.
LASER BEAM MAY
CAUSE BURNS AND
EYE DAMAGE.
TURN CLOCKWISE TO SECURE THE FIBER OPTIC.
MATCH THE KEY TO THE GROOVE, INSERT AND
P-1212
KEYGROOVE
注 意
PLEASE REFER TO THE USER'S MANNUAL FOR DETAILS.
CAUTION
P-1517
精製水をタンクに入れた後に付属の落とし蓋を
水面に浮かべてから使用してください。
詳細は取扱説明書をお読みください。
FLOATING PANEL ON THE WATER.
AFTER FILLING WITH DI WATER, FLOAT THE ATTACHED
Inside of the top surface of the main unit
(top surface of the branch unit cover)
Inside of the right side surface of the main unit
(top surface of the power supply unit cover)
Inside of the top surface of the main unit
(2 places)
Inside of the rear surface of the main unit
(under the interlock board)
Inside of the top surface of the main unit
(top surface of the branch unit cover)
Inside of the top surface of the main unit
(top surface of the branch unit cover)
Inside of the front surface of the main unit
(top surface of the cooling water tank)
Inside of the front surface of the main unit
(front surface of the cooling water tank)

Introduction Part

This manual suits for next models
3
Table of contents
Other Amada Welding System manuals

Amada
Amada TC-W100A User manual

Amada
Amada MA-660A User manual

Amada
Amada MH-5B User manual

Amada
Amada MH-1H-01 User manual

Amada
Amada PU-G User manual

Amada
Amada EZ-AIR User manual

Amada
Amada MH-D500D User manual

Amada
Amada GP-500A-P-DUAL User manual

Amada
Amada TA-150AC/300WC User manual

Amada
Amada Delta User manual
Popular Welding System manuals by other brands

FRONIUS
FRONIUS TransPocket 2500 operating instructions

FRONIUS
FRONIUS Robacta Reamer V 70 Han12P operating instructions

Rtech
Rtech TIG261 Operation instructions

HURNER
HURNER CNC ECO 500 v. 2.0 User'smanual

Lincoln Electric
Lincoln Electric RANGER 225 GXT Operator's manual

Magmaweld
Magmaweld Monostick 200i user manual