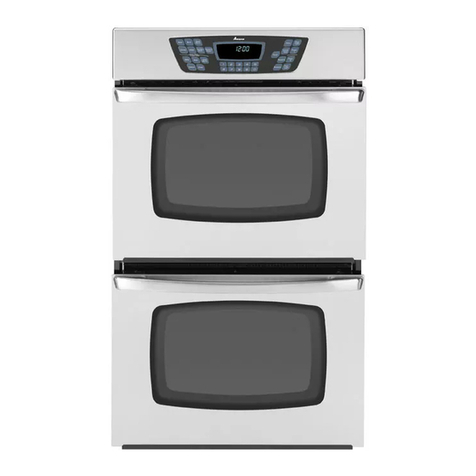
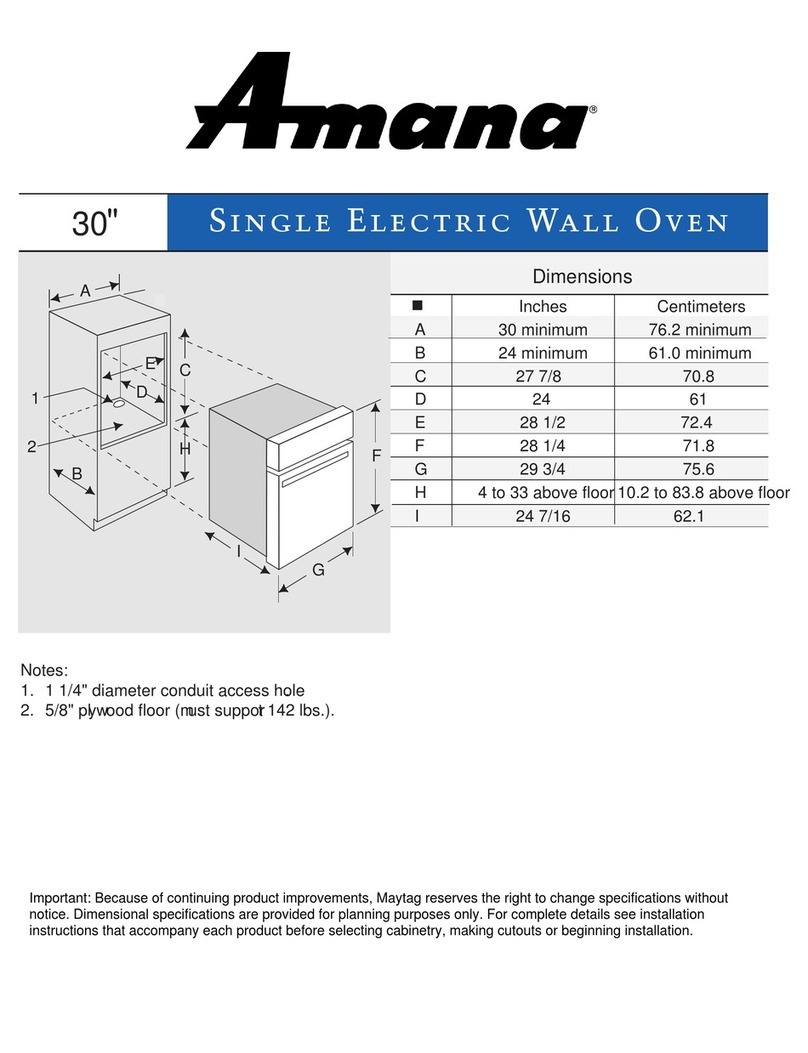
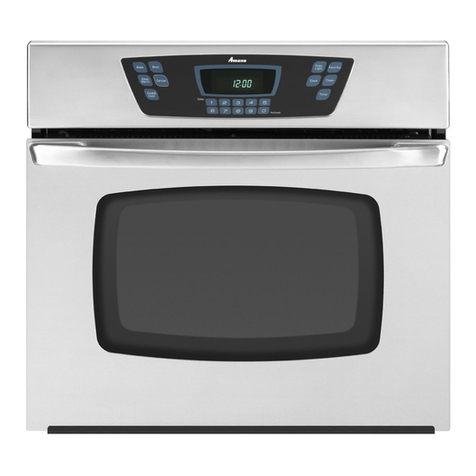
Amana AOCS2740 User manual

Electric
Self-Cleaning
EvenAir™
Convection
Plus
Wall Oven
Owner's Manual
AOCS2740*
* Additionalalphanumericcharacters
representingother models in seriesmay
followeachmodelnumber.
Please Read Manual Before Operating Oven
Important
Save for local electrical inspector’s use.
Installer
Leavethismanualand other literature with consumer for
futureuse.
Customer
Keeptheseinstructionsforfuture reference. If appliance
changesownership,be sure this manualaccompanies
oven.

2
Contents
ModelIdentification ................................................. 2
Parts and Accessories............................................ 2
Service.................................................................... 2
Asure™ ExtendedServicePlan .............................. 2
ImportantSafetyInformation.......................................3
ALL APPLIANCES.................................................. 3
SELF-CLEANINGOVEN......................................... 3
OVEN ..................................................................... 3
DelayedIgnition ...................................................... 4
In Case ofFire ........................................................ 4
Precautions ............................................................ 4
Installation
Packing Material ..................................................... 4
OvenLocation ......................................................... 4
CabinetOpening ..................................................... 4
Electrical Supply Location ...................................... 5
Electrical ConnectionRequirements ....................... 5
Electrical Connection .............................................. 5
Place Oven in Wall ................................................. 6
RemovalandReplacementof Oven ......................... 6
Operation
OvenElementsandConvectionFanLocation.......... 7
Cooking Methods .................................................... 8
OvenControl ........................................................... 9
Flashing Display ..................................................... 12
Setting Electronic Clock ......................................... 12
Setting Electronic Timer.......................................... 12
Prepare to Bake...................................................... 12
Baking,Convection,orConvectionBaking .............. 14
TimedBaking,Convection,
orConvectionBaking .............................................. 14
DelayedBaking,Convection,
orConvectionBaking .............................................. 15
PrepareforBroiling ................................................. 15
Broiling orConvectionBroiling ................................. 15
Hold ........................................................................ 15
PrepareforSlo-Cook™ ........................................... 16
Slo-Cook™ ............................................................. 16
TimedSlo-Cook™................................................... 16
DelayedSlo-Cook™................................................ 17
Defrost .................................................................... 17
Dehydration ............................................................ 17
PrepareforSelf-cleanand ....................................... 18
DelayedSelf-cleanCycle ........................................ 18
Self-cleaning ........................................................... 18
DelayedSelf-cleanCycle ........................................ 18
CareandCleaning
RemovingOvenDoor ............................................... 19
ReplacingOvenLight .............................................. 19
Cleaning.................................................................. 20
BeforeCallingforService............................................21
Warranty ....................................................................22
CookingGuide
BakingGuide .......................................................... 23
BroilingGuide ......................................................... 23
Poultry RoastingGuide ........................................... 24
Beef and PorkRoastingGuide ................................ 24
ConvectionBakingGuide ........................................ 25
ConvectionBroilingGuide ....................................... 25
ConvectionPoultryRoastingGuide ......................... 26
ConvectionBeefandPorkRoastingGuide .............. 26
Slo-Cook™Recipes
Menu Dish Recipes................................................. 27
Slo-Cook™ MenuMeals ......................................... 30
QuickReferenceInstructions .....................................36
Model Identification
Completeenclosedregistrationcard and promptly return.
If registration card is missing, call Consumer Affairs
Departmentat1-800-843-0304insideU.S.A.
319-622-5511outsideU.S.A.WhencontactingAmana,
provideproductinformationlocatedon rating plate. Rating
plateis located on the ovenframe. Record the following:
ModelNumber: ______________________________
ManufacturingNumber: ________________________
SerialorS/N Number: _________________________
Dateofpurchase:_____________________________
Dealer’snameandaddress: ____________________
__________________________________________
__________________________________________
Parts and Accessories
Purchasereplacementparts and additional accessories
(e.g.,refrigeratorshelves, dryer racks, orcooktop
modules)overthephone.To order accessories for your
Amanaproduct,call 1-800-843-0304 inside U.S.A. or
319-622-5511outsideU.S.A.
Service
Keepa copy of sales receipt for futurereference or in
case warranty service is required. Any questions or to
locateanauthorizedservicer,call1-800-NAT-LSVC
(1-800-628-5782)insideU.S.A.319-622-5511 outside
U.S.A.Warranty service mustbe performed by an
authorizedservicer.Amana,also recommends contacting
anauthorizedservicerifserviceisrequiredafterwarranty
expires.
Asure™ Extended Service Plan
Amanaofferslong-termserviceprotectionfor this new
oven.Asure™ Extended Service Planis specially
designedtosupplement Amana’sstrongwarranty.
Thisplancoversparts, labor, andtravelcharges.
Call1-800-528-2682forinformation.
3
IMPORTANT SAFETY INFORMATION
WARNING
!
To avoid personal injury, do not sit, stand or lean on oven
door.
WARNING
!
To avoid risk of electrical shock, personal injury, or death,
makesureyour oven has beenproperlygrounded and
always disconnect it from main power supply before any
servicing.
CAUTION
!
This appliance contains or produces a chemical or
chemicals which can cause death or serious illness and
which are known to the state of California to cause
cancer,birthdefects or otherreproductive harm. To
reduce the risk from substances in the fuel or from fuel
combustion make sure this appliance is installed,
operated, and maintained according to the instructions in
this booklet.
ALL APPLIANCES
1. ProperInstallation—Besure your appliance is
properlyinstalledandgroundedbyaqualified
technician.
2. NeverUseApplianceforWarmingorHeating the
Room.
3. Do NotLeaveChildrenAlone—Childrenshouldnotbe
aloneorunattendedin the area where the appliance
is in use. They should never be allowed to sit or stand
on any part of the appliance.
4. WearProperApparel—Loosefittingorhanging
garmentsshouldneverbewornwhileusingappliance.
5. UserServicing—Donotrepairor replace any part of
theappliance unless specifically recommendedin the
manual.Allother servicing should be referredto a
qualifiedtechnician.
6. Storageinoron Appliance—Flammable materials
shouldnot be stored in oven.
7. DoNotUse Water on GreaseFires—Smother fire or
flame,or use dry chemicalor foam-type extinguisher.
8. UseOnly Dry Potholders—Moist or damppotholders
on hot surfaces may result in burns from steam. Do
not let potholder touch burners. Do not use a towel or
other bulky cloth.
SELF-CLEANING OVEN
1. DoNotClean Door Gasket—The doorgasket is
essential for a good seal. Care should be taken not to
rub,damage,or move the gasket.
2. DoNotUseOvenCleaners—Nocommercialoven
cleanerorovenliner protective coating of anykind
should be used in or around any part of the liner.
3. Clean Only Parts Listed in Manual. See
Cleaning
section.
4. BeforeSelf-CleaningtheOven—Removebroiler pan,
ovenracks, and other utensils.
OVEN
1. UseCareWhen Opening Door—Let hotairor steam
escapebeforeremovingorreplacingfood.
2. DoNotHeatUnopenedFoodContainers—Build-upof
pressure may cause container to burst and result in
injury.
3. KeepOvenVents Ducts Unobstructed.
4. PlacementofOven Racks—Always place oven racks
in desired location while oven is cool. If rack is
removedwhileovenis hot, do not letpotholder
contacthotoven.
In Case of Fire
Fires can occur as a result of over cooking or excessive
grease. Though a fire is unlikely, if one occurs, proceed
as follows:
Oven Fires
1. Ifyousee smoke fromoven, do notopen oven door.
2. Turn ovencontrolto
OFF
.
3. As an added precaution, turn off power at main circuit
breakeror fuse box.
4. Turnonvent to remove smoke.
5. Allow food or grease to burn itself out in oven.
6. If smoke and fire persist, call fire department.
7. If there is any damage to components, call repair
servicebeforeusingoven.
Precautions
• Donot mix household cleaning products. Chemical
mixturesmay interact with objectionable oreven
hazardousresults.
• Do not put plastic items on warm cooking areas. They
may stick and melt.
• Do not use damp sponge or dishcloth to clean oven
when oven is hot. Steam from sponge or dishcloth can
burn.
• Donot leave fat heating unless you remain nearby.Fat
can ignite if overheated by spilling onto hot surfaces.

4
Installation
Packing Material
Removeprotectivepackingmaterialfromoven.Tape
residue can be cleaned with a soft cloth and alcohol.
Leanoven to each sideand remove shipping base.
Oven Location
Choosealocation basedonfollowingfactors.
• Makesurethere is adequate spaceforproper
installation.
• Carefullyreadallinstructionsbeforebeginning
installation.
• Make sure cabinet base is level.
Cabinet Opening
Preparethecabinet for wall oven.
A
BC
E
D
F
A—297/8inches
B—25 inches
C—24 inches minimum
D—27 inches minimum
E—35 inches minimum
F—3 inches minimum
Cabinet Opening
Electrical Supply Location
Electrical supply must be located in the area shown.
AB
A
B
A—5 inches
B—16 inches
ElectricalSupply Location
Electrical Connection Requirements
Linevoltagemustnotexceedratedvoltage. Line voltage
less than rated voltage will result in slow heating. Wiring
system must conform to U.L. Standards and National
Electrical Code. Installation must conform to all local,
municipal and state building codes, and local utility
regulations.Oven must beconnected only to a supplied
circuit as specified on rating plate.
Thisovenrequires3wires,115/230-120/240 volts, 60
Hertz A.C. Unit is equipped with a No. 10 ground wire in
conduit.Ovenshouldbefused separately from other
appliances on a 40 amp circuit minimum. Verify electric
power is off from fuse box to junction box until oven is
installedand ready to operate.

5
Electrical Connection
WARNING
!
To avoid risk of personal injury or electrical shock, do not
ground through neutral wire if installation is in a mobile
home or if local codes do not permit grounding through a
neutral.
Improperconnections of aluminum housewiring to
copperlead can resultin property damage, personal
injury or fire. Use only connectors designed for joining
coppertoaluminum and follow manufacturers'
recommendedprocedureclosely.
1. Withovenpositioned in frontof cabinet opening,
connect wire leads extending from conduit to junction
box. Verify neutral (white) wire is connected to
appropriate terminal. Check local code to see which
option should be used in grounding unit.
Option 1
Attachoven ground wire(green or bare) to junction box (if
grounded)ora suitable ground.
Option 2
Connectovengroundwire (green or bare) to house
groundfeedwire(green,bare, or white). If grounding
throughwhitewire,observeabovewarning.
W
GRD
A
A—Conduit
W—Whiteneutral wire
GRD—Bare ground wire
ElectricalConduit and Wires
If oven is used in a mobile home or if local codes do not
permitgroundingthroughneutral,openconnectionand
usegrounding lead to groundunit in accordance withlocal
codes.Connect neutral lead to branch circuit neutral
conductorinusualmanner.
2. Connectredand black wires to appropriate house
electricalwiring.
3. Verifywiring by connecting electrical power at fuse
boxand checking for proper operation of unit.
• Someinteriorparts are finished with aprotective
coating of oil. When heated for first time oil will burn
off and there will be some odor and smoke.
Place Oven in Wall
Thisprocedureshouldbeperformedby2people.
1. SealOpenings in wallbehind theoven oron floor
underoven.Holes must be sealedbeforesliding oven
into position.
2. Lift wall oven and slide into cutout.
3. Secure wall oven to cabinet with 4 screws.
Place Oven in Wall
Removal and Replacement of Oven
1. Disconnectpower to oven atcircuit breaker or fuse
panel.
2. Removescrewssecuringoventowall.
3. Removeovenandplaceovenaside.
4. Disconnect electrical conduit.
5. Toreinstalloven, follow instructions in
Installation
section of this manual.

6
Cooking Methods
Operation
Bake
Upper and lower elements operate during bake. Upper
element is only used to heat oven quickly and brown
top of food. Bake can be used to cook foods which are
normally baked. Oven must be preheated.
Broil
Upper element operates during broil. Broil can be used
to cook foods which are normally broiled. Preheating is
not required when using broil. All foods should be
turned at least once except fish, which does not need
to be turned.
Convection Bake
Upper element, lower element, and fan operate during
convection bake. Upper element is only used to heat
oven quickly and brown top of food. Convection bake
should be used for cooking casseroles and roasting
meats. Oven should be preheated for best results when
using convection bake. Pans do not need to be
staggered. Cooks approximately 25% quicker than
bake.
Convection Broil
Upper element and fan operate when using convection
broil. Convection broil can be used to cook foods that
are normally broiled. Oven does not require preheating
when using convection broil. Food does not need to be
turned during cooking when using convection roasting
rack. Cooks approximately 25% quicker than broil.
EvenAir™ Convection
Plus
Rear element and fan operate during convection.
Convection should be used for cooking pastries,
souffles, yeast bread, cakes and cookies. Oven should
be preheated for best results when using convection.
Upper and lower elements operate during preheat.
Pans do not need to be staggered. Cooks
approximately 25% quicker than bake.
Slo-Cook™, Hold
Uses lower element. Slo-Cook™ feature sets oven
temperature to cook like a crock pot (approx. 225ºF) for
up to 12 hours.
The hold feature holds the oven at a low temperature
(approx. 170ºF) for 1 hour to keep food warm.
Dehydrate
Uses rear element and convection fan at low oven
temperature (approx. 170ºF). Dehydration is an
excellent way to preserve fresh foods.
Defrost
Uses convection fan only. Defrost feature is an
excellent way to thaw large food items like a turkey.

7
Oven Elements and Convection Fan Location
A
B
C
D
A—Upper Element (Broil)
B—Lower Element (Bake)
C—RearElement (Convection)
D—Convection Fan
Oven Element and Fan Location

8
Controls clock, timer, and interior oven light. STOP
TIME pad is used to program delayed bake and
delayed clean features. COOK TIME pad is used to
program timed bake feature.
Controls, Convection, Convection Bake, Convection
Broil, Slo-Cook™, Hold, Defrost, and Dehydrate
features.
Pad Description
LIGHT Turns light on and off in oven.
TIMER ON/OFF Use to time any kitchen function or cancel timer. Does not control bake, broil, or
clean function.
CLOCK Use to set time of day.
STOP TIME Use to set delayed bake and delayed self-clean.
OVEN CANCEL Cancels any cooking or cleaning function except timer and clock.
COOK TIME Use to set timed baking.
CLEAN Use to select self-clean cycle.
BROIL Use to select broil.
BAKE Use to select bake.
CONV BAKE Used to set oven to Convection Bake.
CONV Used to set oven to Convection.
CONV BROIL Used to set oven to Convection Broil.
Use to set temperature or time.
-
+
Oven Control
Oven Control Panel

9
Display
Some items in display can be seen but will not glow.
Displays time-of-day, timer and timed or delayed
settings.
Displays temperature and cooking method or function
for oven.
Display Glossary
TIME AM, PM or HR TIME AM or PM flashes in display while time-of-day is entered. TIME HR flashes
when time is entered for timed or delayed baking or delayed self-cleaning.
TIMER Flashes in display while timer is set. TIMER stops flashing and displays while time
counts down.
PRE-BAKE, BAKE BAKE flashes while bake oven temperature is entered. While oven preheats PRE-
BAKE displays. After oven has reached temperature, BAKE displays.
ON Displays when oven is heating.
TIMED BAKE Flashes, then displays when a timed baking cycle is set.
DELAYED TIMED
BAKE or CLEAN Displays when delayed bake or clean self-cycle is set.
CONV Displays when a feature using convection is set.
STOP Displays when setting the stop time for a delayed baking or self-clean cycle.
BROIL Flashes, then displays when a broil is set.
CLEAN Displays when self-clean cycle is entered and set.
LOCK LOCK flashes while oven door is locking and remains in display while door is locked.
After cycle is complete and oven has cooled to a safe temperature, LOCK no longer
displays and door can be opened.
HLD Displays when oven is holding oven temperature at 170ºF for 1 hour.
SLO Displays when oven is set to Slo-Cook™ temperature. Oven cooks like crock pot
for up to 12 hours.
Def Displays when oven is set to defrost mode.
Deh Displays when oven is set to dehydration mode.
8888 8888
P
R
B
CONV BROIL PRE
DELAY TIMED BAKE
CLEAN LOCKED ON
CLEAN OVEN 1 2 STOP ON TIMER
AM
PM
HR
8888 8888
P
R
B
CONV BROIL PRE
DELAY TIMED BAKE
CLEAN LOCKED ON
CLEAN OVEN 1 2 STOP ON TIMER
AM
PM
HR

10
Oven Signals
Preheat signal After setting oven to bake and selecting a temperature, oven preheats. When
oven reaches set temperature, 1-second signal sounds.
Timer and
End-of-Cycle signal When a timed cooking cycle is complete or time elapses on timer, three long signals
sound, then once approximately every 6-8 seconds. End of cycle signal continues to
sound until OVEN CANCEL pad is pushed.
If minute timer end of cycle signal is sounding, push TIMER ON/OFF pad.
Other Features
12-hour automatic cancel This safety feature prevents oven from continuing to operate if it has been left on
for over 12 hours. If a cooking function continues longer than 12 hours without any
options on oven control being touched, this feature turns oven off. Any time an
option is touched, 12-hour automatic cancel is reset.
Child lockout This safety feature is used to prevent children from accidentally programming oven
by disabling electronic oven control. Press and hold BAKE and COOK TIME for 5
seconds. “OFF” displays where the temperature normally appears. To reactivate
control, press and hold BAKE and COOK TIME pads for 5 seconds on the upper
oven control. Child lockout must be reset after a power failure.
Service codes and tones Electronic oven control is equipped with a self diagnostic system. Self diagnostic
system alerts you if there is a error or problem in the control. If electronic range
control sounds a series of short, rapid beeps for over 16 seconds and display shows
a F-code, record the F-code shown. Some F-codes can be cleared by touching
OVEN CANCEL or disconnecting power to the range. If the code continues to
reoccur call an authorized servicer. Disconnect electrical supply to range and contact
an authorized servicer.
F1—Control malfunction
F2—High oven temperature
F3—Temperature sensor malfunction
F4—Temperature sensor malfunction
F7—Touch pad malfunction
F9—Door lock malfunction (Door unlocked)
FF—Door lock malfunction (Door locked)
Sounds
Oven Fan Oven cooling fan can turn on while oven is heating to cool oven control.

11
Flashing Display
When power is connected to oven display flashes. Press
OVEN CANCEL to clear display.
Setting Electronic Clock
Whenpower is connectedor restored, displayflashes
until pad is pressed.
1. PressCLOCK pad.
2. Press
+or -pad until correct time-of-day displays.
• Time increases in largerincrements the longer +or
-pad is held.
• Clocksavestime-of-dayapproximately5-10
seconds after time is entered.
Setting Electronic Timer
The timer is a timer only. Electronic timer does not control
bake, broil, or self-clean function. Timer can be set up to
11 hours and 50 minutes. Up to 1 hour, timer displays
minutes and seconds. After 1 hour, timer displays hours
andminutes.
1. PressTIMERON\OFFpad.
2. Press +or -pad until correct time displays.
• Time increases in largerincrements the longer +or
-pad is held.
• Timerbeginscountingdownautomatically after
time is entered.
3. Press TIMER ON\OFF pad to cancel timer signal.
• After time elapses, timer beeps 3 times, and then
approximatelyonceevery6-8seconds until TIMER
ON\OFF pad is pressed.
Resetting and Canceling Timer
To reset the time when remaining time is displayed, press
TIMER ON\OFF pad, then +or -pad until new time
displays.
Tocanceltimer, press and hold TIMERON\OFF pad for
approximately5 seconds.
Also, to cancel timer, press TIMER ON\OFF pad, then
press
+or -pad until timer displays “00”.
Prepare to Bake
CAUTION
!
To reduce risk of food poisoningdue to bacterial growth
and production of toxins, never hold meat, milk, fish or
eggsfor more than 2 hoursbefore cooking.
Remove Items Stored in Oven
Removeany pans and other cooking utensils storedin
oven.
Remove Items Stored in Oven

12
Oven Racks
UseStandard rack fornormal baking and broiling.
Spacesaver™rack sets 1/2" off the oven floor when in
lowest rack position to allow air to circulate around food
andcook evenly.Thisrack provides more usableoven
space for cooking large items or several food items at
once.
AB
A—Standard Rack
B—Spacesaver™ Rack
Standard and Spacesaver™ Rack
Ovenincludes Slo-Cook™ trivet. This trivetshould be
placedin pan or roaster. Slo-Cook™ trivetelevates food
keeping it out of food liquids.
Slo-Cook™ Trivet
Ovenincludes a special convection roasting rack. This
rack should be placed on top of broiler pan and grid. This
allowsair to circulate around food and cook evenly
without turning. If convection roasting rack is not used,
foods must be turned at least once during cooking.
A
B
A—Convection Roasting Rack
B—Broiling Pan and Grid
Convection Roasting Rack, and Broiling Pan and Grid
Oven Rack Placement
Positionovenrack before turning ovenon.
WARNING
!
Toavoid damaging oven lineror creating fire, do not line
ovenbottom or ovenracks with foil.
1. Pull rack forward to stop position.
2. Raise front edge of rack and pull until rack is out of
oven.
3. Place rack in new rack position.
• Curvededge of rack must betoward rear of oven.
Oven Rack Placement
Bake Pan Placement
• Keep pans and baking sheets 2 inches from oven
walls.
• Stagger pans placed on different racks so one is not
directlyover the other.
PanPlacement

13
Convection Pan Placement
Baking pans and cookie sheets should not touch side or
rearwalls of oven. If pans are placed ondifferent racks,
theycan be placed directly over each other. Convection
cookingcirculatesairaroundovenprovidingeven
browningon all rack positions. When using convection,
oven can be loaded on all racks with excellent cooking
results.
ConvectionPan Placement
Baking, Convection, or Convection Baking
Openoven door to confirm nothing is storedin oven
cavity and set racks to proper height before baking. For
delicatebaking, preheat approximately 15–20 minutes
beforeplacingfoodinsideoven.
1. Press BAKE, CONV, or CONV BAKE pad.
2. Press
+or -pad until desired temperature is
displayed.
• Temperaturecan be set from170°F to 550°F in 5
degreeincrements.
• Temperaturestartsat 170°F andincreases in 5°
incrementsuntil reaching set temperature. Some
minorsmokingis normal when usingoven for first
time.
• Whencooktemperature is reached oven signal
soundsforapproximately 1 second.
3. PressOVENCANCEL pad whenfinished.
• Removefoodfromovenwhencookingtimehas
elapsed.Foodleftinovencan overcook.
Timed Baking, Convection,
or Convection Baking
Setoven to cook for desired amount of time. Oven
automatically stops heating after time elapses.
1. Placefoodin oven.
2. PressCOOKTIME pad.
3. Press
+or -pad until cooking time is displayed.
• Cook time can be set up to 11 hours and 50
minutes.
• 10 minutes minimum cooking time.
4. Press BAKE, CONV, or CONV BAKE pad.
5. Press
+or -pad until desired temperature is
displayed.
• Temperaturecanbe set from170°F to 550°F in5°
increments.
• Temperaturedisplayincreases in 5°F increments
startingat 100°F until reachingset temperature.
Someminorsmoking is normal whenusingoven for
firsttime. When cook temperatureis reached oven
signals.
• Toviewcook time, pressand hold COOK TIME
pad.
• When cooking time has elapsed, an end of cycle
signalsounds,oven automatically turns off and
display returns to time of day. Oven signal sounds 3
times, then once every 3 seconds for 5 minutes or
until OVEN CANCEL pad is pressed.
6. PressOVENCANCEL pad whenfinished.
• Removefoodfromovenwhencookingtimehas
elapsed.Foodleftinovencan overcook.
To Cancel Remaining Cooking Time
PressOVEN CANCEL pad.

14
Delayed Baking, Convection,
or Convection Baking
Set oven to begin and end baking at later time. Oven
control automatically calculates starting time.
1. Placefoodin oven.
2. PressSTOPTIME pad.
• Current time of day appears in display.
3. Press
+or -pad until desired stop time displays.
• Stop time can be set 11 hours 50 minutes ahead of
current time of day.
4. PressCOOKTIME pad.
5. Press
+or -pad until desired cooking time
displays.
• 10 minutes minimum cooking time.
6. Press BAKE, CONV, or CONV BAKE pad.
7. Press
+or -pad until desired temperature is
displayed.
• Temperaturecanbe set from170°F to 550°F in5°
increments.
• Electronic oven control calculates start time.
• When start time is reached “DELAY” no longer
displays and “ON” displays.
• Toviewcook time, pressand hold COOK TIME
pad.
• Toview stop time,press and hold STOPTIMEpad.
• When cooking time has elapsed, end of cycle
signalsounds,oven automatically turns off and
display returns to time of day. Oven signal sounds 3
times, then once every 3 seconds for 5 minutes or
until OVEN CANCEL pad is pressed.
To Cancel Remaining Cooking Time
PressOVEN CANCEL pad.
Prepare for Broiling
WARNING
!
To avoid risk of fire, do not line the broiler grid with foil.
• Foil may trap grease on top of grid close to burner
causing a fire.
• Neverleaveovenunattendedwhilebroiling.
Overcookingmay result in a fire.
Broiling Tips
• Removeexcess fat from meat before broiling. Cut
edgesof meat toprevent curling.
• Place food on a cold ungreased broiling pan. If pan is
hot, food sticks.
• All food except fish should be turned at least one time.
Begin broiling with skin side down.
• Seasonmeat after it has browned.
• Broilingdoesnot require preheating.
• Begin cooking using suggested rack levels in
Broiling
Guide
section to test broiler results. If food is not brown
enough, cook on a higher rack position. If food is too
brown, cook on a lower rack position.
Broiling or Convection Broiling
Broiling system generates immediate, intense heat using
a special reflector. This reflector focuses heat directly on
thefood; searing in natural juices and providing
restaurantquality,charbroiledflavor.
1. Centerfoodon broiling gridand pan, andplace on
rackin oven.
• Ovendoor should be closed.
A
B
A—Broiler Grid
B—Broiler Pan
Broiler Pan and Grid
2. PushBROILor CONV BROILpad.
3. Press
+pad to set HI broil or -pad to set lower
broiltemperature.
• Temperaturesetsto HI or from 170°F to 545°F.
Broiler Setting Use
HI Cooking red meats
545 Cooking pork
525 Cooking poultry
475 Cooking seafood
425 Cooking fruits and vegetables
400 and below Toasting and warming breads
4. PressOVENCANCEL pad whenfinished.
Hold
Thehold feature holds theoven at a lowtemperature
(approx.170°F)for 1 hour tokeep food warm.
1. Press BAKE pad.
2. Press -pad until 170°, then HLD is displayed.
• If -pad is held after HLD displays, SLO for Slo-
Cook™displays.
3. PressOVENCANCEL pad whenfinished.
• Removefoodfromovenwhencookingtimehas
elapsed.Foodleftinovencan overcook.

15
Prepare for Slo-Cook™
Facts and Hints to Remember
•Amana’s Slo-Cook™ feature simulates a traditional
crockpot by cooking food slowly at a low temperature.
• Slo-Cook™providesenhanced flavor and tenderness,
since food is cooked slowly at low temperature.
•Meats cooked at low temperature shrink less and are
more tender, thus allowing less expensive cuts of meat
to be used.
• Slo-Cook™time for meat varys depending on
distributionand amount of fat, bone,weight, and
shape.
•Meats may be placed on Slo-Cook™ trivet to avoid
saturation of juices and to brown.
•Dairy products such as milk, cheese, sour cream,
andcondensed cream soups have a tendency to
separate,break down, and mix with other ingredients
duringSlo-Cook™.
•Fresh vegetables tend to discolor or turn dark during
Slo-Cook™. Discolorationcan be avoided by using
frozenorblanchedvegetables.
•Spices areenhanced and liquids donot boil away
whencooked slowly at low temperature.
• Foodflavors are not mixed when cooked in the oven in
separate,covered dishes. Covered dishes generally
cookmore evenly andretain moisture.
• Mixing, cooking, and serving an entire meal in the
sameoven-proof glass or stoneware canbe
accomplishedwith the Slo-Cook™feature.
• Astandard oven cavity allowsfour rack positions for
placingdishes in oven forSlo-Cook™.
•No preheating of oven is necessary before using the
Slo-Cook™feature.
• Valuableheatloss is prevented sincestirring is not
necessary during Slo-Cook™. It is important not to
openoven door during Slo-Cook™, as heat loss will
occur resulting in extended cooking time.
Suggested Dish Arrangements
• Determine rack level by dish size and amount of food.
• Covereddishesretainmoisturebetter than uncovered
dishes.
• Casseroleitems with bread or cracker topping should
be left uncovered so toppings stay crisp.
• Roast should not be covered so a rich browness can be
obtained.
• Wrap food items like baking potatoes and corn on the
cob in foil.
• While using Slo-cook™ feature, one-dish items such
as casseroles require adding a separate dish with
water. This is important as it prevents overcooking of
food.
Slo-Cook™ Trivet
Ovenincludes Slo-Cook™ trivet. Thistrivet should be
placedin pan orroaster. Slo-Cook™ trivet elevates food
keeping it out of food liquids.
Slo-Cook™ Trivet
Slo-Cook™
Slo-Cook™feature sets oven temperature tocook like a
crockpot(approx.225°F) for up to12 hours. Open oven
door to confirm nothing is stored in oven cavity and set
racksto proper height beforeusing Slo-Cook™ feature.
See“Slo-Cook™ Recipes” and “Slo-Cook™MenuMeals”
sections for recipes.
1. Press BAKE pad.
2. Press -pad until 170°, then HLD, and then SLO is
displayed.
3. PressOVENCANCEL pad whenfinished.
• Removefoodfromovenwhencookingtimehas
elapsed.Foodleftinovencan overcook.
Timed Slo-Cook™
Set oven to cook for desired amount of time at crockpot
temperature.Oven automatically stops heating after time
elapses.See “Slo-Cook™ Recipes” and“Slo-Cook™
Menu Meals” sections for recipes.
1. Placefoodin oven.
2. PressCOOKTIME pad.
3. Press
+or -pad until cooking time is displayed.
• Cook time can be set up to 11 hours and 55
minutes.
• 10 minutes minimum cooking time.
4. Press BAKE pad.
5. Press -pad until 170°, then HLD, and then SLO is
displayed.
• Toviewcook time, pressand hold COOK TIME
pad.
• When cooking time has elapsed, an end of cycle
signalsounds,oven automatically turns off and
display returns to time of day. Oven signal sounds 3
times, then once every 3 seconds for 5 minutes or
until OVEN CANCEL pad is pressed.
6. PressOVENCANCEL pad whenfinished.
• Removefoodfromovenwhencookingtimehas
elapsed.Foodleftinovencan overcook.
To Cancel Remaining Cooking Time
PressOVEN CANCEL pad.

16
Delayed Slo-Cook™
Set oven to begin and end cooking at later time using
crockpottemperature. Oven control calculates back from
end time to determine starting time. See “Slo-Cook
Recipes”and “Slo-Cook Menu Meals” sections for
recipes.
CAUTION
!
To reduce risk of food poisoningdue to bacterial growth
and production of toxins, never hold meat, milk, fish or
eggsfor more than 2 hoursbefore cooking.
1. Placefoodin oven.
2. PressSTOPTIME pad.
• Current time of day appears in display.
3. Press
+or -pad until desired stop time displays.
• Stop time can be set 11 hours 50 minutes ahead of
current time of day.
4. PressCOOKTIME pad.
5. Press
+or -pad until desired cooking time
displays.
• 10 minutes minimum cooking time.
6. Press BAKE pad.
7. Press -pad until 170°, then HLD, and then SLO is
displayed.
• Electronic oven control calculates start time.
• When start time is reached “DELAY” no longer
displays and “ON” displays.
• Toviewcook time, pressand hold COOK TIME
pad.
• Toview stop time,press and hold STOPTIMEpad.
• When cooking time has elapsed, end of cycle
signalsounds,oven automatically turns off and
display returns to time of day. Oven signal sounds 3
times, then once every 3 seconds for 5 minutes or
until OVEN CANCEL pad is pressed.
To Cancel Remaining Cooking Time
PressOVEN CANCEL pad.
Defrost
The defrost feature is an excellent way to thaw large food
items like a turkey or ham. Oven does not heat during
defrost.
1. Place food on dish or cookie sheet in middle of oven.
2. Open door to first stop position.
3. Press CONV BAKE pad.
4. Press -until 170°, then dEF appears in display.
• Ovenis equipped with a12 hour automatic cancel
feature.If defrost time islonger than 12 hours,
control will need to be reset.
5. Whenfinishedpress OVEN CANCEL pad.
Dehydration
Dehydrationis an excellent way topreserve fresh foods.
The best way to become familiar with dehydration is
using fruits, vegetables, herbs and spices.
1. Place food on dehydration rack or cookie sheet in
middleofoven.
2. Open door to first stop position.
3. Press CONV BAKE pad.
4. Press -until 170°, then dEF and dEH appears in
display.
• Ovenis equipped with a12 hour automatic cancel
feature.If dehydration time is longerthan 12 hours,
control will need to be reset.
5. Whenfinishedpress OVEN CANCEL pad.
Dehydration Tips
Fruits
• Always start with fresh fruit.
• Cut fruit in equal pieces approximately 1/8” thick.
Thinnerpieces will dry quicker.
• Fruits need to be dipped into an antioxidant, a color-
keepingpreservative,or two parts waterandone part
lemon juice. Treating fruit with an antioxidant will help it
retainvitamins,colorand flavor.
Vegetables
Mostvegetablesrequireblanching to inactivate enzymes.
Herbs and Spices
• Herbs and spices dry quickly.
• Checkevery 30 minutes toavoid over drying.
• Whendrying herbs, leaf clusters should be separated
from stems.
Food Drying Time Results
Fruits
Apples 4–6 hours Leathery, Soft
Bananas 16–20 hours Leathery
Vegetables
Mushrooms
(No blanching) 3–4 hours Leathery, Soft
Carrots 3–7 hours Dry, Brittle
Herbs and Spices
Parsley 45–90 minutes Dry, Crumbly
Orange/
Lemon Peel 3–7 hours Hard, Tough

17
Prepare for Self-clean and
Delayed Self-clean Cycle
WARNING
!
To avoid risk ofpersonal injury, do not touch oven vents
orareasaround vents during self-cleaning. Theseareas
can become hot enough to cause burns.
To avoid risk of smoke damage or fire, clean excess
spillsfrom oven interior.
• A small amount of smoke is normal when cleaning.
Excess smoke may indicate a faulty gasket or too
muchfood residue has been left in oven.Move birds
and small animals susceptible to fumes or smoke to
anotherroom.
• Do not use cleaning cycle if oven light cover is not
properlyin place.
• Removeoven racks and allcooking utensils from oven.
Self-cleaning
Self-cleanfeatureuses high oven temperatureto clean
oveninterior.
1. Prepareovenforself-cleaning.
2. Press CLEAN pad.
3. Press
+or -pad to adjust desired amount of
cleaningtime.
• Increase or decrease cleaning time by 5 minute
increments.
• Clean can be set from 2 to 4 hours. Minimum
recommendedcleaning time is 3hours.
• “LOCK”flasheswhileoven door is locking and
remains in display while door is locked.
• Ovenbeginsto clean automatically.
• Afterovenhas cooled to a safetemperature,
“LOCK”no longer displays anddoor is unlocked.
Delayed Self-clean Cycle
Self-cleanfeatureuses high oven temperatureto clean
oveninterior. Set oven to begin and end cleaning at later
time using. Control calculates back from end time to
determinestarting time.
1. Prepareovenforself-cleaning.
2. Press CLEAN pad.
3. Press
+or -pad to adjust desired amount of
cleaningtime.
• Increase or decrease cleaning time by 5 minute
increments.
• Clean can be set from 2 to 4 hours. Minimum
recommendedcleaning time is 3hours.
4. PressSTOPTIME pad.
5. Press
+or -pad until desired stopping time
appearsin display.
• Starting time is automatically calculated back
based on amount of cleaning time and stop time.
Ovenbeginsto clean automatically.
• “LOCK”flasheswhileoven door is locking and
remains in display while door is locked.
• Toviewremainingcleaning time, press and hold
CLEANpad.
• To view calculated stop time, press and hold STOP
TIMEpad.
• Afterovenhas cooled to a safetemperature,
“LOCK”no longer displays anddoor is unlocked.
Interrupt Self-Clean Cycle
1. PressOVEN CANCEL pad.
2. Afterovenhas cooled to a safe temperature, door
canbe opened.

18
Removing Oven Door
CAUTION
!
To avoid personalinjuryorproperty damage, handle oven
doorwith care.
• Dooris heavy and can be damaged ifdropped.
• Avoidplacing hands inhinge area when door is
removed.Hinge can snapclosed and pinch hands.
• Do not scratch or chip glass, or twist door.
Glass may break suddenly.
• Replacedoor glass if damaged.
• Do not lift door by handle.
1. Opendoor fully.
2. Removescrews.
• Oven doors are attached with a screw on each side
ofovendoor.
3. Close door to first stop, grasp door firmly on each
side, and lift upward until door is off hinges.
• Do not lift door by handle. Glass or handle can
break.
• Only push hinges closed once oven door is
removedif necessary.Use both hands when
closing hinge. Hinge snaps closed.
Removing Oven Door
Care and Cleaning
Replacing Oven Light
WARNING
!
To avoid risk of burns or electrical shock, disconnect
electricalsupply to ovenbefore changing lightbulb.
• Before replacing light bulb make sure bulb and lens are
cool.
• Wearprotectivegloves.
• Donot operate oven without bulb and lenscover in
place.
1. Disconnect electrical supply.
2. Removeovendoorifdesired.
3. Unscrewlightbulb cover (counterclockwise) located
inrear of ovencavity. Then turn light bulb
counterclockwiseto remove.
4. Replacelight bulb with 120-volt, 40-wattappliance
bulb.
• Donot overtighten bulb or cover. Theymay be
difficulttoremovelater.
5. Replacelightbulb cover and oven doorbeforeuse.
6. Reconnectpowersupply.
Replacing Oven Light

19
Cleaning
Part Materials to Use General Directions
Heating elements Do not clean. Any food on element will burn off.
Broiler pan and grid Soap and a non-
abrasive plastic
scouring pad
Drain fat, cool pan and grid slightly. (Do not let soiled pan and
grid stand in oven to cool.) Sprinkle with soap. Fill the pan with
warm water. Let pan and grid stand for a few minutes. Wash
or scour if necessary. Rinse and dry. The broiler pan and grid
may also be cleaned in the dishwasher.
Inside oven door Soap and water Clean the outside of the door and the window area with warm
soapy water.
Oven Door Gasket
Do not clean the braided oven door gasket. Gasket should not
be moved while cleaning. Avoid getting any cleaning materials
on gasket.
Outside finish Soap and water Wash all glass with cloth dampened in soapy water. Rinse and
polish with a dry cloth.
Oven interior
surfaces Soap and water Cool before cleaning. Frequent wiping with mild soap and
water prolongs time between self-cleanings. Be sure to rinse
thoroughly.
Control panel Soap and water Wash with cloth dampened in soapy water. Rinse and polish
with a dry cloth.
Oven racks Soap and water For heavy soil, clean by hand and rinse thoroughly racks for
ease in cleaning. Be sure racks are dry before replacing.

20
Before Calling for Service
Problem Check
Oven light does not work. Check for loose bulb. Check for burned out bulb; replace with
40-watt appliance bulb.
Oven does not heat. Check circuit breaker. Check control for proper setting.
Oven door will not open. Wait for oven to cool. Door latch will release automatically after
oven cools. Do not force door.
Oven temperature is not accurate. Store purchased oven thermometers do not measure oven
temperature accurately. An accurate digital thermometer is
necessary to calibrate oven.
Check for blocked heat vents.
Aluminum foil alters oven temperature.
Adjusting Oven Temperature
Oven temperature has been factory calibrated and tested. If
oven consistently over or under cooks food, adjust thermostat.
Oven temperature can be increased or decreased 35°F. To
avoid over adjusting oven, move temperature 5°F each time.
1. Push BAKE pad.
2. Press +
pad until an oven temperature greater than 500°F
shows in display.
3. Immediately push and hold, approximately 5 seconds,
BAKE button until “00” appears.
4. Press
+ or - arrow pad to adjust oven temperature.
• To increase oven temperature (for a hotter oven), Press
pad until a positive number appears in display.
• To decrease oven temperature (for a cooler oven),
Press
pad until a negative number appears in display.
5. Press OVEN CANCEL pad to save adjustment.
• Setting is saved if power fails or is disconnected.
Oven cycles on and off. This condition is normal when baking or roasting. To maintain
a temperature for baking, oven cycles on and off. The
temperature may vary up to 25°F higher or lower than the oven
temperature set on the control.
The oven smokes the first few times it is
turned on. Minor smoking is normal first few times oven is used.
Fan runs while cooking. This sound is normal. The fan cools the oven control.
Odor or smoke while self-cleaning the oven. There may be some smoke and odor during the first few
cleaning cycles. If there is excessive smoke or odor, too much
soil remains in the bottom of the oven. If the oven smokes
excessively, turn off the oven, wait for the oven to cool and
wipe away the excess soil. Reset the self-clean cycle.
Table of contents
Other Amana Oven manuals

Amana
Amana RS2320006 User manual

Amana
Amana EvenAir Plus User manual

Amana
Amana AOES2430 Series User manual

Amana
Amana AOWS2030 User manual

Amana
Amana Gas Freestanding BIG OVEN User manual

Amana
Amana AEW3530D User manual

Amana
Amana HIGH SPEED COMBINATION OVEN User manual

Amana
Amana AO24-DC User manual

Amana
Amana AXP520 User manual

Amana
Amana AO27SEW User manual

Amana
Amana ACO27 User manual

Amana
Amana AMC7159TA User manual

Amana
Amana ACO1180A User manual

Amana
Amana AEW4630D User instructions

Amana
Amana AMV6177AA User manual

Amana
Amana EvenAir AOCS3040WW User manual

Amana
Amana AO24-SC User manual

Amana
Amana AEW3530D User instructions

Amana
Amana EvenAir AOCS3040 User manual

Amana
Amana EvenAir AOCS3040 User manual