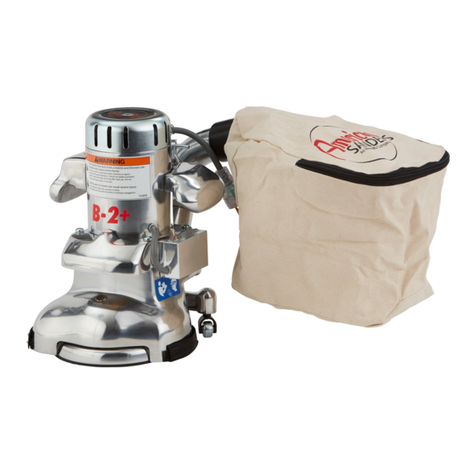
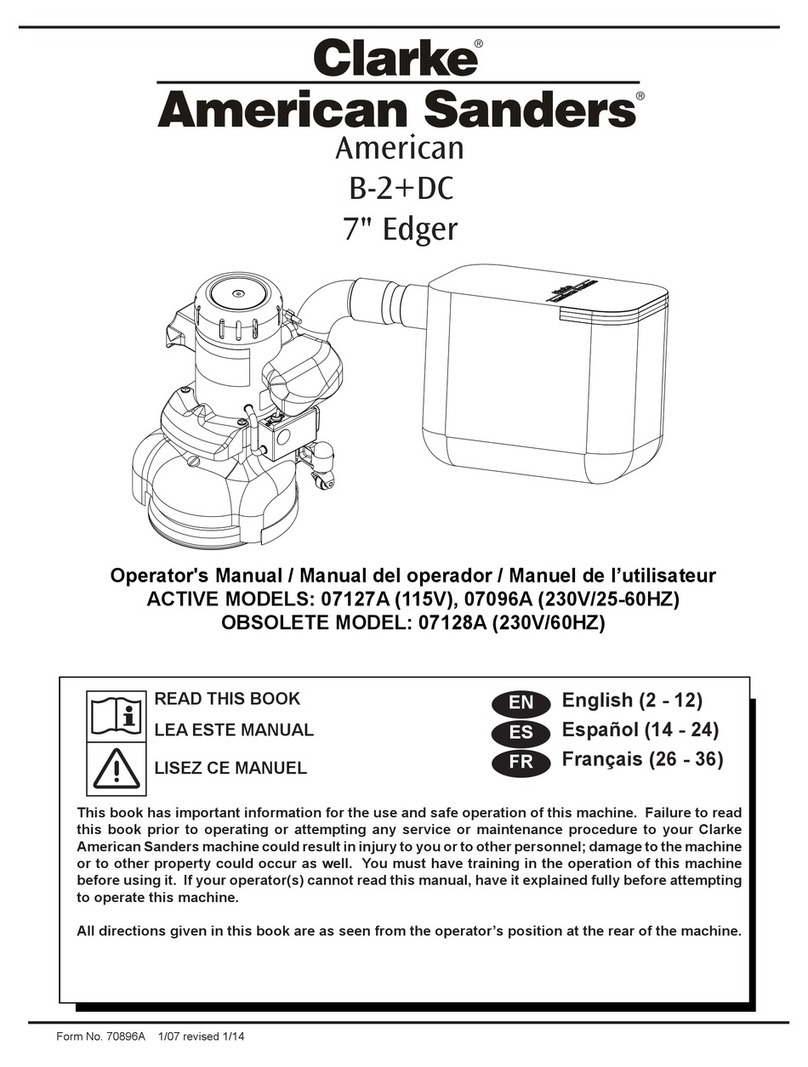
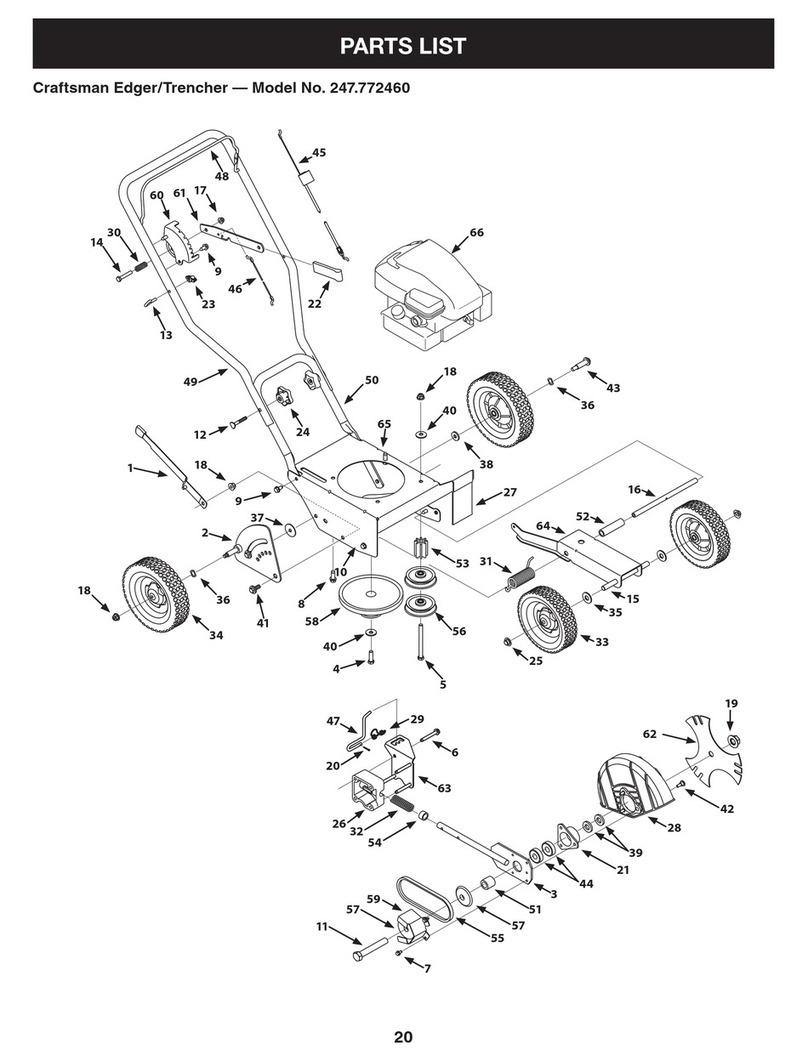
Amano 07208A User manual

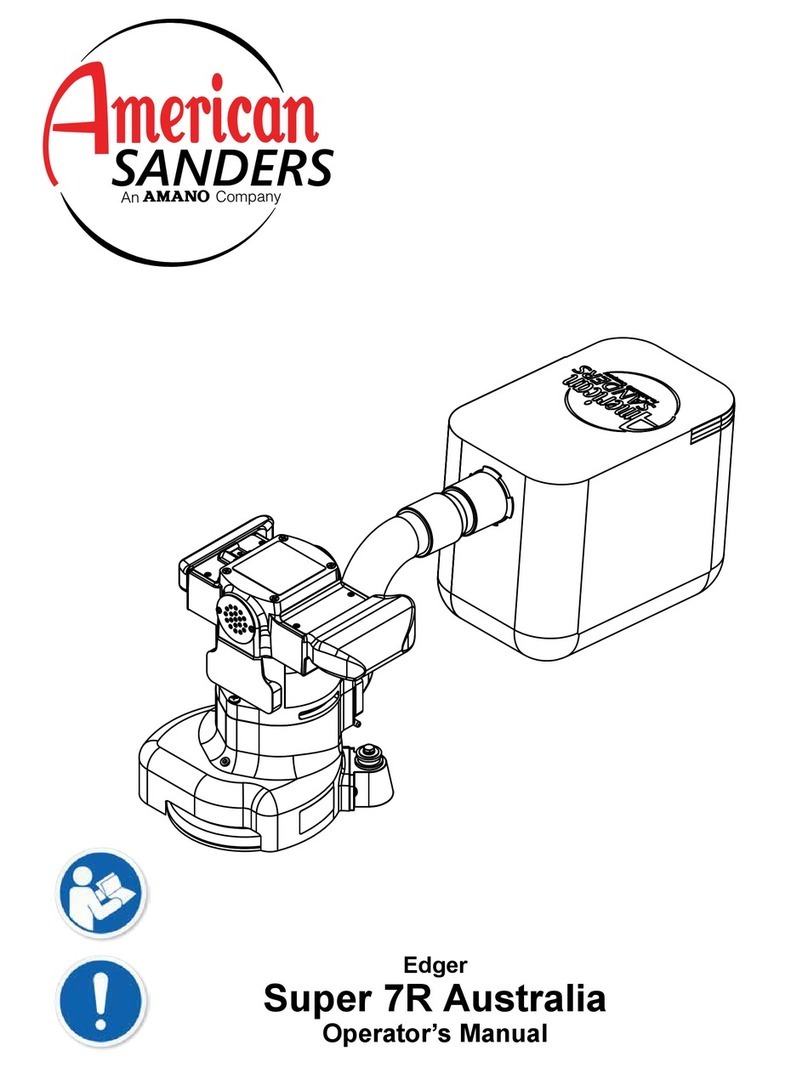
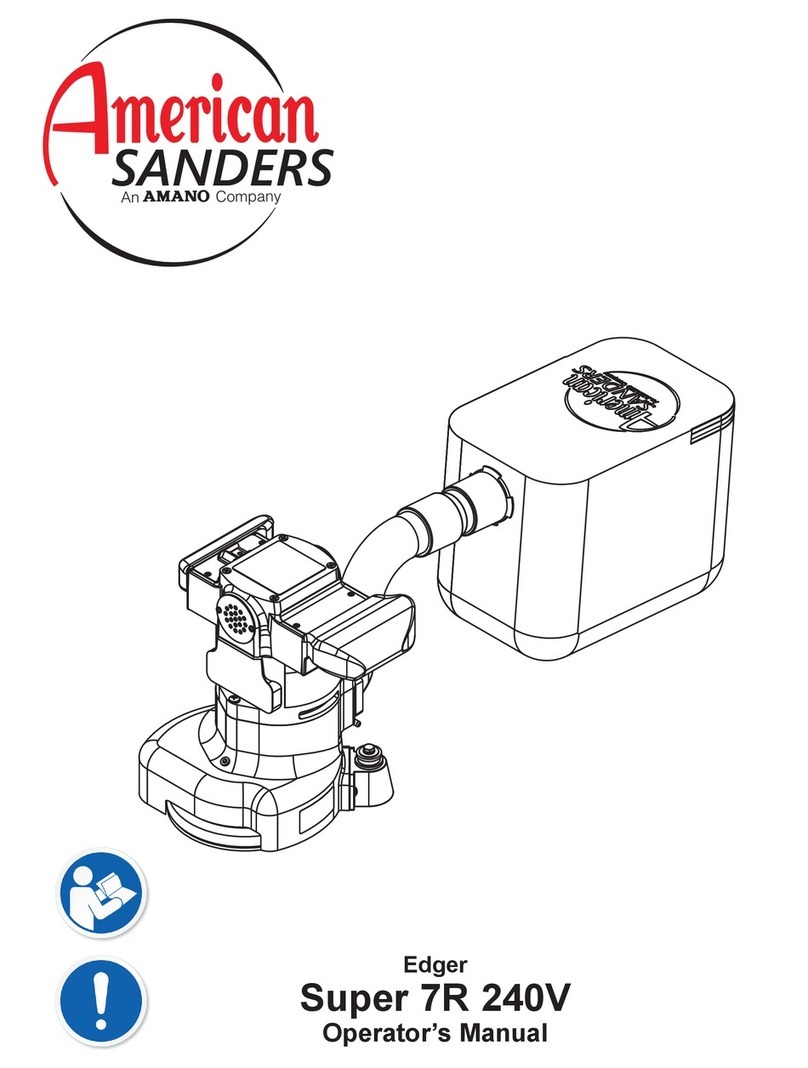
7” Edger
Super 7R
Operator’s Manual
For Models
07208A, 07208B, 07209A, 07209B


Contents
Operator Safety Instructions..................................................... 4-7
Introduction...................................................................................8
Machine Specifications.................................................................8
Electrical Connection Instructions ..............................................9
Machine Setup............................................................................10
Operating Instructions ................................................................11
Adjustment Procedures ..............................................................12
Maintenance......................................................................... 12-13
Parts Manual ..............................................................................32
Wiring Diagram...........................................................................33
Lower Assembly .........................................................................34
Upper Assembly .........................................................................36
Warranty .....................................................................................38
READ THIS BOOK
This book has important information for the use and safe operation of this machine. Failure to read this book prior to
operating or attempting any service or maintenance procedure to your American Sanders machine could result in injury
to you or to other personnel; damage to the machine or to other property could occur as well. You must have training in
the operation of this machine before using it. If your operator(s) cannot read this manual, have it explained fully before
attempting to operate this machine.
All directions given in this book are as seen from the operator’s position at the rear of the machine.
***This product is intended for commercial use only***
WARNING!
The Products sold with this Manual contain or may contain chemicals that are known to certain governments (such as the State of
California, as identied in its Proposition 65 Regulatory Warning Law) to cause cancer, birth defects or other reproductive harm. In
certain locations (including the State of California) purchasers of these Products that place them in service at an employment job site
or a publicly accessible space are required by regulation to make certain notices, warnings or disclosures regarding the chemicals that
are or may be contained in the Products at or about such work sites. It is the purchaser’s responsibility to know the content of, and
to comply with, any laws and regulations relating to the use of these Products in such environments. The Manufacturer disclaims any
responsibility to advise purchasers of any specic requirements that may be applicable to the use of the Products in such environments.
In this Operation Manual you will find three statements that you must read and observe to ensure safe operation of this
machine.
DANGER means: Severe bodily injury or death can occur to you or other personnel if the DANGER
statements found on this machine or in this Operation Manual are ignored or are not adhered to. Read
and observe all DANGER statements found in this Operation Manual and on your machine.
WARNING means: Injury can occur to you or to other personnel if the WARNING statements found on
your machine or in the Operation Manual are ignored or are not adhered to. Read and observe all
WARNING statements found in this Operation Manual and on your machine.
CAUTION means: Damage can occur to the machine or to other property if the CAUTION statements found
on your machine or in this Operation Manual are ignored or are not adhered to. Read and observe all
CAUTION statements found in this Operation Manual and on your machine.
Operator Safety Instructions
EN

EN
DANGER: Failure to read the Owner’s Manual prior to operating or servicing your American Sanders machine could result in injury to
you or to other personnel; damage to the machine or to other property could occur as well. You must have training in the
operation of this machine before using it. If you or your operator(s) cannot read English, have this manual explained fully
before attempting to operate this machine.
DANGER: A. Sanding/nishing wood oors can create an explosive or combustible environment. Do not operate this machine around
solvents, thinners, alcohol, fuels, oor nishes, wood dust or any other ammable materials. Cigarette lighters, pilot lights,
electrical sparks and all other sources of ignition should be extinguished or avoided. Keep work area well ventilated.
B. Dust generated from sanding wood oors can spontaneously ignite or explode. Promptly dispose of any sanding dust in
a metal container clear of any combustibles. Do not dispose in a re.
DANGER: A. Electrocution could occur if the machine is being serviced while the machine is connected to a power source. Disconnect
the power supply before servicing.
B. Electrocution or re could occur if the machine is being operated with a damaged power cord. Keep the power cord clear
of the pad. Always lift the cord over the machine. Do not move the machine by the power cord.
C.Shock hazard. Do not use the machine if it has been rained on or sprayed with water.
DANGER: To avoid injury keep hands, feet, and loose clothing away from all moving parts on the machine. Disconnect the power cord
before replacing the pad, changing the abrasive, or when servicing. Do not operate the machine unless all guards are in
place. Never leave the machine unattended while connected to a power source.
WARNING: Injury can occur if protective clothing or equipment is not used while sanding. Always wear safety goggles, protective
clothing, and dust mask while sanding.
WARNING: This sander is not to be used on pressure treated wood. Some pressure treated woods contain arsenic and sanding
pressure treated wood produces hazardous dust. Inhaling hazardous dust from pressure treated wood can cause serious
injury or death. Sanding pressure treated wood decks or uneven surfaces can damage the sander which is not covered
under warranty or damage waiver.
WARNING: Any alterations or modications of this machine could result in damage to the machine or injury to the operator or other
bystanders. Alterations or modications not authorized by the manufacturer voids any and all warranties and liabilities.
WARNING: Risk of explosion. Floor sanding can result in an explosive mixture of ne dust and air. Use oor sanding machine only in a
well-ventilated area free from any ame or match.
A SPECIAL WARNING ABOUT BAG FIRES
Dust generated from sanding raw or previously nished wood oors CAN SPONTANEOUSLY IGNITE OR EXPLODE!
The sanding machine’s DUST CONTAINMENT BAG MUST BE EMPTIED FREQUENTLY and before any work stoppage.
NEVER STORE SANDING DUST IN OR AROUND STRUCTURES OR OTHER COMBUSTIBLE MATERIALS.
Promptly dispose of any sanding dust outside in accordance with local regulations. Do not dispose in a re.

5
WARNING: Read all safety warnings and
instructions. Failure to follow warnings and
instructions may result in electric shock, re and
or serious injury.
Save all warnings and instructions for future use.
The term “power tool” in the warnings refers to your
main-operated (corded) power tool or battery operated
(cordless) power tool.
1) Work area safety
a) Keep work area clean and well lit. Clutter or dark
areas invite accidents.
b) Do not operate power tools in explosive
atmospheres, such as in the presence of
ammable liquids, gases, or dust. Power tools
create sparks which may ignite the dust or fumes.
c) Keep children and bystanders away while
operating a power tool. Distractions can cause
you to lose control.
2) Electrical safety
a) Power tool plugs must match the outlet. Never modify the
plug in any way. Do not use any adapter plugs with earthed
(grounded) power tools. Unmodied plugs and matching
outlets will reduce risk of electric shock.
b) Avoid body contact with earthed or grounded surfaces such
as pipes, radiators, ranges, and refrigerators. There is an
increased risk of electric shock if your body is earthed or
grounded.
c) Do not expose power tools to rain or wet conditions. Water
entering a power tool will increase the risk of electric shock.
d) Do not abuse the cord. Never use the cord for carrying,
pulling or unplugging the power tool. Keep cord away
from heat, oil, sharp edges or moving parts. Damaged or
entangled cords increase the risk of electric shock.
e) When operating a power tool outdoors, use an extension
cord suitable for outdoor use. Use of cord suitable for
outdoor use reduces the risk of electric shock.
f) If operating a power tool in a damp location is unavoidable,
use a residual current device (RCD) or ground fault circuit
interrupter (GFCI ) protected supply. Use of a RCD or GFCI
reduces the risk of electric shock.
3) Personal safety
a) Stay alert, watch what you are doing and use common
sense when operating a power tool. Do not use a power
tool while you are tired or under the inuence of drugs,
alcohol, or medication. A moment of inattention while
operating power tools may result in serious personal injury.
b) Use personal protective equipment. Always wear eye
protection. Protective equipment such as dust mask, non-
skid safety shoes, hard hat, or hearing protection used for
appropriate conditions will reduce personal injury.
c) Prevent unintentional starting. Ensure switch is in
o-position before connecting to power source and/or
battery pack, picking up, or carrying the tool. Carrying
power tools with your nger on the switch or energizing
power tools that have the switch on invites accidents.
d) Remove any adjustment wrench or key before turning
the power tool on. A wrench or key left attached to a
rotating part of the power tool may result in personal injury.
e) Do not overreach. Keep proper footing and balance at
all times. This enables better control of the power tool in
unexpected situations.
f) Dress properly. Do not wear loose clothing or jewelry.
Keep your hair, clothing and gloves away from moving
parts. Loose clothes, jewelry, or long hair can be caught in
moving parts.
g) If devices are provided for the connection of dust
extraction and collection facilities, ensure these are
connected and properly used. Use of dust collection can
reduce dust related hazards. It is recommendation that the
tool always be supplied via a residual current device with a
rated residual current of 30mA or less.
4) Power tool use and care
a) Do not force the power tool. Use the correct power tool
for your application. The correct power tool will do the job
better and safer at the rate for which it was designed.
b) Do not use the power tool if the switch does not turn it
on and o. Any power tool that cannot be controlled with
the switch is dangerous and must be repaired.
c) Disconnect the plug from the power source and/or the
battery pack from the power tool before making any
adjustments, changing accessories or storing power
tools. Such preventative safety measures reduce the risk of
starting the power tool accidentally.
d) Store idle power tools out of the reach of children and
do not allow persons unfamiliar with the power tool or
these instructions to operate the power tool. Power
tools are dangerous in the hands of untrained users.
e) Maintain power tools. Check for misalignment or
binding of moving parts, breakage of parts and any
other condition that may aect the power tool’s
operation. If damaged, have the power tool repaired
before use. Many accidents are caused by poorly
maintained power tools.
f) Keep cutting tools sharp and clean. Properly maintained
cutting tools with sharp cutting edges are less likely to bind
and are easier to control.
g) Use the power tool, accessories and tool bits etc. in
accordance with these instructions, taking into account
the working conditions and the work to be performed.
Use of the power tool for operations dierent from those
intended could result in a hazardous situation.
5) Service
a) Have the power tool serviced by a qualied repair
person using only identical replacement parts. This
will ensure that the safety of the power tool is maintained.
If the supply cord is damaged, it must be replaced by the
manufacturer, its service agent or similarly qualified persons
in order to avoid a hazard.
General Power Tool Safety Warnings

6
EN
1. This power tool is intended to function as a
sander. Read all safety warnings, instructions and
specications provided with this power tool. Failure
to follow all instructions listed below may result in
electric shock, re, or personal injury.
2. Operations such as grinding, wire brushing,
polishing or cutting-o, are not recommended to
be performed with this power tool. Operations
for which the tool was not designed may create a
hazard and cause personal injury.
3. Do not use accessories which are not specically
designed and recommended by the tool
manufacturer. Just because the accessory can be
attached to your power tool, it does not assure safe
operation.
4. The rated speed of the accessory must be at least
equal to the maximum speed marked on the power
tool. Accessories running faster than their rated
speed can break and y apart.
5. The outside diameter and thickness of your
accessory must be within the capacity rating of
your power tool. Incorrectly sized accessories
cannot be adequately guard or controlled.
6. The arbor size of wheels, anges, backing pads
or any other accessory must t the spindle of the
power tool. Accessories with arbor holes that do
not match the mounting hardware of the power tool
will run out of balance, vibrate excessively and may
cause loss of control.
7. Do not use damaged accessory. Before each use
inspect the accessory such as abrasive wheel for
chips or cracks, backing pad for cracks, tear or
excess wear, wire brush for loose or cracked wires.
If power tool or accessory is dropped, inspect for
damage or install an undamaged accessory. After
inspecting or installing an accessory, position
yourself or bystanders away from the plane of
the rotating accessory and run the power tool at
maximum no-load speed for one minute. Damaged
accessories will normally break apart during this
time.
8. Wear personal protective equipment. Depending
on application, use face shield, safety goggles or
safety glasses. As appropriate, wear dust mask,
hearing protectors, gloves and workshop apron
capable of stopping ying debris generated by
various operations. The eye protection must be
capable of stopping ying debris generated by
various operations. The dust mask or respirator
must be capable of ltering particles generated
by your operations. Prolonged exposure to high
intensity noise may cause hearing loss.
9. Keep bystanders a safe distance away from work
area. Anyone entering the work area must wear
personal protective equipment. Fragments of work
piece or a broken accessory mayy away and
cause injury beyond immediate area of operation.
10. Hold power tool by gripping insulated surfaces
(handle) only, when performing an operation where
the cutting accessory may contact hidden wiring or
its own cord. Cutting accessory contacting a “live”
wire may make exposed metal parts of the power
tool “live” and shock the operator.
11. Position the cord clear of the spinning accessory. If
you loose control, the cord may be cut or snagged
and your arm or hand may be pulled into the
spinning accessory.
12. Never lay the power tool down until the accessory
has come to a complete stop. The spinning
accessory may grab the surface and pull the power
tool out of your control.
13. Do not run the power tool while carrying it at
your side. Accidental contact with the spinning
accessory could snag your clothing, pulling the
accessory into your body.
14. Regularly clean the power tools air vents. The
motor’s fan will draw the dust inside the housing
and excessive accumulation may cause electrical
hazards.
15. Do not operate the power tool near ammable
materials. Sparks could ignite these materials.
16. Do not use excessively oversized sanding disc
paper. Follow manufacturer’s recommendations
when selecting sanding paper. Larger sanding
paper extending beyond the sanding pad presents
a laceration hazard and may cause snagging,
tearing of the disc or kickback.
17. Risk of explosion. Floor sanding can result in an
explosive mixture of ne dust and air. Use oor
sanding machine only in a well-ventilated area free
from any ame or match.
Safety Warnings for Sanding Operations

7
EN
Kickback and Related Warnings
Kickback is a sudden reaction to a pinched or
snagged rotating wheel, backing pad, brush or any
other accessory. Pinching or snagging causes rapid
stalling of the rotating backing pad which in turn causes
uncontrolled power tool to be forced in the opposite
direction of the backing pad’s rotation at the point of the
binding.
For example, if an abrasive wheel is snagged or
pinched by the work piece, the edge of the wheel that
is entering into the pinch point can dig into the surface
of the material causing the wheel to climb out or kick
out. The wheel may either jump toward or away from
the operator, depending on direction of the wheel’s
movement at the point of pinching. Abrasive wheels
may also break under these conditions.
Kickback is the result of power tool misuse and
incorrect operating procedures or conditions and can
be avoided by taking proper precautions as given
below.
1. Maintain a rm grip on the power tool and position
your body and arms to allow you to resist kickback
forces. Always use auxiliary handles, if provided
for maximum control over kickback or torque
reactions during start up. The operator can control
torque reactions or kickback forces, if proper
precautions are taken.
2. Never place your hand near the rotating accessory.
Accessory may kickback over your hand.
3. Do not position your body in the area where power
tool will move if kickback occurs. Kickback will
propel the tool in the direction opposite to the
wheel’s movement at the point of the snagging.
4. Use special care when working corners, sharp
edges etc. Avoid bouncing and snagging the
accessory. Corners, sharp edges or bouncing
have a tendency to snag the rotating accessory
and cause loss of control or kickback.
1. Empty the dust bag or dust collection receiver
frequently. Do not leave residue in dust bag or dust
collection receiver unattended. Always empty in a
non-combustible metal container. Sanding wood
or varnish produces dust that can self ignite and
cause injury or damage. Follow this precaution for
storage.
2. Set all exposed nails. Sweep loose abrasive away
from work area. Do not strike metal pipes, etc.,
with sanding paper. Striking metal or abrasive
particles with sanding paper produces sparks that
could ignite the sanding dust which can cause
injury or damage.
3. Do not operate a partially assemble power tool.
Keep all adjustments within manufacturer’s
specications. Keep all fasteners tight. Operating
a partially assembled power tool could result in
injury to the operator or bystander and could cause
damage to the equipment or surroundings.
4. Do not attempt to change the sanding paper while
the power tool is running. The sanding pad can
snag clothing and cause injury to limbs and moving
sanding paper can cause abrasions.
5. The power tool should only be used on an electrical
system (mains) that is rated for the electrical
requirements of the power tool as shown on the
nameplate. Use only on an earthing (grounded)
system. Do not service the power tool if it is
energized or connected to an electrical circuit.
Improper use could cause re or electric shock.
Additional Rules For Safe Operation

8
Introduction
EN
KNOW YOUR MACHINE
1 Control Switch
2 Dust Collection Bag
3 Operating Handles
4 Abrasive Wrench
5 Steel Reinforced Molded Rubber Sanding Pad
6 Wall Guard
7 Work Light
8 Circuit Breaker (on select models) 2
1
7
6
5
4
38
Model 07209A 07208A 07208B 07209B
Electrical Rating 115 V, 12.0 A, 60 Hz 115 V, 12.0 A, 60 Hz 115 V, 12.0 A, 60 Hz 115 V, 12.0 A, 60 Hz
Storage Case Standard Standard NA NA
Motor 1 Hp 1 Hp 1 Hp 1 Hp
Abrasive Size 7" x 7 7/8" Dia. Disc 7" x 7 7/8" Dia. Disc 7" x 7 7/8" Dia. Disc 7" x 7 7/8" Dia. Disc
Disc Rate 2800 rpm 2800 rpm 2800 rpm 2800 rpm
Disc Driver System Gear Driven Gear Driven Gear Driven Gear Driven
Power Cable 12-3 Gray Rubber 14-3 Gray Rubber 14-3 Gray Rubber 12-3 Gray Rubber
Dust Collection Standard Standard Standard Standard
Dust Control Rate 110 CFM 110 CFM 110 CFM 110 CFM

9
Electrical Connection Instructions
EN
SAFETY INSTRUCTIONS
This oor-nishing machine shall be grounded while in use to protect the operator from electrical shock. The machine
is provided with a three-conductor cord and a three contact grounding attachment plug to t the proper grounding type
receptacle. The green (or green and yellow) conductor in the cord is the grounding wire. Never connect this wire to other than
the grounding pin of the attachment plug.
This machine is for use on a nominal 120 volt or 240 volt circuit and has a grounding plug that resembles the plug illustarted
as (A) in the sketch. Make sure that the machine is connected to an outlet having the same conguration as the plug. No
adapter should be used with this machine.

10
Machine Setup
EN
This sanding machine is designed to be operated with a remote vacuum
dust collection system or with the included dust bag.
Preparing Remote Vacuum Dust Collection Systems
To prepare the machine for remote vacuum dust collection systems that
have a 2” hose end, follow this procedure:
1. Install 2” hose end (gure 1, A) directly over the exhaust tube
(gure 1, B).
2. The exhaust tube can be rotated for optimum convenience.
To prepare the machine for remote vacuum dust collection systems that
have a 1 ½” hose end, follow this procedure:
1.
Install the 2” x 1½” hose end adaptor (Part No. 30563A) (gure 1, C)
over the exhaust tube (gure 1, B).
2. Insert 1 ½” hose end (gure 1, D) into the adaptor (gure 1, C).
NOTE: Start the remote vacuum collection system before operation.
Preparing to use the included dust bag
To prepare the machine for use with the included dust bag (Part No.
53544B), follow this procedure:
1. Install the dust bag by pressing the end onto the exhaust tube
until the ring locks into the groove (gure 2). This is best done
by pressing on the back of the bag opening with the palm of your
hand.
2. The exhaust tube can be rotated for optimum convenience.
3. To remove the dust bag from the exhaust tube, pry up the end
of the bag opening to partially release the internal rib from the
groove, then pull.
4. To empty the dust bag, unzip the disposal ap and force contents
out by inverting the bag.
NOTE: For best results, empty frequently. Follow all warnings
posted in this manual and on the dust bag.
Preparing the Machine for Operation
1. Familiarize yourself with the machine. Read all danger, warning,
and caution statements and the Owner’s Manual before operating
this machine. If you or your operator cannot read English,
have this manual explained fully before attempting to operate this
machine.
2. Remove screw and abrasive retainer. Center abrasive on pad
and secure with abrasive retainer and screw. (Figure 3)
3.
Return machine to upright position and tilt machine back on casters
until
it comes to rest on the exhaust bracket. Machine will be in a
reclined position.
Do not allow machine to rest on pad especially
after use, or compression set may take place within elastomer on
pad. This will create a at spot and bounce during use. (Figure 4)
EN ENGLISH
-8- American Sanders Operator’s Manual (EN) - Super 7R
Install the dust bag by
pressing the end onto the
exhaust tube until the ring
locks into the groove.
A
2” Hose from
vacuum system
(not included)
1.5” Hose from
vacuum system
(not included)
D
B
C
Exhaust Tube
(30563A) 2” Tube x 1.5” hose adaptor
Figure 1
Figure 2
MACHINE SET-UP
This sanding machine is designed to be operated with a remote vacuum
dust collection system or with the included dust bag.
Preparing Remote Vacuum Dust Collection Systems
To prepare the machine for remote vacuum dust collection systems that
have a 2” hose end, follow this procedure:
1. Install 2” hose end (gure 1, A) directly over the exhaust tube (gure 1,
B).
2. The exhaust tube can be rotated for optimum convenience.
To prepare the machine for remote vacuum dust collection systems that
have a 1 ½” hose end, follow this procedure:
1. Install the 2” x 1½” hose end adaptor (Part No. 30563A) (gure 1, C)
over the exhaust tube (gure 1, B).
2. Insert 1 ½” hose end (gure 1, D) into the adaptor (gure 1, C).
NOTE: Start the remote vacuum collection system before operation.
Preparing to use the included dust bag
To prepare the machine for use with the included dust bag (Part No.
53544B), follow this procedure:
1. Install the dust bag by pressing the end onto the exhaust tube until the
ring locks into the groove (gure 2). This is best done by pressing on
the back of the bag opening with the palm of your hand.
2. The exhaust tube can be rotated for optimum convenience.
3. To remove the dust bag from the exhaust tube, pry up the end of the
bag opening to partially release the internal rib from the groove, then
pull.
4. To empty the dust bag, unzip the disposal ap and force contents out
by inverting the bag.
NOTE: For best results, empty frequently. Follow all warnings posted
in this manual and on the dust bag.
Figure 1
EN ENGLISH
-8- American Sanders Operator’s Manual (EN) - Super 7R
Install the dust bag by
pressing the end onto the
exhaust tube until the ring
locks into the groove.
A
2” Hose from
vacuum system
(not included)
1.5” Hose from
vacuum system
(not included)
D
B
C
Exhaust Tube
(30563A) 2” Tube x 1.5” hose adaptor
Figure 1
Figure 2
MACHINE SET-UP
This sanding machine is designed to be operated with a remote vacuum
dust collection system or with the included dust bag.
Preparing Remote Vacuum Dust Collection Systems
To prepare the machine for remote vacuum dust collection systems that
have a 2” hose end, follow this procedure:
1. Install 2” hose end (gure 1, A) directly over the exhaust tube (gure 1,
B).
2. The exhaust tube can be rotated for optimum convenience.
To prepare the machine for remote vacuum dust collection systems that
have a 1 ½” hose end, follow this procedure:
1. Install the 2” x 1½” hose end adaptor (Part No. 30563A) (gure 1, C)
over the exhaust tube (gure 1, B).
2. Insert 1 ½” hose end (gure 1, D) into the adaptor (gure 1, C).
NOTE: Start the remote vacuum collection system before operation.
Preparing to use the included dust bag
To prepare the machine for use with the included dust bag (Part No.
53544B), follow this procedure:
1. Install the dust bag by pressing the end onto the exhaust tube until the
ring locks into the groove (gure 2). This is best done by pressing on
the back of the bag opening with the palm of your hand.
2. The exhaust tube can be rotated for optimum convenience.
3. To remove the dust bag from the exhaust tube, pry up the end of the
bag opening to partially release the internal rib from the groove, then
pull.
4. To empty the dust bag, unzip the disposal ap and force contents out
by inverting the bag.
NOTE: For best results, empty frequently. Follow all warnings posted
in this manual and on the dust bag.
Figure 2
EN
ENGLISH
American Sanders Operator’s Manual (EN) - Super 7R - 9 -
Figure 3
Figure 4
Figure 5
MACHINE SET-UP
Preparing the Machine for Operation
1. Familiarize yourself with the machine. Read all danger, warning, and caution
statements and the Owner’s Manual before operating this machine. If you or
your operator cannot read English, have this manual explained fully before
attempting to operate this machine.
2. Remove screw and abrasive retainer. Center abrasive on pad and secure with
abrasive retainer and screw. (Figure 3)
3. Return machine to upright position and tilt machine back on casters until it
comes to rest on the exhaust bracket. Machine will be in a reclined position.
Do not allow machine to rest on pad especially after use, or compression set
may take place within elastomer on pad. This will create a at spot and bounce
during use. (Figure 4)
OPERATING INSTRUCTIONS
1. Move machine to the location of your work. Set any exposed nails with ham-
mer and punch to avoid encounter with abrasive.
WARNING: Bodily injury could occur if power is applied to
the machine with the power switch already in the “ON” position. Always
check to assure that the power switch is in the “OFF” position before
applying power to the power cable.
2. Make sure the control switch is in the “Off” position then connect the supply
cable to an appropriately grounded fused circuit. Connect the supply cable to
the motor pigtail. (Figure 5)
3. With the machine in the reclined position rmly grasp both handles and ip the
control switch to the “ON” position. (Figure 4.)
4. Gradually lower pad to surface intended for sanding. Make sure the ma-
chine is in motion while the pad is engaged with the surface to be sanded.
You may use broad circular motion as you sand along the length of the
surface or your may use a combination of forward and sideward motions.
In time you will develop your own technique to optimize coverage and dust
recovery. It is advisable to not add effort to the pad as this may lead to “nos-
ing in” or “tipping” which produces grooves or lines on the surface.
5. When replacing abrasive, emptying the contents of the dust bag, or sanding
operation is completed, return machine to reclined position, ip control
switch to “Off” then disconnect the motor pigtail from the supply cable.
6. Empty dust bag whenever it becomes 1/3 full.
Figure 3
Figure 4

11
Operating Instructions
EN
1. Move machine to the location of your work. Set any exposed nails
with hammer and punch to avoid encounter with abrasive.
WARNING: Bodily injury could occur if power is applied to the
machine with the power switch already in the “ON” position. Always check
to assure that the power switch is in the “OFF” position before applying
power to the power cable.
2. Make sure the control switch is in the “Off” position then connect the
supply cable to an appropriately grounded fused circuit. Connect
the supply cable to the motor pigtail. (Figure 5)
3. With the machine in the reclined position rmly grasp both handles
and ip the control switch to the “ON” position. (Figure 4.)
4. Gradually lower pad to surface intended for sanding. Make sure the
machine is in motion while the pad is engaged with the surface to
be sanded. You may use broad circular motion as you sand along
the length of the surface or your may use a combination of forward
and sideward motions. In time you will develop your own technique
to optimize coverage and dust recovery. It is advisable to not add
effort to the pad as this may lead to “nosing in” or “tipping” which
produces grooves or lines on the surface.
5. When replacing abrasive, emptying the contents of the dust bag, or
sanding operation is completed, return machine to reclined position,
ip control switch to “Off” then disconnect the motor pigtail from the
supply cable.
6. Empty dust bag whenever it becomes 1/3 full.
.
DANGER: Failure to disconnect the supply cable from machine
whenever servicing, replacing abrasive, or emptying the dust bag could
result in electrocution or severe injury. Never leave machine unattended
while the supply cable is connected.
DANGER: Never leave dust bag unattended with sanding dust
in it. Sanding dust can spontaneously ignite and cause a re or explosion.
Empty dust bag into a metal container, clear of any combustibles. Do not
empty content into a re. Do not overll dust bag.
EN
ENGLISH
American Sanders Operator’s Manual (EN) - Super 7R - 9 -
Figure 3
Figure 4
Figure 5
MACHINE SET-UP
Preparing the Machine for Operation
1. Familiarize yourself with the machine. Read all danger, warning, and caution
statements and the Owner’s Manual before operating this machine. If you or
your operator cannot read English, have this manual explained fully before
attempting to operate this machine.
2. Remove screw and abrasive retainer. Center abrasive on pad and secure with
abrasive retainer and screw. (Figure 3)
3. Return machine to upright position and tilt machine back on casters until it
comes to rest on the exhaust bracket. Machine will be in a reclined position.
Do not allow machine to rest on pad especially after use, or compression set
may take place within elastomer on pad. This will create a at spot and bounce
during use. (Figure 4)
OPERATING INSTRUCTIONS
1. Move machine to the location of your work. Set any exposed nails with ham-
mer and punch to avoid encounter with abrasive.
WARNING: Bodily injury could occur if power is applied to
the machine with the power switch already in the “ON” position. Always
check to assure that the power switch is in the “OFF” position before
applying power to the power cable.
2. Make sure the control switch is in the “Off” position then connect the supply
cable to an appropriately grounded fused circuit. Connect the supply cable to
the motor pigtail. (Figure 5)
3. With the machine in the reclined position rmly grasp both handles and ip the
control switch to the “ON” position. (Figure 4.)
4. Gradually lower pad to surface intended for sanding. Make sure the ma-
chine is in motion while the pad is engaged with the surface to be sanded.
You may use broad circular motion as you sand along the length of the
surface or your may use a combination of forward and sideward motions.
In time you will develop your own technique to optimize coverage and dust
recovery. It is advisable to not add effort to the pad as this may lead to “nos-
ing in” or “tipping” which produces grooves or lines on the surface.
5. When replacing abrasive, emptying the contents of the dust bag, or sanding
operation is completed, return machine to reclined position, ip control
switch to “Off” then disconnect the motor pigtail from the supply cable.
6. Empty dust bag whenever it becomes 1/3 full.

12
Adjustment Procedures
Routine Maintenance
EN
Leveling
To level machine: Grasp caster adjusting screw “A” with an appropriate
tool (pliers ect.). Using a similar tool, loosen locknut “B” with a counter
clockwise motion. (Figure 6).
Condition - Pad creates ridges on both edges or a “hop” is experi-
enced: Rotate both adjusting screws equal amounts clockwise. Tighten
locknuts and test on a piece of plywood. Repeat procedure until condi-
tion is corrected. We recommend you not exceed 1/8” rotation for each
attempt.
Condition - Pad creates a ridge on the tip of the pad: Rotate both
adjusting screws counter clockwise, tighten locknuts and test. Repeat
procedure until condition is corrected. Use only 1/8 rotation for each
attempt.
Condition - Pad creates a ridge on only one side of the pad: Either
rotate the adjusting screw of the side effected clockwise or rotate the
adjusting screw opposite counterclockwise, depending on whether the
ridge terminates beyond the tip of the pad or prior to it. If it is prior to
the tip, adjust the side effected, otherwise adjust the opposite side.
EN ENGLISH
-10- American Sanders Operator’s Manual (EN) - Super 7R
Figure 6
OPERATING INSTRUCTIONS cont.
DANGER: Failure to disconnect the supply cable from
machine whenever servicing, replacing abrasive, or emptying the
dust bag could result in electrocution or severe injury. Never leave
machine unattended while the supply cable is connected.
DANGER: Never leave dust bag unattended with
sanding dust in it. Sanding dust can spontaneously ignite and cause
a re or explosion. Empty dust bag into a metal container, clear of
any combustibles. Do not empty content into a re. Do not overll
dust bag.
ADJUSTMENT PROCEDURES
Leveling
To level machine: Grasp caster adjusting screw “A” with an appropriate
tool (pliers ect.). Using a similar tool, loosen locknut “B” with a counter
clockwise motion. (Figure 6).
Condition - Pad creates ridges on both edges or a “hop” is experienced:
Rotate both adjusting screws equal amounts clockwise. Tighten locknuts
and test on a piece of plywood. Repeat procedure until condition is cor-
rected. We recommend you not exceed 1/8” rotation for each attempt.
Condition - Pad creates a ridge on the tip of the pad: Rotate both
adjusting screws counter clockwise, tighten locknuts and test. Repeat
procedure until condition is corrected. Use only 1/8 rotation for each
attempt.
Condition - Pad creates a ridge on only one side of the pad: Either rotate
the adjusting screw of the side effected clockwise or rotate the adjusting
screw opposite counterclockwise, depending on whether the ridge
terminates beyond the tip of the pad or prior to it. If it is prior to the tip,
adjust the side effected, otherwise adjust the opposite side.
ROUTINE MAINTENANCE
CAUTION: Failure to perform maintenance at
recommended intervals may void warranty.
Carbon Brushes
Have the carbon brushes replaced at least every 500 hours and more
frequently under heavy use.
Dust Bag
Periodically the dust bag should be turned inside out, shaken vigor-
ously and machine washed in cold water
to prevent pore blockage and loss of dust control.
Bearings
To insure reliable performance, have armature and pad driver
bearings inspected for wear or damage after every 1500
hours. If used heavily, have the bearings replaced seasonally.
Lubrication
The machine comes fully lubricated. The gears in the gear
box have enough lubrication for approximately six months of
normal operation. Have the lubricant changed at least every
6 months or more frequently under heavy use.
A
B
CAUTION: Failure to perform maintenance at recommended intervals may void warranty.
Carbon Brushes
Have the carbon brushes replaced at least every 500 hours and more frequently under heavy use.
Dust Bag
Periodically the dust bag should be turned inside out, shaken vigorously and machine washed in cold water
to prevent pore blockage and loss of dust control.
Bearings
To insure reliable performance, have armature and pad driver bearings inspected for wear or damage after every 1500 hours. If used heavily, have
the bearings replaced seasonally.
Lubrication
The machine comes fully lubricated. The gears in the gear box have enough lubrication for approximately six months of normal operation. Have the
lubricant changed at least every 6 months or more frequently under heavy use.
CAUTION: Maintenance and repairs performed by unauthorized personnel could result in damage or injury. Maintenance and repairs
performed by unauthorized personnel will void your warranty. Failure to perform maintenance at recommended intervals may void warranty.

13
Maintenance
EN
To Change The Lubricant In The Gearbox
To change the lubricant in the gearbox, follow this procedure:
1. Put the machine upside down on a bench.
2. Align one of the two holes in the rubber pad with one of the three holes in the rotating wall guard.
3. Align both holes with one of the three screws in the gear housing cover. Remove the screw from the gear housing cover. (Figure 9)
4. Align the holes with each of the other two screws, then remove screws.
CAUTION: Make sure no dust enters the gear box. Damage will occur to the gear box.
5. Remove the cover from the gear housing.
6. Remove the old lubricant from the gearbox.
7. Add six ounces of American SandersTechnology lubricant to the gear box.
CAUTION: To prevent damage to the motor, do not add more than six ounces
of lubricant to the gearbox.
8. Using the three screws removed above, install the cover on the gear housing.
9. Start the machine and let it run for 15 minutes. A small amount of excess lubricant
should ow out the vent hole. If none appears it may be necessary to add
additional lubricant.
10. Wipe off excess lubricant and clear vent hole.
Carbon Brushes
Inspect all four brushes every 6 months or 250 hours. Access to the brushes is gained through the front and back motor vent plugs and under
both motor covers (gure 7). Press tab (A) on spring clip assembly in, rotate, then remove (gure 8).Use needlenose pliers to disconnect the
shunt wire. If any brush has worn to 3/8” in length or shorter, replace the entire set.
CAUTION: Use only motor brush PN 40818A or PN 40055A with shunt wire or motor failure will occur.
When replacing the brushes make sure that the brush seats against the commutator, the spring rest in the recess of the brush, and the brush
is free to travel. When returning the switch cover, keep any wires clear of the commutator and any pinch site.
EN
ENGLISH
American Sanders Operator’s Manual (EN) - Super 7R -11 -
Figure 9
Qty Part No.
1Qt. 16610A
1Gal. 16611A
Lubricants
Figure 7
Figure 8
MAINTENANCE
CAUTION: Maintenance and repairs performed by
unauthorized personnel could result in damage or injury. Maintenance
and repairs performed by unauthorized personnel will void your
warranty. Failure to perform maintenance at recommended intervals
may void warranty.
Carbon Brushes
Inspect all four brushes every 6 months or 250 hours. Access to the
brushes is gained through the front and back motor vent plugs and un-
der both motor covers (gure 7). Press tab (A) on spring clip assembly
in, rotate, then remove (gure 8).Use needlenose pliers to disconnect
the shunt wire. If any brush has worn to 3/8” in length or shorter,
replace the entire set.
CAUTION: Use only motor brush PN 40818A or PN
40055A with shunt wire or motor failure will occur.
When replacing the brushes make sure that the brush seats against the
commutator, the spring rest in the recess of the brush, and the brush is
free to travel. When returning the switch cover, keep any wires clear of
the commutator and any pinch site.
To Change The Lubricant In The Gearbox
To change the lubricant in the gearbox, follow this procedure:
1. Put the machine upside down on a bench.
2. Align one of the two holes in the rubber pad with one of the three
holes in the rotating wall guard.
3. Align both holes with one of the three screws in the gear housing
cover. Remove the screw from the gear housing cover. (Figure 9)
4. Align the holes with each of the other two screws, then remove
screws.
CAUTION: Make sure no dust enters the gear box.
Damage will occur to the gear box.
5. Remove the cover from the gear housing.
6. Remove the old lubricant from the gearbox.
7. Add six ounces of American SandersTechnology lubricant to the
gear box.
CAUTION: To prevent damage to the motor, do not add
more than six ounces of lubricant to the gearbox.
8. Using the three screws removed above, install the cover on the
gear housing.
9. Start the machine and let it run for 15 minutes. A small amount of
excess lubricant should ow out the vent hole. If none appears it
may be necessary to add additional lubricant.
10. Wipe off excess lubricant and clear vent hole.
A
Figure 8
EN
ENGLISH
American Sanders Operator’s Manual (EN) - Super 7R -11 -
Figure 9
Qty Part No.
1Qt. 16610A
1Gal. 16611A
Lubricants
Figure 7
Figure 8
MAINTENANCE
CAUTION: Maintenance and repairs performed by
unauthorized personnel could result in damage or injury. Maintenance
and repairs performed by unauthorized personnel will void your
warranty. Failure to perform maintenance at recommended intervals
may void warranty.
Carbon Brushes
Inspect all four brushes every 6 months or 250 hours. Access to the
brushes is gained through the front and back motor vent plugs and un-
der both motor covers (gure 7). Press tab (A) on spring clip assembly
in, rotate, then remove (gure 8).Use needlenose pliers to disconnect
the shunt wire. If any brush has worn to 3/8” in length or shorter,
replace the entire set.
CAUTION: Use only motor brush PN 40818A or PN
40055A with shunt wire or motor failure will occur.
When replacing the brushes make sure that the brush seats against the
commutator, the spring rest in the recess of the brush, and the brush is
free to travel. When returning the switch cover, keep any wires clear of
the commutator and any pinch site.
To Change The Lubricant In The Gearbox
To change the lubricant in the gearbox, follow this procedure:
1. Put the machine upside down on a bench.
2. Align one of the two holes in the rubber pad with one of the three
holes in the rotating wall guard.
3. Align both holes with one of the three screws in the gear housing
cover. Remove the screw from the gear housing cover. (Figure 9)
4. Align the holes with each of the other two screws, then remove
screws.
CAUTION: Make sure no dust enters the gear box.
Damage will occur to the gear box.
5. Remove the cover from the gear housing.
6. Remove the old lubricant from the gearbox.
7. Add six ounces of American SandersTechnology lubricant to the
gear box.
CAUTION: To prevent damage to the motor, do not add
more than six ounces of lubricant to the gearbox.
8. Using the three screws removed above, install the cover on the
gear housing.
9. Start the machine and let it run for 15 minutes. A small amount of
excess lubricant should ow out the vent hole. If none appears it
may be necessary to add additional lubricant.
10. Wipe off excess lubricant and clear vent hole.
A
Figure 9

Contents
Instrucciones de seguridad para el operador.............................15
Introducción................................................................17
Machine Specifications................................................................17
Instrucciones de conexión eléctrica .............................................18
Instalación de la máquina............................................................19
Operación de la máquina.......................................................20-21
Procedimientos de ajuste de la lijadora.......................................21
Mantenimiento de rutina...............................................................22
Parts Manual...............................................................................32
Wiring Diagram............................................................................33
Lower Assembly..........................................................................34
Upper Assembly..........................................................................36
Warranty.....................................................................................38
LEA ESTE MANUAL
Este manual contiene información importante acerca del uso y la seguridad de la máquina. Si no lee el manual antes de utilizar su
máquina American Sanders o de intentar realizar los procedimientos de reparación o mantenimiento de la misma, usted o el resto
del personal podrían sufrir lesiones; asimismo, podrían producirse daños a la máquina o a otras propiedades. Antes de utilizar la
máquina, es necesario recibir la capacitación adecuada en la operación de la misma. Si el operador de la máquina no sabe leer en
español, explíquele el manual exhaustivamente antes de que intente utilizarla.
Todas las indicaciones incluidas en este manual se ofrecen desde la posición del operador en la parte posterior de la máquina.
ADVERTENCIA!
Los Productos a la venta en este Manual contienen, o pueden contener, productos químicos reconocidos por algunos gobiernos (como el Estado
de California, según lo indica en su Proposición 65, Ley de Advertencia Regulatoria) como causantes de cáncer, defectos de nacimiento u otros
daños reproductivos. En algunas jurisdicciones (incluido el Estado de California), los compradores de estos Productos que los coloquen en servicio
en un emplazamiento laboral o en un espacio de acceso público tienen la obligación regulatoria de realizar determinados avisos, advertencias o
divulgaciones respecto de los productos químicos contenidos o posiblemente contenidos en los Productos utilizados en tal lugar. Es la responsabilidad
del comprador conocer y cumplir con todas las leyes y reglamentaciones relacionadas con el uso de estos Productos en tales entornos. El Fabricante
niega toda responsabilidad de informar a los compradores sobre requisitos especícos que pueden regir el uso de los Productos en tales entornos.
ES
PELIGRO signica: Usted u otras personas pueden estar expuestos a sufrir lesiones personales, inclusive la
muerte si las indicaciones de PELIGRO que se encuentran en esta máquina o en el manual
de instrucciones se ignoran o no se tienen en cuenta. Lea y respete todas las indicaciones
de PELIGRO que se encuentran en el manual de instrucciones y en la máquina.
ADVERTENCIA signica: Usted u otras personas pueden estar expuestos a sufrir lesiones personales, si las
indicaciones de ADVERTENCIA que se encuentran en esta máquina o en el manual de
instrucciones se ignoran o no se tienen en cuenta. Lea y respete todas las indicaciones de
ADVERTENCIA que se encuentran en el manual de instrucciones y en su máquina.
PRECAUCIÓN signica:
La máquina u otros bienes pueden sufrir daños materiales si las indicaciones de PRECAUCIÓN
que se encuentran en la máquina o en el manual de instrucciones se ignoran o no se
tienen en cuenta. Lea y respete todas las indicaciones de PRECAUCIÓN que se
encuentran en el manual de instrucciones y en la máquina.
Instrucciones De Seguridad Para El Operador
***Este producto está destinado exclusivamente para uso comercial***

ES
15

ES
16
UNA ADVERTENCIA ESPECIAL SOBRE LOS INCENDIOS DE LAS BOLSAS
El polvo que se genera al lijar pisos de madera en bruto o previamente acabados PUEDE ENCENDERSE O EXPLOTAR DE
FORMA ESPONTÁNEA! Las BOLSAS CONTENEDORAS DE POLVO de la lijadora DEBEN VACIARSE CON FRECUENCIA
y antes de cualquier interrupción de trabajo. NUNCA ALMACENE POLVO DE LIJADO EN ESTRUCTURAS U OTROS
MATERIALES COMBUSTIBLES NI ALREDEDOR DE ELLOS. Elimine de inmediato el polvo de lijado en exteriores de
acuerdo con la normativa local. No lo arroje al fuego.

17
Introducción
ES
CONOZCA SU MÁQUINA
1 Interruptor de control
2 Bolsa colectora de polvo
3 Manijas de funcionamiento
4 Llave del abrasivo
5 Almohadilla de lijado de goma moldeada y reforzada con acero
6 Protección de pared
7 Luz de funcionamiento
8 Cortacircuitos (en modelos selectos)
2
1
7
6
5
4
38
Modelo 07209A 07208A 07208B 07209B
Requerimientos eléctricos 115 V, 12.0 A, 60 Hz 115 V, 12.0 A, 60 Hz 115 V, 12.0 A, 60 Hz 115 V, 12.0 A, 60 Hz
Caja de almacenamiento Standard Standard NA NA
Motor 1 Hp, 756 vatios 1 Hp, 756 vatios 1 Hp, 756 vatios 1 Hp, 756 vatios
Tamaño del abrasivo 7" x 7 7/8" Dia. Disc 7" x 7 7/8" Dia. Disc 7" x 7 7/8" Dia. Disc 7" x 7 7/8" Dia. Disc
Velocidad de disco 2800 rpm 2800 rpm 2800 rpm 2800 rpm
Sistema del impulsor de disco Gear Driven Gear Driven Gear Driven Gear Driven
Cable de alimentación 12-3 Gray Rubber 14-3 Gray Rubber 14-3 Gray Rubber 12-3 Gray Rubber
Colector de polvo Standard Standard Standard Standard
Tasa de control de polvo 110 CFM 110 CFM 110 CFM 110 CFM

ES
18
Instrucciones de conexión eléctrica
Esta máquina para pisos de acabado deberá estar conectado a tierra mientras esté en uso para proteger al operador de una descarga eléctrica.
La máquina está provista de un cable de tres conductores y un accesorio de conexión a tierra de tres contactos de enchufe para adaptarse al
receptáculo de conexión a tierra adecuada. El conductor verde (o verde y amarillo) en el cable es el cable a tierra. Nunca conecte este cable a
otro que el pasador de puesta a tierra del enchufe.
Esta máquina es para uso en un circuito nominal de 120 voltios y tiene un enchufe de conexión a tierra que se parece al enchufe illustarted
como (A) en el boceto. Asegúrese de que la máquina está conectada a un tomacorriente que tenga la misma configuración que el enchufe. Sin
adaptador se debe utilizar con esta máquina.

Instalación de la máquina
ES
Esta lijadora está diseñada para utilizarse con un sistema colector de
polvo remoto mediante vacío o con la bolsa de polvo incluida.
Preparación de los sistemas colectores de polvo remotos
mediante vacío
Si desea preparar la máquina para sistemas colectores de polvo remotos
mediante vacío que tengan un extremo de manguera de 2”, siga este
procedimiento:
1. Instale e extremo de manguera de 2” (gura 1, A) directamante
sobre el tubo de escape (gura 1, B).
2. El tubo de escape puede girarse para mayor comodidad.
Si desea preparar la máquina para sistemas colectores de polvo remotos
mediante vacío que tengan un extremo de manguera de 1 ½”, siga este
procedimiento:
1. Instale el adaptador del extremo de manguera de 2” x 1½” (Node
pieza 30563A) (gura 1, C) sobre el tubo de escape (gura 1, B).
2. Inserte el extremo de manguera de 1½” (gura 1, D) en el adaptador
(gura 1, C).
NOTA: Ponga en marche el sistema colector remoto mediante vacío
antes de encender la máquina.
Preparación para usar la bolsa de polvo incluida
Si desea preparar la máquina para su uso con la bolsa de polvo incluida
(No de pieza 53544B), siga este procedimiento.
1. Instale la bolsa de recolección de polvo presionando el extremo del
tubo de escape hasta que el anillo encaje dentro de la ranura (gura
2). El mejor modo de hacer esto es presionando la parte posterior
de la abertura de la bolsa con la palma de su mano.
2. El tubo de escape puede girarse para mayor comodidad.
3. Para retirar la bolsa de polvo del tubo de escape, haga palanca
hacia arriba en el extremo de la abertura de la bolsa para liberar
parcialmente el saliente interno de la ranura, y después tire.
4. Para vaciar la bolsa de polvo, abra la aleta de vaciado y saque sus
contenidos dando la vuelta a la bolsa.
NOTA: Para lograr los mejores resultados, vacíe frecuentemente.
Siga todas las advertencias incluidas en el manual y en la bolsa de
polvo.
ES ESPAÑOL
-18- American Sanders Manual del operador (ES) - Super 7R
A
MANGUERA DE 2”
DEL SISTEMA DE
ASPIRACIÓN (NO
INCLUIDO)
MANGUERA DE
1.50” DEL SISTEMA
DE ASPIRACIÓN
(NO INCLUIDO)
D
B
C
TUBO DE ESCAPE
Figura 1
Figura 2
INSTALE LA BOLSA DE
RECOLECCIÓN DE POLVO
PRESIONANDO EL EXTREMO DEL
TUBO DE ESCAPE HASTA QUE EL
ANILLO ENCAJE DENTRO DE LA
RANURA.
Instalación de la máquina
Esta lijadora está diseñada para utilizarse con un sistema colector de
polvo remoto mediante vacío o con la bolsa de polvo incluida.
Preparación de los sistemas colectores de polvo remotos mediante
vacío
Si desea preparar la máquina para sistemas colectores de polvo remo-
tos mediante vacío que tengan un extremo de manguera de 2”, siga
este procedimiento:
1. Instale e extremo de manguera de 2” (gura 1, A) directamante
sobre el tubo de escape (gura 1, B).
2. El tubo de escape puede girarse para mayor comodidad.
Si desea preparar la máquina para sistemas colectores de polvo remo-
tos mediante vacío que tengan un extremo de manguera de 1 ½”, siga
este procedimiento:
1. Instale el adaptador del extremo de manguera de 2” x 1½” (Node
pieza 30563A) (gura 1, C) sobre el tubo de escape (gura 1, B).
2. Inserte el extremo de manguera de 1½” (gura 1, D) en el adaptador
(gura 1, C).
NOTA: Ponga en marche el sistema colector remoto mediante vacío
antes de encender la máquina.
Preparación para usar la bolsa de polvo incluida
Si desea preparar la máquina para su uso con la bolsa de polvo inclu-
ida (No de pieza 53544B), siga este procedimiento.
1. Instale la bolsa de recolección de polvo presionando el extremo del
tubo de escape hasta que el anillo encaje dentro de la ranura (gura
2). El mejor modo de hacer esto es presionando la parte posterior
de la abertura de la bolsa con la palma de su mano.
2. El tubo de escape puede girarse para mayor comodidad.
3. Para retirar la bolsa de polvo del tubo de escape, haga palanca
hacia arriba en el extremo de la abertura de la bolsa para liberar
parcialmente el saliente interno de la ranura, y después tire.
4. Para vaciar la bolsa de polvo, abra la aleta de vaciado y saque sus
contenidos dando la vuelta a la bolsa.
NOTA: Para lograr los mejores resultados, vacíe frecuentemente.
Siga todas las advertencias incluidas en el manual y en la bolsa de
polvo.
19

Instalación de la máquina
ES
20
Preparando la máquina para la operación
1. Veillez prendre connaissance de l’appareil et lisez toutes les notices de danger,
d’avertissements et de mises en garde. Assurez-vous que tous les opérateurs de cet
appareil ont bien lu le Manuel de l’utilisateur. S’ils ne sont pas en mesure de lire ce
Manuel, ils devront se le faire expliquer entièrement avant d’utiliser la ponceuse.
2. Saque el tornillo y el retenedor del abrasivo. Centre el abrasivo sobre la almohadilla y
asegúrelo con el retenedor y el tornillo del abrasivo. (Figura 3)
3. Vuelva a colocar la máquina en posición vertical e inclínela hacia atrás sobre las
roldanas pivotantes hasta que se apoye sobre la abrazadera de escape. La máquina
estará en posición reclinada. No deje que la máquina permanezca apoyada sobre la
almohadilla, especialmente después del uso, ya que de lo contrario se podrá producir
el endurecimiento por compresión dentro del elastómero de la almohadilla. Esto creará
una parte plana y rebotes durante el uso. (Figura 4)
ES
ESPAÑOL
American Sanders Manual del operador (ES) - Super 7R - 19 -
Figura 3
Figura 4
Figura 5
Instalación de la máquina
Preparando la máquina para la operación
1. Veillez prendre connaissance de l’appareil et lisez toutes les notices de
danger, d’avertissements et de mises en garde. Assurez-vous que tous les
opérateurs de cet appareil ont bien lu le Manuel de l’utilisateur. S’ils ne sont
pas en mesure de lire ce Manuel, ils devront se le faire expliquer entièrement
avant d’utiliser la ponceuse.
2. Saque el tornillo y el retenedor del abrasivo. Centre el abrasivo sobre la
almohadilla y asegúrelo con el retenedor y el tornillo del abrasivo. (Figura 3)
3. Vuelva a colocar la máquina en posición vertical e inclínela hacia atrás sobre
las roldanas pivotantes hasta que se apoye sobre la abrazadera de escape.
La máquina estará en posición reclinada. No deje que la máquina permanez-
ca apoyada sobre la almohadilla, especialmente después del uso, ya que de
lo contrario se podrá producir el endurecimiento por compresión dentro del
elastómero de la almohadilla. Esto creará una parte plana y rebotes durante
el uso. (Figura 4)
Operación de la máquina
1. Desplace la máquina al lugar de trabajo. Fije cualquier anillo expuesto con
martillo y embutidor para evitar que se tope con el abrasivo. Conecte el cable
de alimentación a un circuito adecuadamente provisto de toma de tierra y
fusibles.
ADVERTENCIA: Pueden producirse lesiones corporales
si se aplica potencia a la máquina con el interruptor de control colocado
en la posición “ON” (Encendido). Verique siempre que el interruptor de
control se encuentre en posición “OFF” (Apagado) antes de enchufar el
cable de alimentación.
2. Asegúrese de que el interruptor de control esté ajustado en “OFF” (Apagado).
Para la posición “OFF” (Apagado), el interruptor se mueve hacia el lado del
operador. Vea la marca en el interruptor. Conecte el cable de alimentación al
cable eléctrico del motor. (Figura 5)
3. Con la máquina en posición recli nada, tome rmemente las dos manijas y
mueva el interruptor de control a la posición “ON” (Encendido). (Figura 4)
4. Baje gradualmente la almohadilla a la supercie destinada a ser lijada.
Asegúrese de que la máquina esté en movimiento mientras la almohadilla
está engranada con la supercie a lijar. Puede usar un movimiento circu-
lar amplio mientras lija a lo largo de la supercie o una combinación de
movimientos hacia adelante y hacia los costados. Con el tiempo desarrollará
su propia técnica, lo cual le permitirá optimizar la cobertura y la recolección
de polvo. Es aconsejable no agregar esfuerzo a la almohadilla ya que esto
podría conducir a la “elevación de la parte delantera” o a la “inclinación” y
como resultado quedarían ranuras o líneas en la supercie.
5. Al cambiar el abrasivo, vacíe el contenido de la bolsa de polvo o, al terminar
el lijado, vuelva a dejar la máquina en la posición reclinada, desactive el inter-
ruptor de control en la posición “OFF” (Apagado), luego desconecte el cable
eléctrico del motor del cable de alimentación.
6. Vacíe la bolsa de polvo cada vez que se llene hasta 1/3 de su capacidad.
Operación de la máquina
1. Desplace la máquina al lugar de trabajo. Fije cualquier anillo expuesto con martillo y
embutidor para evitar que se tope con el abrasivo. Conecte el cable de alimentación a
un circuito adecuadamente provisto de toma de tierra y fusibles.
ADVERTENCIA: Pueden producirse lesiones corporales si se aplica potencia a
la
máquina con el interruptor de control colocado en la posición “ON” (Encendido).
Verique siempre que el interruptor de control se encuentre en posición “OFF”
(Apagado) antes de enchufar el cable de alimentación.
2. Asegúrese de que el interruptor de control esté ajustado en “OFF” (Apagado). Para la
posición “OFF” (Apagado), el interruptor se mueve hacia el lado del operador. Vea la
marca en el interruptor. Conecte el cable de alimentación al cable eléctrico del motor.
(Figura 5)
3. Con la máquina en posición recli nada, tome rmemente las dos manijas y mueva el
interruptor de control a la posición “ON” (Encendido). (Figura 4)
4. Baje gradualmente la almohadilla a la supercie destinada a ser lijada. Asegúrese de
que la máquina esté en movimiento mientras la almohadilla está engranada con la
supercie a lijar. Puede usar un movimiento circular amplio mientras lija a lo largo de
la supercie o una combinación de movimientos hacia adelante y hacia los costados.
Con el tiempo desarrollará su propia técnica, lo cual le permitirá optimizar la cobertura
y la recolección de polvo. Es aconsejable no agregar esfuerzo a la almohadilla ya que
esto podría conducir a la “elevación de la parte delantera” o a la “inclinación” y como
resultado quedarían ranuras o líneas en la supercie.
EN
ENGLISH
American Sanders Operator’s Manual (EN) - Super 7R - 9 -
Figure 3
Figure 4
Figure 5
MACHINE SET-UP
Preparing the Machine for Operation
1. Familiarize yourself with the machine. Read all danger, warning, and caution
statements and the Owner’s Manual before operating this machine. If you or
your operator cannot read English, have this manual explained fully before
attempting to operate this machine.
2. Remove screw and abrasive retainer. Center abrasive on pad and secure with
abrasive retainer and screw. (Figure 3)
3. Return machine to upright position and tilt machine back on casters until it
comes to rest on the exhaust bracket. Machine will be in a reclined position.
Do not allow machine to rest on pad especially after use, or compression set
may take place within elastomer on pad. This will create a at spot and bounce
during use. (Figure 4)
OPERATING INSTRUCTIONS
1. Move machine to the location of your work. Set any exposed nails with ham-
mer and punch to avoid encounter with abrasive.
WARNING: Bodily injury could occur if power is applied to
the machine with the power switch already in the “ON” position. Always
check to assure that the power switch is in the “OFF” position before
applying power to the power cable.
2. Make sure the control switch is in the “Off” position then connect the supply
cable to an appropriately grounded fused circuit. Connect the supply cable to
the motor pigtail. (Figure 5)
3. With the machine in the reclined position rmly grasp both handles and ip the
control switch to the “ON” position. (Figure 4.)
4. Gradually lower pad to surface intended for sanding. Make sure the ma-
chine is in motion while the pad is engaged with the surface to be sanded.
You may use broad circular motion as you sand along the length of the
surface or your may use a combination of forward and sideward motions.
In time you will develop your own technique to optimize coverage and dust
recovery. It is advisable to not add effort to the pad as this may lead to “nos-
ing in” or “tipping” which produces grooves or lines on the surface.
5. When replacing abrasive, emptying the contents of the dust bag, or sanding
operation is completed, return machine to reclined position, ip control
switch to “Off” then disconnect the motor pigtail from the supply cable.
6. Empty dust bag whenever it becomes 1/3 full.
Figura 3
Figura 4
This manual suits for next models
4
Table of contents
Languages:
Other Amano Edger manuals

Amano
Amano American Sanders COMPASS HDTR User manual
Amano
Amano American Sanders Super 7R Australia User manual

Amano
Amano American Sanders Compass User manual

Amano
Amano 07125A User manual

Amano
Amano American Sanders 07246A User manual
Amano
Amano American Sanders Super 7R 240V User manual

Amano
Amano American Sanders EZ-E User manual

Amano
Amano AMERICAN SANDERS 07222A User manual
