9
x2
Ø 10mm
x4*
Piso Terminado / Finished floor
*
*
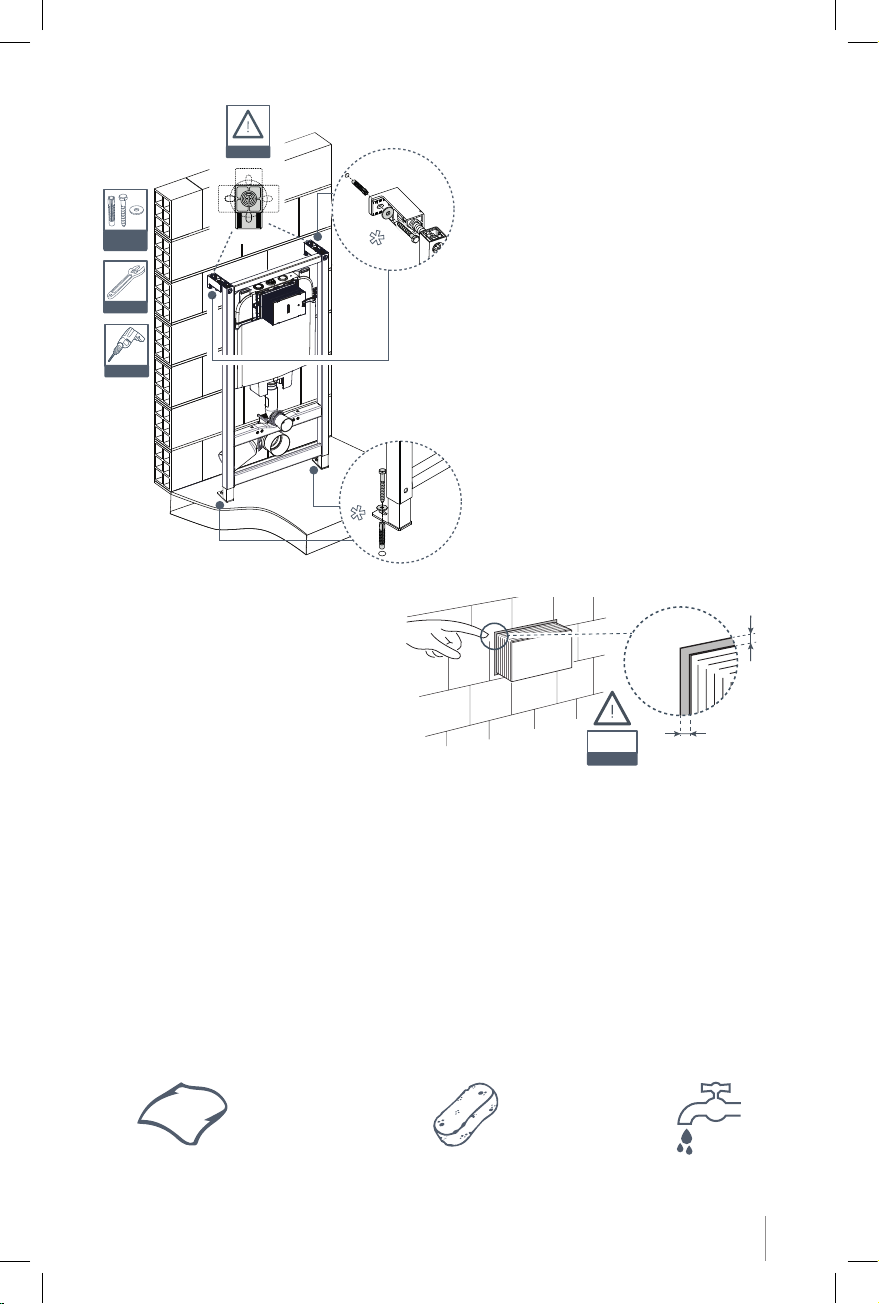
11.
Verifique que las dimensiones anteriormente
tomadas corresponda a lo que va a instalarse.
Apriete los tornillos de fijación a la pared
y al piso terminado, verifique que queden
correctamente instalados, firmemente mueva
la estructura y ajuste cualquier imperfección
que se tenga durante el procedimiento de
instalación.
Verify that dimensions taken previously
must be the correct according to your bowl
installation holes. Tighten the fixation screws
of the frame to the wall and finished floor.
Verify the correct installation of them. Frame
has to be firmly tightened to the wall and
finished floor, adjust and move the frame
correcting any mistake or imperfection during
the installation process.
12.
5mm
Pared Terminada / Finished wall
RECOMENDACIONES DE CUIDADO Y MANTENIMIENTO
Care & Maintenance Recommendations
La utilización de limpiadores abrasivos pueden dañar la superficie y no es
recomendable. Limpie la superficie externa con una solución de agua y jabón
suave con un limpiador no abrasivo. Usar limpiadores que contengan CLORO,
pueden causar daños y deteriorar la superficie de la carcasa.
Use of scouring cleaners may damage the surface on the basin and are not
recommended. Wipe the outside surface with a soapy water solution and clean
basin area with a non-abrasive type. Use cleaners with BLEACH, would be to cause
damages and deteriorate the frame’s surface.
Paño suave húmedo
Soft & damp cloth
Esponja suave
Soft sponge
Agua
Water
Verifique que alrededor de la“caja
protectora” quede una línea de separación
de 5 mm (0,2”) máximo después de tener la
pared terminada.
Verify around of the “protective case” left a
separation line of 5 mm (0,2”) maximum after
to have the finished wall.