4
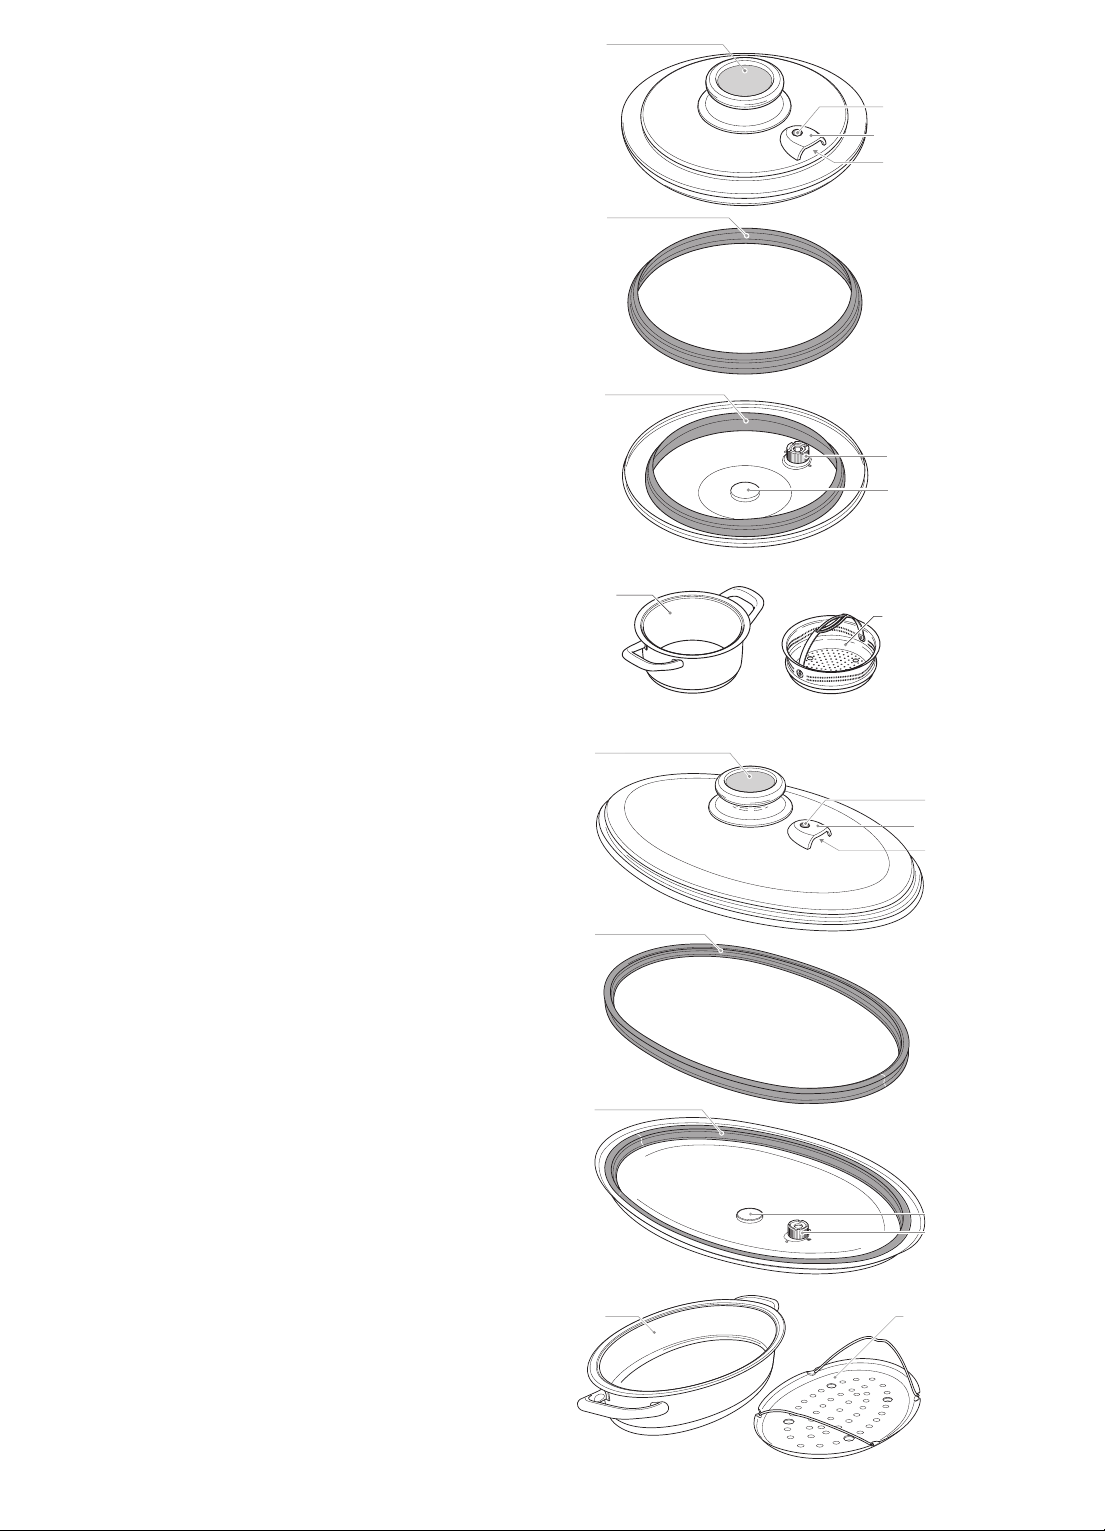
1.1 Geeignete AMC Töpfe und Topf-Einsätze
EasyQuick darf verwendet werden mit:
Töpfen 20 cm und 24 cm
GourmetLine 20 cm und 24 cm
Eurasia 24 cm
Softiera-Einsatz 20 cm und 24 cm (Ausnahme: in Töpfen 2.3 l und 2.5 l sowie Eurasia
24cm)
Kombi-Siebaufsatz
Oval EasyQuick darf verwendet werden mit:
Ovaler Griddle 38 cm 3.5 l und 4.5 l
Ovaler Locheinsatz 38 cm
EasyQuick und Oval EasyQuick dürfen nicht verwendet werden mit:
HotPan 20 cm und HotPan 24 cm
Oval Grill
Ringeinsatz, Reibe-, Raspel- und Hobel-Einsatz, Kombischüssel (eingehängt)
EasyQuick darf nicht mit Töpfen und Pfannen anderer Hersteller verwendet werden.
1.2 Geeignete Kochstellen
Mit EasyQuick verschlossene Töpfe (gemäss Kapitel 1.1) können auf allen haushaltsüblichen Arten von
Kochstellen in passender Größe verwendet werden.
Beschreibungen und Tipps in den „AMC Kochmethoden“ beachten.
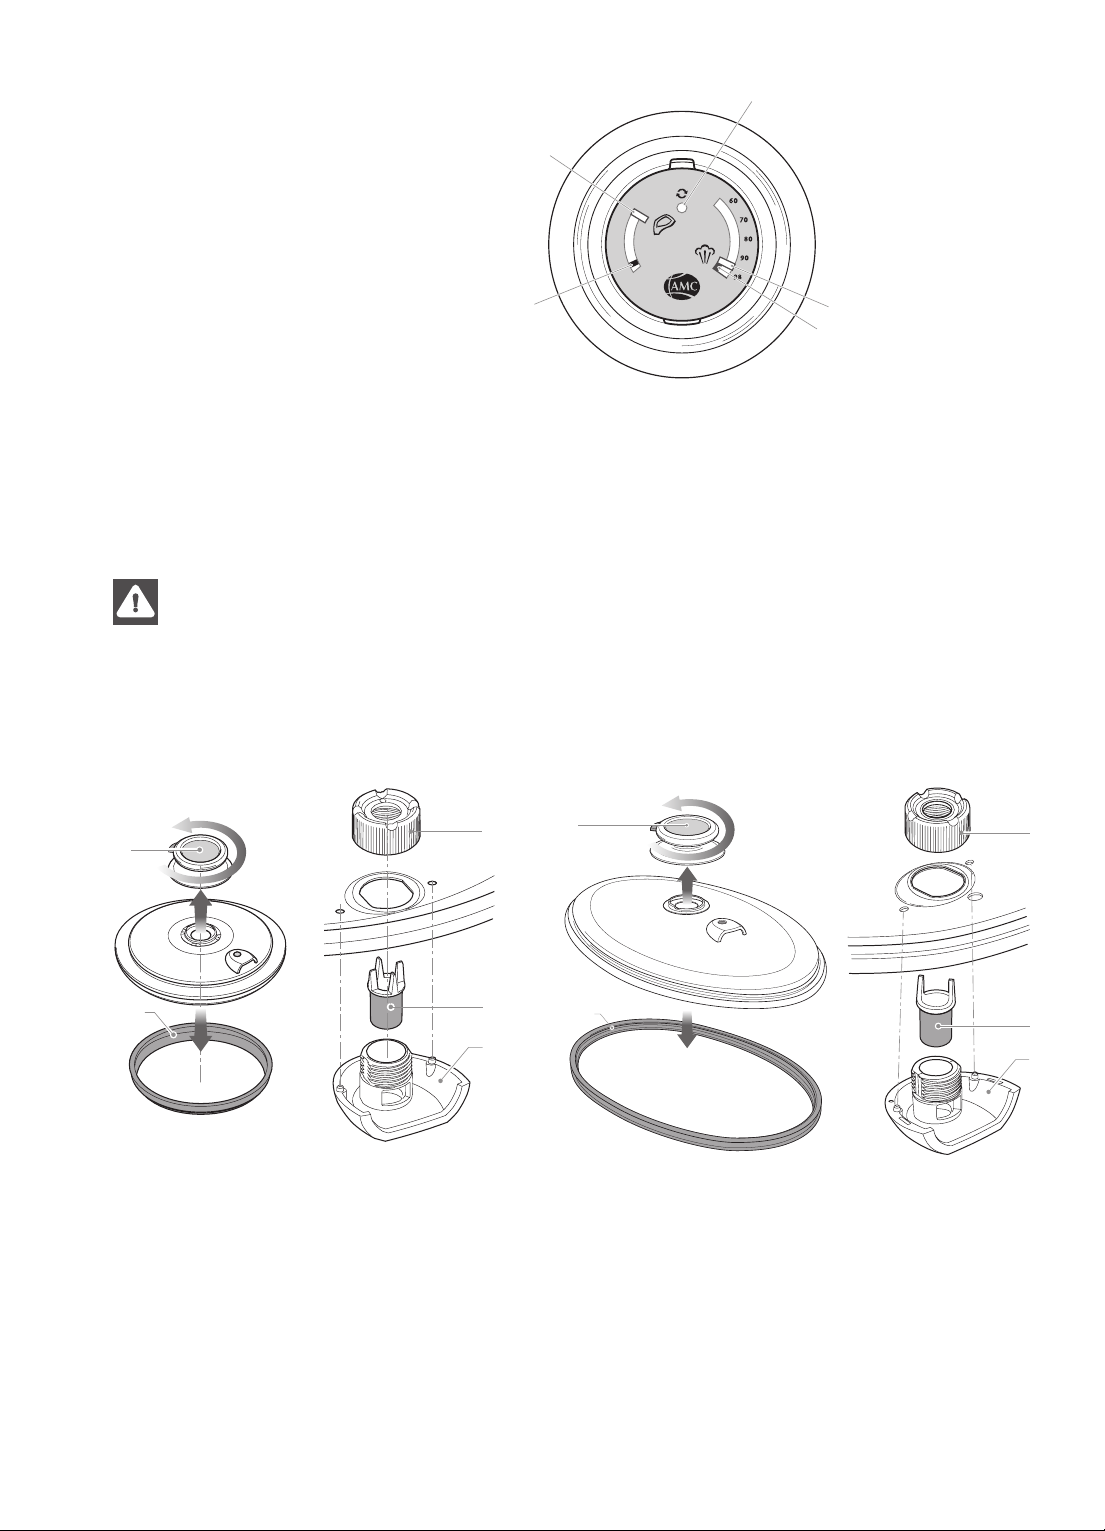
1.3 Wichtige Anwendungs- und Sicherheitshinweise
Beschädigungen und unsachgemäße Verwendung vermeiden:
Bei Gaskochstellen darf der 24 cm Dichtring nie zusätzlich im EasyQuick eingelegt sein,
wenn ein Topf 20 cm verwendet wird. Der Dichtring könnte beschädigt werden oder in
Brand geraten.
EasyQuick nicht im Backofen oder in der Mikrowelle verwenden. Kunststo- und Silikonteile
können hierdurch beschädigt werden.
EasyQuick nicht zum Frittieren verwenden.
Keine Veränderungen am EasyQuick vornehmen. Durch unsachgemäße Eingrie oder
Anwendung von Gewalt können Funktion und Sicherheit beeinträchtigt werden.
Beaufsichtigung
EasyQuick ist in Folie verpackt. Verpackungsfolien dürfen nicht in die
Hände von Kindern gelangen, es besteht Erstickungsgefahr.
EasyQuick muss beim Garen beaufsichtigt werden.
Unbeaufsichtigtes, unkontrolliertes Garen kann zu Überhitzung führen.
Speisen können verderben, Topf oder EasyQuick können beschädigt
oder zerstört werden. Unfall- und Brandgefahr.
EasyQuick ist nicht für die Benutzung durch Kinder geeignet.
Kinder müssen beaufsichtigt werden, wenn sie sich in der Nähe des
EasyQuick aufhalten. Verbrennungs- oder Verbrühungsgefahr.
Gerät kann von Personen mit reduzierten physischen, sensorischen oder geistigen Fähig-
keiten bzw. Mangel an Erfahrung oder Wissen benutzt werden. Sie müssen beaufsichtigt
oder bezüglich des sicheren Gebrauches des Geräts unterwiesen werden und die daraus
resultierenden Gefahren verstanden haben.
DE