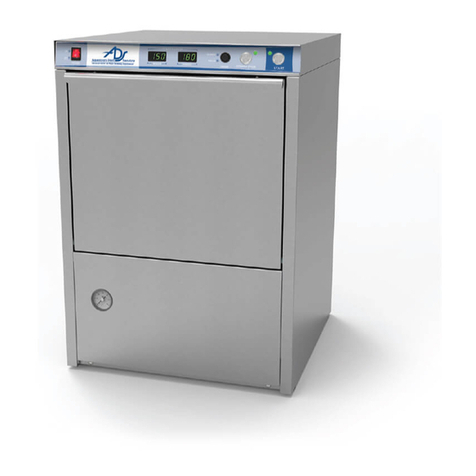
American Dish Service ET Series User manual

Undercounter Dishmachines
InstallationInstructions
If you have questions, call 800-922-2178 or visit our website at: www.AmericanDish.com
Optional Accessories -
2 1/2 minute 8-cam timer for regular ET Series
(pre-wash, wash, rinse cycle)
2 minute timer
Sink drain adapter w/barb for pumped drain
Dishracks
Table Package: 48” table w/sink, pre-rinse,
wall shelf, scrap basket
FOR YOUR SAFETY
Read and observe all CAUTIONS and
WARNINGS shown throughout these
instructions. While performing
installations described in this booklet
APPROVED Personal Protective
Equipment, including SAFETY EYE-
WEAR must be worn.
Always disconnect power to dishmachine and tag out
before servicing. Caution: Refer to chemical
suppliers MSDS sheets for proper handling and
chemicalissues. Turnoffmachineatmasterswitch
before opening for inspection.
BEFOREYOUBEGIN:
AmericanDishServiceprovides thisinformation asa serviceto ourcustomers. Keep allinstructions
forfuture reference. ADSreserves theright toalterorupdatethis informationat anytime. Should you
desireto makesure thatyou havethe mostup-to-date information,wewoulddirectyoutotheappro-
priatedocumenton ourweb site: www.americandish.com.
Setoutbelow arethe specifications andrequirements thatyoumust useand follow toproperly install
the type or types of equipment listed above. It is your obligation as the customer to ensure that the
machine is installed safely and properly, and when completed, the machine is left in proper and safe
working order. Electrical,Plumbing,andChemicalhookupmustbeperformedbyqualifiedpersonnel
whowillensure thatthe equipmentis installedinaccordance withall applicableCodes, Ordinances,
and Safety requirements. Failure to follow these requirements will void the war-
ranty. ADS assumes no liability or control over the installation of the equip-
ment. Product failure due to improper installation is not covered under the
ADS Warranty.
WARNING:
DO NOT OPERATE MACHINE WITH SPRAY ARM INSTALLED
UNTIL MACHINE IS FLUSHED WITH WATER.
Fill machine with water and run though one cycle without spray
arm in place. This will flush installation debris from tank and
pumpandprevent damageto sprayarm bearing.
Water Heaters or boilers must provide the minimum temperature
required by the type of machine and a minimum recovery rate of
68gallonsper hour.Therecommendedtemperature rangefor
optimal performance is 130-140 degrees F. Caution:Do not
exceedwater tempertures above150degrees F.
Dishmachinesare 120voltand requirea20 ampclean
circuit and suitable ground. It is recommended that new
equipment be installed with new circuit breakers.
IMPORTANT:
NOTETOINSTALLER:
IMPORTANT- Dishwasher MUST be installed to
allow for service of motor and rear plumbing. For the
pumped drain model, the water inlet line must be
flexibleandlongenough toremove themachine, as
wellas thepowerline anddrain hose. Thisisa code
requirementforcleaningand servicingundercounter
dishwashers.

Plumbing
Connect to Water Supply
Important: Always check for local plumbing codes before installing. Flush water lines before connecting
dishmachine.
Prior to plumbing the dishmacine, level machine by adjusting feet, at the bottom of each leg, up or down.
Waterheatersor boilersmust providetheminimum temperaturerequired bythe typeofmachine anda minimumrecovery
rate of 68 gallons per hour. The recommended temperature range for optiomal performance is 130-140 degrees F.
Caution: Do not exceed water tempertures above 150 degrees F. Residential hotwater heatersare notsufficient
forcommercialapplication. Typical On-Demandor “FlashHeaters”do nothave flowrates capableofsupplying commer-
cialdishwashers.
Connect1/2”FPTwatersupplylineto 1/2”FPT onthe freshwater inletmanifold. Fresh waterinlet manifoldis onthe
lower frame. Supply water must be 120 degress F. minimum (130-140 degress F. recommended) from primary heat
source. Building source water supply must be a minimum of 15 PSI flow during fill (water solenoid open).
Water Pressure Problems: Waterpressurebelow 15PSIflowwill requireadditonalmeasuresto resolvelowpresssure
issues. To resolve water pressure problem, increase pipe diameter to 3/4” coming directly from the hot water heater. If
problempersists, suggestinstalling pressurebladder tankat 5gallon mimimumcapacity. Another option,wouldbeto
order the undercounter machine with a longer time cycle, allowing longer fill time.
Drain Requirements for Undercounter Dishmachines “ET Series”
Followlocalcodes
Gravity drain line is 1 1/2” pipe -WARNING: Never use anything smaller on a Gravity Drain.
Pumped drain is 3/4” hose, 6-feet long
Close petcock on wash pump before operating machine
Gravity Drain
Plumbundercounterdishmachine drainoutlet (11/2”FPT) towaste drainpipe access. Dishmachinegravitydrain is8”
(on center) from the floor. If drain line has a long run increase pipe size to 2”.
Important: Drain access, including the trap, must be no higher than 7” from the floor.
Plumb drain line as straight as possible and verify that drains are free-running. Once plumbed run machine through a
complete cycle and check for leaks under the sump area. Inspect drain push rod for alignment and smooth up and down
movement.
To test for slow-running drains: Run machine through normal cycle, open door, and use manual drain switch to remove
water. Time the length it takes to completely empty the machine. If length of time is greater than ten (10) seconds,
sewer drain is clogged or restricted. Consult a plumber.
Pumped Drain
The 3/4” drain hose provided with the machine is 6-feet long and will transfer drain water frrom the machine to a wall drain.
Connect the hose to a 3/4” barb fitting and clamp the hose on the barb. The barb fitting is first screwed into a bushing
adapter that in turn screws into or onto the building’s drain pipe. This prevents the drain hose from coming out of the
drain and flooding the floor. The wall drain must have a trap prior to connection to the barb fitting. Do not install the hose
barb higher than 20” off the floor or the machine’s safety overflow protection will be defeated.
IMPORTANT: The pumped drain undercounter option is designed with a built-in overflow protection in the
event the water valve experiences a slow running leak. This overflow protection does not work if the drain
hose is run higher than 20” off the floor. Leaking that results from the tank overflow will be the responsibility
of the installer if the drain height exceeds 20” from the floor.
If the installer decides to run the drain line to an existing sink drain above the trap, ADS offers a barbed connection
adapter that will attach to a 1 1/2” tail piece and then connect to a 1 1/2” slip nut connection of the gas trap. The PVC
part must be cut to fit. The part number is #92-1088. Do not install on wall connections higher than 14”.

Electrical
ElectricalLow-EnergyDishmachines-“ETSeries”
Important: The dishmachine master switch must be in the OFF position before
connecting power. This switch is located on the right side of the control box.
The power supply (120 volt - 20 amps) must consist of two (2) 10-12 AWG copper wiresand a suitable ground wire.
The20-ampbreaker orfuse must beon aclean circuit tothe machine. ADShasprovided ajunction box(forelectri-
cal hook-up) with a conduit hole for 1/2” conduit. This junction box is located on the left front side of the frame,
behind the front panel or skirt.
Removethejunction boxcover andattach120 voltsupply wire (usuallyblack) toblack wire inthe junctionbox.
Attachtheneutral wire(white) tothewhite wirein thejunction box. Attach theground wireto the greenground screw
locatedinthe junctionbox andtighten allwiresfirmly. Replace junctionbox cover.
Warning: You must wear approved Personal Protective Equipment,
including SAFETY EYE-WEAR before connecting chemicals. Chemicals
can destroy the plumbing and stainless of the dishmachine. Do not run
chemical lines over controls or plumbing. Always secure chemical
lines and check regularly for leaks.
Chemical Dispensers
ADS provides three (3) peristaltic pumps to dispense liquid chemicals
Chemical feed lines are color coded“Red” Detergent ,“Green” Sanitizer,“Blue” Rinse-aid
Pick-uptubesare provided forchemical product containers
Sanitizer(chlorine) settingsat 50 partsper million
Caution: Use only commercial grade low-energy chemicals. For proper operation, use
non-foaming detergents and buffered sanitizers. Do not wash gold, pewter, silver, or
silverplate with chlorine based sanitizers. High concentrations of chlorine sanitizers and
caustic detergents will cause damage to metals and welds. Do not exceed 100 parts per
million (PPM) free chlorine. USE ABOVE THIS LEVEL WILL VOILD THE WARRANTY.
Place color coded tubes into proper chemical containers. The containers need to be as close to the machine as
possible. This may require shortening of the flexible chemical transfer tube. On the side of the control skirt, there
arechemicalprime switches. Thereis adecalidentifying eachswitch. To primechemicals usethesemomentary
primeswitches,verifyingthatallthreepumps rotate. Ifa chemicalpump squeezetube hastaken aset (not
allowing the pump to turn), manually free the pump by pulling on the discharge side (right-hand) of the squeeze tube
whilepushingthe primeswitch.
Chemicaldispensing iscontrolled bya mechanicalcam timer. Allchemical productsmust beadjustedforproduct’s
concentrationandlocal waterconditions. It willbe necessaryto adjustinitialfactory setting(See CamTimer
Adjustment Section). Water softeners should be added to correct hard water conditions. Hard water can be treated
with expensive chemicals, but it is more effective and less expensive to soften the water before it comes to the
dishmachine.

CamTimerAdjustment
Timers are available with 6,7, or 8 cams .
Cycle time is not adjustable
Timer cams (wheels) are fixed or adjustable. Each cam controls a specific function, as noted on the timer decal. Adjustable
cams are comprised of two (2) wheels. The outer edge of each wheel (half) has a high and low segment. When the wheels
are rotated, the two low segments can form a notch. Above each cam is a timer switch with a metal finger that rides on the
cam. When the finger drops into the cam notch, the function of that cam begins. To widen (length = time) or close the notch,
usetimeradjustment tool(provided). This tool hastwo (2)raised buttons thatfit intotheholes oneach wheel. Thefactory
sets the start of each function using the right-side of the cam. TO ADJUST rotate only the left-side cam wheel. The
left-side of the wheel controls when that specific functions stops.
#1 Cam: The white cam on your left is the master cam. It controls the total time of the cycle and is not adjustable.
#2 Cam: Continuingleft toright,this blackcam controlsdetergent. The detergentcam isadjustable.
#3 Cam: This white cam controls the drain. No adjustment is available.
#4 Cam: The H2O or fill cam opens the water solenoid. Too little water causes the pump to cavitate. Overfilling does not
allow all the water to drain between cycles, causing carry-over. Do not move the right side of the cam wheel. Adjust left-side
ofcamwheeltoclosewatersolenoidwhenthedishmachinereachesfullsprayarmpressure.
#5 Cam: Thisblackcam controlssanitizer. The sanitizercam isadjustable. Set sanitizerconcentrations at50 partsper
million (Warning: Do not exceed 100 PPM’s). Monitor chlorine levels by using chlorine test strips. To Test: Run rack of
dishes through a complete cycle, use test strip to test water sample from the top of any glass.
#6 Cam: This black cam controls rinse additive. The rinse-aid cam is adjustable.
#7 Cam: This cam is used to pause or “burp” the pump. It is set at the factory, but can be adjusted.
#8 Cam: Available on 2 1/2 minute timers only. Provides prewash/wash/rinse. Do not adjust.
Machine Tuning
Tuning is essential for proper cleaning
Do not skip this IMPORTANT PROCEDURE
Thekeyto understandingproper tuning,isto realizethat youcannot control orchange thedrain. It is afixed function.
Therefore, all tuning is accomplished by setting or adjusting the fill cam in relationship to the fixed drain cam. The goal of
tuning is to eliminate all soiled water through the drain before the fixed drain closes.
Asignthatsoiledwater hasexited thetank willbe thetypical hollowsoundofapump runningwithout water. Itis atthis point
that you want the water solenoid to come on. That function is controlled by the adjustment of the fill cam. For optimum
results, allow the fill water to flush the interior of the machine for a few seconds before the drain closes.
Once the drain is closed the fill cycle begins. Fill must continue until full spray arm pressure is reached. This can be verified
with the use of a spray arm pressure gauge attached to the lower wash arm end plug. This gauge will indicate full spray arm
pressure when the needle stops fluctuating and remains steady. Adjust your fill cam to turn the water OFF when you reach
this point of steady pressure. To satisfy code, a minimum of seven (7) seconds of full rinse pressure (with chlorinated water) is
required. Sanitizersshouldbeinjectedduring thesecond halfof thefill cycle.
If a pressure gauge is not available, an approximation of full spray arm pressure could be determined by the sound of the spray
arms. There would be a typical continuous swishing sound of the water spraying. Again, this would be the point to turn the
water OFF.
Important Note: Seven seconds of full spray arm rinse pressure is required by code. In the event that air is trapped in the
pump during fill, a vapor lock can occur. If vapor locked, check incoming water temperature and reduce to 120 degrees F.
minimum (130-140 degrees F. recommended). If the problem is caused by low water pressure to the machine, see plumbing
instructions to correct condition. If vapor lock is still present, electrically stop or pause the pump to release air. This is done
by moving the brown wire on the back of the switch behind sanitizer cam. Move this brown wire, which is currently on the top
positionofthe switch,to the centerposition taking care that wires do not touch.
ControlSystemSet-Up

Final Installation Check List
Check to be sure power isOFF. The masterswitch islocatedon theright sideofthecontrolbox.
Open door and remove all packaging, save all instructions for future reference.
Remove protective film if present from door, hood, front panel, and control box cover.
Turn on water supply. Check for leaks. Tighten connections if needed.
To operate, turn on main power circuit breaker and switch dishmachine master switch to ON position. This switch is
the bottom toggle switch on the right side of your control panel or skirt.
Remove spray arm and manually fill the machine with water using the fill switch (labeled FILL). Thisswitchis
located on the front of the control skirt, under the door. Run one complete cycle pushing the black start switch
(labeled START)locatedonthefront controlpanel orskirt. This isyour flush cycle, which removes installation
debris from wash tank and pump. After flushing, re-install the spray arm.
Failure to follow this procedure can damage spray arm bearing.
Observe the water level decal. This decal is located behind the front control skirt, on the outside of the pan, near the
drain of the machine. This mark is the approximate level for initial fill.
Verifyincomingwater temperatures120 degreesF.minimum (130-140degrees F.recommended).
Caution: Do not open door while machine is in cycle. Doing so may result in personal
injury.
Table of contents
Other American Dish Service Dishwasher manuals

American Dish Service
American Dish Service ASQ User manual

American Dish Service
American Dish Service 5-AG-S User manual

American Dish Service
American Dish Service ASQ II User manual

American Dish Service
American Dish Service ADS HUB-40-HIGH TEMP User manual

American Dish Service
American Dish Service AF-3D User manual

American Dish Service
American Dish Service 5-CD LF/RF User manual

American Dish Service
American Dish Service ADC-66 L-R/R-L User manual

American Dish Service
American Dish Service ASQ User manual

American Dish Service
American Dish Service AF-3D User manual

American Dish Service
American Dish Service HT-25 User manual