Instruction
Attention
-1-
The motor is suitable for motorization of roller blinds
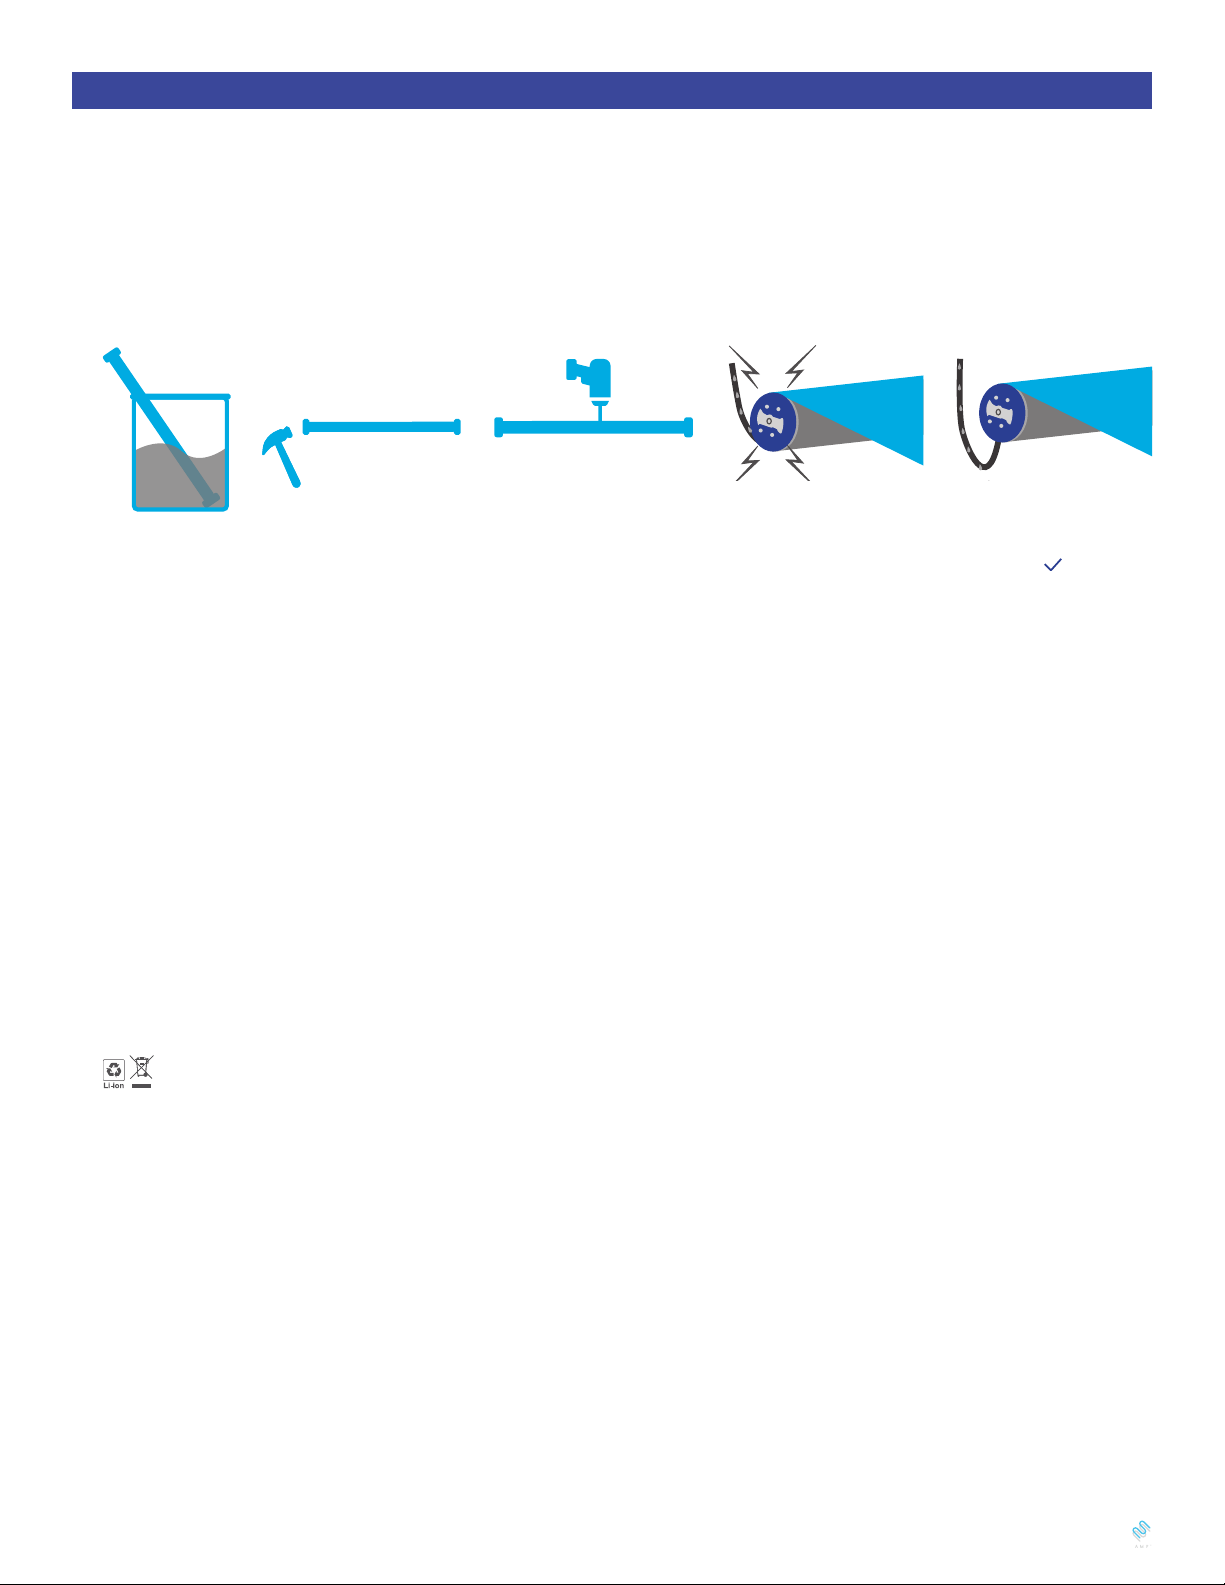
Never drop, knock, drill or submerge the motor. Keep the power cable in right position as following.
Important safety instructions to be read before installation.
Incorrect installation can lead to serious injury and will void manufacturer’s liability and warranty.
Do not dispose of in general waste.
Please recycle batteries and damaged electrical products appropriately.
-2-
1. Do not expose motor to humid, damp or extreme temperature conditions.
2. Do not drill into motor.
3. Do not cut the antenna and keep it clear from metal objects.
4. Do not allow children to play with this device.
5. If power cable or connector is damaged, do not use.
6. Ensure correct crown and drive adaptor are used.
7. Ensure power cable and aerial is clear and protected from moving parts.
8. Cable routed through walls shall be properly isolated.
9. Motor is to be mounted in horizontal position only.
10. Before installation, remove unnecessary cords and disable equipment not needed for powered
operation.
11. Installation and programming to be performed by a qualified professional, use or modification outside
the scope of this instruction may void warranty.
Features
Fields of Application
Specifications
Following data for reference
Working temperature: -10℃ ~ +50℃
Input Voltage: USB 5V 1A / USB 5V 2A
Radio Frequency: 433.925MHz
Maximum Running Time: 6 minutes
Model Rated Torque
(N.m)
Rated Speed
(rpm)
Rated Power
(W)
- 0.7/34 0.7 34 8
-1.1/28 1.1 28 8
Charging Instructions
This motor has a built in Li-ion battery pack with integrated charge management.
Max power input for recharging: 5V 2A.
Before first use please charge motor for 6 hours. Using 5V charger (most phones charger is 5V ) .
During operation, when the motor starts, the buzzer will beep 10 times, indicating a low-voltage alarm and
needs to be charged.
During operation, the voltage was detected to be too low, the battery was about to run out, the battery stopped
running and needed to be recharged.
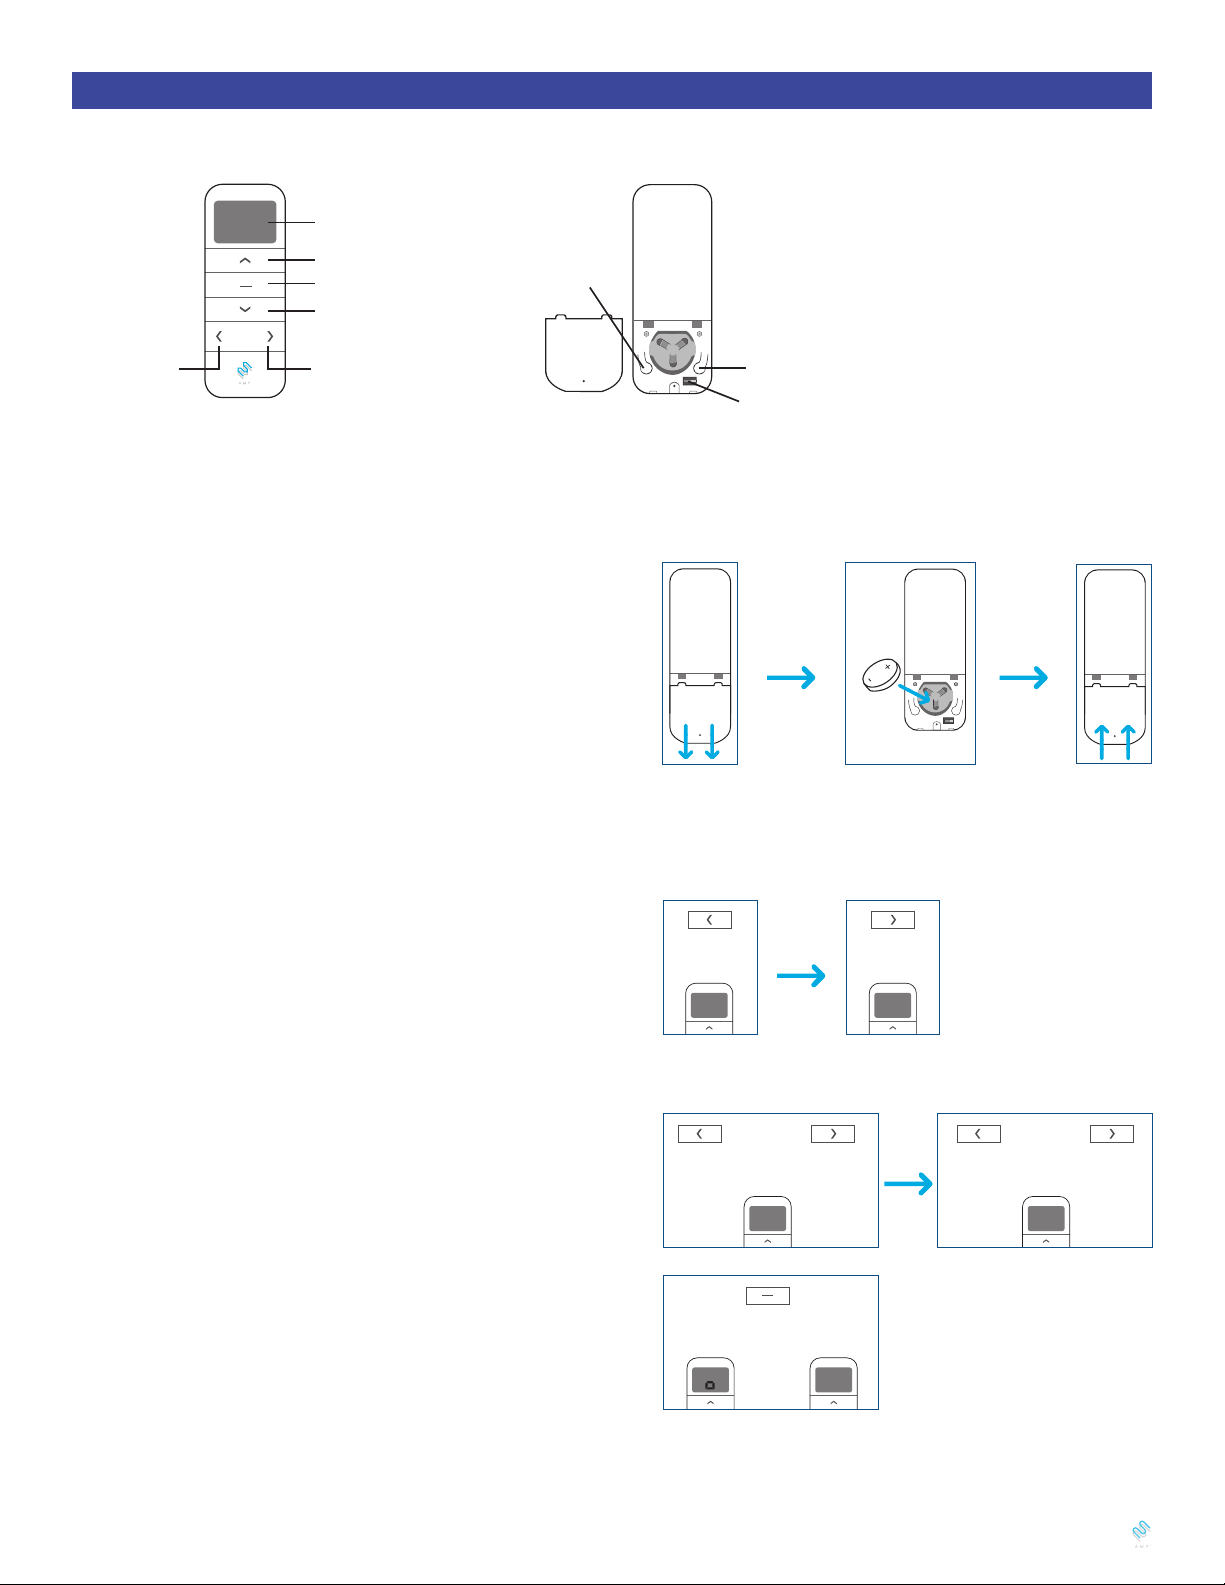
Rechargeable Battery
Blinking red:
Low battery alert
Blinking green:
Charging is processing
Solid green:
Battery has
finished charging.
A zoom in on the
charging port
Button Instructions
P1 button
Lithium Battery Switch
LED light
Micro-USB Port
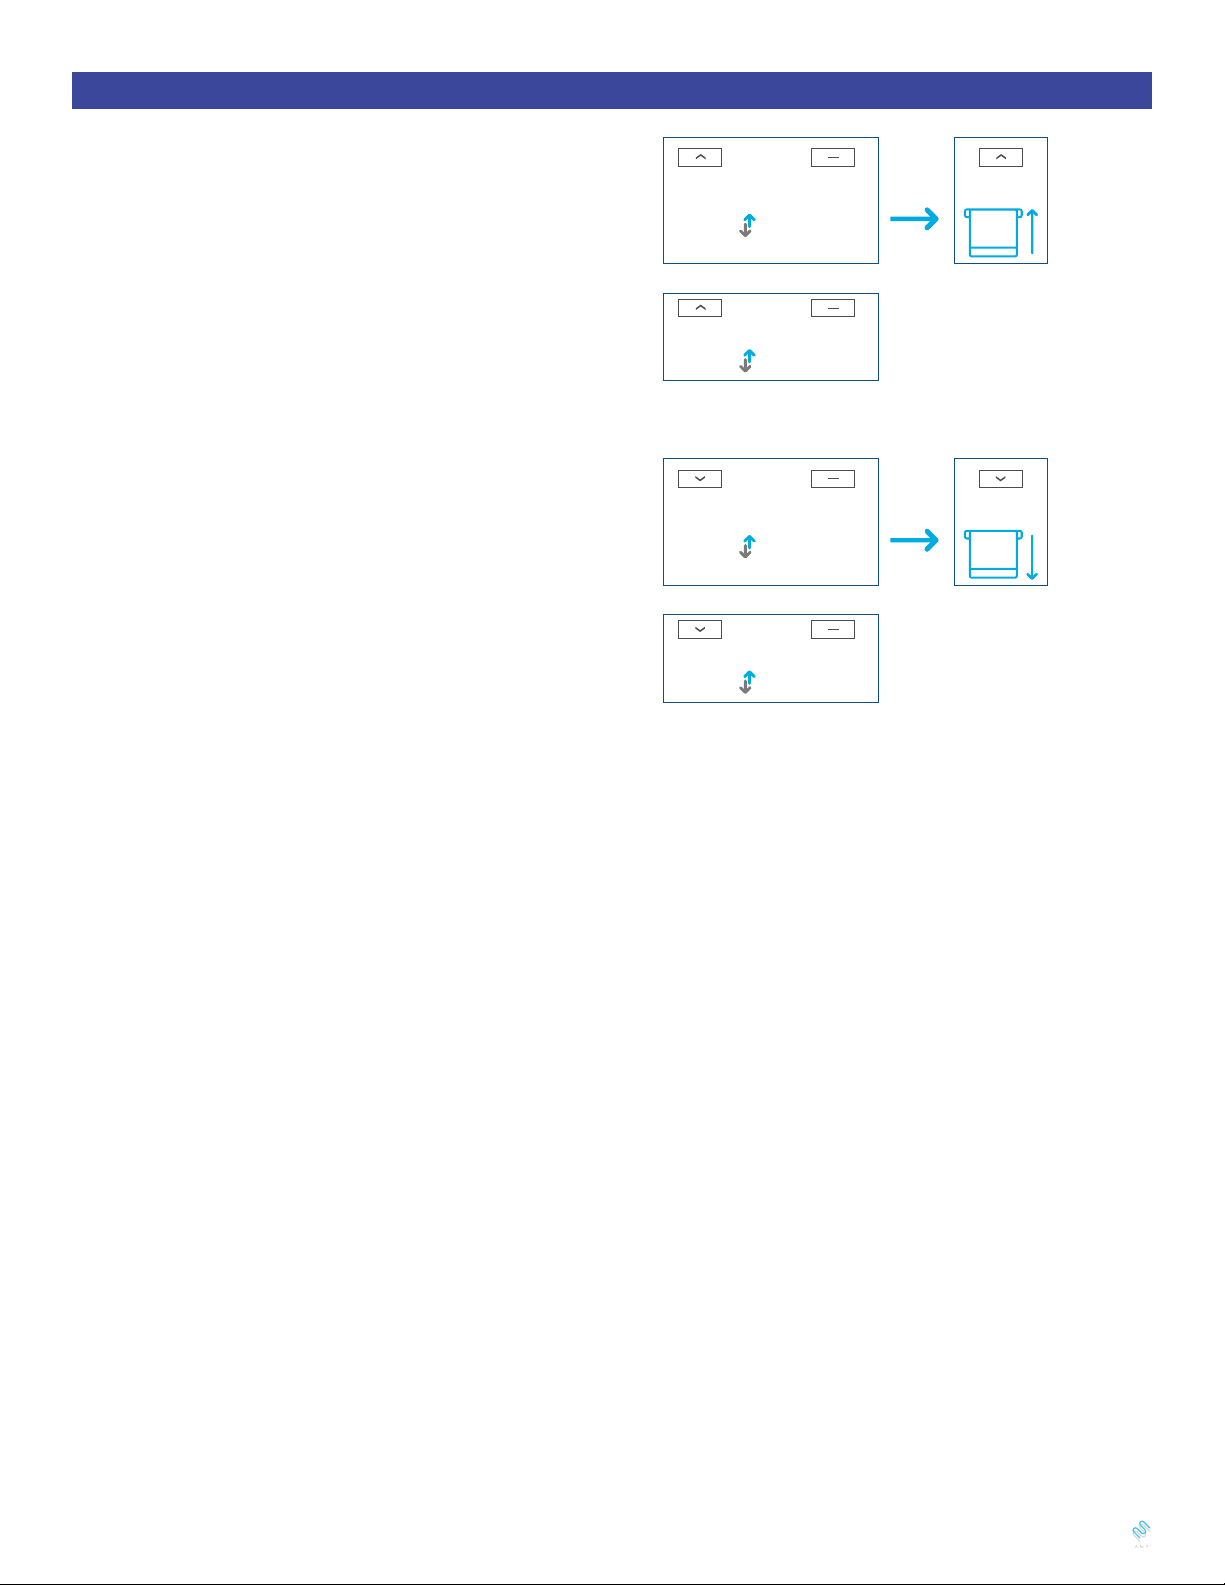
Sheer
Roller Revolve Roman shades
Do not dispose of in general waste.
Please recycle batteries and damaged electrical products appropriately.
AMPC E L - 0 . 6 / 5 0 |P R OGRAMMING GUIDE
4
AMP 2 color logo: PMS Cool Gray 2 & PMS 306 Blue
Safety Instructions
Important Safety Instructions
Attention
1. Do not expose motor to humid, damp, or extreme temperature conditions.
2. Do not drill into motor.
3. Do not cut the antenna. Keep it clear from metal objects.
4. Do not allow children to play with this device.
5. If the power cable or connector is damaged, do not use.
6. Ensure the correct crown and drive adaptor are used.
7. Ensure the power cable and aerial is clear and protected from moving parts.
8. Cable routed through walls should be properly isolated.
9. Motor is to be mounted in horizontal position only.
10. Before installation, remove unnecessary cords and disable equipment not needed for powered operation.
11. Installation and programming should be performed by a qualified professional. Use or modification outside the scope of these instructions may void warranty.
Never drop, knock, drill or submerge the motor. Keep the power cable in the proper position as shown below.
Read all safety instructions before installation.
Incorrect installation can lead to serious injury and will void manufacturer’s liability and warranty.
× ×× ×