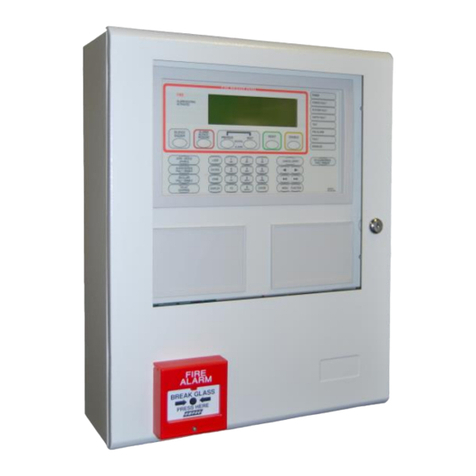
Ampac EvacUwiz MAN3084-0 Owner's manual

MAN2995-2 05/09/12
OWS Programming Manual
MAN3084-0

TABLE OF CONTENTS
Section Page No.
1
Introduction ....................................................................................................................... 3
2
Overview ............................................................................................................................ 3
3
Equipment Required ......................................................................................................... 3
4
The Main Window .............................................................................................................. 4
4.1
Description ........................................................................................................... 4
5
The Main Menu .................................................................................................................. 5
5.1
File -> New........................................................................................................... 5
5.2
File -> Open ......................................................................................................... 5
5.3
File -> Recent Files.............................................................................................. 5
5.4
File -> Save.......................................................................................................... 6
5.5
File -> Save As .................................................................................................... 6
5.6
File -> Settings..................................................................................................... 6
5.7
File -> Exit............................................................................................................ 6
5.8
Help -> Help Topics ............................................................................................. 6
5.9
Help -> About....................................................................................................... 6
6
The Main Toolbars ............................................................................................................ 7
6.1
Options................................................................................................................. 7
6.2
Edit Sounds.......................................................................................................... 7
6.3
Get Sounds .......................................................................................................... 7
6.4
Upgrade ............................................................................................................... 7
6.5
Get Project ........................................................................................................... 8
6.6
CLI ....................................................................................................................... 8
6.7
Amplifier Status.................................................................................................... 8
6.8
About.................................................................................................................... 8
6.9
Ampac.................................................................................................................. 8
6.10
The Treeview Toolbar.......................................................................................... 9
6.10.1
Expand ................................................................................................. 9
6.10.2
Collapse................................................................................................ 9
6.10.3
Show All.............................................................................................. 10
7
File Operations ................................................................................................................ 10
7.1
Opening a Project .............................................................................................. 10
7.2
Saving a Project................................................................................................. 11
8
Device Configuration ...................................................................................................... 12
8.1
Configuration Overview ..................................................................................... 12
8.2
The Devices ....................................................................................................... 12
8.2.1
The Treeview...................................................................................... 13
8.2.2
The Details Pane ................................................................................ 14
8.3
The CIC (Front Panel) ....................................................................................... 15
8.3.1
The Treeview...................................................................................... 15
8.3.2
The Details Pane ................................................................................ 15
8.3.3
Configuration Options......................................................................... 16
8.4
The GIC (General Indicator Card) ..................................................................... 17
8.4.1
The Treeview...................................................................................... 17
8.4.2
The Details Pane ................................................................................ 17
8.4.3
Configuration Options......................................................................... 18
8.5
The RPC (Remote Paging Console) ................................................................. 19
8.5.1
The Treeview...................................................................................... 19
8.5.2
The Details Pane ................................................................................ 19
8.5.3
Configuration Options......................................................................... 20
8.6
The ASL (Audio Line Splitter Board) ................................................................. 22
8.6.1
The Treeview...................................................................................... 22
8.6.2
The Details Pane ................................................................................ 23

8.6.3
Configuration Options......................................................................... 23
8.7
The TGB (Tone Generator Board), 25W and 50W Amplifiers.......................... 26
8.7.1
The Treeview...................................................................................... 26
8.7.2
The Details Pane ................................................................................ 27
8.7.3
Configuration Options......................................................................... 27
9
Amplifier and Tone Generator Configurable Inputs .................................................... 30
10
Sounds ............................................................................................................................. 33
10.1
Editing Sounds................................................................................................... 33
10.1.1
The Sound List ................................................................................... 34
10.1.2
The Sample Parameters .................................................................... 36
10.1.3
The Sample Details ............................................................................ 36
10.1.4
The File Menu .................................................................................... 37
10.1.5
The Help Menu ................................................................................... 37
10.2
Importing/Exporting Sounds .............................................................................. 39
10.3
Retrieving Sounds ............................................................................................. 40
11
The Amplifier Status ....................................................................................................... 41
11.1
Introduction ........................................................................................................ 41
11.2
Boot Mode Status .............................................................................................. 42
11.3
Application Mode Status .................................................................................... 43
11.4
Status Notifications ............................................................................................ 44
11.5
The Status Buttons ............................................................................................ 44
12
Options............................................................................................................................. 45
12.1
Introduction ........................................................................................................ 45
12.2
Recent Files List ................................................................................................ 45
12.3
Dynamic Range Compression........................................................................... 46
12.4
Automatic Sample Conversion .......................................................................... 46
13
Upgrading & Updating .................................................................................................... 47
13.1
Introduction ........................................................................................................ 47
13.2
The Upgrade Process........................................................................................ 47
13.3
The Update Process (Get Project) .................................................................... 49
14
Program Example............................................................................................................ 51

Page 3
EWCIE Programming Manual
1 Introduction
This manual contains all the information required to program the AMPAC EvacU range of Emergency
Warning Control and Indicating Equipment (EWCIE), formally referred to as Occupant Warning
System.
2 Overview
The Windows configuration software (referred to as 'EvacUwiz’) is used to construct a configuration
‘file’, suitable for ‘programming’ the Evac-U series of OWS devices (amplifiers and/or tone generators),
and for the creation and editing of relevant sound libraries, as well as for realtime interrogation and
interaction of the OWS devices.
‘file’ will refer to the collection of configuration parameters (including sound library data) to be either
sent to the device or received from the device, which will allow the user to either program the device to
perform certain functions, or behave in a certain manner, or to view how the device is currently
programmed or configured. It is not necessarily a physical ‘file’ stored on a hard drive.
‘programming’ refers to the processing of storing configuration, or sound, data into the device’s non-
volatile memory, such that the device will perform the required functions and produce the desired
sounds, as set up by the user using EvacUwiz.
The supported/compatible operating systems are as follows:
• Windows 2008/2008 R2 Server
• Windows Vista
• Windows 7
• Windows 8/8.1
• Windows 2012/2012 R2 Server
• Windows 10
3 Equipment Required
PC or laptop (with compatible Windows installed)
USB cable
Figure 1: The 50W amplifier powered and connected to a PC

Page 4
EWCIE Programming Manual
4 The Main Window
Figure 2: The Main Window
4.1 Description
The main window consists of the main menu, the main toolbar, the tree view, the tree view toolbar
and the details pane.

Page 5
EWCIE Programming Manual
5 The Main Menu
Figure 3: The file menu
5.1 File -> New
Clears the current project and creates a new workspace.
5.2 File -> Open
Opens a previously saved configuration file for editing.
5.3 File -> Recent Files
Opens a recently opened/saved configuration file for editing.
Figure 4:
Empty Recent Files list
Figure 4 shows the Recent Files list with no entries (no files have been successfully opened or saved as yet),
so nothing can be selected.

Page 6
EWCIE Programming Manual
Figure 5: Filled Recent Files list
Figure 5 shows a fully populated Recent Files list, allowing the user to select a previously opened/saved file
for editing.
5.4 File -> Save
Saves the current configuration to disk.
5.5 File -> Save As
Saves the current configuration to disk with a different name.
5.6 File -> Settings
Opens a window, allowing for application-specific settings and configurations to be set, on a per
software installation basis.
5.7 File -> Exit
Close the application.
Figure 6: The help menu
5.8 Help -> Help Topics
Opens the Help window and shows the table of contents.
5.9 Help -> About
Opens the ‘About’ box, with various details about the application.

Page 7
EWCIE Programming Manual
6 The Main Toolbars
Figure 7: The Main toolbar
6.1 Options
Opens a window, allowing for application-specific settings and configurations to be set, on a
per software installation basis.
6.2 Edit Sounds
Opens the Sound Librarian dialog box, allowing for the construction and/or editing of a sound
library file.
6.3 Get Sounds
Initiates a file transfer session with the connected amplifier and receives all valid sounds
from the device, saving them to a .EUB sound binary file.
6.4 Upgrade
Provides the ability to select an application binary file and then automatically transmit it to the
device.

Page 8
EWCIE Programming Manual
6.5 Get Project
Retrieves the current configuration from the connected amplifier and uses the data received
to create the current project and make it available for editing.
6.6 CLI
Opens a new communications dialog box, with a terminal window, to allow for
communications to and from the device, with sending/receiving files and realtime logging of
data. Only available with assistance from Ampac technical Support
6.7 Amplifier Status
Opens a status communications dialog box, to allow for the retrieval of various pertinent
status messages from the connected device, including current firmware version numbers and
any faults present.
6.8 About
Opens the ‘About’ box, with various details about the application.
6.9 Ampac
Opens a new browser window and navigates to the Ampac homepage
(http://www.ampac.net).

Page 9
EWCIE Programming Manual
6.10 The Treeview Toolbar
The Treeview Toolbar resides at the bottom of the Treeview Pane and provides the user with options
as to the display of the network treeview.
Figure 8: The Treeview toolbar
6.10.1 Expand
Clicking on the Expand button expands all branches in the treeview:
Figure 9: The expanded Treeview toolbar
6.10.2 Collapse
Clicking on the Collapse button collapses all branches in the treeview:
Figure 10: The collapsed Treeview toolbar

Page 10
EWCIE Programming Manual
6.10.3 Show All
Clicking on the Show All button expands only those branches that have been activated and
collapses the rest:
Figure 11: The collapsed Treeview toolbar
7 File Operations
7.1 Opening a Project
Figure 12: The Open dialog
This is the dialog box that is opened by the Windows operating system to allow the user to select a file to
open (load).
The default file extension for a configuration project file is .EUP.

Page 11
EWCIE Programming Manual
Normal Windows file navigation and selection rules apply here.
7.2 Saving a Project
Figure 13: The Save As dialog
This dialog box is opened by the Windows operating system to allow the user to either select a file to save
the current configuration/project data to or to specify the name of a new file that the current
configuration/project data will be saved to.
The default file extension for a configuration file is .EUP.
Normal Windows file navigation and selection rules apply here.

Page 12
EWCIE Programming Manual
8 Device Configuration
8.1 Configuration Overview
The configuration software allows for the configuring and placement of a number of devices relevant to the
OWS network.
Each device has its own defined programming area and programmable parameters; the following sections
describe, in general, the types of configuration that can be attempted, with later sections explaining, in detail,
how configuration affects specific devices.
8.2 The Devices
Figure 14: The configurable devices
The configuration software allows for the configuring and placement of a number of devices relevant to the
OWS network, using a simple tree view and details pane view format.
The devices that can be configured appear in Figure 13, and are as follows:
•CIC (Front Panel) – Section 8.3
•GIC (General Indicator Card) – Section 8.4
•RPC (Remote Paging Console) – Section 8.5
•ASL (Audio Line Splitter Board) – Section 8.6
•TGB (Tone Generator Board) – Section 8.7
•AMP25 (25W Amplifier) – Section 8.7
•AMP50 (50W Amplifier) – Section 8.7

Page 13
EWCIE Programming Manual
8.2.1 The Treeview
Figure 15: The tree view (with all nodes expanded)
The tree view represents the currently configured network (any and all devices that have been enabled to
operate on the network) and allows for the user to enable and/or disable devices, configure devices and
interact with specific devices, such as the ability to transmit files to the relevant amplifier or tone generator
boards.
A device, on the network, is enabled by selecting the checkbox next to the relevant device, with disablement
just the reverse (de-selecting the relevant checkbox).
Note: Amplifiers (and tone generators) must be enabled and disabled in sequential order; ie. it is NOT
possible to have gaps in addresses between devices - should a user attempt this an error message will
appear to that effect.
Other restrictions on the number and type of devices will be addressed in the relevant device's configuration
section.

Page 14
EWCIE Programming Manual
8.2.2 The Details Pane
Figure 16: The details pane - in default (no selection) state
The details pane is the window area directly to the right of the tree view and is allocated solely for device-
specific configuration and notification.
The type, and amount, of configurable parameters is device dependent, but the generic look is detailed in
Figure 15 above.
The common/generic fields are:
•'Icon' - An icon (picture) graphically representing the device currently being configured
•Module Type - A line of text representing the device currently being configured
•Attached To - The device, on the network, that this device is physically connected to; this field is
populated by how the device currently being configured is situated on the network, as presented
by it's tree view orientation
•Associated With - The device, on the network, that this device is 'logically' connected to
•Active - Displays, via a graphic, the current enabled state of the device being configured
Below these generic fields the non-generic (device-specific) fields will appear.

Page 15
EWCIE Programming Manual
8.3 The CIC (Front Panel)
The CIC is represented graphically by the image in Figure 16
Figure 17: The CIC device
8.3.1 The Treeview
Figure 18: The tree view (with device selected)
Clicking on the checkbox next to the CIC icon in the tree view enables the device on the network.
The CIC may have a single 'child', the GIC, which can also be enabled in a similar way.
Selecting the CIC for editing results in the editing symbol (the pencil and paper graphic) being overlayed onto
the CIC icon in the tree view.
8.3.2 The Details Pane
Figure 19: The details pane generic/common fields

Page 16
EWCIE Programming Manual
The details pane contains both the generic/common fields (common to all devices) and the device-specific
configuration options.
The common/generic fields are:
•'Icon' - The graphic representing the CIC module
•Module Type - A line of text representing the device currently being configured; ie. CIC (Front Panel
Board)
•Attached To - The device, on the network, that this device is physically connected to; the CIC exists
as its own entity, so is connected to the network directly
•Associated With - The device, on the network, that this device is 'logically' connected to; the CIC is
not logically connected to any other devices on the network
•Active - Displays, via a graphic, the current enabled state of the device being configured; the CIC is
currently enabled, represented by the 'yes' graphic
8.3.3 Configuration Options
Figure 20: The configuration options window space
The CIC has no user-configurable software options.
The CIC must be hard-programmed (via its onboard DIP switch) to cater for the number of amplifiers/tone
generators that are expected to appear on the network.

Page 17
EWCIE Programming Manual
8.4 The GIC (General Indicator Card)
The GIC is represented graphically by the image in Figure 20
Figure 21: The GIC device
8.4.1 The Treeview
Figure 22: The tree view (with device selected)
Clicking on the checkbox next to the GIC icon in the tree view enables the device on the network, as well as
enabling the CIC, if it is not already enabled; the GIC cannot operate on its own and requires the CIC to be
present.
The GIC does not have any 'children' and exists purely as a 'child' of the CIC.
Selecting the GIC for editing results in the editing symbol (the pencil and paper graphic) being overlayed
onto the GIC icon in the tree view.
8.4.2 The Details Pane
Figure 23: The details pane generic/common fields

Page 18
EWCIE Programming Manual
The details pane contains both the generic/common fields (common to all devices) and the device-specific
configuration options.
The common/generic fields are:
•'Icon' - The graphic representing the GIC module
•Module Type - A line of text representing the device currently being configured; ie. GIC (Zone
Indicator Card)
•Attached To - The device, on the network, that this device is physically connected to; the GIC exists
as its own entity, so is connected to the network directly
•Associated With - The device, on the network, that this device is 'logically' connected to; the GIC
is logically connected to the CIC, as it requires the CIC to be enabled in order to operate
•Active - Displays, via a graphic, the current enabled state of the device being configured; the GIC is
currently enabled, represented by the 'yes' graphic
8.4.3 Configuration Options
Figure 24: The configuration options window space
The GIC has the following user-configurable software options:
•Monitored - Allows the user to enable or disable monitoring of this device and any resultant fault
reporting that may be enacted on the event of a fault detected.
The GIC has a 'Reset To Defaults' button that, when clicked, will return all configurable options to their
default state.

Page 19
EWCIE Programming Manual
8.5 The RPC (Remote Paging Console)
The RPC is represented graphically by the image in Figure 24
Figure 25: The RPC device
8.5.1 The Treeview
Figure 26: The tree view (with device selected)
Clicking on the checkbox next to the RPC icon in the tree view enables the device on the network, as well as
enabling the parent Amplifier/Tone Generator, if it is not already enabled; the RPC cannot operate on its own
and requires an Amplifier/Tone Generator to be present.
The RPC does not have any 'children' and exists purely as a 'child' of the FIRST Amplifier/Tone Generator
(the Amplifier/Tone Generator with address 1).
Selecting the RPC for editing results in the editing symbol (the pencil and paper graphic) being overlayed
onto the RPC icon in the tree view.
8.5.2 The Details Pane
Figure 27: The details pane generic/common fields
Table of contents
Other Ampac Security System manuals