Amulet Hotkey CoreModule MX Retention Bracket User manual

CoreModule MX Retenon Bracket
Install the Retenon Brackets in the MX7000
Quick Start Guide
www.amulethotkey.com QS-MX7K-0030 v1.0 June 2021
For Health and safety informaon, refer to the sheet LS-AHKL-0001.
The Retenon Bracket Field Replacement Unit (FRU) is an upgrade to the
CoreModule (v1.0) running rmware version 5.0.4 or later. This guide describes how
to replace the fan modules in a CoreModule with the retenon brackets.
Field replacement kit
Requirements
1. Remove retenon brackets from the packaging
Always use appropriate an-stac handling procedures when handling sleds,
cards and modules.
2. Power o the sled(s) connected to the CoreModule(s)
To avoid disrupon, migrate any VMs from sleds before power down.
3. Remove the CoreModule(s) from the MX7000 enclosure
4. Remove the CoreModule cover screws
5. Hold catches open and remove the CoreModule cover
6. Remove the fan modules
Posidriv M2.5
Release catch
Thumb grip
2
2
1
2
+
1
2
+
LEFT
RIGHT
www.amulethotkey.com CoreModule MX Retenon Bracket Quick Start Guide
Health and Safety (Refer to legislaon sheet LS-AHKL-0001)
• This device complies with part 15 of the FCC Rules (Class A)
• Operang temperature range: 15° to 30° C (59° to 86° F)
• Operang humidity range: 10% to 80% (non-condensing)
For documentaon, downloads and technical assistance, visit:
For further informaon on all our products, visit www.amulethotkey.com.
© 2021 Amulet Hotkey Ltd. All rights reserved.
Informaon in this document is subject to change. No part of this document may be reproduced through any means including (but not limited to) electronic or
mechanical, without express wrien permission from Amulet Hotkey Ltd. Amulet Hotkey Ltd may have patents, patent applicaons, trademarks or copyrights or other
intellectual property rights covering subject maer in this document. PC-over-IP, PCoIP and the PCoIP logo are registered trademarks of Teradici Corp. Amulet Hotkey
and ‘soluons you can bank on’ are registered trademarks of Amulet Hotkey Ltd. Other product names and company names listed within this document may be
trademarks of their respecve owners. Amulet Hotkey products are designed and built in the UK.
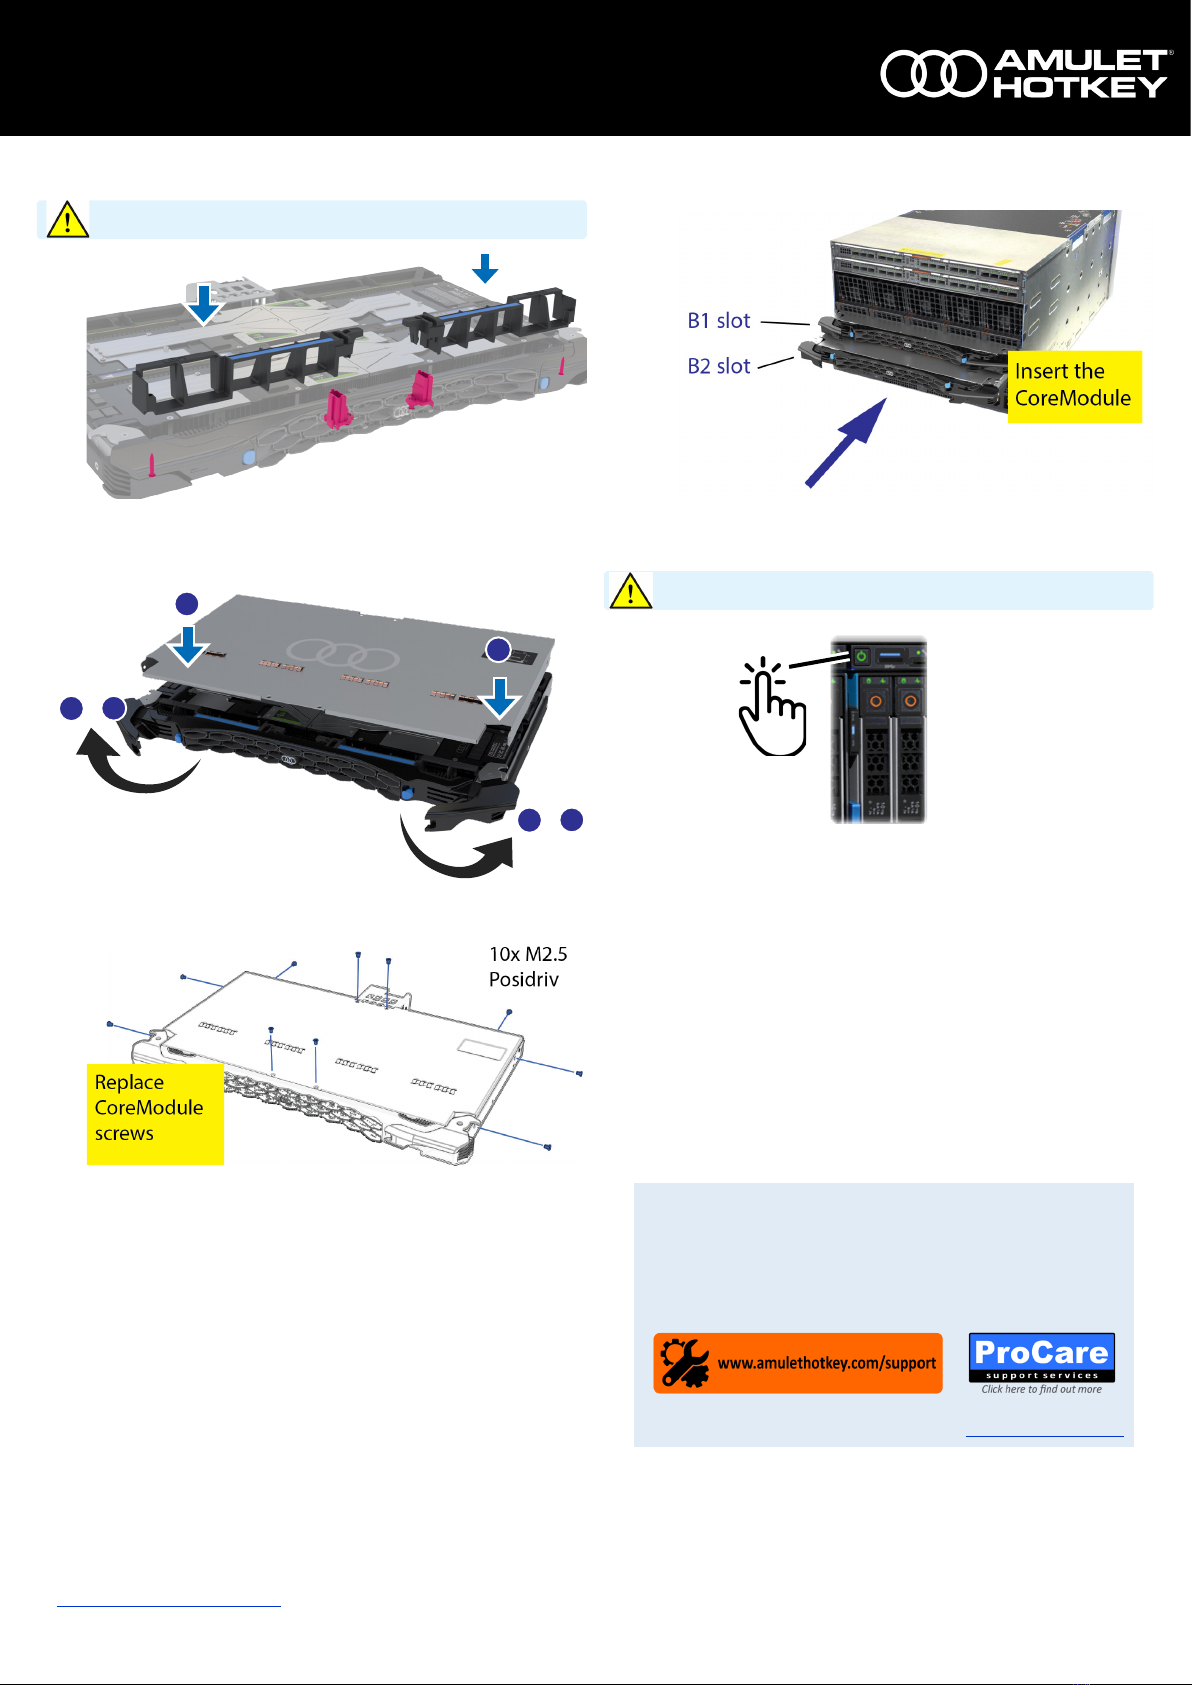
7. Install the retenon brackets (le and right)
Locate the retenon brackets on the guides.
8. Hold catches open and replace the CoreModule cover
9. Replace the CoreModule cover screws
10. Replace the CoreModule(s)
11. Power on the sled(s)
Remember to migrate any VMs that were moved from the sleds
2
2
1
2
+
1
2
+
LEFT
RIGHT


